Loading ...
Loading ...
Loading ...
Before use Operation Cleaning When in trouble
13
How to maintain your automatic ice-makerHow to maintain your automatic ice-maker
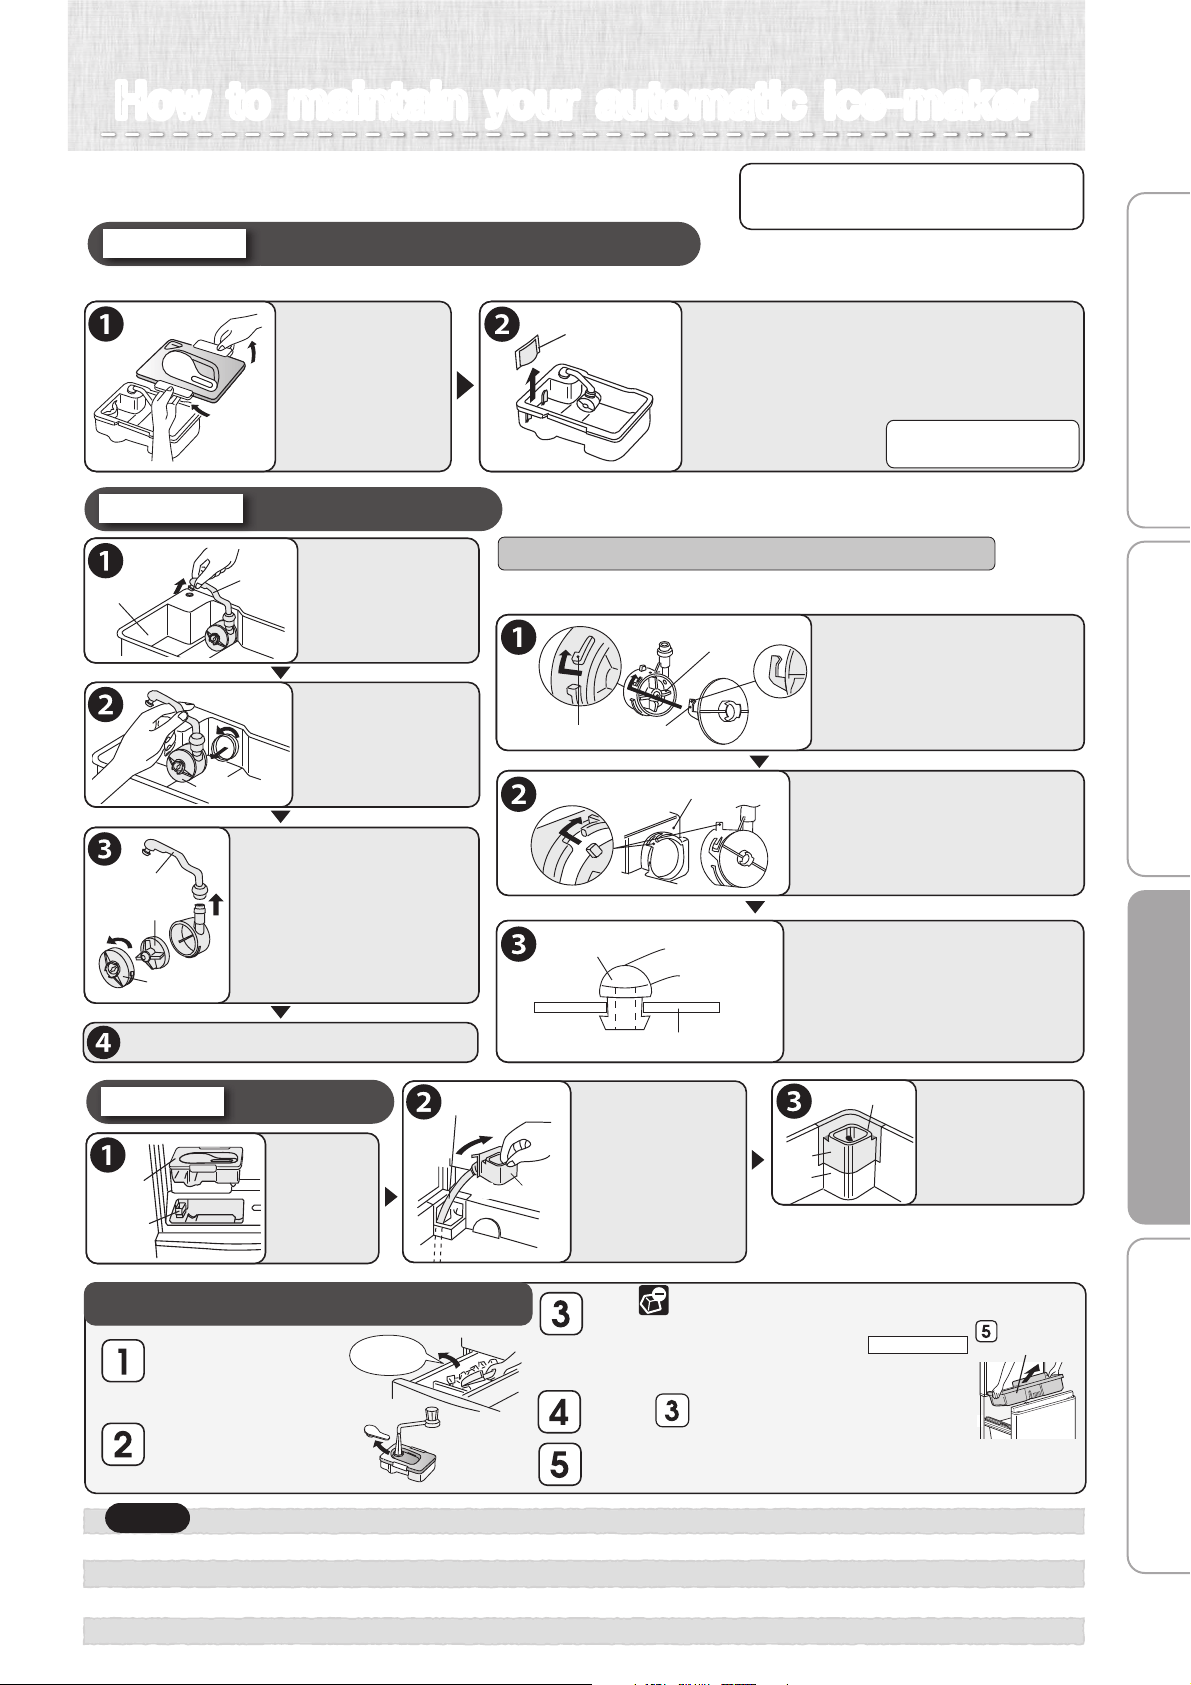
Please do periodic care to prevent the occurrence of water
scale, mold, etc. Please remove water when not making ice.
Take out
ice cubes.
●
●
●
●
Do not use washing agents such as kitchen detergents, benzene or bleach to clean the water filter. It will cause ice to have an odor.
If you use a bleach to clean your water supply tank or lid, please follow product directions carefully.
Assemble the water supply pump properly and firmly. If it is not assembled properly, it may not make ice or it may make a loud sound.
Please attach the lid of water supply tank securely. If the lid is not attached properly, the lid may be out and the water supply tank will fall.
Take ice out of the
ice storage container,
close the freezer door.
Fill water supply tank
with water, put back
in original position.
Press for about 5 seconds (at temperature adjustment
panel at inner back of freezer compartment.)
●
●
The stop ice-maker light (red) will blink for about 1 minute.
(It rinses the ice-maker tray with water from the water supply tank.)
When light stops blinking, it will return to the previous indication.
Repeat 2 or 3 times.
Remove the Freezing Case (upper) discard water and ice.
Do not throw out the noise prevention mat.
Freezing Case
(upper)
※
Do not use a dishwasher or dryer
because it may cause deformation.
For once-a-week
If mold forms easily in the certain types of water, clean about 2 or 3 times a week.
Water supply tank / Purification filter
Take off the lid
and wash with
water.
(Temperature
tolerance
approx 60
o
C)
Purification filter
Remove and wash with water.
Normally, it does not need replacing.
Please replace for the following reasons:
●
●
●
If something other than water was put in
and the opening got blocked.
If it is damaged.
If mold, etc. is forming.
Water supply pump
For once-a-month
Turn the pump
and take out.
Take out the pipe,
Turn the cap and remove,
Take out the impeller
and wash with water.
Water tank
Pipe
Water supply pump
Impeller※
Pipe
Cap
Water supply pipe
For once-a-month
Take out
the water
supply tank.
Water supply
tank
Water supply
pipe
Take out the
water supply pipe
and wash with
running water.
Water receptacleWater receptacle
Hose part
The water receptacle
and hose part
cannot be removed.
Return back to
original positions.
Facet A
Facet B
Water supply pipe
Make sure to insert the water
supply pipe properly so that
there’s no difference in surface
level between facet A and facet B is.
Return the water supply tank and, if does not
sit in properly, re-set the water supply pipe.
If removal or assembly are not done correctly,
a problem such as a water leakage will occur.
If it is not assembled properly, it may not make ice or it may make
a loud sound. Please check on the following.
The claw on the cap ( )
is turned to put onto the
protruding part ( ) of
the water supply pump.
①
②
②
①
Impeller
Turn
Turn
Water supply tank
※Check to make sure that
the impeller is inside.
Attach the water supply
pump properly to the
water supply tank by
turning and attaching.
Insert the pipe into the
water supply tank opening,
Connect the pipe to the
water supply pump.
※
Check to make sure that there are no substances
at the connection point of the two pipes.
Water supply tank
Pipe
Remove it from
tank.
※
The impeller is made with a
magnetic material. Clean thoroughly
with water, making sure there
are no substances on it.
Cleaning the ice-making tray (rinsing)
Pointers for assembling the water supply pump
To buy another filter, please
inquire at the store where
you bought your unit.
Return parts by following the reverse procedure.
Notice
Loading ...
Loading ...
Loading ...