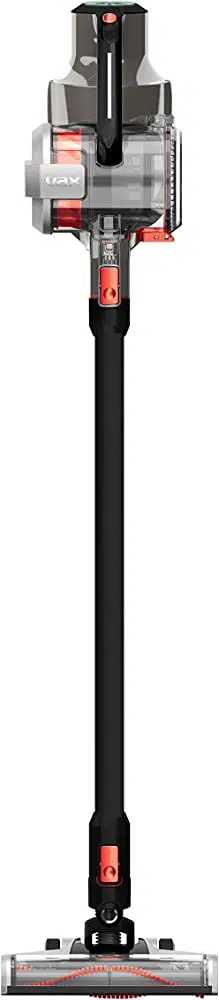
USER MANUAL Blade Cordless Handstick Vacuum Cleaner
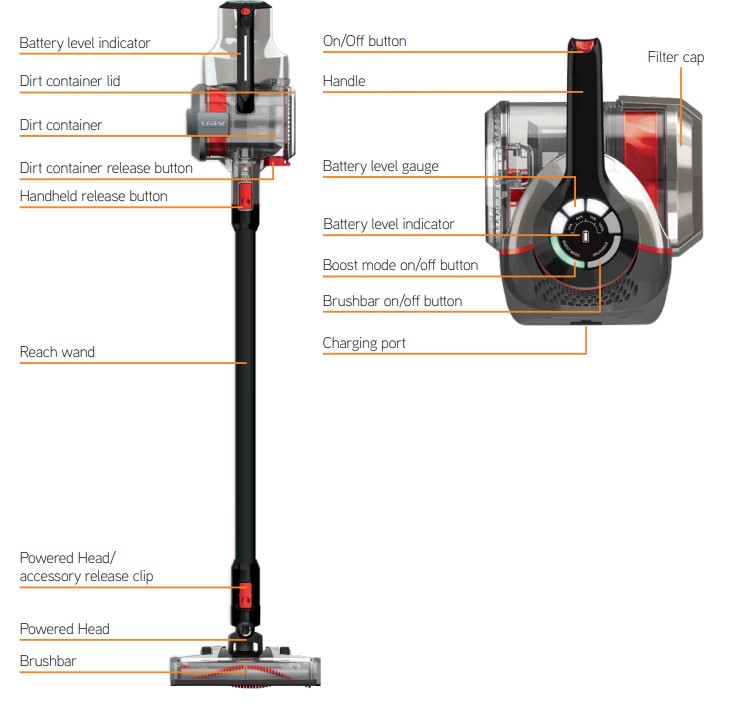
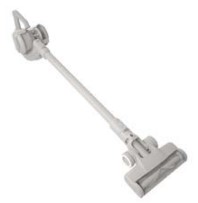
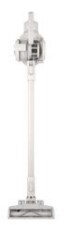
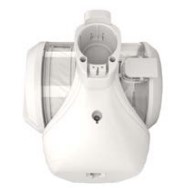
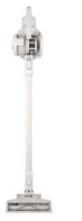
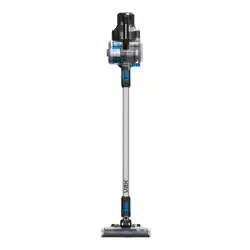
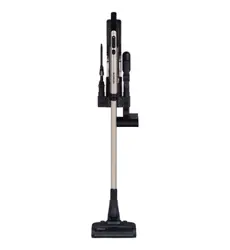
Getting to know your machine
Getting started
Before you begin
CAUTION: Always switch off the vacuum cleaner before connecting or disconnecting the handheld/attachments or removing and emptying the dirt container.
For best cleaning results, filters require cleaning at least every 3 months and should be replaced every 12 months depending upon use.
Lithium-Ion battery safety features
Over charge protection
Over load protection
Short circuit protection
High/low temp protection
Deep discharge protection
Assembling your upright slim vacuum cleaner
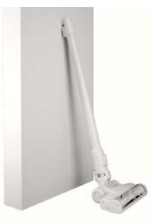
CAUTION: This vacuum cleaner is not free standing. In between uses or when carrying out any maintenance always lie flat on the floor in a suitable location so it does not become a trip hazard or can be stepped on.
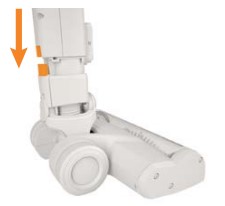
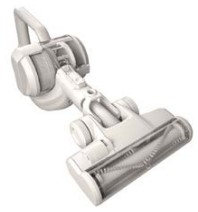
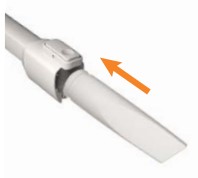
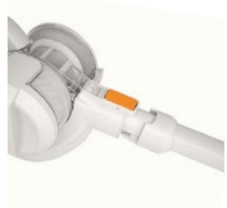
Line up the connector on the reach wand with the Powered Head. Push the reach wand down onto the Powered Head until it clicks into place.
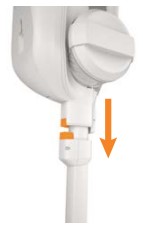
Push the handheld down onto the reach wand until it clicks into place.
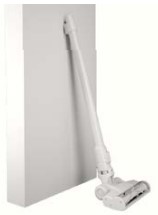
The vacuum is not free standing and in between uses must always be placed in the wall bracket, or laid flat on the floor in a suitable location, so it does not become a trip hazard or can be stepped on.
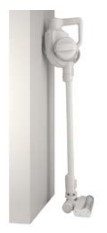
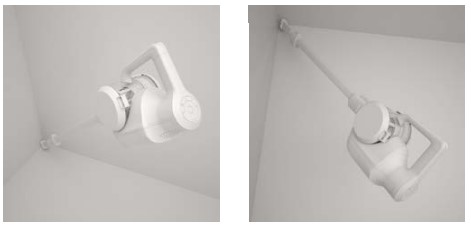
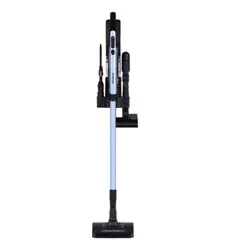
Fixing the wall bracket
Fully assemble the vacuum.
Slot the wall bracket through the groove and lift upwards into position.
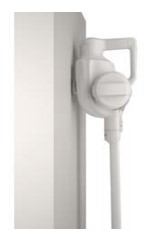
Choose a position where you would like to keep the vacuum stored, preferably near a power point. With the wall bracket attached, stand the vacuum close to the wall, in the upright position with the Powered Head flat on the floor.
Holding the wall bracket firmly in place, carefully lift and remove the vacuum away from the wall bracket.
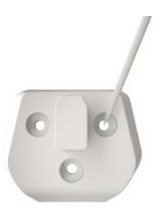
Using a pencil make a small mark for each screw.
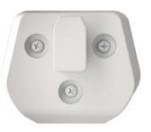
Use both screws and wall plugs to secure the wall bracket to the wall. Place covers over the screws.
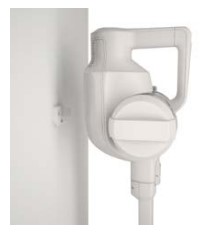
Firmly press the vacuum handle into the wall bracket to secure.
CAUTION: The battery used in this device may present a risk of fire or chemical burn if mistreated. Do not disassemble or heat above manufacturer’s maximum temperature limit (60°C/140°F) or incinerate. Use of another battery may present a risk of fire or explosion. Dispose of used battery promptly. Keep away from children. Do not disassemble and do not dispose of in a fire. Do not attempt to disassemble the battery or remove any component projecting from the battery terminals. The battery and charger have no user serviceable parts. Fire or injury may result. Prior to disposal, protect exposed terminals with heavy insulating tape to prevent shorting. The battery is to be disposed of safely at your local battery recycling centre.
Do not attempt to recharge non-rechargeable batteries. The battery must be removed from the appliance before it is scrapped. The appliance must be disconnected from the charger/supply mains before use and when removing or installing the battery into the machine. In case of battery leakages avoid any contact with the skin. Contact our Customer Care Line on: AU 1300 361 505 / NZ 0800 800 900.
Charging the vacuum cleaner
NOTE: The initial charge is 4 hours, charging will be required before first use. The vacuum can be charged with the handheld either attached to, or detached from, the reach wand.
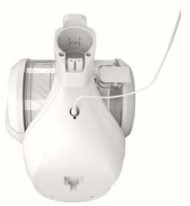
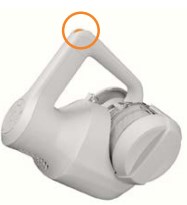
To charge the machine, detach the reach wand and place the handheld on its base. You can also charge the machine whilst attached to the wall mount.
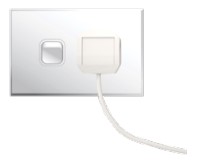
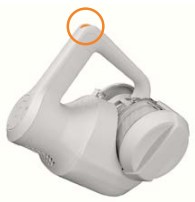
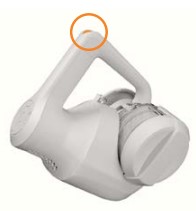
Insert the charging lead into the charging port located on the base of the handle.
Plug the charging plug into a power point.
Charging the battery
WARNING: Do not use the vacuum cleaner when the machine is plugged in and charging.
NOTE: Once the battery is fully depleted the vacuum will still turn on for a few seconds. Plug in the charger until fully charged. The machine can remain on the battery charger once fully charged. The life expectancy of the battery will vary depending on the usage of the vacuum cleaner.
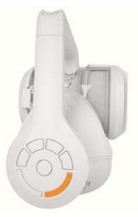
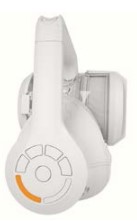
White light flashing – The battery is charging.
White light – The battery is charged (after 4 hours).
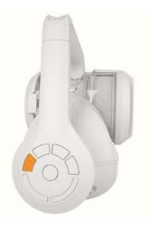
Red light – The battery is low.
If charging for the first time the initial charge time is 4 hours.
Using your machine
CAUTION: For use on delicate hard floors, the brushbar must be turned off to enable slow suction. To prevent any damage being sustained test on an inconspicuous area of the flooring.
Using as a stick vacuum cleaner
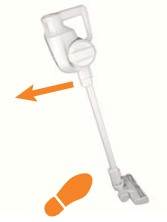
Place your foot on the Powered Head and pull the handle backwards to recline.
To turn the machine on, press the on/off button located on the handle.
To activate and deactivate the brushbar, press the brushbar on/off button located on the dial. The machine will always start with the brushbar turned off.
For additional cleaning time, deactivate the boost mode located on the dial. The machine will always turn on in boost mode.
When the vacuum cleaner is in use the charging lights will indicate how much charge is remaining. When the first bar starts to flash red this indicates the battery is running low (<25%).
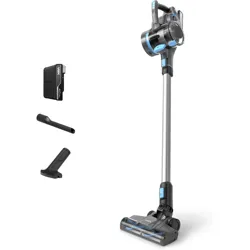
Using as a handheld vacuum cleaner
CAUTION: Always take extra care when using the vacuum cleaner on the stairs.
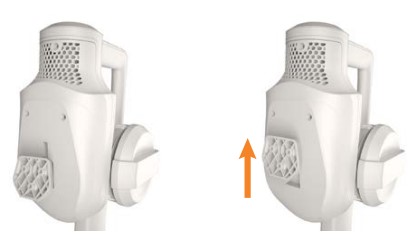
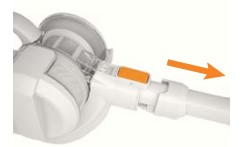
Press the handheld release clip. Pull to separate the handheld from the reach wand.
The reach wand, when attached to the Powered Head/accessory, is not free standing. Place safely and securely to one side.
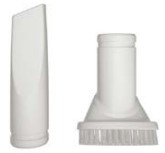
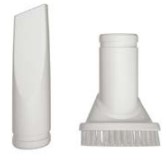
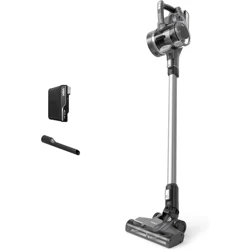
Choose an accessory.
Push the chosen accessory into the handheld until it clicks into place.
To turn the machine on. Press the on/off button located on the handle.
All of the accessories including the Powered Head can be attached directly onto the handheld.
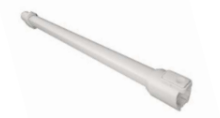
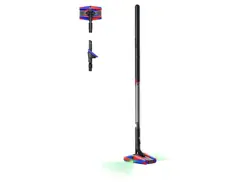
Using as a reach stick vacuum cleaner
The reach wand can be used for hard to reach places.
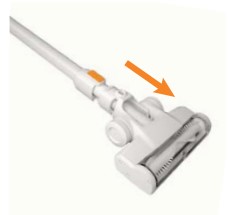
Press the Powered Head/ accessory release clip and pull to remove the Powered Head from the reach wand.
Choose an accessory
Push the chosen accessory into the reach wand until it clicks into place.
To turn the machine on, press the on/off button located on the handle.
The reach wand can be used for hard to reach places and at different heights for above floor cleaning.
The vacuum is not free standing and in between uses must always be placed in the wall bracket, or laid flat on the floor in a suitable location, so it does not become a trip hazard or can be stepped on.
Taking care of your machine
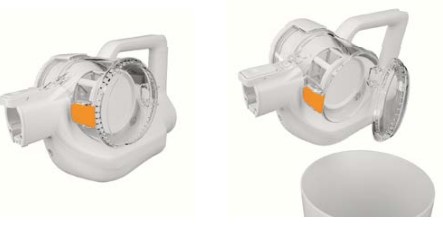
Emptying and cleaning the dirt container
WARNING: Don’t over fill the dirt container to avoid blocking the air flow through the vacuum cleaner.
Press the handheld release clip. Pull to separate the handheld from the reach wand.
The reach wand when attached to the Powered Head/accessory is not free standing. Place safely and securely to one side.
Hold the handheld over a bin, press the dirt release button to allow dirt/debris to fall out.
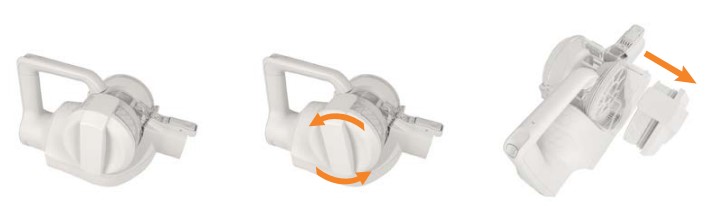
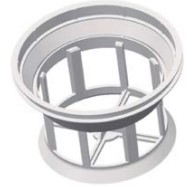
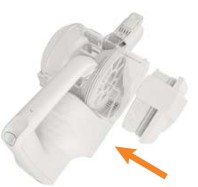
Cleaning the filter and separator
CAUTION: Always empty the dirt container before cleaning the separator and filter. Remove the reach wand/ accessories from the handheld. Incorrect fitting of the separator and filter will reduce suction. Always switch off the vacuum cleaner before carrying out any maintenance or troubleshooting. Do not use your vacuum cleaner without the filters in place.
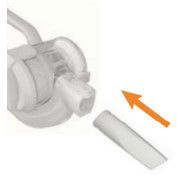
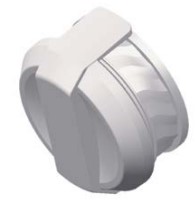
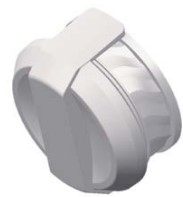
To access the filter and separator twist the cap anti-clockwise and pull out.
To put the cap back on, push the cap into the unlock position ensuring it is fitted correctly and twist clockwise to lock.
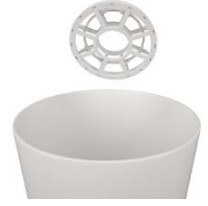
Remove the filter from the lid.
Tap the filter, foam and separator over a bin to remove any dirt and debris. Do not wash the separator.
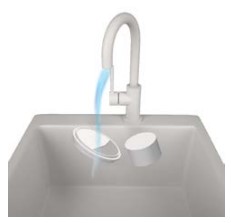
Wash the foam and filter under running water (max 40°C).
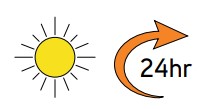
Leave for 24hrs or until fully dry before replacing.
Reassemble filter and separator
1 - SEPARATOR
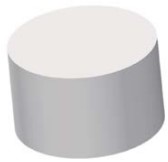
2 - FOAM
Step 1: place foam (2) into separator (1).
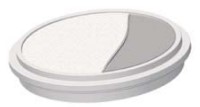
3 - FILTER
4 - LID
Step 2: place filter (3) into lid (4) with the pull tab facing up.
Step 3: attach back onto machine
Let’s talk technical
IMPORTANT: If the brushbar has been obstructed, the Motor Protection Sensor may have been activated and the brushbar will seize. Remove the Powered Head from the machine and clear any obstruction. Refit the Powered Head, switch on the vacuum cleaner by pressing the trigger and press the brushbar on/off button.
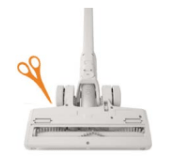
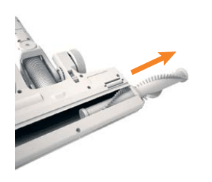
Removing blockages from the Powered Head and reach wand
Using scissors, remove any threads or hair from around the brushbar and clear any dirt or debris from Powered Head.
To test for a blockage in the reach wand, drop a small ball of paper into the wand. The paper will drop through if the wand is clear. Use a broom handle or similar blunt object to remove any blockage.
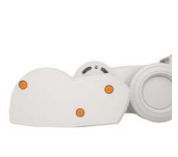
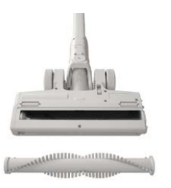
Removing and replacing the brushbar and belt
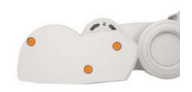
On the base of the floorhead, find letter A engraved to indicate the side of the brushbar cap. Using a screwdriver, unscrew the three screws to remove the brushbar cap.
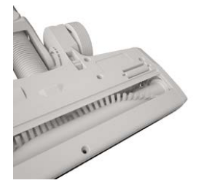
Once the cap is removed, slide the brushbar out.
Clear any threads or hair from around the brushbar and any dirt/debris inside the housing of the Powered Head.
When re-fitting the brushbar, slide it back into place ensuring the brushbar end cap fits into position. Realign the cap and screw securely back on.
On the base of the floorhead, find letter B engraved to indicate the side of the belt cap. Using a screwdriver, unscrew the three screws to remove the belt cap.
What to do if it goes wrong
Problem
Solution
There is an accessory missing
Check the contents panel on the box to make sure the part is included with your vacuum cleaner.
Why does my vacuum cleaner have no power?
The battery may not be charged. Go to ‘Getting Started’.
The motor thermostat may have tripped. If this has happened, switch off the vacuum cleaner. Remove and empty the dirt container and check for blockages. Clean the filters and allow the vacuum cleaner to cool for approximately 1 hour (if you have washed the filters you will need to wait 24 hours for the filters to fully dry before putting them back into the vacuum cleaner).
Why isn’t the light on the vacuum cleaner lit when the battery is charging?
Check the battery charger is plugged in. Go to ‘Getting started’.
Why won’t the vacuum cleaner pick up?
The dirt container may not be correctly fitted, remove the dirt container from the vacuum cleaner and check it’s assembled correctly, refit ensuring it’s locked into place.
The separator is not correctly fitted. Go to ‘Taking care of your machine’.
The filters may be clogged, clean the filters. Go to ‘Taking care of your machine’.
The dirt container may be blocked, empty the dirt container. Go to ‘Taking care of your machine’.
The brush on the Powered Head has not been activated. Go to ‘Using your machine’.
There may be a blockage in the reach wand. Disconnect from the vacuum cleaner and carefully remove any blockages. Go to ‘Let’s talk technical’.
Brushbar may be blocked, this will activate the brushbar motor thermostat.
Why won’t the brushbar turn?
The brushbar has not been activated. Go to ‘using your machine’.
The Powered Head/brushbar may be obstructed. Go to ‘Let’s talk technical’.
Why is dust escaping from the vacuum?
The filters may be clogged, clean the filters. Go to ‘Taking care of your machine’.
The separator may be clogged, clean the separator. Go to ‘Taking care of your machine’.
The separator may be misassembled or not locked in correctly.