Loading ...
Loading ...
Loading ...
Installation Instructions
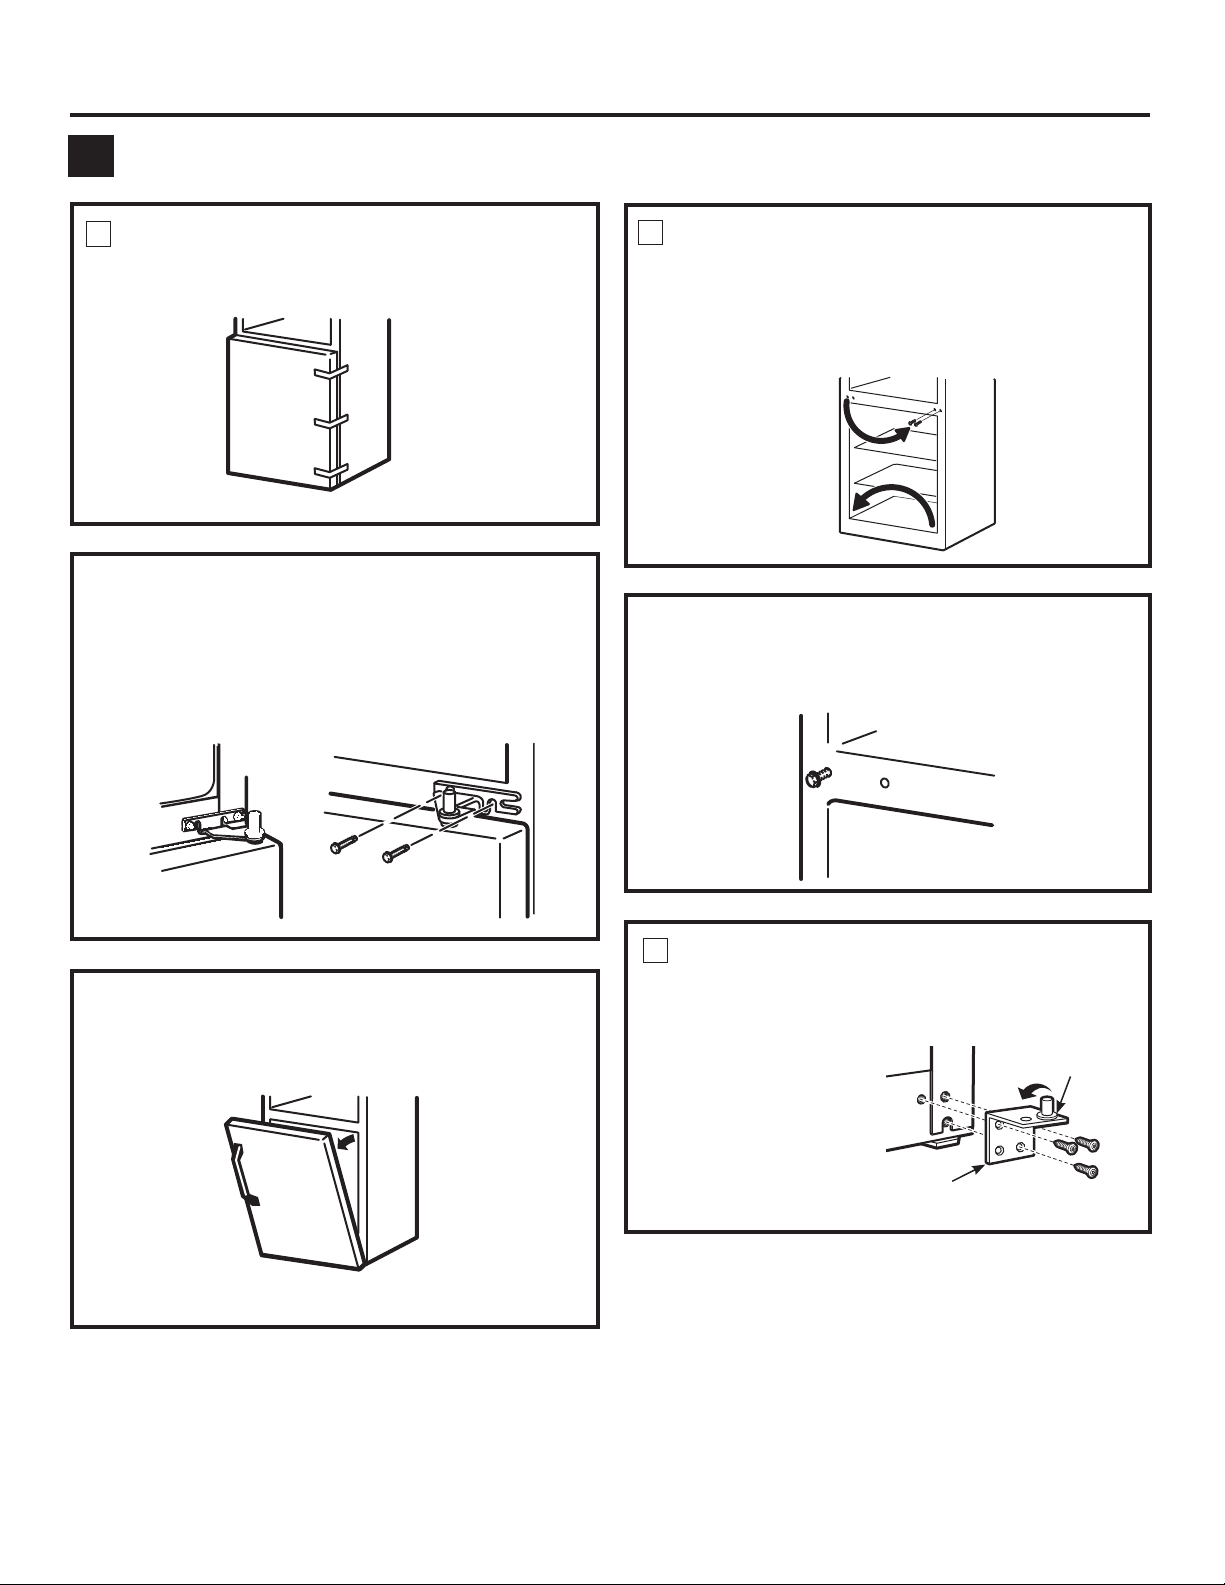
3.1 Tape the door shut with masking tape.
REMOVE THE FRESH FOOD DOOR
3
3.4 Set the door outside-up on a non-scratching surface.
3.3 Remove the tape and tilt the door away from the
FDELQHW/LIWWKHGRRUIURPWKHSLQLQWKHERWWRP
KLQJHEUDFNHW,IWKHSODVWLFZDVKHUVWLFNVWRWKHGRRU
ERWWRPSXWLWEDFNRQWKHKLQJH
3.2 Using a 5/16”KH[KHDGVRFNHWVFUHZGULYHUDQGD
5/16” open-end wrench, remove the two screws
KROGLQJWKHFHQWHUKLQJHWRWKHFDELQHW/LIWWKH
center hinge to free its pin from the socket in the
top of the door, and set hinge and screws aside.
Be careful not to lose the center hinge spacer and
washer.
3.7 Take one of the screws removed in step 2 and start
it in the outermost screw hole on the opposite side.
'RQRWGULYHLWDOOWKHZD\GRZQ³OHDYHHQRXJKVSDFH
XQGHUWKHVFUHZKHDGIRUWKLFNQHVVRIWKHEUDFNHW
14
REVERSING THE HARDWARE
4
REVERSING THE DOOR SWING (CONT.)
2
3.5 Transfer the two screws from the opposite side of the
FDELQHWWRWKHVFUHZKROHVYDFDWHGE\WKHFHQWHUKLQJH
removal.
3.67UDQVIHUWKHZDVKHULI\RXUPRGHOKDVRQHWRWKH
opposite side.
3
REMOVE THE FRESH FOOD DOOR (CONT.)
4.1 0RYHWKHERWWRPKLQJHEUDFNHWDQGSODVWLFZDVKHUIURP
the right side to the left side.
Plastic
Washer
Hinge
Bracket
Switch the hinge pin to the
RSSRVLWHVLGHRIWKHEUDFNHW
Loading ...
Loading ...
Loading ...