Loading ...
Loading ...
Loading ...
13
Installation Instructions
REVERSING THE DOOR SWING
2
:KHQUHYHUVLQJWKHGRRUVZLQJ
5HDGWKHLQVWUXFWLRQVDOOWKHZD\WKURXJKEHIRUHVWDUWLQJ
+DQGOHSDUWVFDUHIXOO\WRDYRLGVFUDWFKLQJSDLQW
6HWVFUHZVGRZQE\WKHLUUHODWHGSDUWVWRDYRLGXVLQJ
them in the wrong places.
3URYLGHDQRQVFUDWFKLQJZRUNVXUIDFHIRUWKHGRRUV
IMPORTANT:2QFH\RXEHJLQGRQRWPRYHWKHFDELQHWXQWLO
door-swing reversal is completed.
These instructions are for changing the hinges from the
ULJKWVLGHWRWKHOHIWVLGH³LI\RXHYHUZDQWWRFKDQJHWKH
KLQJHVEDFNWRWKHULJKWVLGHIROORZWKHVHVDPHLQVWUXFWLRQV
and reverse all references to left and right.
IMPORTANT NOTES
Phillips screwdriver
TOOLS REQUIRED
Masking tape
7RU77RU[GULYHU
QHHGHGIRUVRPH
PRGHOV
5/16”KH[KHDG
socket driver
5/16” open-end
wrench
Putty knife or thin-
EODGHVFUHZGULYHU
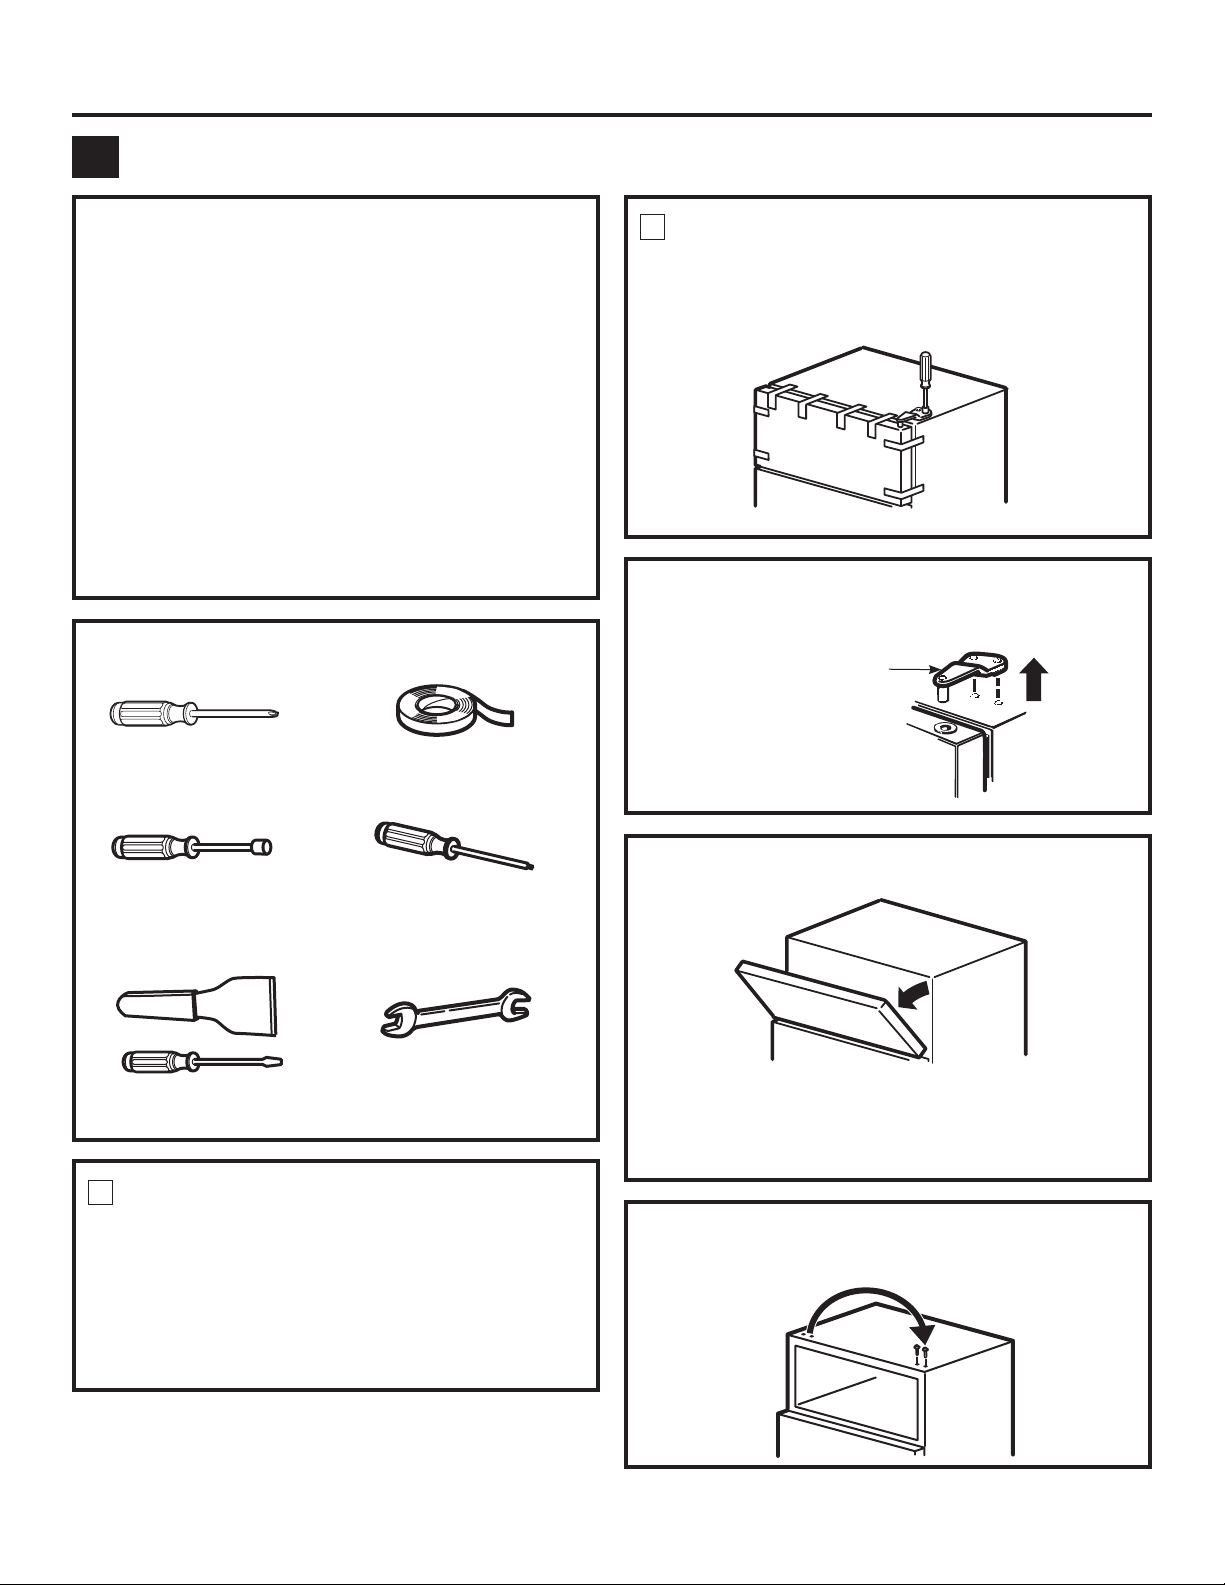
2.1 Tape the door shut with masking tape.
2.2 With a 5/16”KH[KHDGVRFNHWGULYHUUHPRYHWKH
VFUHZVWKDWKROGWKHWRSKLQJHWRWKHFDELQHW
REMOVE THE FREEZER DOOR
2
2.3 Lift the hinge straight up to free the hinge pin
from the socket in the top of the door and set it
aside, along with its screws.
2.6 Transfer the 2 screws from the opposite side of
WKHFDELQHWWRWKHVFUHZKROHVYDFDWHGE\WKHWRS
hinge removal.
2.5 Set the door on a non-scratching surface with
the outside up.
2.4 Remove the tape and tilt the door away from the
FDELQHW/LIWLWRȺWKHFHQWHUKLQJHSLQ
Top Hinge
1.1 Unplug the refrigerator from its electrical outlet.
1.2 Empty all door shelves, including the dairy
compartment.
CAUTION: 'RQRWOHWHLWKHUGRRUGURSWRWKHÀRRU7R
do so could damage the door stop.
BEFORE YOU START
1
Loading ...
Loading ...
Loading ...