USER MANUAL Electric Built-In Double Oven
Description
General Description

1 Control panel
2 Main oven light
3 Main oven seal
4 Main oven door
5 Fan
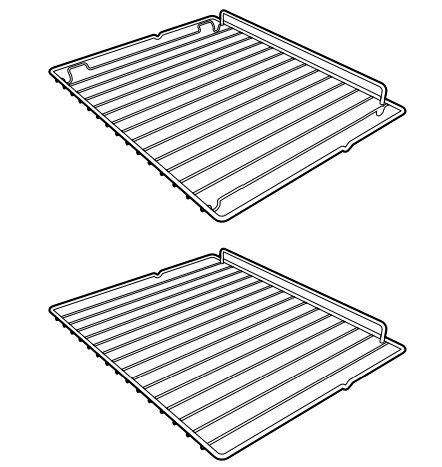
6 Rack/tray support frames
 Frame shelf
7 Auxiliary oven light
8 Auxiliary oven seal
9 Auxiliary oven door
Control panel
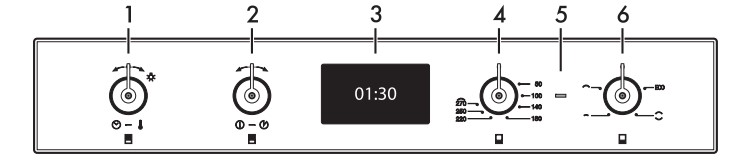
1 Main oven temperature knob
This knob allows you to select the cooking time and temperature, set programmed cooking and the current time as well as turn the light inside the oven on and off.
2 Main oven function knob
This knob allows you to turn the appliance on and off and select the cooking function.
3 Main oven display
Displays the current time, the selected cooking temperature and function and any time set.
4 Auxiliary oven temperature knob
This knob allows you to select the cooking temperature.
Turn the knob clockwise to the required value, between the minimum and maximum settings.
5 Auxiliary oven thermostat indicator light
The thermostat indicator light remains lit when the oven is heating up. Once the oven has reached the selected temperature the indicator light switches off.
6 Auxiliary oven function knob
The oven's various functions are suitable for different cooking modes. After selecting the required function, set the cooking temperature using the temperature knob.
Other parts
Shelves
The appliance features shelves for positioning trays and racks at different heights. The insertion heights are indicated from the bottom upwards (see 2.1 General Description).
Cooling fan
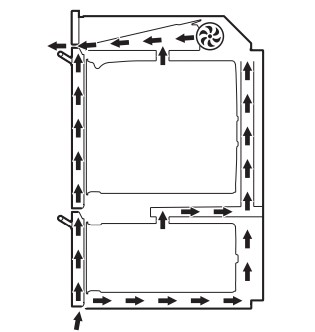
The fan cools the oven and comes into operation during cooking.
The fan causes a steady outflow of air from above the door which may continue for a brief period of time even after the appliance has been turned off.
Interior lighting
The appliance interior lighting comes on:
- when the door is opened;
- when any function is selected, except for
 and
and  ;
;
- by turning the temperature knob right when no function is selected (turn the temperature knob right again to switch off interior lighting).
Available accessories
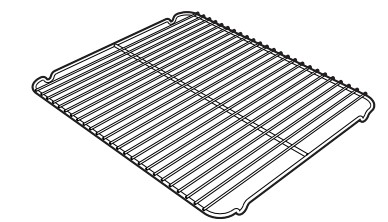
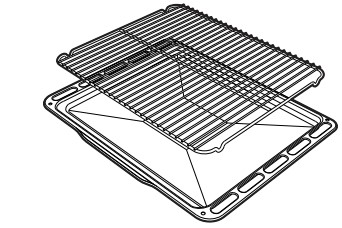
Rack
Useful for supporting containers with food during cooking.
Tray rack
To be placed over the top of the oven tray; for cooking foods which may drip
Oven tray
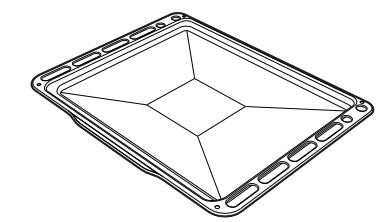
Useful for collecting fat from foods placed on the rack above and for cooking sweets, biscuits, etc.
Deep tray
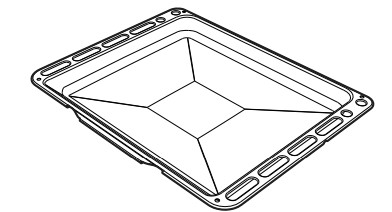
Useful for collecting fat from foods placed on the rack above and for cooking sweets, biscuits, etc.
Use
First use
- Remove any protective film from the outside or inside of the appliance, including accessories.
- Remove any labels (apart from the technical data plate) from the accessories and from the oven cavity.
- Remove and wash all the appliance accessories (see 4 Cleaning and maintenance).
- Heat the empty oven at the maximum temperature to burn off any residues left by the manufacturing process.
Using the accessories
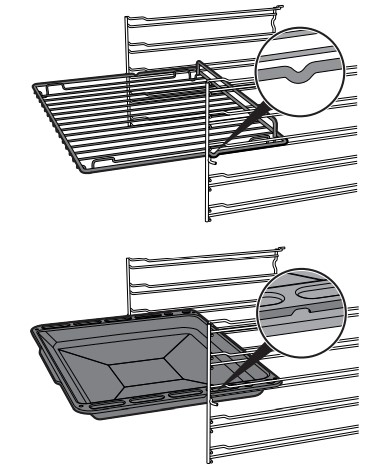
Racks and trays
Racks and trays have to be inserted into the side guides until they come to a complete stop.
- The mechanical safety locks that prevent the rack from being taken out accidentally have to face downwards and towards the oven back.
Tray rack
The tray rack has to be inserted into the tray. In this way fat can be collected separately from the food which is being cooked.
Using the auxiliary oven
To switch the auxiliary oven on:
- Select the cooking function using the function knob.
- Select the temperature using the temperature knob.
Using the main oven with display
First use

On the first use, or after a power failure,  will be flashing on the appliance's display. In order to be able to start any cooking program, the current time must be set (if the oven is being turned on for the first time, it is also recommended you set the required language).
Press the control knob to enter the settings menu, see “3.10 Settings”.
Favourites
Press the return knob from the clock screen to display the last preset programs or personal recipes used.

Deleting favourites
If you wish to delete the favourites:
1. Press the return knob from the clock screen to display the last preset programs or personal recipes used.
2. Hold the control knob down for a few seconds.
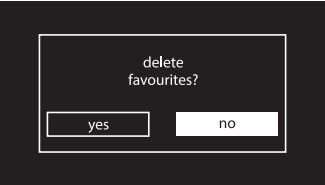
3. Select YES if you wish to delete the favourites.

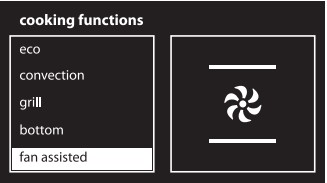
Cooking functions
1. Turn the control knob to the right or left to select cooking functions from the main menu. Then press it to confirm.

2. Turn the control knob to select the required function. Press the knob to confirm the selection.
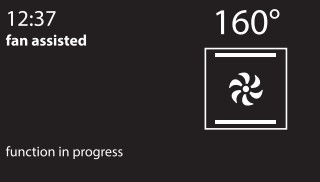
3. The appliance will begin automatic preheating. The display will show the chosen function, the pre-set temperature, the current time and the progress bar of the temperature reached (preheating).
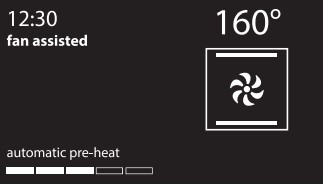
4. When the preheating stage is over a buzzer will sound to indicate that the food can be placed inside the oven.

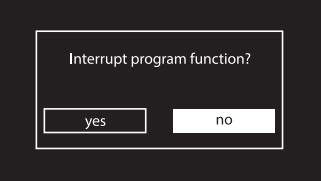
Interrupting a function
Press the return knob to interrupt a cooking function. Select the required option and confirm it using the return knob.
Cooking advice
Timer during function
1. Press the control knob during a cooking function.
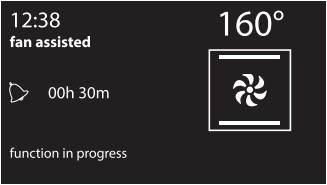
2. Turn the control knob right or left to set the duration (from 1 minute to 4 hours). After a few seconds, the  symbol stops flashing and the countdown starts.
3. Wait for the buzzer to indicate that the time has finished. The symbol flashes.
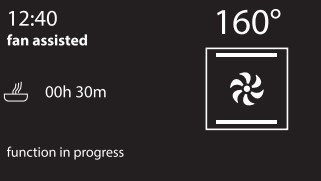
Timed cooking
1. After selecting a cooking function and temperature, press the control knob twice.
2. Turn the knob right or left to set the minutes of cooking from 00:01 to 13:00. Keep the knob turned to produce a faster increase or decrease.
3. A few seconds after the required duration is set, the  symbol stops flashing and timed cooking starts
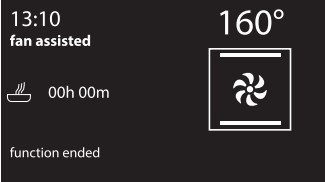
4. At the end of the cooking time “function ended” appears on the display and a buzzer will sound that can be deactivated by pressing the control knob.
Modifying the data set during timed cooking
During operation, it is possible to modify timed cooking duration:
1. When the symbol is steady and the appliance is cooking, press the control knob. The symbol starts flashing.
2. Turn the control knob right or left to alter the preset cooking duration.
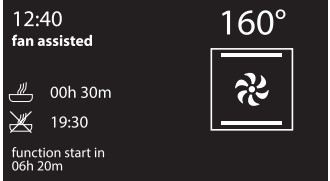
Delayed cooking
1. After selecting a function and a cooking temperature, press the control knob to set the cooking time.
2. Press the control knob before the symbol stops flashing to set the cooking end time.
3. The  symbol flashes. Turn the knob right or left to set the end of cooking time.
4. After a few seconds the and symbols stop flashing. The appliance waits for the delayed start time.
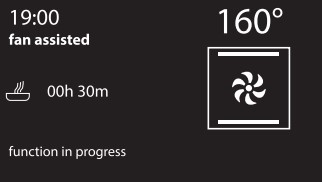
5. Based on the values set, the appliance will start a preheating stage of approximately 10 minutes.

6. It will then proceed with the selected function.
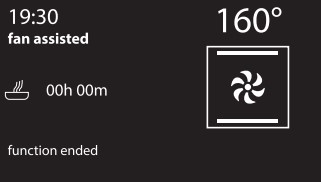
7. At the end of the cooking time “function ended” appears on the display and a buzzer will sound that can be deactivated by pressing the control knob.
Modifying the data set during programmed cooking
During operation, it is possible to modify programmed cooking duration:
1. When the and symbols are lit steadily and the appliance is waiting for cooking to start, press the control knob. The symbol starts flashing.
2. Turn the control knob to alter the previously set cooking time.
3. Press the control knob again. The symbol switches off and starts flashing. The display shows the end of cooking time.
4. Turn the control knob to delay the end of cooking time.
5. After a few seconds the and symbols stop flashing and programmed cooking restarts its operation with the new settings.
Cleaning and maintenance
Instructions
Improper use: Risk of damage to surfaces
- Do not use steam jets to clean the appliance.
- Do not use cleaning products containing chlorine, ammonia or bleach on steel parts or parts with metallic finishes on the surface (e.g. anodizing, nickel- or chromium-plating).
- Do not use abrasive or corrosive detergents on glass parts (e.g. powder products, stain removers and metallic sponges).
- Do not use rough or abrasive materials or sharp metal scrapers.
Cleaning the surfaces
To keep the surfaces in good condition, they should be cleaned regularly after use. Let them cool first.
Ordinary daily cleaning
Always use only specific products that do not contain abrasives or chlorine-based acids.
Pour the product onto a damp cloth and wipe the surface, rinse thoroughly and dry with a soft cloth or a microfibre cloth.
Food stains or residues
Do not use metallic sponges or sharp scrapers as they will damage the surfaces.
Use ordinary non-abrasive products with the aid of wooden or plastic utensils if necessary. Rinse thoroughly and dry with a soft cloth or a microfibre cloth
Do not allow residues of sugary foods (such as jam) to set inside the oven. If left to set for too long, they might damage the enamel lining of the oven.
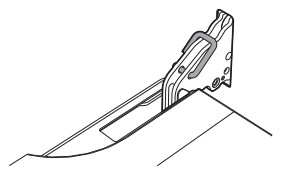
Removing the door
For easier cleaning, the door can be removed and placed on a canvas.
To remove the door proceed as follows:
1. Open the door completely and insert two pins into the holes on the hinges indicated in the figure.
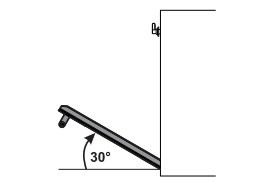
2. Grasp the door on both sides with both hands, lift it forming an angle of around 30° and remove it.
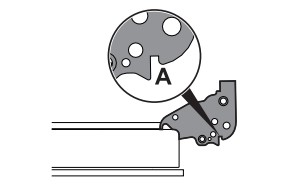
3. To reassemble the door, put the hinges in the relevant slots in the oven, making sure that grooved sections A are resting completely in the slots. Lower the door and once it is in place remove the pins from the holes in the hinges.
Cleaning the door glazing
The glass in the door should always be kept thoroughly clean. Use absorbent kitchen roll. In case of stubborn dirt, wash with a damp sponge and an ordinary detergent.
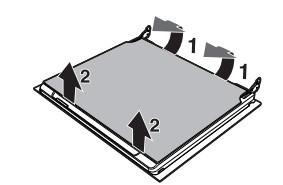
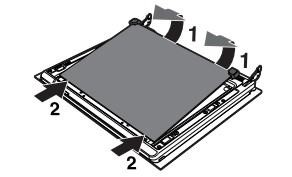
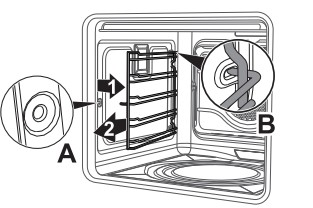
Removing the internal glass panels
For easier cleaning the door internal glass panels can be disassembled.
1. Remove the internal glass panel by pulling the rear part gently upwards, following the movement indicated by the arrows (1).
2. Then, pull the front part upwards (2). In this way, the 4 pins attached to the glass detach from their housings in the oven door.
3. Some models have an intermediate glass panel. Remove the intermediate glass panel by lifting it upwards.
4. Clean the external glass panel and the panels previously removed. Use absorbent kitchen roll. In case of stubborn dirt, wash with a damp sponge and neutral detergent.
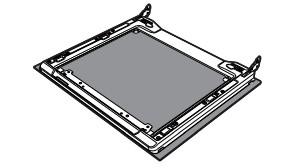
5. Refit the panels in the reverse order in which they were removed.
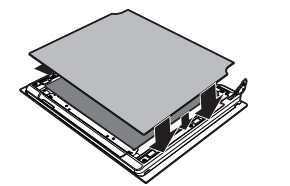
6. Reposition the internal glass panel. Take care to centre and insert the 4 pins into their housings in the oven door by applying slight pressure.
Cleaning the inside of the oven
For the best oven upkeep, clean it regularly after having allowed it to cool. Take out all removable parts.
Clean the oven racks with warm water and non-abrasive detergent. Carefully rinse and dry damp parts.
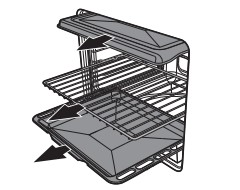
Removing racks/trays support frames
Removing the guide frames enables the sides to be cleaned more easily. This operation should be performed each time the automatic cleaning cycle is used (on some models only).
To remove the guide frames: Pull the frame towards the inside of the oven to unhook it from its groove A, then slide it out of the seats B at the back.
When cleaning is complete, repeat the above procedures to put the guide frames back in.
Pyrolytic (main oven only)
Preliminary operations
Before starting the pyrolytic cycle:
- Clean the internal glass panel following the usual cleaning instructions.
- For very stubborn encrustations spray an oven cleaning product onto the glass (read the warnings on the product); leave for 60 minutes, then rinse and dry the glass using kitchen roll or a microfibre cloth.
- Completely remove all accessories from inside the oven.
- Remove the racks/trays support frames.
- Remove the upper guard (if present).
- Close the door.
Pyrolytic function setting
1. Turn the control knob to the right or left to select eco pyrolytic or pyrolytic from the “special functions” menu. Then press it to confirm.
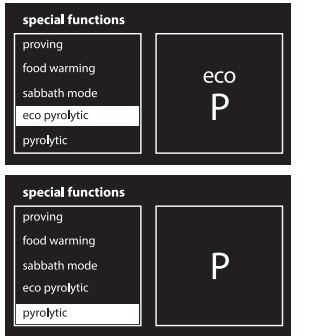
2. Turn the control knob to set the cleaning cycle duration from a minimum of 2 hours to a maximum of 3 hours (except for the  function whose duration is 2 hours).

3. Press the control knob. The  symbol will now be lit solidly. The display shows a warning to remove accessories from inside the oven cavity.
4. Press the control knob to start the pyrolytic cycle.
Pyrolytic
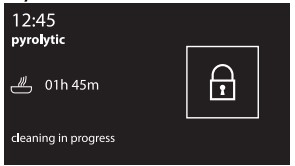
1. The display shows “cleaning in progress” and the remaining time to indicate that the appliance is carrying out the automatic cleaning cycle. Two minutes after the pyrolytic cycle has started the door is locked (the door lock indicator light  comes on) by a device that prevents the door from being opened.
2. At the end of the pyrolytic cycle, the door remains locked as long as the temperature inside the oven returns to safety levels.
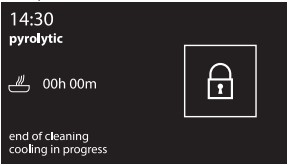
3. The display indicates that the cooling procedure inside the oven cavity is in progress. Wait for the oven to cool down and collect the residues deposited inside with a damp microfibre cloth.
Setting of programmed pyrolytic cycle
It is possible to program the pyrolytic cycle start time.
1. After selecting the pyrolytic cycle duration, press the control knob. The display shows the current time and the symbol comes on.
2. Turn the control knob to set the time you wish the pyrolytic cycle to finish.
3. After a few seconds, the  and symbols remain lit steadily and the appliance waits for the set start time to start the cleaning cycle.
Extraordinary maintenance
Replacing the internal light bulb
1. Completely remove all accessories from inside the oven.
2. Remove the racks/trays support frames.
3. Remove the bulb cover using a tool (e.g. a screwdriver).
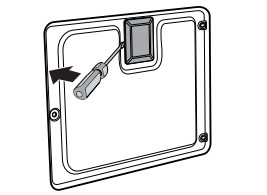
4. Slide out and remove the lamp
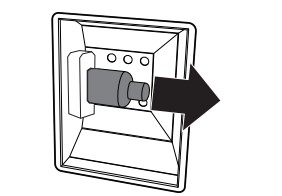
5. Replace the lamp with one of the same type (40W).
6. Refit the cover correctly, so that the moulded part of the glass is facing the door.
7. Press the cover completely down so that it attaches perfectly to the bulb support.
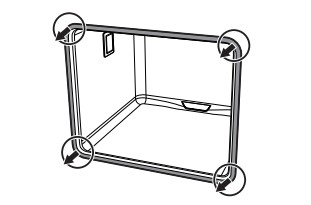
Removing the door seal (auxiliary oven only)
To permit thorough cleaning of the oven, the door seal may be removed. There are fasteners on all four sides to attach it to the edge of the oven. Pull the 4 edges of the seal outwards to detach the fasteners.
What to do if...
The display is completely off:
- Check the mains power supply.
- Check whether an omnipolar switch upstream of the appliance supply line is in the “ON” position.
The appliance does not heat up:
- Check whether it has been set in “demo” mode (for further details see “Settings”).
The controls do not respond:
- Check whether it has been set to “control lock” mode (for further details see “Settings”).
The cooking times are longer than those indicated in the table:
- Check whether it has been set to “ecologic” mode (for further details see “Settings”).
After the automatic cleaning cycle (pyrolytic) it is not possible to select a function:
- Verify whether the door lock has deactivated. If it has not, the oven has a safety device that does not allow functions to be selected while the door lock is active. This is because the temperature inside the oven is still too high to permit any type of cooking
The display shows “Error 4”:
- The door lock has not properly attached to the door. This might be because the door was accidentally opened during the door lock activation. Switch the oven off and on again, waiting a few minutes before selecting a new cleaning cycle.
If the door is opened during a fan-assisted function, the fan stops:
- This is not a fault. It is a normal operation of the appliance, useful when cooking foods in order to avoid excessive heat escaping. When the door is closed, the oven will return to normal operation.