Loading ...
Loading ...
Loading ...
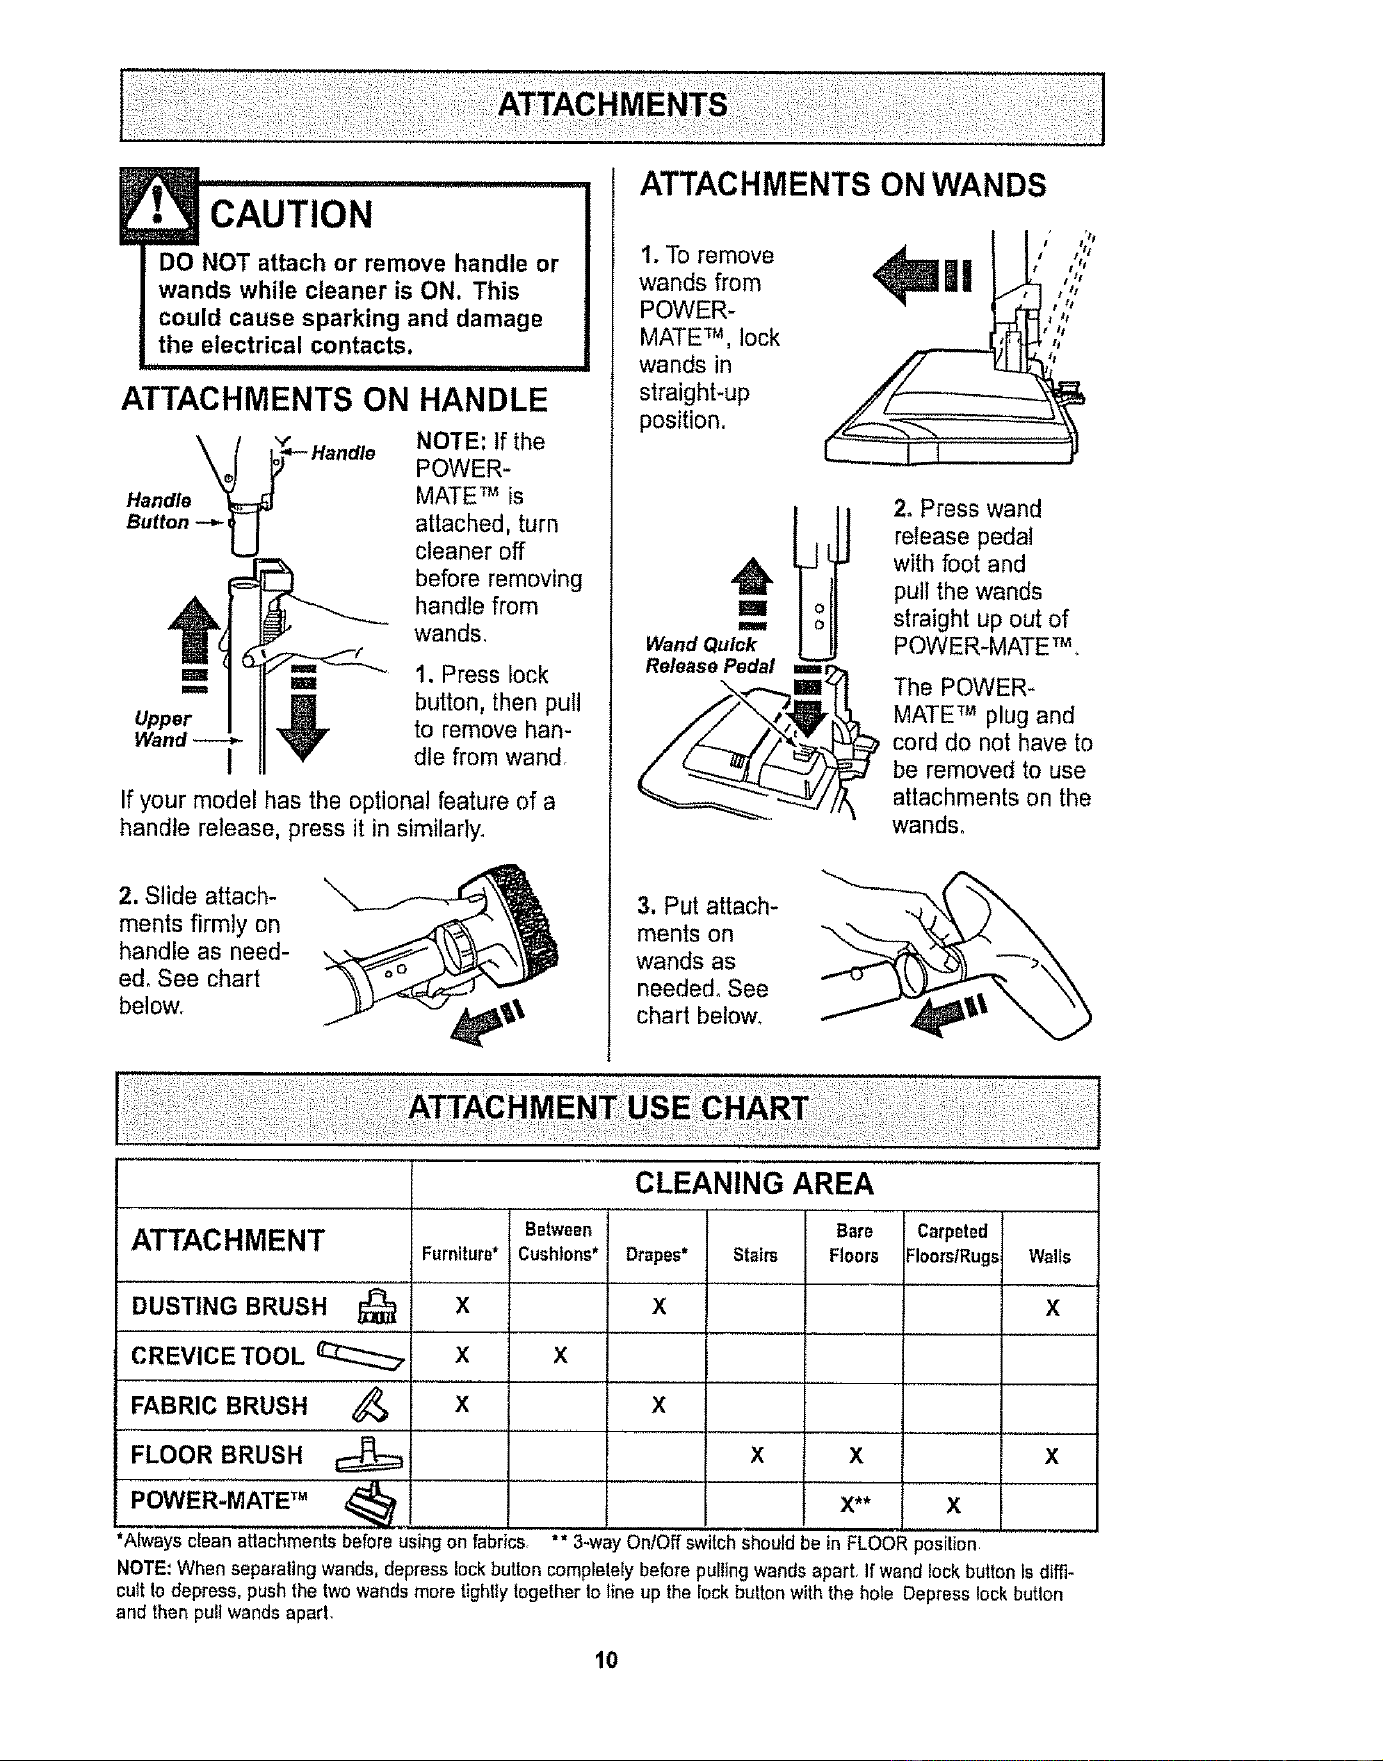
CAUTION ....................
DO NOT attach or remove handle or
wands while cleaner is ON. This
could cause sparking and damage
the electrical contacts.
u,
ATTACHMENTS ON HANDLE
NOTE: If the
POWER-
Handle MATE TM is
Button attached, turn
cleaner off
before removing
handle from
wands,
Upper
u 1. Press lock
,_ button, then pull
to remove han-
I dte from wand,
If your model hasthe optional feature of a
handle release, press it in similarly,
2. Slide attach-
ments firmly on
handle as need-
ed, See chart
below,
1, To remove
wands from
POWER-
MATE TM, lock
wands in
straight-up
position.
t tl
|! o:,::,
m
Wand Quick
Release Pedal ===
2. Press wand
release pedal
with foot and
pull the wands
straight up out of
POWER-MATE TM,
The POWER-
MATE TM plug and
cord do not have to
be removed to use
attachments on the
wands°
3. Put attach-
ments on
wands as
needed° See
chart below,
FABRIC BRUSH
FLOOR BRUSH
POWER-MATE TM
CLEANING AREA
Between Carpeted
ATTACHMENT Furniture* Cushions* Drapes* Floors/Rugs Walls
DUSTING BRUSH _ X X X
CREVICE TOOL _ X X
x x
x
*Always clean attachmentsbefore using on fabrics,
Bare
Stairs Floors
X x
x** x
"* 3-way On/Off switch should be in FLOOR position
NOTE,'When separating wands, depress lock button completeEybefore purlingwands apart, Ifwand lockbutton is diffi-
cult todepress, pushthe twowandsmore tightlytogetherto line up the Iock button withthe hole Depress lockbutlon
ann then puttwands aparL
10
Loading ...
Loading ...
Loading ...