Loading ...
Loading ...
Loading ...
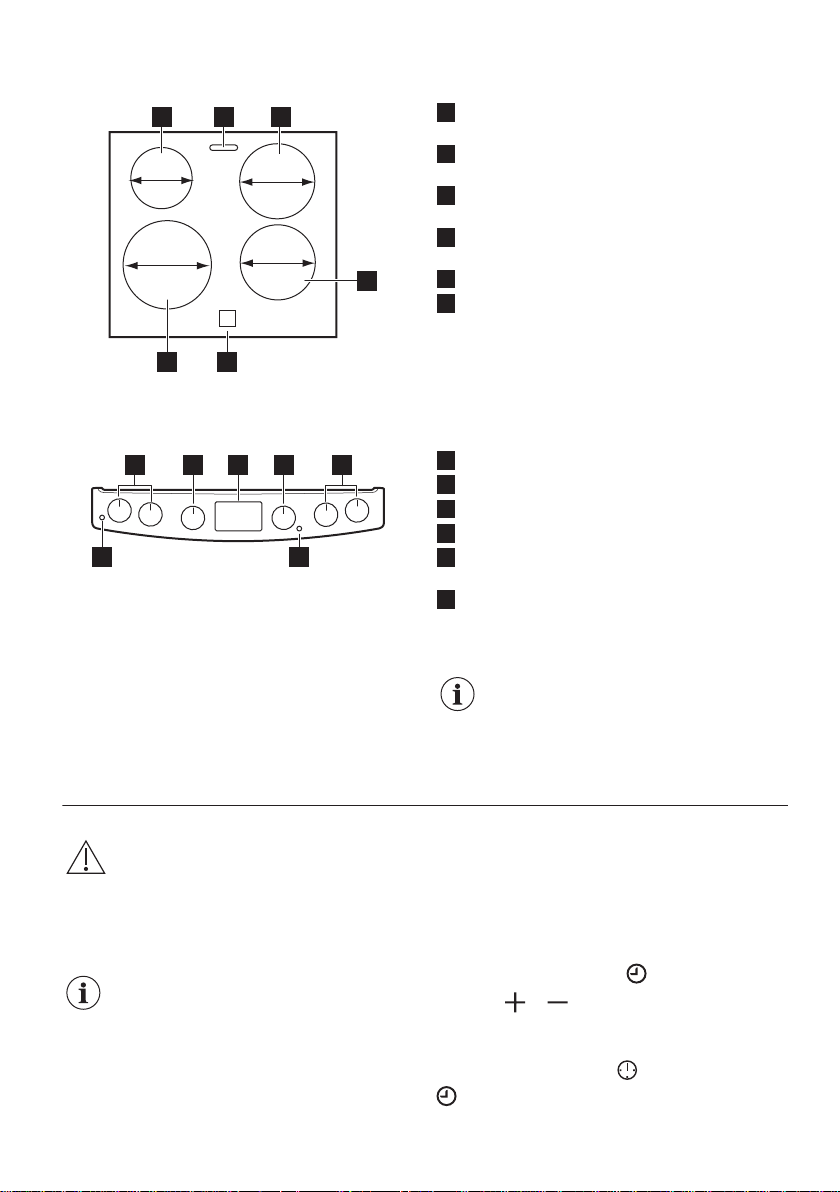
COOKING SURFACE LAYOUT
2
210 mm
180 mm
180 mm
140 mm
1 3
6
4
5
1
Induction cooking zone 1400 W with the
PowerBoost 2500 W
2
Steam outlet - number and position depend on
the model
3
Induction cooking zone 1800 W with the
PowerBoost 2800 W
4
Induction cooking zone 1800 W with the
PowerBoost 2800 W
5
Control panel
6
Induction cooking zone 2300 W with the
PowerBoost 3600 W
COOKER CONTROL PANEL
56
1 2 43 1
1
Knobs for the hob
2
Knob for the top oven functions
3
Display
4
Knob for the main oven functions
5
Temperature indicator / symbol for the main
oven
6
Temperature indicator / symbol for the top oven
ACCESSORIES
• Wire shelf
For cookware, cake tins, roasts.
• Grill- / Roasting pan
To bake and roast or as pan to collect fat.
• Trivet
For roasting and grilling.
Use the trivet only with the Grill- /
roasting pan.
BEFORE FIRST USE
WARNING! Refer to Safety chapters.
INITIAL CLEANING
Remove all accessories and removable shelf
supports from the oven.
Refer to "Care and cleaning" chapter.
Clean the oven and the accessories before first
use.
Put the accessories and the removable shelf
supports back to their initial position.
USING THE SENSOR FIELDS
To activate a function touch and hold the selected
symbol on the display for minimum 1 second.
SETTING AND CHANGING THE TIME
You must set the time before you operate the oven.
When you connect the appliance to the electrical
supply or after a power cut, flashes.
Press the or to set the correct time.
After approximately 5 seconds, the flashing stops
and the display shows the time of day.
To change the time, press
again and again until
starts to flash.
7
Loading ...
Loading ...
Loading ...