Loading ...
Loading ...
Loading ...
5
INSTALLATION INSTRUCTIONS
Remove Mounting Plate
Depending on your model, the mounting plate may be in the
foam packaging, or it may be attached to the back of the
microwave oven.
NOTE: To avoid possible damage, cover the work surface.
1. Remove any remaining contents from the microwave oven
cavity.
2. If the mounting plate is attached to the back of the
microwave oven, remove it and set it aside.
3. Tape the microwave oven door closed so that the door does
not swing open while the microwave oven is being handled.
NOTE: To avoid damage to the microwave oven, do not grip or
use the door or door handle while the microwave oven is being
handled.
Rotate Blower Motor
The microwave oven is set for recirculation installation. For wall
or roof venting, changes must be made to the venting system.
NOTE: Skip this section if you are using recirculation installation.
Keep the damper assembly in case the venting method is
changed, or the microwave oven is reinstalled in another location
where wall or roof venting may be used.
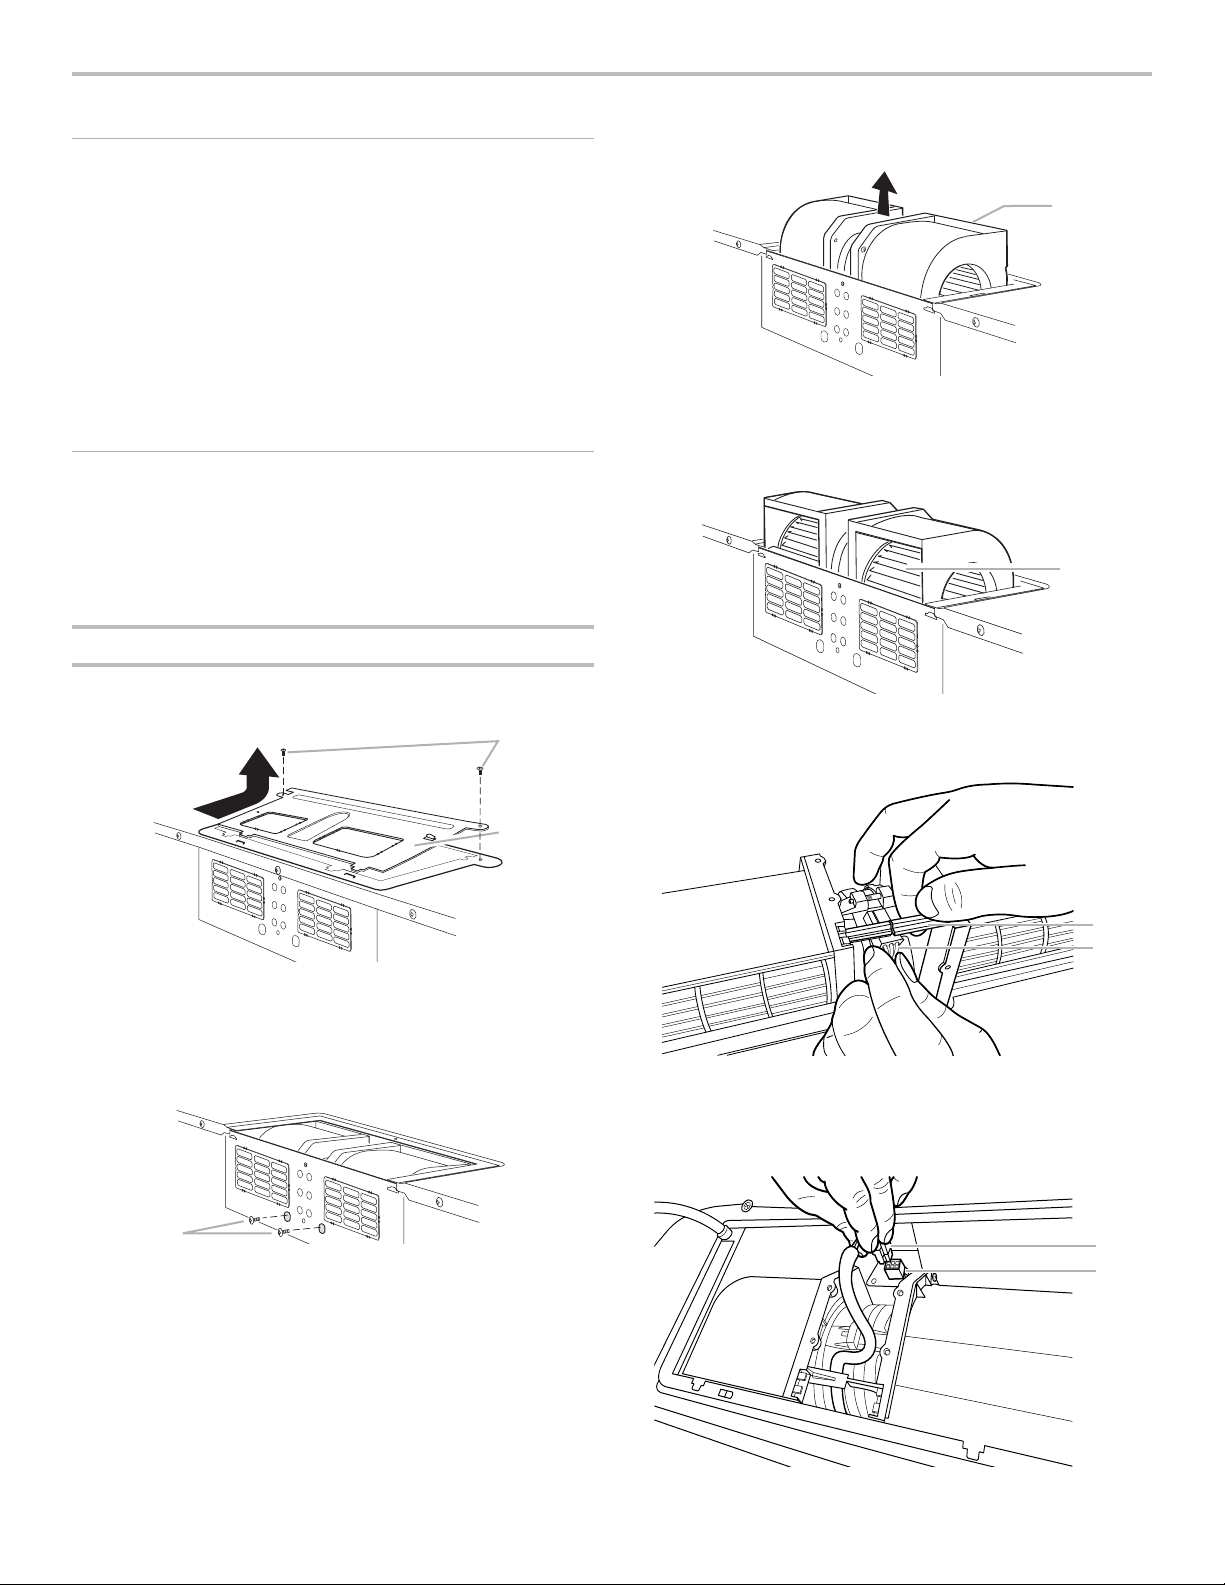
Wall Venting Installation Only
1. Remove screws attaching damper plate to top of microwave
oven exterior. Slide damper plate toward the front of the
microwave oven and lift up.
2. Keep damper plate and screws together and set aside.
3. Remove 2 screws attaching blower motor to back of
microwave oven.
4. Lift blower motor out of microwave oven.
5. Rotate blower motor 180 degree so that exhaust ports face
the back of the microwave oven.
6. Hold the blower motor wire, put the wire through the blower
motor bridge.
7. Insert the blower motor wire into the connector.
A
B
A. Screws
B. Damper plate
A. Screws (in recessed holes)
A
A
A. Blower motor
A
A. Exhaust Port
A. Blower motor wire
B. Connector
A
B
A. Blower motor bridge
B. Blower motor wire
A
B
Loading ...
Loading ...
Loading ...