Loading ...
Loading ...
Loading ...
14 49-80797-3
Installation
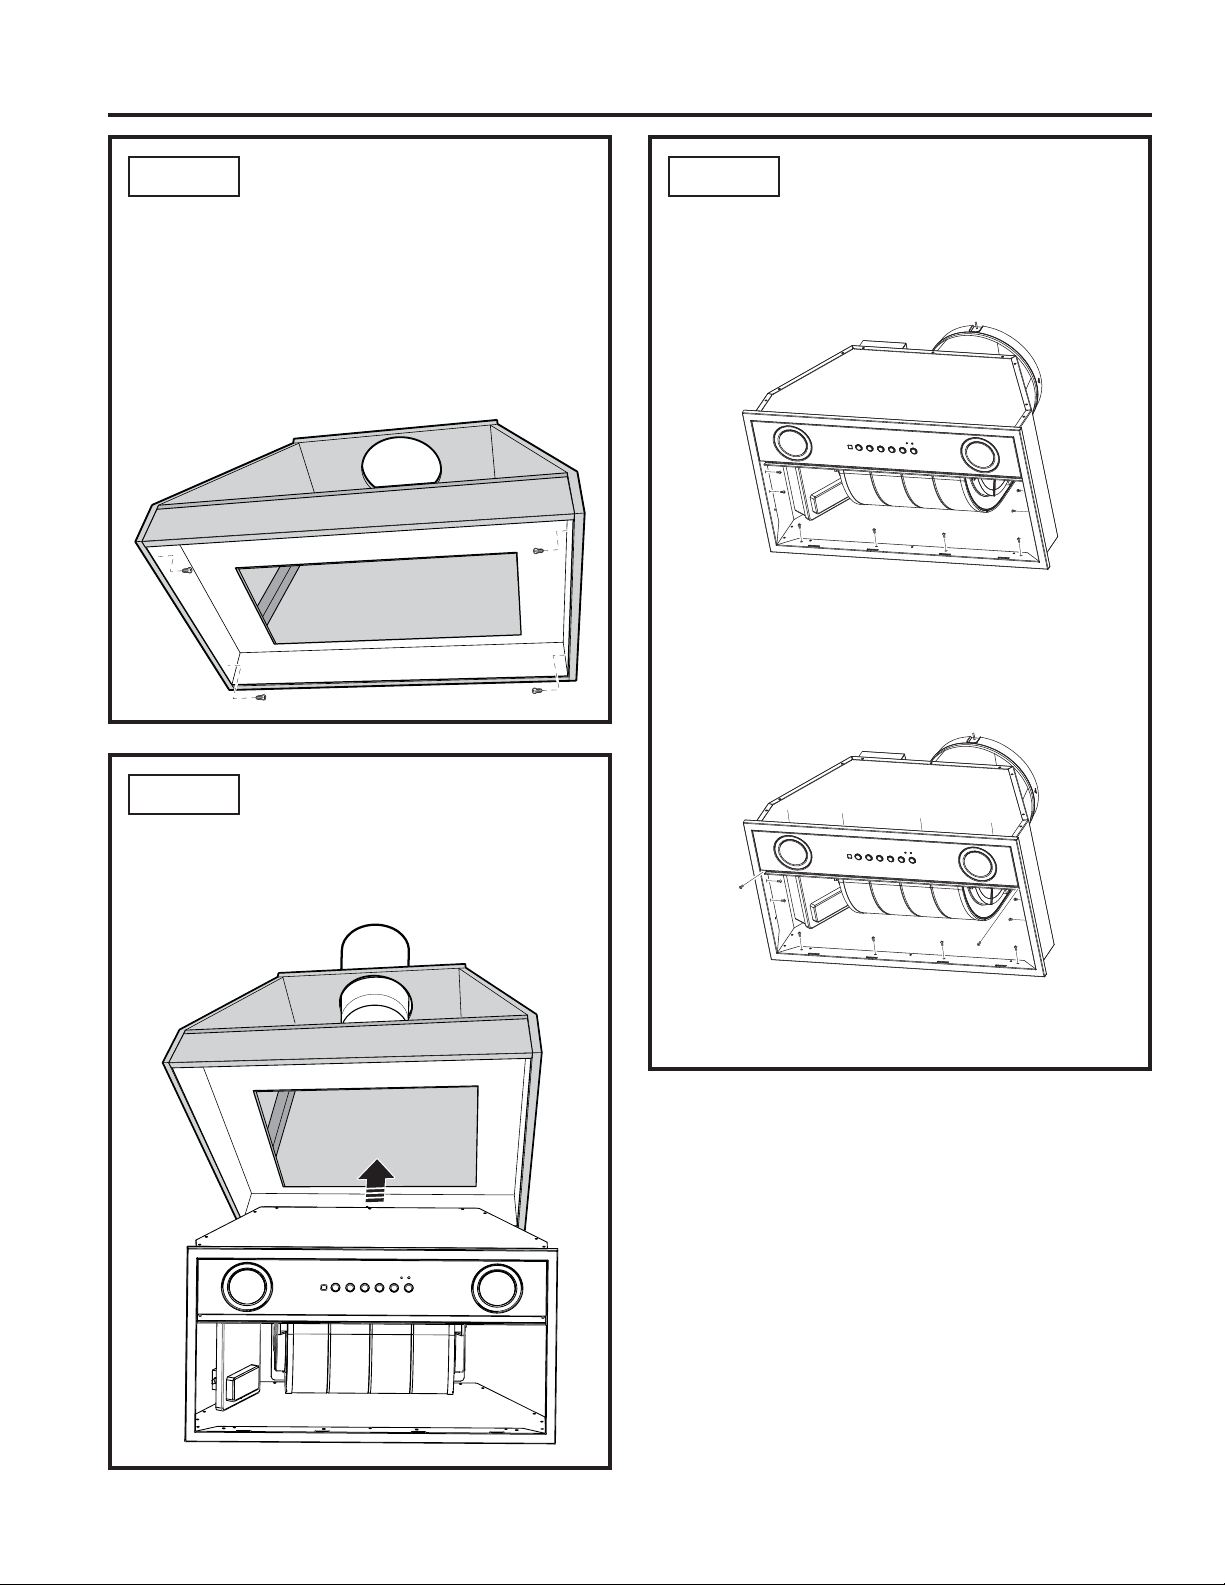
INSTALLATION
STEP 1
INSTALL HOOD LINER
(If Used)
1. The rectangular opening in framing or custom
cabinet must be sized for the liner outside and
inside dimensions. Refer to Product Dimensions
section.
2. Secure the liner to the cabinet with 4 wood
screws (A) or (D) as needed.
STEP 2
INSTALL THE HOOD
1. Confirm the damper is in place in the hood
exhaust opening.
2. Insert the hood into the cabinet opening.
STEP 2
INSTALL THE HOOD (Cont.)
3. Fasten with 8 screws (A or L), 4 in the back
and 2 on each side. It is recommended to start
with one corner and fasten screws diagonally to
ensure unit flushness with cabinet.
If the liner is used, fasten 12 machine screws
(B), 4 in the back, 4 in the front, and 2 on each
side. The front 4 screw holes are accessed by
removing the light panel assembly. The light
panel assembly is removed by removing the
two screws on both ends of the panel.
4. Once the hood is in place, seal the duct to the
hood with duct tape (Do not use screws).
Loading ...
Loading ...
Loading ...