Loading ...
Loading ...
Loading ...
9
INSTALLATION INSTRUCTIONS
Prepare Location
■ It is recommended that the vent system be installed before
hood is installed.
■ Before making cutouts, make sure there is proper clearance
within the ceiling or wall for exhaust vent.
■ Check your ceiling height and the hood height maximum
before you select your hood.
1. Disconnect power.
2. Determine which venting method to use: roof, wall,
or non-vented.
3. Select a flat surface for assembling the range hood.
Place covering over that surface.
WARNING
Excessive Weight Hazard
Use two or more people to move and install
range hood.
Failure to do so can result in back or other injury.
4. Using 2 or more people, lift range hood onto
covered surface.
5. Remove the motor from the canopy assembly (see the
“Motor Removal” section in this section).
Motor Removal
To remove motor:
1. Remove the filter cover and metal grease filter (see the
“Metal Grease Filters” section in the “Range Hood Care”
section).
2. Disconnect the blower motor wiring at the 9-pin connector.
3. Locate the special
1
/
2
" (13 mm) tool inside the range hood
blower housing in the left front corner behind the insulation
pad. Use it to loosen the 4 nuts located inside the blower
housing that mounts the motor to the module top cover.
4. Grasp the motor plate and slide the motor toward the
back of the module housing to the large openings in the
keyhole slots.
B
F
E
D
C
A
A. Special
1
/
2
" (13 mm) tool
B. Motor assembly
C. Keyhole slots (large opening) (4)
D.
1
/
2
" (13 mm) motor mounting nuts (4)
E. Motor plate
F. Module top cover
5. Remove the motor from the range hood.
A
B
D
C
A. Blower housing
B. Keyhole slots (4)
C. Motor assembly
D. Motor plate
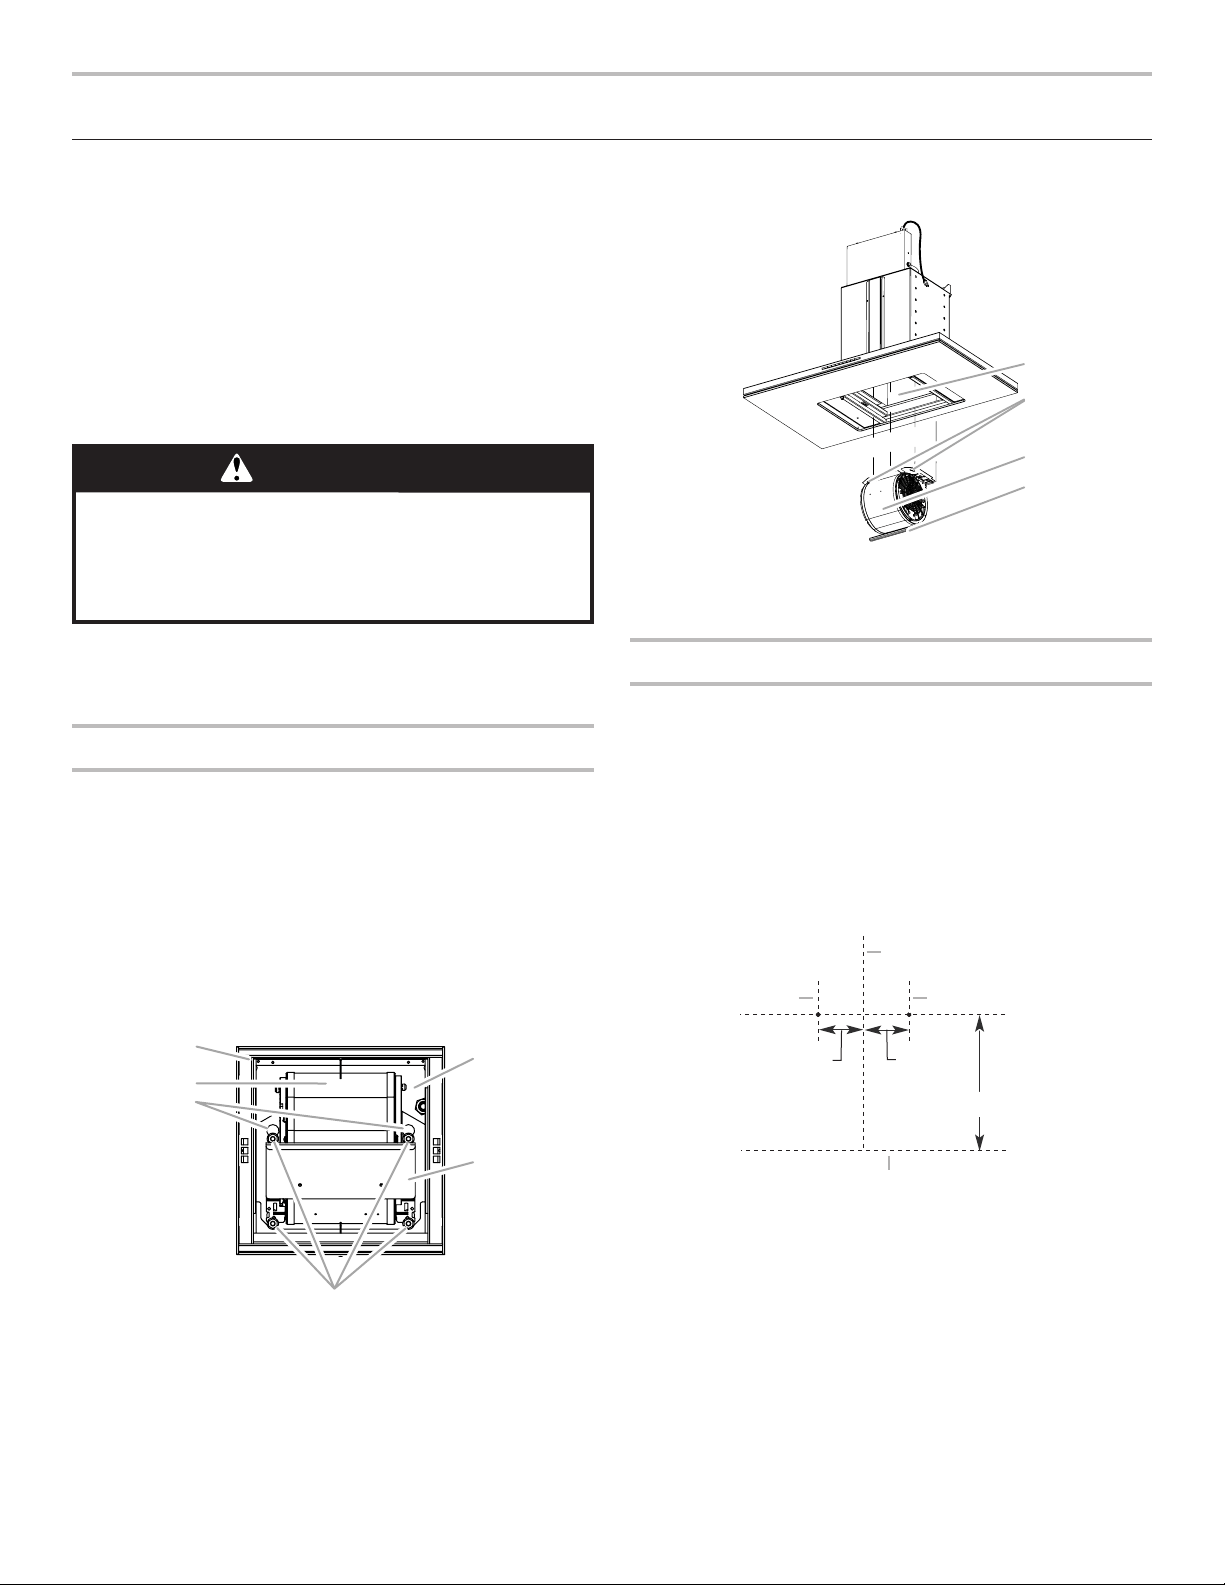
Range Hood Mounting Screws Installation
1. Determine and mark the centerline on the wall where the
canopy hood will be installed.
2. Select a mounting height between a minimum of 24"
(61.0 cm) for an electric cooking surface, a minimum of
30" (76.2 cm) for a gas cooking surface, and a suggested
maximum of 36" (91.4 cm) above the range to the bottom
of the hood. Mark a horizontal reference line on the wall.
3. Measure up from the horizontal mounting height reference
line 21
15
/
16
" (55.7 cm) and draw a parallel horizontal line.
Measure from the centerline 4
5
/
8
" (11.8 cm) in each direction
along the upper horizontal line. Mark the centers for the
fastener locations.
A
C
B
B
21¹⁵⁄₁₆" (55.7 cm)
4⁵⁄₈"
(11.8 cm)
4⁵⁄₈"
(11.8 cm)
A. Centerline
B. Fastener locations
C. Mounting height reference
(hood bottom line)
IMPORTANT: All screws must be installed into wall wooden
support structure. If there is no wooden support structure
to screw into, additional wall framing supports will be
required. This mounting structure must be capable of
supporting 100 lbs (45.4 kg).
4. Drill
3
/
16
" (4.8 mm) pilot holes at all locations where screws
are being installed into wood.
Loading ...
Loading ...
Loading ...