USER MANUAL Spiralizer with Peel, Core and Slice
PARTS AND FEATURES
PARTS AND ACCESSORIES

NOTE: Store your Spiralizer attachment and all accessories in the provided storage box. Be sure to keep out of the reach of small children.
USING THE SPIRALIZER ATTACHMENT
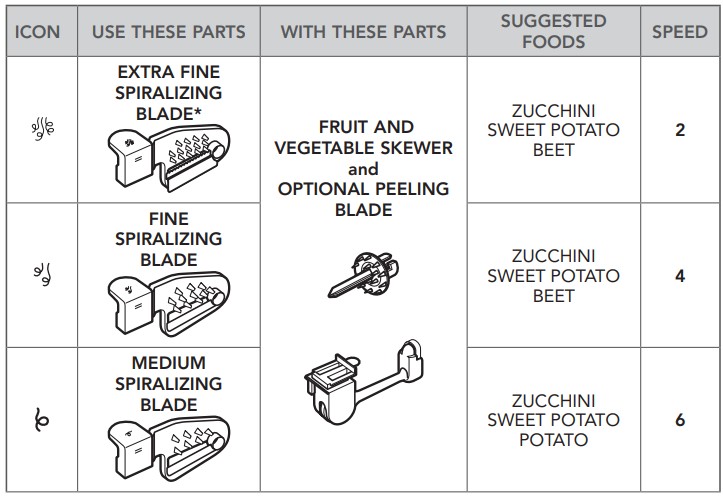
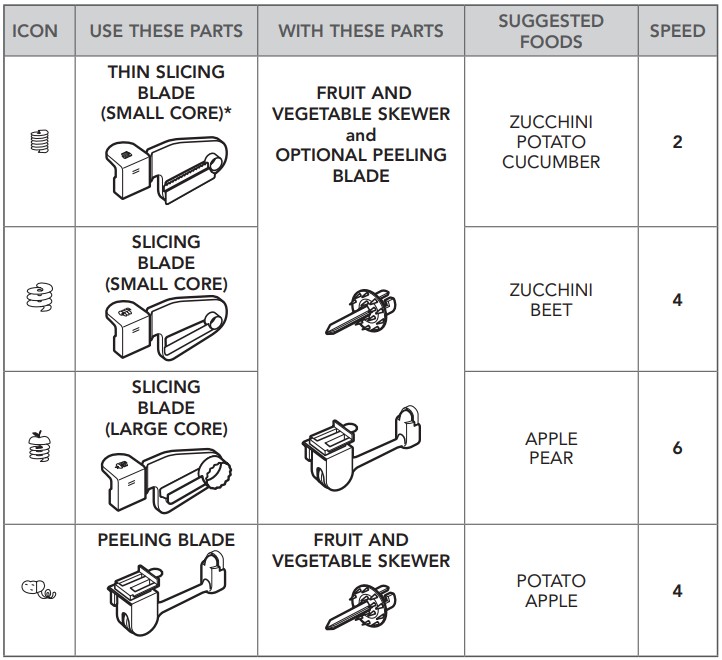
SPIRALIZER ATTACHMENT BLADE CHART
NOTE: Cut the ends off food items to ensure that the food will properly fit on the Spiralizer, and to create flat surfaces for best spiralizing, slicing, and coring results. Food should be 1.5-3.75 inches (3.81-9.5 cm) in diameter, and no longer than 5.5 inches (14 cm). This step also ensures proper placement onto the fruit and vegetable skewer.
When beginning to cut, start at the “Stir” speed, then adjust to the recommended speed for your blade listed in the chart.
FOR DETAILED INFORMATION ON USING THE SPIRALIZER ATTACHMENT
Visit kitchenaid website /quickstart for additional instructions with videos, inspiring recipes, and tips on how to use your Spiralizer attachment.
ATTACHING THE SPIRALIZER TO THE STAND MIXER
 |
|
|
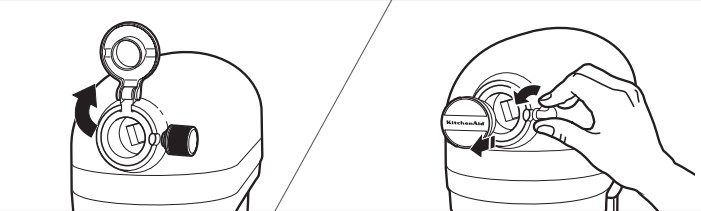
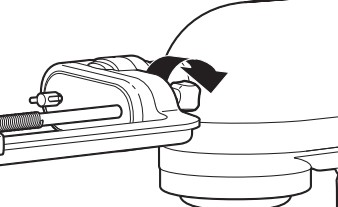
1. For Stand Mixers with a hinged attachment hub cover: Flip up to open.
For Stand Mixers with a removable attachment hub cover: Turn the attachment knob counterclockwise to remove attachment hub cover.
|
|
 |
|
 |
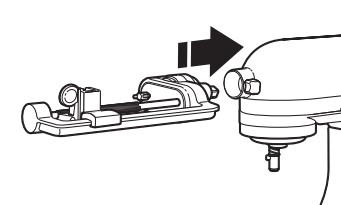
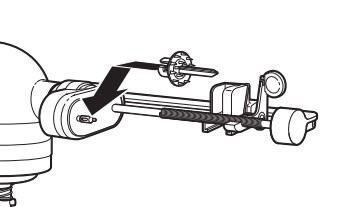
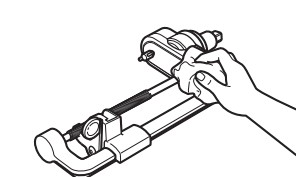
| 2. Insert the Spiralizer attachment shaft housing into the attachment hub, making certain that the power shaft fits into the square hub socket. Rotate the Spiralizer attachment back and forth, if necessary. The pin on the shaft housing will slip fully into the notch on the hub rim when it’s in the proper position. |
|
3. Tighten the attachment knob until the Spiralizer attachment is completely secured to the Stand Mixer. Visit kitchenaid website for detailed information on how to use your Spiralizer’s different blades and features. |
PREPARING TO PROCESS
IMPORTANT: To prepare food before spiralizing, wash food, then remove stems, cut the ends off squarely, and remove any eyes, if applicable.
 |
|
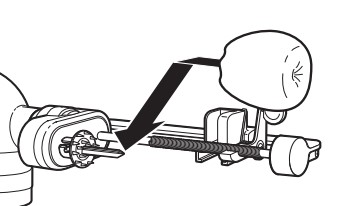 |
| 1. Install fruit and vegetable skewer by slipping onto the skewer mount, and twisting counterclockwise until it clicks into place. |
|
2. Place bowl or plate under the Spiralizer attachment, then affix food to the fruit and vegetable skewer. |
 |
|
 |
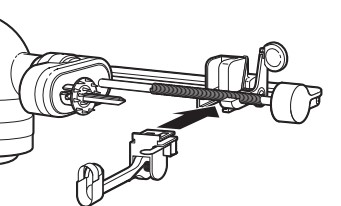
| OPTIONAL: If using the peeler, install by sliding into the bottom of the blade carrier until it clicks into place. |
|
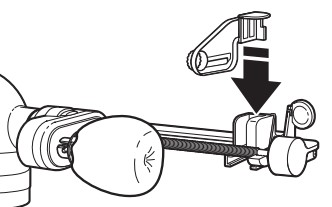
3. Install the desired blade. |
 |
|
 |
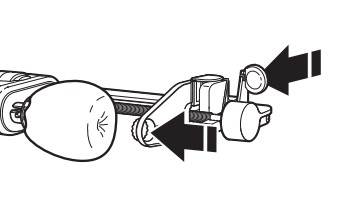
| 4. Pull the release lever, then push the blade carrier towards the Stand Mixer to align the blade core with the center of the food. |
|
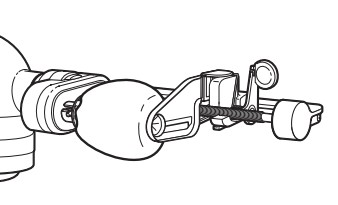
5. Press blade core into food for added stability before operating the Stand Mixer.
IMPORTANT: When finished, remove the blade before removing your food item.
|
CARE AND CLEANING
CLEANING THE SPIRALIZER ATTACHMENT AND ACCESSORIES
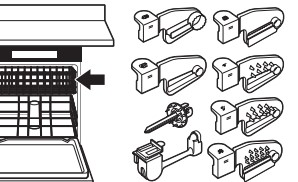
IMPORTANT: To avoid damage, never wash or immerse the main body of the Spiralizer attachment in water or place in the dishwasher. The removable blades and accessories are dishwasher safe, top rack only.
 |
|
 |
|
1. After using the Spiralizer, remove all blades and accessories. Wash the blades and accessory pieces by hand with a soft cloth, in warm sudsy water; or, wash in the top rack of the dishwasher.
|
|
2. Clean the main body of the Spiralizer attachment by hand only. Wash with a soft, damp cloth. Dry thoroughly with a soft dry cloth. Do not wash in the dishwasher. Do not immerse in water.
|
NOTE: For best cleaning, rinse blades immediately after use. If necessary, use a dish washing brush.
NOTE: After washing, store your Spiralizer attachment and all accessories in the provided storage box. Be sure to keep out of the reach of small children.
TROUBLESHOOTING
If your Stand Mixer should malfunction or fail to operate while using the Spiralizer attachment, please check the following:
- Did you follow the preparation suggestions in the “Spiralizer attachment blade” chart?
- Did you choose a blade recommended for the type of food you are spiralizing?
- Is the Stand Mixer plugged in? Refer to the “Instructions” manual that came with your Stand Mixer to find possible solutions.
- Is the fuse in the circuit to the Stand Mixer in working order? Refer to the “Instructions” manual that came with your Stand Mixer to find possible solutions.
If the problem is not due to one of the above items, see the “Arranging for Service” section in the “Warranty”.
Do not return the Spiralizer attachment or the Stand Mixer to the retailer, as they do not provide service.
SPIRALIZER ATTACHMENT SAFETY
When using electrical appliances, basic safety precautions should always be followed, including the following:
- Read all instructions.
- To protect against risk of electrical shock, do not put Stand Mixer in water or other liquid.
- Be sure to turn the Stand Mixer OFF (and detach the Spiralizer attachment with peel, core and slice from Stand Mixer) after each use of the Spiralizer attachment and before cleaning. Make sure the motor stops completely before disassembling.
- Keep hands, utensils or other objects away from the Spiralizer attachment with peel, core & slice blades, skewer or moving parts while it is in operation to reduce the risk of severe injury to persons or damage to the Spiralizer attachment.
- Never feed by hand. Always use the provided skewer.
- If food becomes lodged in any blade or the skewer, turn the motor off and disassemble Spiralizer attachment to remove the remaining food.
- Avoid contacting moving parts.
- The use of attachments not recommended or sold by KitchenAid may cause fire, electric shock, or injury.
- Do not use outdoors.
- Close supervision is necessary when any appliance is used by or near children.
- Do not use the appliance if the driver mechanism or rotating parts are damaged. Return appliance to the nearest Authorized Service Facility for examination, repair, or electrical or mechanical adjustment.
- Do not let the Stand Mixer cord hang over the edge of table or counter.
- Blades are sharp. Handle carefully when inserting or removing blades.
- Do not remove food until Stand Mixer is OFF and skewer stops.
- To avoid damaging the gear assembly, do not immerse the Spiralizer attachment main assembly in water or other liquids.