W10597601D
THANK YOU for purchasing this high-quality product. Register your new refrigerator at www.whirlpool.com. In Canada, register your
refrigerator at www.whirlpool.ca.
For future reference, please make a note of your product model and serial numbers. These can be located on the inside wall of the
refrigerator compartment.
Model Number ___________________________ Serial Number_____________________________
REFRIGERATOR USER INSTRUCTIONS
Para obtener acceso a “Instrucciones para el usuario del refrigerador” en español, o para obtener información adicional acerca de
su producto, visite: www.whirlpool.com.
Necesitará su número de modelo y de serie, ubicado en el interior del compartimiento del refrigerador.
REFRIGERATOR USER INSTRUCTIONS
REFRIGERATOR SAFETY .............................................................. 2
INSTALLATION INSTRUCTIONS ................................................... 3
Unpack the Refrigerator ............................................................... 3
Location Requirements ................................................................4
Electrical Requirements ...............................................................4
Water Supply Requirements ........................................................4
Connect the Water Supply ...........................................................5
Refrigerator Door(s) and Drawer ..................................................6
Door Closing and Door Alignment .............................................12
REFRIGERATOR USE ..................................................................12
Opening and Closing Doors .......................................................12
Using the Controls .....................................................................13
Ice Maker ....................................................................................14
Water Dispenser .........................................................................15
Water Filtration System ..............................................................15
REFRIGERATOR CARE ...............................................................15
Cleaning .....................................................................................15
Changing the Light Bulb ............................................................16
Vacation and Moving Care .........................................................16
TROUBLESHOOTING ..................................................................17
Refrigerator Operation ...............................................................17
Temperature and Moisture .........................................................18
Ice and Water .............................................................................18
PERFORMANCE DATA SHEETS .................................................20
WARRANTY ..................................................................................23
Table of Contents
SÉCURITÉ DU RÉFRIGÉRATEUR...............................................24
INSTRUCTIONS D’INSTALLATION .............................................26
Déballage du réfrigérateur..........................................................26
Exigences d’emplacement .........................................................27
Spécications électriques ..........................................................27
Spécications de l’alimentation en eau .....................................28
Raccordement à la canalisation d’eau ......................................28
Porte et tiroir du réfrigérateur .....................................................30
Fermeture et alignement de la porte ..........................................36
UTILISATION DU RÉFRIGÉRATEUR ..........................................36
Ouverture et fermeture des portes .............................................36
Utilisation des commandes .......................................................37
Machine à glaçons .....................................................................38
Distributeur d’eau .......................................................................39
Système de ltration d’eau ........................................................39
ENTRETIEN DU RÉFRIGÉRATEUR ............................................40
Nettoyage ...................................................................................40
Remplacer l’ampoule d’éclairage ..............................................40
Précautions à prendre pour
lesvacances ou le déménagement ...........................................41
DÉPANNAGE .................................................................................42
Fonctionnement du réfrigérateur ...............................................42
Température et humidité ............................................................43
Glaçons et eau ...........................................................................43
FEUILLES DE DONNÉES SUR LA PERFORMANCE ................45
GARANTIE .....................................................................................47
Tables des Matières
Índice
SEGURIDAD DEL REFRIGERADOR ...........................................50
INSTRUCCIONES DE INSTALACIÓN .........................................52
Desembale el refrigerador ..........................................................52
Requisitos de ubicación .............................................................53
Requisitos eléctricos ..................................................................53
Requisitos de suministro de agua .............................................53
Conexión del suministro de agua ..............................................54
Puerta(s) y cajón del refrigerador ...............................................55
Cierre y alineamiento de las puertas..........................................62
USO DE SU REFRIGERADOR .....................................................62
Cómo abrir y cerrar las puertas .................................................62
Uso de los controles ..................................................................63
Fábrica de hielo ..........................................................................64
Despachador de agua ................................................................65
Sistema de ltración de agua ....................................................65
CUIDADO DEL REFRIGERADOR ...............................................66
Limpieza .....................................................................................66
Cómo cambiar el foco ................................................................66
Cuidado durante las vacaciones ylasmudanzas .....................67
SOLUCIÓN DE PROBLEMAS......................................................68
Funcionamiento del refrigerador ................................................68
Temperatura y humedad ............................................................69
Hielo y agua ................................................................................69
HOJAS DE DATOS DEL PRODUCTO .........................................71
GARANTÍA.....................................................................................74
2
You can be killed or seriously injured if you don't immediately
You
can be killed or seriously injured if you don't
follow
All safety messages will tell you what the potential hazard is, tell you how to reduce the chance of injury, and tell you what can
happen if the instructions are not followed.
Your safety and the safety of others are very important.
We have provided many important safety messages in this manual and on your appliance. Always read and obey all safety
messages.
This is the safety alert symbol.
This symbol alerts you to potential hazards that can kill or hurt you and others.
All safety messages will follow the safety alert symbol and either the word “DANGER” or “WARNING.”
These words mean:
follow instructions.
instructions.
DANGER
WARNING
REFRIGERATOR SAFETY
State of California Proposition 65 Warnings:
WARNING: This product contains one or more chemicals known to the State of California to cause cancer.
WARNING: This product contains one or more chemicals known to the State of California to cause birth defects or other
reproductive harm.
IMPORTANT SAFETY INSTRUCTIONS
WARNING:
To reduce the risk of fire, electric shock, or injury when using your refrigerator, follow these basic precautions:
SAVE THESE INSTRUCTIONS
■ Plug into a grounded (earthed) outlet.
■ Do not remove ground prong.
■ Do not use an adapter.
■ Do not use an extension cord.
■ Disconnect power before servicing.
■ Replace all parts and panels before operating.
■ Remove doors from your old refrigerator.
■ Use nonflammable cleaner.
■ Do not store or use petrol, flammable liquids or gas in the
vicinity of this or other electrical appliances. The fumes can
cause fires or explosions.
■ Do not store explosive substances such as aerosol cans
with a flammable propellant in this refrigerator.
■ Do not use or place electrical devices inside the refrigerator
compartments if they are not of the type expressly
authorized by the manufacture.
■ Use two or more people to move and install refrigerator.
■ Disconnect power before installing ice maker (on ice maker
kit ready models only).
■ A qualified service technician must install the water line and
ice maker. See installation instruction supplied with
ice maker kit IC13B for complete details.
■ Connect to a potable water supply only.
■ Use a sturdy glass when dispensing ice (on some models).
■ This appliance is not intended for use by persons (including
children) with reduced physical, sensory or mental
capabilities, or lack of experience and knowledge, unless
they have been given supervision or instruction concerning
use of the appliance by a person responsible for their safety.
■ Children should be supervised to ensure that they do not
play with the appliance.
■ To avoid the risk of children becoming trapped and
suffocating, do not allow them to play or hide inside the
refrigerator.
■ If the power supply cord is damaged, it must be replaced by
the manufacturer or its service agent or a similarly qualified
person.
3
Proper Disposal of Your Old Refrigerator
WARNING
Suffocation Hazard
Remove doors from your old refrigerator.
Failure to do so can result in death or
brain damage.
IMPORTANT: Child entrapment and suffocation are not problems
of the past. Junked or abandoned refrigerators are still dangerous
– even if they will sit for “just a few days.” If you are getting rid of
your old refrigerator, please follow these instructions to help
prevent accidents.
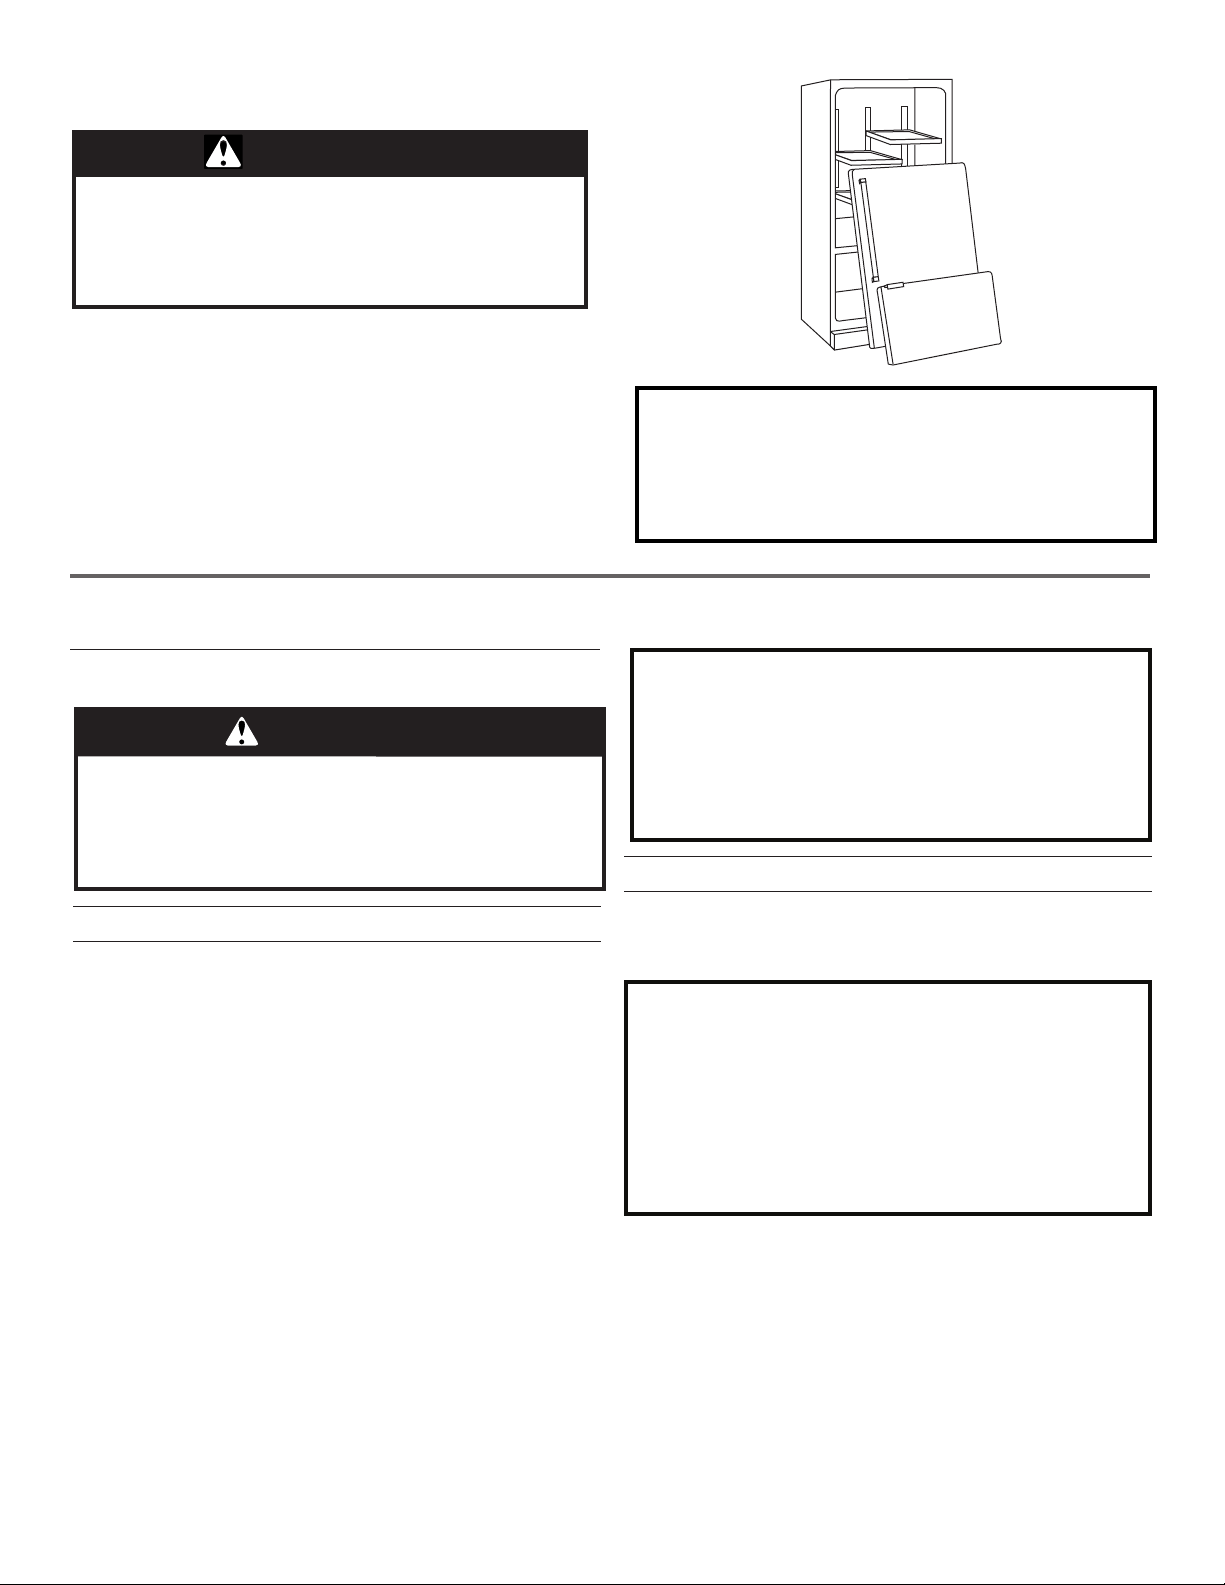
Before You Throw Away Your Old Refrigerator or Freezer:
■ Take off the doors.
■ Leave the shelves in place so that children may not easily
climb inside.
INSTALLATION INSTRUCTIONS
Unpack the Refrigerator
Remove the Packaging
■ Remove tape and glue residue from surfaces before turning
on the refrigerator. Rub a small amount of liquid dish soap
over the adhesive with your ngers. Wipe with warm water
and dry.
■ Do not use sharp instruments, rubbing alcohol, ammable
uids, or abrasive cleaners to remove tape or glue. These
products can damage the surface of your refrigerator. For
more information, see “Refrigerator Safety.”
■ Dispose of/recycle all packaging materials.
Clean Before Using
After you remove all of the package materials, clean the inside of
your refrigerator before using it. See the cleaning instructions in
“Refrigerator Care.”
Important information to know about disposal of
refrigerants:
Dispose of refrigerator in accordance with Federal and Local
regulations. Refrigerants must be evacuated by a licensed,
EPA certified refrigerant technician in accordance with
established procedures.
WARNING
Excessive Weight Hazard
Use two or more people to move and install
refrigerator.
Failure to do so can result in back or other injury.
When Moving Your Refrigerator:
Your refrigerator is heavy. When moving the refrigerator for
cleaning or service, be sure to cover the oor with
cardboard or hardboard to avoid oor damage. Always pull
the refrigerator straight out when moving it. Do not wiggle or
“walk” the refrigerator when trying to move it, as oor
damage could occur.
Important information to know about glass shelves and
covers:
Do not clean glass shelves or covers with warm water when
they are cold. Shelves and covers may break if exposed to
sudden temperature changes or impact, such as bumping.
Tempered glass is designed to shatter into many small,
pebble-sized pieces. This is normal. Glass shelves and
covers are heavy. Use both hands when removing them to
avoid dropping.
4
Location Requirements
IMPORTANT: This refrigerator is designed for indoor, household
use only.
This appliance is intended to be used in household and similar
applications such as:
■ Staff kitchen areas in shops, ofces and other working
environments.
■ Farm houses and by clients in hotels, motels and other
residential type environments.
■ Bed and breakfast type environments.
■ Catering and similar non-retail applications.
To ensure proper ventilation for your refrigerator, allow for ¹⁄2"
(1.25 cm) of space on each side and at the top. Allow for 1"
(2.54 cm) of space behind the refrigerator. If your refrigerator has
an ice maker, allow extra space at the back for the water line
connections. When installing your refrigerator next to a xed wall,
leave 2 ¹⁄2" (6.3 cm) minimum on the hinge side (some models
require more) to allow for the door to swing open.
NOTE: This refrigerator is intended for use in a location where
the temperature ranges from a minimum of 55°F (13°C) to a
maximum of 110°F (43°C). The preferred room temperature
range for optimum performance, which reduces electricity usage
and provides superior cooling, is between 60°F (15°C) and 90°F
(32°C). It is recommended that you do not install the refrigerator
near a heat source, such as an oven or radiator.
2¹⁄2 " (6.3 cm)
¹⁄2 " (1.25 cm)
Electrical Requirements
Before you move your refrigerator into its nal location, it is
important to make sure you have the proper electrical
connection.
If the supply cord is damaged, it must be replaced by the
manufacturer or its service agent or a similarly qualied person.
Do not use a cord that shows cracks or abrasion damage along
its length or at either the plug or connector end.
Recommended Grounding Method
A 115 Volt, 60 Hz, AC only 15 or 20 A fused, grounded electrical
supply is required. It is recommended that a separate circuit
serving only your refrigerator be provided. Use an outlet that
cannot be turned off by a switch. Do not use an extension cord.
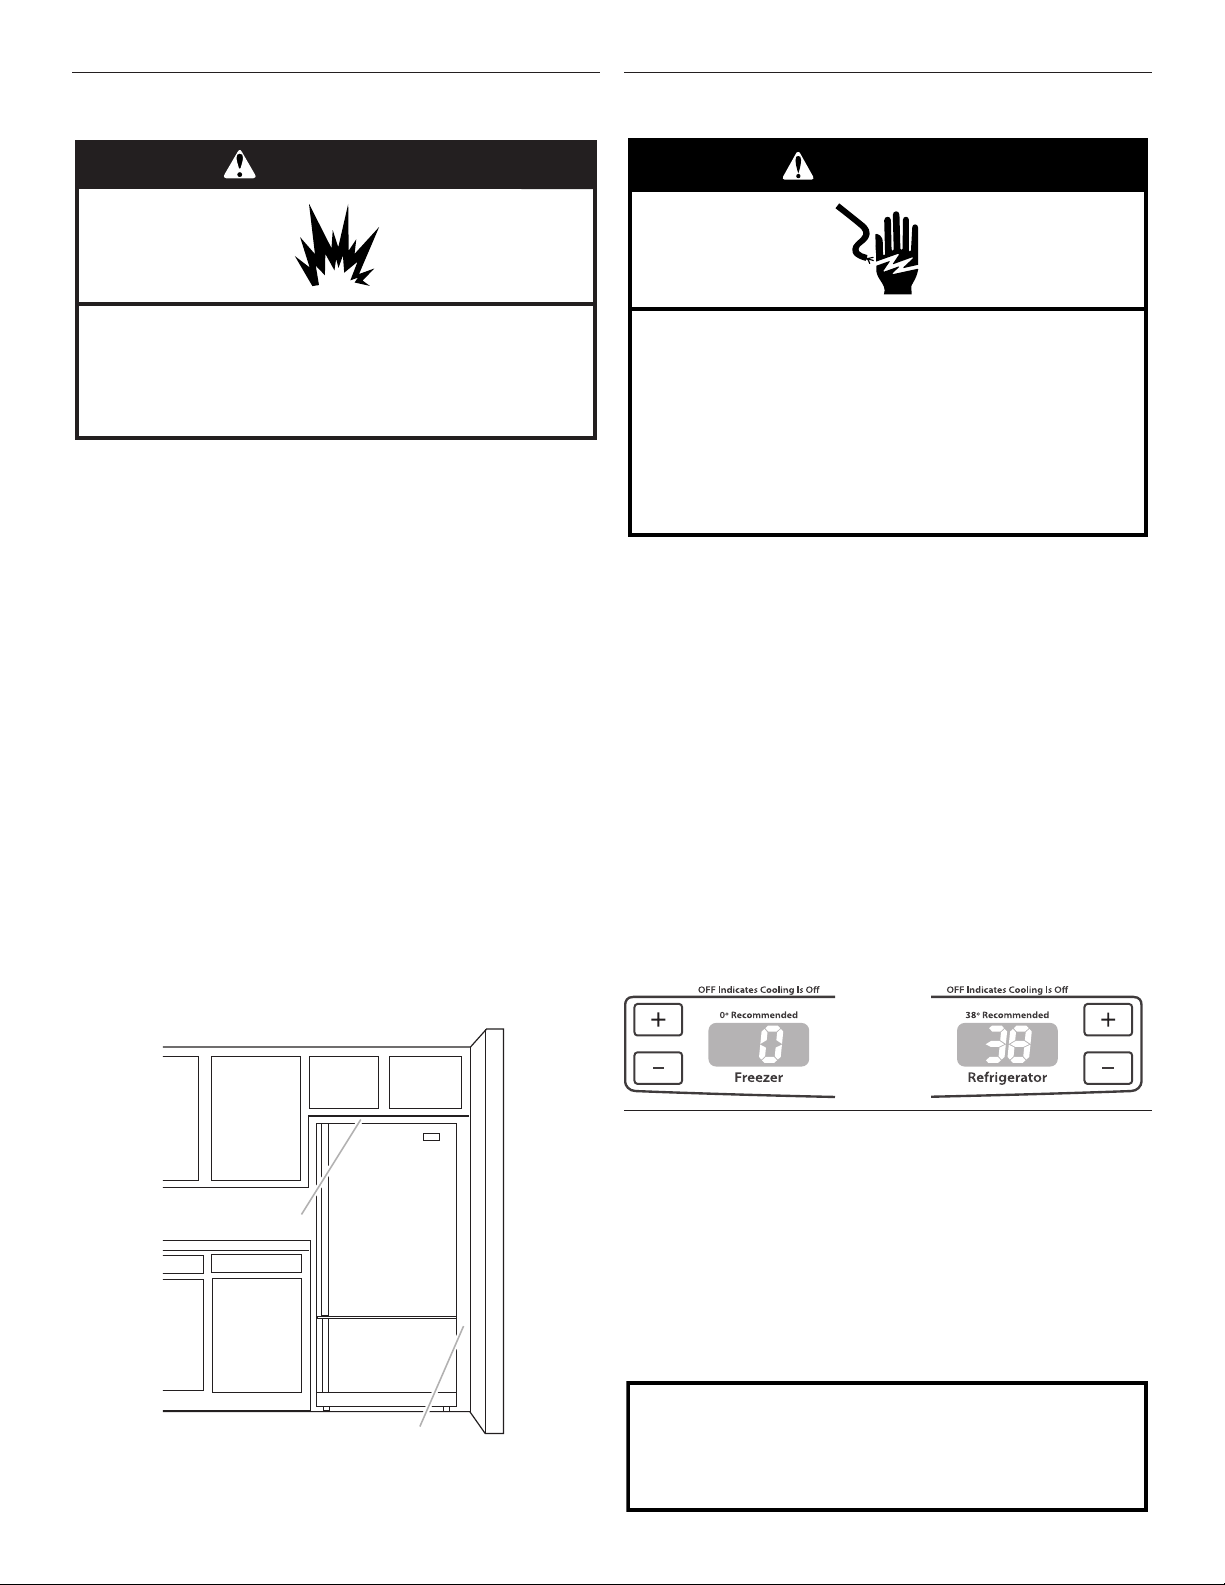
NOTE: Before performing any type of installation, cleaning, or
removing a light bulb, turn the refrigerator to OFF. Depending
on your model, either turn the freezer control to the word OFF,
or press the Minus sign touch pads repeatedly until a dash (–)
appears in both the Freezer and Refrigerator displays as shown.
Disconnect the refrigerator from the electrical source. When you
are nished, reconnect the refrigerator to the electrical source
and reset the temperature controls to the desired setting. See
“Using the Controls.”
Water Supply Requirements
Gather the required tools and parts before starting installation. Read
and follow the instructions provided with any tools listed here.
TOOLS NEEDED:
■ Flat-blade screwdriver ■ ¹⁄4" Nut driver
■
7
⁄16" and ¹⁄" Open-end or two
adjustable wrenches
■ ¹⁄4" Drill bit
■ Cordless drill
IMPORTANT:
■ Connect to a potable water supply only.
WARNING
Explosion Hazard
Keep flammable materials and vapors, such as
gasoline, away from refrigerator.
Failure to do so can result in death, explosion, or fire.
Electrical Shock Hazard
Plug into a grounded 3 prong outlet.
Do not remove ground prong.
Do not use an adapter.
Do not use an extension cord.
Failure to follow these instructions can result in death,
fire, or electrical shock.
WARNING
Do not use with water that is microbiologically unsafe or
of unknown quality without adequate disinfection before
or after the system. Systems certified for cyst reduction
may be used on disinfected waters that may contain
filterable cysts.
5
■ All installations must meet local plumbing code requirements.
■ Do not use a piercing-type or ³⁄16" (4.76 mm) saddle valve
which reduces water ow and clogs more easily.
■ Use copper tubing and check for leaks. Install copper tubing
only in areas where the household temperatures will remain
above freezing.
■ For models with water lters, the disposable water lter
should be replaced at least every 6 months.
Water Pressure
A cold water supply with water pressure of between 35 and 120
psi (241 and 827 kPa) is required to operate the water dispenser
and ice maker. If you have questions about your water pressure,
call a licensed, qualied plumber.
Reverse Osmosis Water Supply
IMPORTANT: The pressure of the water supply coming out
of a reverse osmosis system going to the water inlet valve
of the refrigerator needs to be between 35 and 120 psi (241
and 827 kPa).
If a reverse osmosis water ltration system is connected to your
cold water supply, the water pressure to the reverse osmosis
system needs to be a minimum of 40 to 60 psi (276 to 414 kPa).
If the water pressure to the reverse osmosis system is less than
40 to 60 psi (276 to 414 kPa):
■ Check to see whether the sediment lter in the reverse
osmosis system is blocked. Replace the lter if necessary.
■ Allow the storage tank on the reverse osmosis system to rell
after heavy usage.
■ If your refrigerator has a water lter, it may further reduce
the water pressure when used in conjunction with a reverse
osmosis system. Remove the water lter. See “Water
Filtration System.”
If you have questions about your water pressure, call a licensed,
qualied plumber.
Connect the Water Supply
Read all directions before you begin.
IMPORTANT:
■ Plumbing shall be installed in accordance with the
International Plumbing Code and any local codes and
ordinances.
■ The gray water tubing on the back of the refrigerator (which
is used to connect to the household water line) is a PEX
(cross-linked polyethylene) tube. Copper and PEX tubing
connections from the household water line to the refrigerator
are acceptable, and will help avoid off-taste or odor in your
ice or water. Check for leaks.
If PEX tubing is used instead of copper, we recommend the
following part numbers:
W10505928RP (7 ft [2.14 m] jacketed PEX),
8212547RP (5 ft [1.52 m] PEX), or
W10267701RP (25 ft [7.62 m] PEX).
■ Install tubing only in areas where temperatures will remain
above freezing.
■ If you turn on the refrigerator before the water line is
connected, turn off the ice maker to avoid excessive noise or
damage to the water valve.
Connect to Water Line
1. Unplug refrigerator or disconnect power.
2. Turn OFF main water supply. Turn ON nearest faucet long
enough to clear line of water.
3. Find a ¹⁄2" to 1¹⁄4" (12.7 mm to 31.8 mm) vertical cold water
pipe near the refrigerator.
IMPORTANT:
■ Make sure it is a cold water pipe.
■ Horizontal pipe will work, but the following procedure
must be followed: Drill on the top side of the pipe, not the
bottom. This will help keep water away from the drill. This
also keeps normal sediment from collecting in the valve.
4. Determine the length of copper tubing you need. Measure
from the connection on the lower right rear of the refrigerator
to the water pipe. Add 7 ft (2.1 m) to allow for cleaning. Use
¹⁄4" (6.35 mm) O.D. (outside diameter) copper tubing. Be sure
both ends of copper tubing are cut square.
5. Using a cordless drill, drill a ¹⁄4" hole in the cold water pipe
you have selected.
F
G
A
B
C
D
E
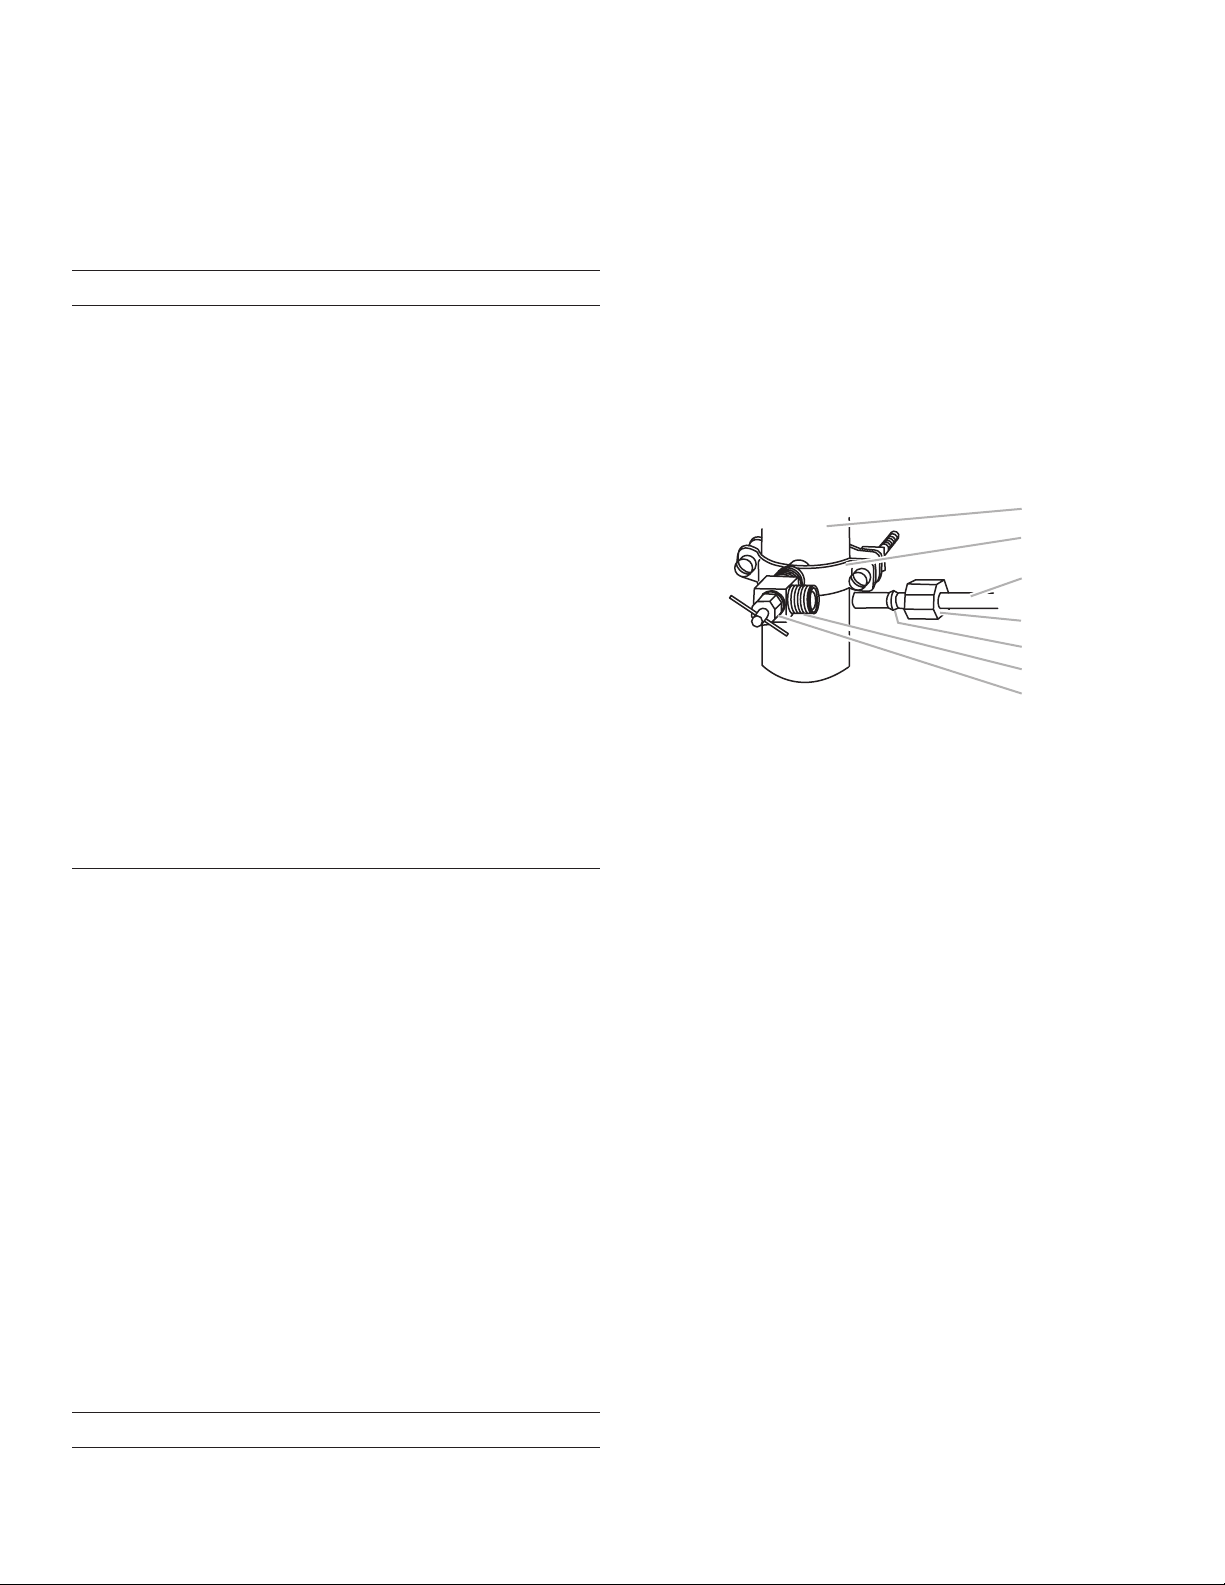
6. Fasten the shutoff valve to the cold water pipe with the pipe
clamp. Be sure the outlet end is solidly in the ¹⁄4" drilled hole
in the water pipe and that the washer is under the pipe clamp.
Tighten the packing nut. Tighten the pipe clamp screws
slowly and evenly so the washer makes a watertight seal. Do
not overtighten.
7. Slip the compression sleeve and compression nut on the
copper tubing as shown. Insert the end of the tubing into the
outlet end squarely as far as it will go. Screw compression nut
onto outlet end with adjustable wrench. Do not overtighten or
you may crush the copper tubing.
8. Place the free end of the tubing in a container or sink, and
turn ON the main water supply. Flush the tubing until water is
clear. Turn OFF the shutoff valve on the water pipe.
A. Cold water pipe
B. Pipe clamp
C. Copper tubing
D. Compression nut
E. Compression sleeve
F. Shutoff valve
G. Packing nut
6
Connect to Refrigerator
Depending on your model, the water line may come down from
the top or up from the bottom. Follow the connection instructions
for your model.
Style 1
1. Remove plastic cap from water valve inlet port. Attach the
copper tube to the valve inlet using a compression nut
and sleeve as shown. Tighten the compression nut. Do not
overtighten. Conrm copper tubing is secure by pulling on
copper tubing.
2. Create a service loop with the copper tubing. Avoid kinks
when coiling the copper tubing. Secure copper tubing to
refrigerator cabinet with a “P” clamp.
B
A
C
D
3. Turn on water supply to refrigerator and check for leaks.
Correct any leaks.
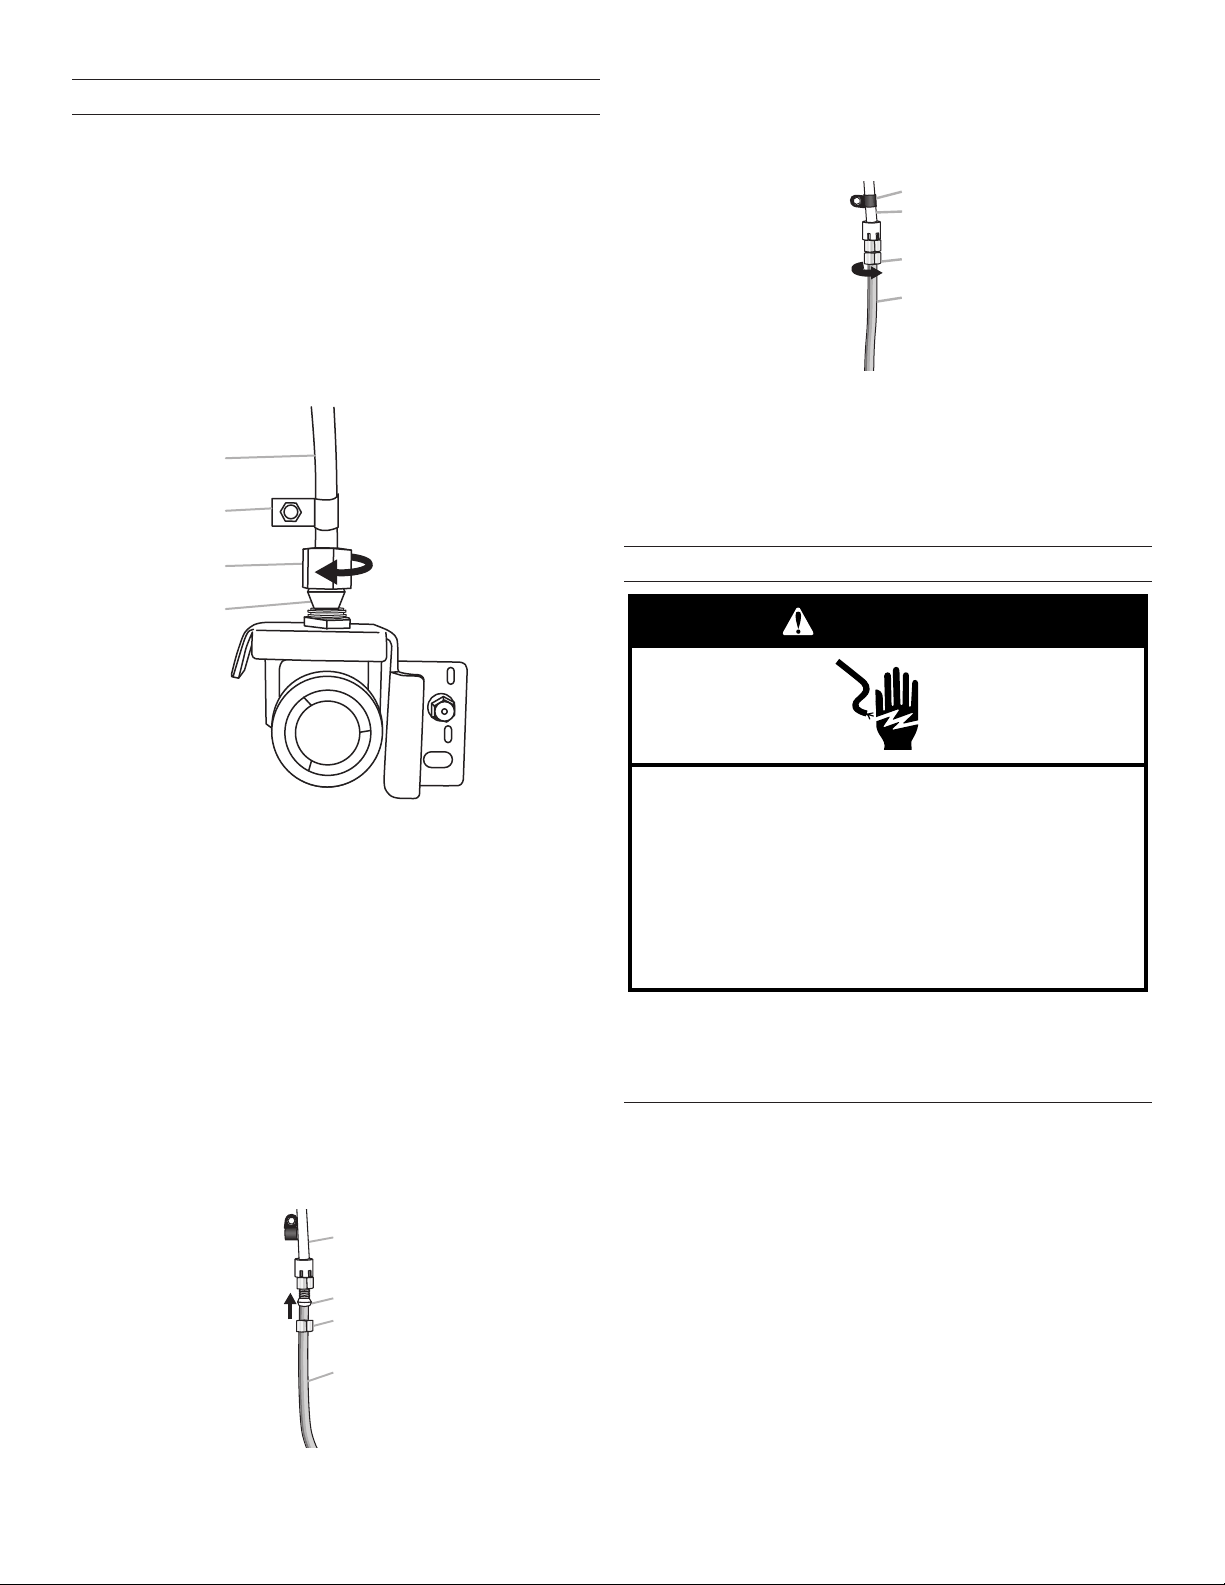
Style 2
1. Create a service loop (minimum diameter of 2 ft [61 cm])
with the copper tubing. Avoid kinks when coiling the copper
tubing.
2. Remove the plastic cap from water valve inlet port. Place a
compression nut and sleeve on the copper tubing.
3. Insert the end of the copper tubing into the water valve inlet
port. Shape tubing slightly so that the tubing feeds straight
into the port to avoid kinks.
4. Slide the compression nut over the sleeve and screw into the
water valve inlet port.
B
A
C
D
5. Using an adjustable wrench, hold the nut on the plastic water
line to keep it from moving. Then, with a second wrench turn
the compression nut on the copper tubing counterclockwise
to completely tighten. Do not overtighten.
B
C
D
A
6. Check connection by pulling on copper tubing. Attach the
plastic water line to the refrigerator cabinet with a “P” clamp.
7. Turn on water supply to the refrigerator and check for leaks.
Correct any leaks.
Complete the Installation
Electrical Shock Hazard
Plug into a grounded 3 prong outlet.
Do not remove ground prong.
Do not use an adapter.
Do not use an extension cord.
Failure to follow these instructions can result in death,
fire, or electrical shock.
WARNING
1. Plug into a grounded 3 prong outlet.
NOTE: Allow 24 hours to produce the rst batch of ice.
Discard the rst three batches of ice produced. Allow 3 days to
completely ll the ice storage bin.
Refrigerator Door(s) and Drawer
TOOLS NEEDED:
5
⁄16",
3
⁄8", ¹⁄4" hex head socket wrenches, a
#2 Phillips screwdriver, and a at-blade screwdriver.
IMPORTANT:
■ Your refrigerator has a standard reversible refrigerator door
with either a freezer door or freezer drawer, or French doors.
Follow the instructions specic to the door style of your
model.
■ All graphics referenced in the following instructions are
included later in this section after “Final Steps.” The graphics
shown for the standard door are for a right-hand swing
refrigerator (hinges factory installed on the right).
■ If you only want to remove and replace the doors see
“Remove Doors and Hinges” and “Replace Doors and
Hinges.”
A. Copper tubing
B. “P” clamp
C. Compression nut
D. Compression sleeve
A. Plastic water tubing
B. Sleeve
C. Compression nut
D. Copper tubing
A. “P” clamp
B. Plastic water line
C. Compression nut
D. Copper tubing
7
■ Before you begin, turn the refrigerator control OFF, and
remove food and adjustable door or utility bins from the
doors. Replace and Remove Handles.
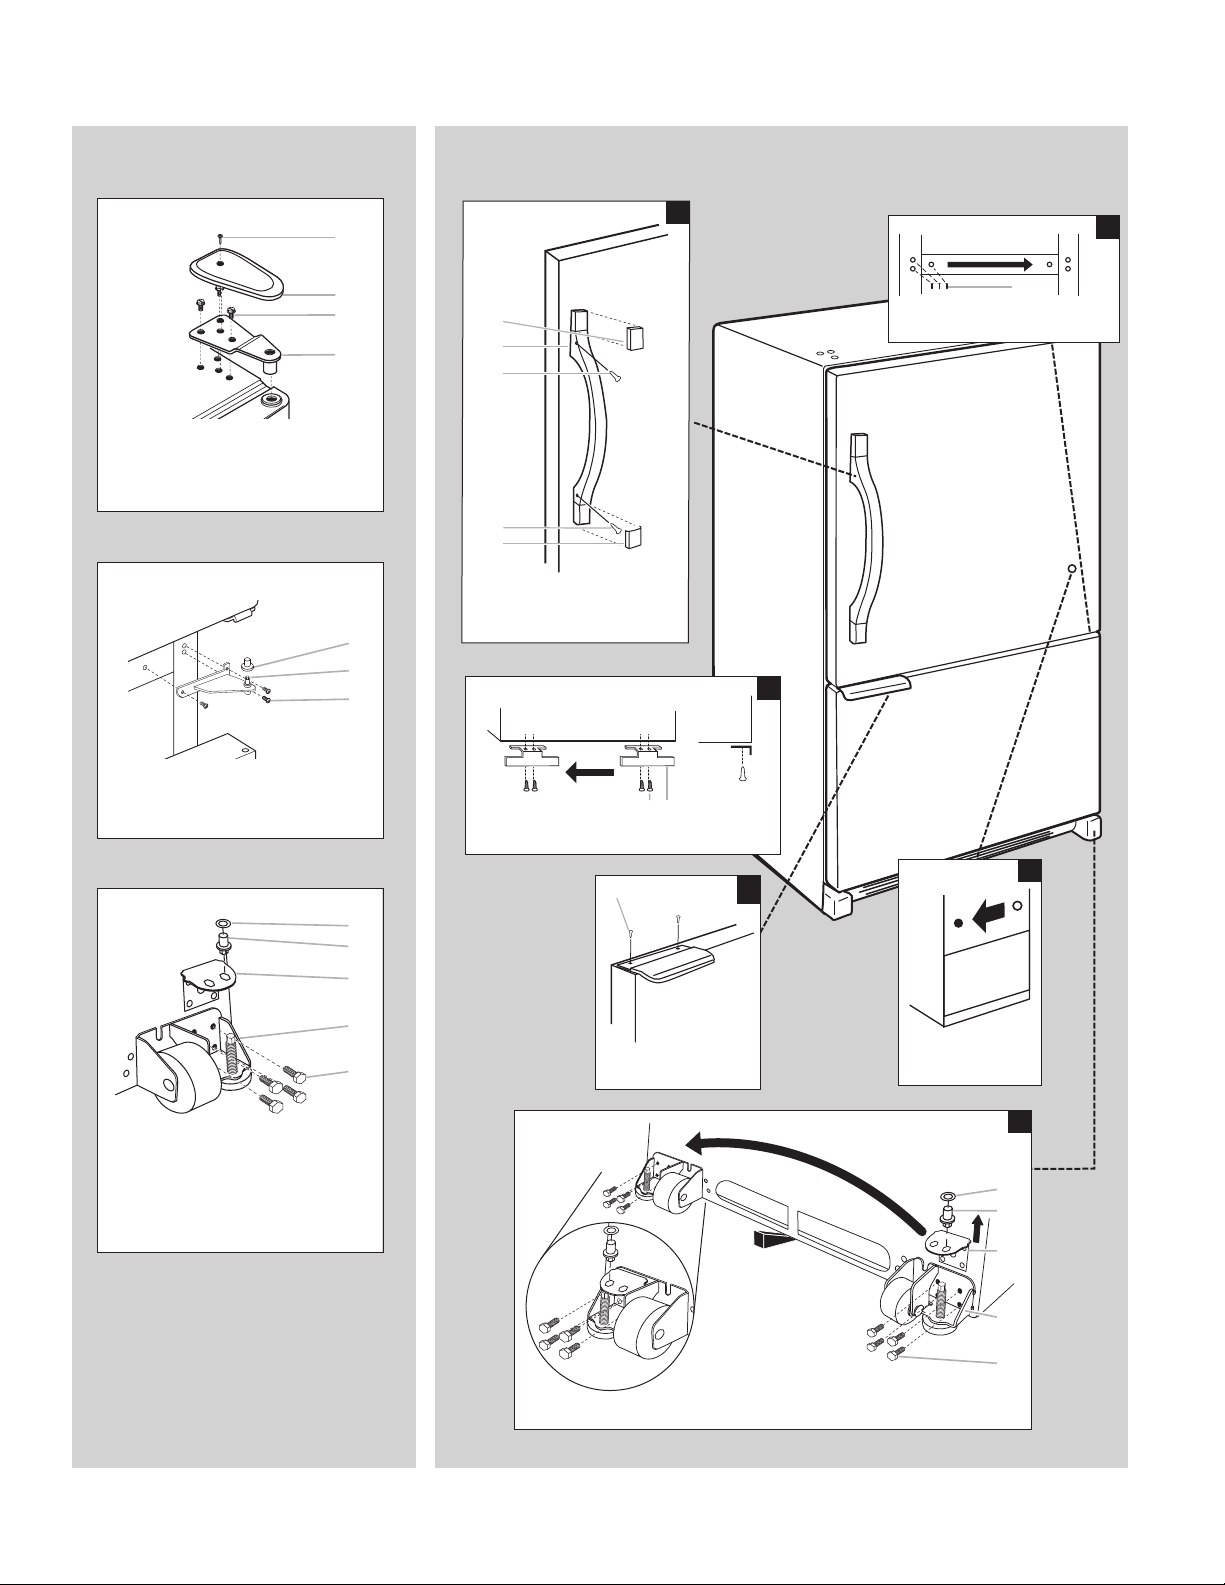
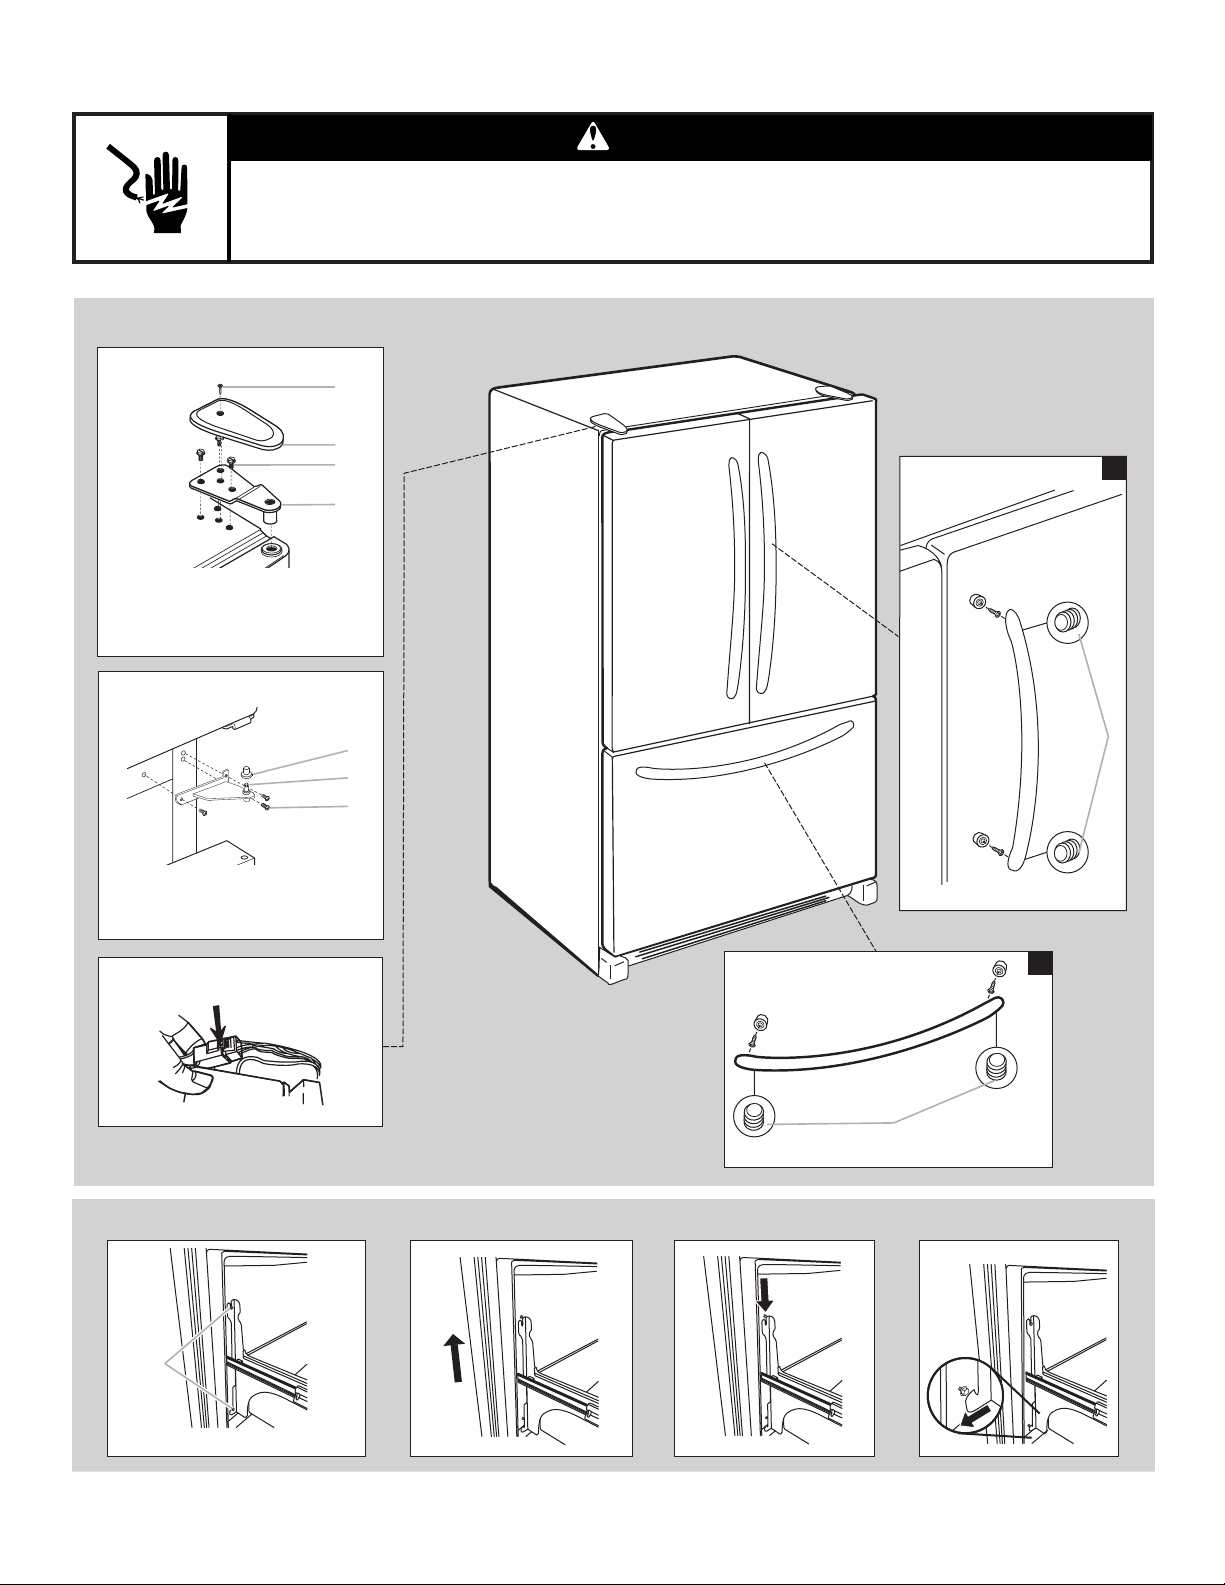
Replace and Remove Handles
Standard Door
■ To replace the handle, align the handle on the door or drawer
as shown. Using a Phillips screwdriver, attach the handle with
the handle screws.
■ To replace the handle trim pieces, using your hand, apply
rm pressure on the face of the trim and slide the trim piece
toward the center of the handle.
■ To remove handles, reverse directions.
French Doors
■ To remove the handle, use a ³⁄32" hex key to loosen the two
setscrews located on the side of each handle. Pull the handle
straight out from the door or drawer. Make sure you keep the
screws for reattaching the handles. See Handle graphics 1
and 2.
■ To replace the handles, reverse the directions.
Remove Doors and Hinges
Standard Door
Freezer drawer models
1. Unplug refrigerator or disconnect power.
2. Keep the refrigerator door closed until you are ready to lift it
free from the cabinet.
NOTE: Provide additional support for the door while the
hinges are being moved. Do not depend on the door gasket
magnets to hold the door in place while you are working.
3. Remove the parts for the top hinge as shown in Top Hinge
graphic. Lift the refrigerator door free from the cabinet.
4. Remove the parts for the bottom hinge as shown in Bottom
Hinge graphic.
Freezer door models
1. Unplug refrigerator or disconnect power.
2. Keep the freezer door closed until you are ready to lift it free
from the cabinet.
NOTE: Provide additional support for the door while the
hinges are being moved. Do not depend on the door gasket
magnets to hold the door in place while you are working.
3. Remove the parts for the top hinge as shown in Top Hinge
graphic. Lift the refrigerator door free from the cabinet.
4. Remove the center hinge pin and remove the hinge screws as
shown in the Center Hinge graphic. Lift the freezer door free
from the cabinet.
5. Remove the base grille by grasping the grille rmly with both
hands and pulling it toward you.
6. Remove the parts for the bottom hinge as shown in Bottom
Hinge graphic.
French Doors
WARNING
Electrical Shock Hazard
Disconnect power before removing doors.
Failure to do so can result in death or electrical shock.
1. Unplug refrigerator or disconnect power.
2. Keep the refrigerator doors closed until you are ready to lift
them free from the cabinet.
NOTE: Provide additional support for the refrigerator door
while the hinges are being removed. Do not depend on the
door gasket magnets to hold the door in place while you are
working.
3. Starting with the right-hand side door, remove the parts
for the top hinge as shown in Top Hinge graphic. Lift the
refrigerator door from the bottom hinge pin.
4. Remove the hinge pin cover from the bottom hinge pin and
keep it for later use. See Bottom Hinge graphic.
5. Before removing the left-hand side door, disconnect the
wiring plug located on top of the top hinge by wedging a
atblade screwdriver or your ngernail between the two
sections. See Wiring Plug graphic.
NOTE: The green, ground wire remains attached to the hinge.
6. Remove the parts for the left-hand side door top hinge as
shown in the Top Hinge graphic. Lift the door from the bottom
hinge pin.
NOTE: Remove the hinge pin cover from the bottom hinge
pin and keep it for later use. See Bottom Hinge graphic.
Reverse Door - Standard Door (optional)
IMPORTANT: If you want to reverse your door so it opens from
the opposite side, follow these steps. If you are not reversing the
door, see “Replace Door(s) and Hinges.”
Cabinet
1. Remove hinge screws from handle side and move them to
opposite side. See Graphic 1.
Refrigerator door
1. Remove the refrigerator handle assembly as shown in
Graphic 2. Keep all parts together.
2. Remove door handle seal screw front. Move to opposite side
of refrigerator door as shown in Graphic 5.
3. Remove the door stop. Move it to the opposite side of the
refrigerator door as shown in Graphic 3.
4. Attach refrigerator handle on opposite side of the refrigerator
door with the two screws as shown in Graphic 2. Replace
handle trim, as shown.
Hex Head Top Hinge Screw
Door Stop Screw Door Handle Seal Screw Front
Flat-Head Handle Screw
Cabinet Hinge Hole Plug
8
5. Tighten all screws. Set aside the door until hinges and freezer
compartment drawer are in place.
Freezer door
1. Remove the freezer handle assembly as shown in Graphic 4.
Keep all parts together.
2. Remove door stop. Move to opposite side of freezer door as
shown in Graphic 3.
3. Attach handle to opposite side of freezer door.
4. Tighten all screws. Set the door aside.
5. Remove the base grille by grasping the grille rmly with both
hands and pulling it toward you.
NOTE: Place a shim under the bottom front edge of the
refrigerator cabinet to take the weight off the roller brackets.
6. Remove the screws from both roller brackets. See Graphic 6.
7. Remove the hinge plate located behind the roller bracket
and move it to the opposite side of the refrigerator. Move the
hinge pin and shim to the outside hole on the hinge plate. See
Graphic 6.
Replace Doors and Hinges
Standard Door
NOTE: Graphics may be reversed if door swing is reversed.
Freezer drawer models
1. Replace the parts for the bottom hinge as shown. Tighten
screws.
NOTE: Provide additional support for the door while the
hinges are being moved. Do not depend on the door gasket
magnets to hold the door in place while you are working.
2. Assemble the parts for the top hinge as shown in Top Hinge
graphic. Do not tighten screws completely.
3. Adjust the door so that the bottom of the refrigerator door is
aligned with the top of the freezer drawer. Tighten all screws.
Freezer door models
1. Make sure the hinge plate is securely fastened behind the
roller bracket and that the hinge pin is inserted into the
outside hole. Fully tighten all roller bracket screws. See
Graphic 6.
2. Remove the shim that you placed under the front edge of the
refrigerator cabinet. Replace the freezer door.
NOTE: Provide additional support for the door while the
hinges are being moved. Do not depend on the door gasket
magnets to hold the door in place while you are working.
3. Assemble the parts for the center hinge as shown in the
Center Hinge graphic, and tighten all the screws. Replace the
refrigerator door.
4. Assemble the parts for the top hinge as shown in the Top
Hinge graphic. Do not tighten the screws completely.
5. Adjust the doors so that the bottom of the refrigerator door is
aligned with the top of the freezer door. Tighten all screws.
French Doors
1. Assemble the parts for the top hinges as shown in Top Hinge
graphic. Do not tighten the screws completely.
2. Replace the parts for the bottom hinges as shown in Bottom
Hinge graphic. Tighten screws. Replace the refrigerator
doors.
NOTE: Provide additional support for the refrigerator doors
while the hinges are being moved. Do not depend on the
door gasket magnets to hold the doors in place while you are
working.
3. Align each door so that the bottom of the refrigerator door
aligns evenly with the top of the freezer drawer. Tighten all
screws.
4. Reconnect the wiring plug on top of the left-hand side
refrigerator door.
5. Replace the top hinge covers.
Remove and Replace Freezer Drawer
IMPORTANT:
■ Two people may be required to remove and replace the
freezer drawer.
■ All graphics are included later in this section after “Final
Steps.”
Remove Drawer Front
1. Open the freezer drawer to full extension.
2. Loosen the four screws attaching the drawer glides to the
drawer front. See Drawer Front Removal graphic.
NOTE: Loosen screws three to four turns. Keep the screws in
the drawer front.
3. Lift drawer front upward and off the screws. See Drawer Front
Removal graphic.
Replace Drawer Front
1. Slide the drawer glides out of the freezer compartment. Insert
the screws in the top of the drawer front into the slots in the
drawer brackets. See Drawer Front Replacement graphic.
2. Pull the drawer brackets toward you to insert the two screws
in the bottom of the drawer front into the brackets. See
Drawer Front Replacement graphic.
3. Completely tighten the four screws.
Final Steps
1. Check all holes to make sure that hole plugs and screws are
in place. Reinstall top hinge cover as shown in Top Hinge
graphic.
2. Replace the base grille.
Electrical Shock Hazard
Plug into a grounded 3 prong outlet.
Do not remove ground prong.
Do not use an adapter.
Do not use an extension cord.
Failure to follow these instructions can result in death,
fire, or electrical shock.
WARNING
3. Plug into a grounded 3 prong outlet.
4. Return all removable door parts to door and food to
refrigerator
9
Standard Door - Freezer Door
A
B
C
D
E
B
A
C
D
A
B
C
3
A
B
1
1
A
5
4
2
A
B
C
A
A
C
6
A
B
C
D
E
A. Hinge Cover Screw
B. Top Hinge Cover
C.
5
/16" Hex-Head Hinge Screws
D. Top Hinge
A. Hinge Pin Cover
B. Center Hinge
C. Hinge Screws
A. Hinge Pin Shim
B. Bottom Hinge
C. Hinge Plate
D. Roller Bracket
E. ³⁄8" Hex-Head Hinge Screws
A. Handle Trim
B. Refrigerator Door Handle
C. Flat-Head Handle Screws
A. Door Stop Screws
B. Door Stop
A. Flat-Head Handle
Screws
Door Handle
Seal Screw
Front
A. Hinge Pin Shim
B. Bottom Hinge
C. Hinge Plate
D. Roller Bracket
E. ³⁄8" Hex-Head Hinge Screws
Front View Side View
Top Hinge
Center Hinge
Bottom Hinge
Door Swing Reversal (optional)Door Removal &
Replacement
A.
5
⁄16" Hex-Head Hinge Screw

10
Standard Door - Freezer Drawer
3
A
B
A
1
A
5
2
C
B
A
A
B
B
A
C
D
A
B
C
4
C B AAB
A
A. Hinge Cover Screw
B. Top Hinge Cover
C.
5
/16" Hex-Head Hinge Screws
D. Top Hinge
Top Hinge
Door Removal &
Replacement
A. Hinge Pin Cover
B. Bottom Hinge
C. Hinge Screws
Bottom Hinge
Door Swing Reversal (optional)
A. Handle Trim
B. Flat-Head Handle Screws
C. Refrigerator Door Handle
A. Door Stop Screws
B. Door Stop
Front View Side View
A. Handle Trim
B. Flat-Head Handle Screws
C. Freezer Drawer Handle
Door Handle
Seal Screw
Front
Drawer Front Removal
Drawer Front Replacement
A. Loosen 4 Door Bracket Screws
A. Hinge Screws
11
French Doors
A
1
B
A
C
D
A
B
C
A
A
2
Door Removal and Replacement
Top Hinge
Wiring Plug
Bottom Hinge
A.
3
⁄32" or
1
⁄8" Setscrew
A.
3
⁄32" or
1
⁄8" Setscrew
Drawer Front Removal
Drawer Front Replacement
A. Hinge Cover Screw
B. Top Hinge Cover
C. 5/16" Hex-Head Hinge Screws
D. Top Hinge
A. Hinge Pin Cover
B. Bottom Hinge
C. Hinge Screws
A. Loosen 4 Door Bracket Screws
WARNING
Electrical Shock Hazard
Disconnect power before removing doors.
Failure to do so can result in death or electrical shock.
12
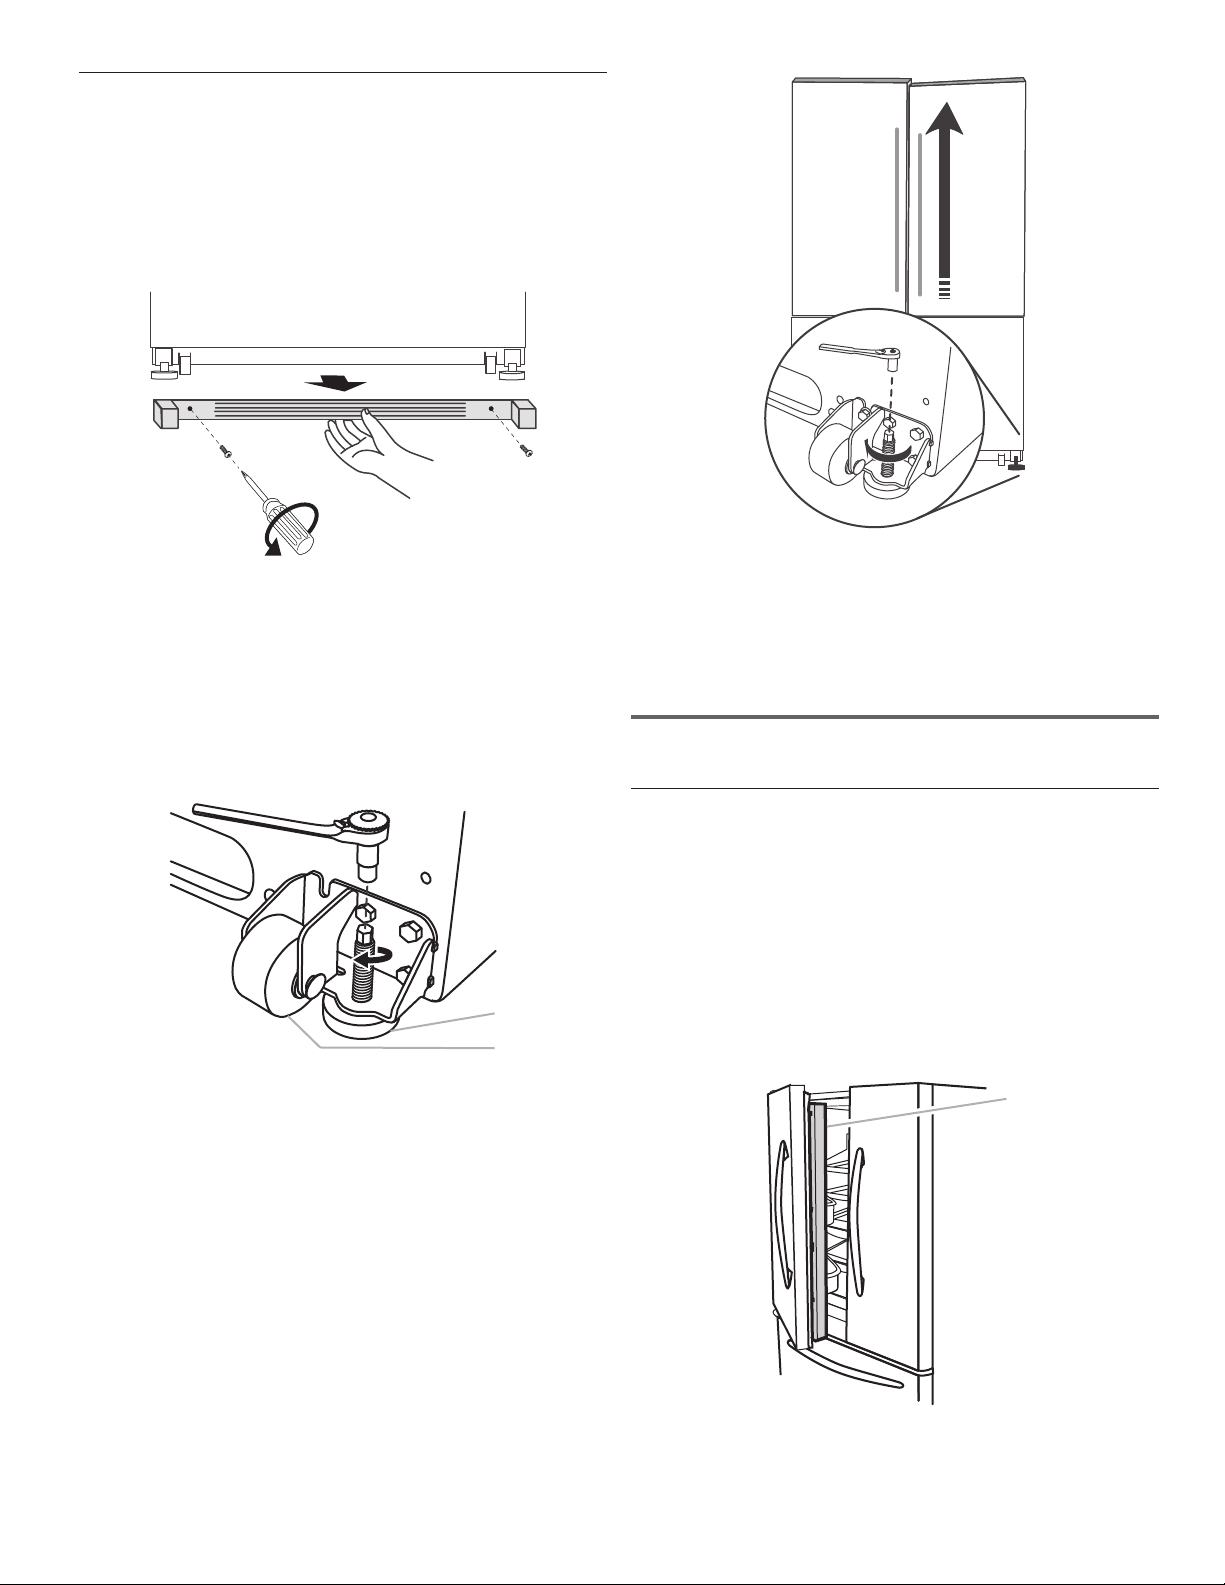
Door Closing and Door Alignment
The base grille covers the leveling screws and roller assemblies
located at the bottom of the refrigerator cabinet below the freezer
door or drawer. Before making adjustments, remove the base
grille and move the refrigerator to its nal location.
1. Remove the two screws fastening the base grille to the
cabinet, and set the screws aside. Grasp the grille and pull it
toward you.
2. Move the refrigerator to its nal location.
NOTE: To allow the refrigerator to roll easier, raise the
leveling legs off the oor by turning the leveling screws
counterclockwise. The front rollers will be touching the oor.
3. So the doors will close easier, use a ¹⁄4" hex driver to turn
both leveling screws clockwise. This will raise the front of the
refrigerator tilting it slightly downward to the rear. Turn both
leveling screws the same amount.
NOTE: Having someone push against the top of the
refrigerator takes some weight off the leveling screws. This
makes it easier to turn the screws.
A
¹⁄₄"
B
4. Open and close the doors to make sure they close as easily
as you like. If not, increase the tilt by turning both leveling
screws clockwise. It may take several turns of the leveling
screw to allow the doors to close easier.
5. Check for door alignment. If one door is lower than the other,
adjust the leveling screw, on the lower side of the refrigerator.
Using a ¹⁄4" hex driver, turn the screw clockwise to raise that
side of the refrigerator until the doors are aligned. It may take
several turns of the leveling screw to raise the refrigerator.
NOTE: Having someone push against the top of the
refrigerator takes some weight off the leveling screws. This
makes it easier to turn the screws.
¹⁄₄"
6. Make sure the refrigerator is steady. If the refrigerator seems
unsteady or rolls forward when the door or drawer is opened,
adjust the leveling screws. Using a ¹⁄4" hex driver, turn the
leveling screw on each side clockwise until the rollers are up
and the leveling feet are rmly against the oor.
7. Replace the base grille by aligning the holes in the grille with
the holes in the cabinet and fasten using the screws removed
in Step 1.
REFRIGERATOR USE
Opening and Closing Doors
(French door models)
There are two refrigerator compartment doors. The doors can be
opened and closed either separately or together.
There is a vertically-hinged seal on the left-hand refrigerator door.
■ When the left-hand door is opened, the hinged seal
automatically folds inward so that it is out of the way.
■ When both doors are closed, the hinged seal automatically
forms a seal between the two doors.
A
A. Leveling screw
B. Front roller
A. Hinged seal
13
Using the Controls
The control center is located at the top front of the refrigerator
compartment.
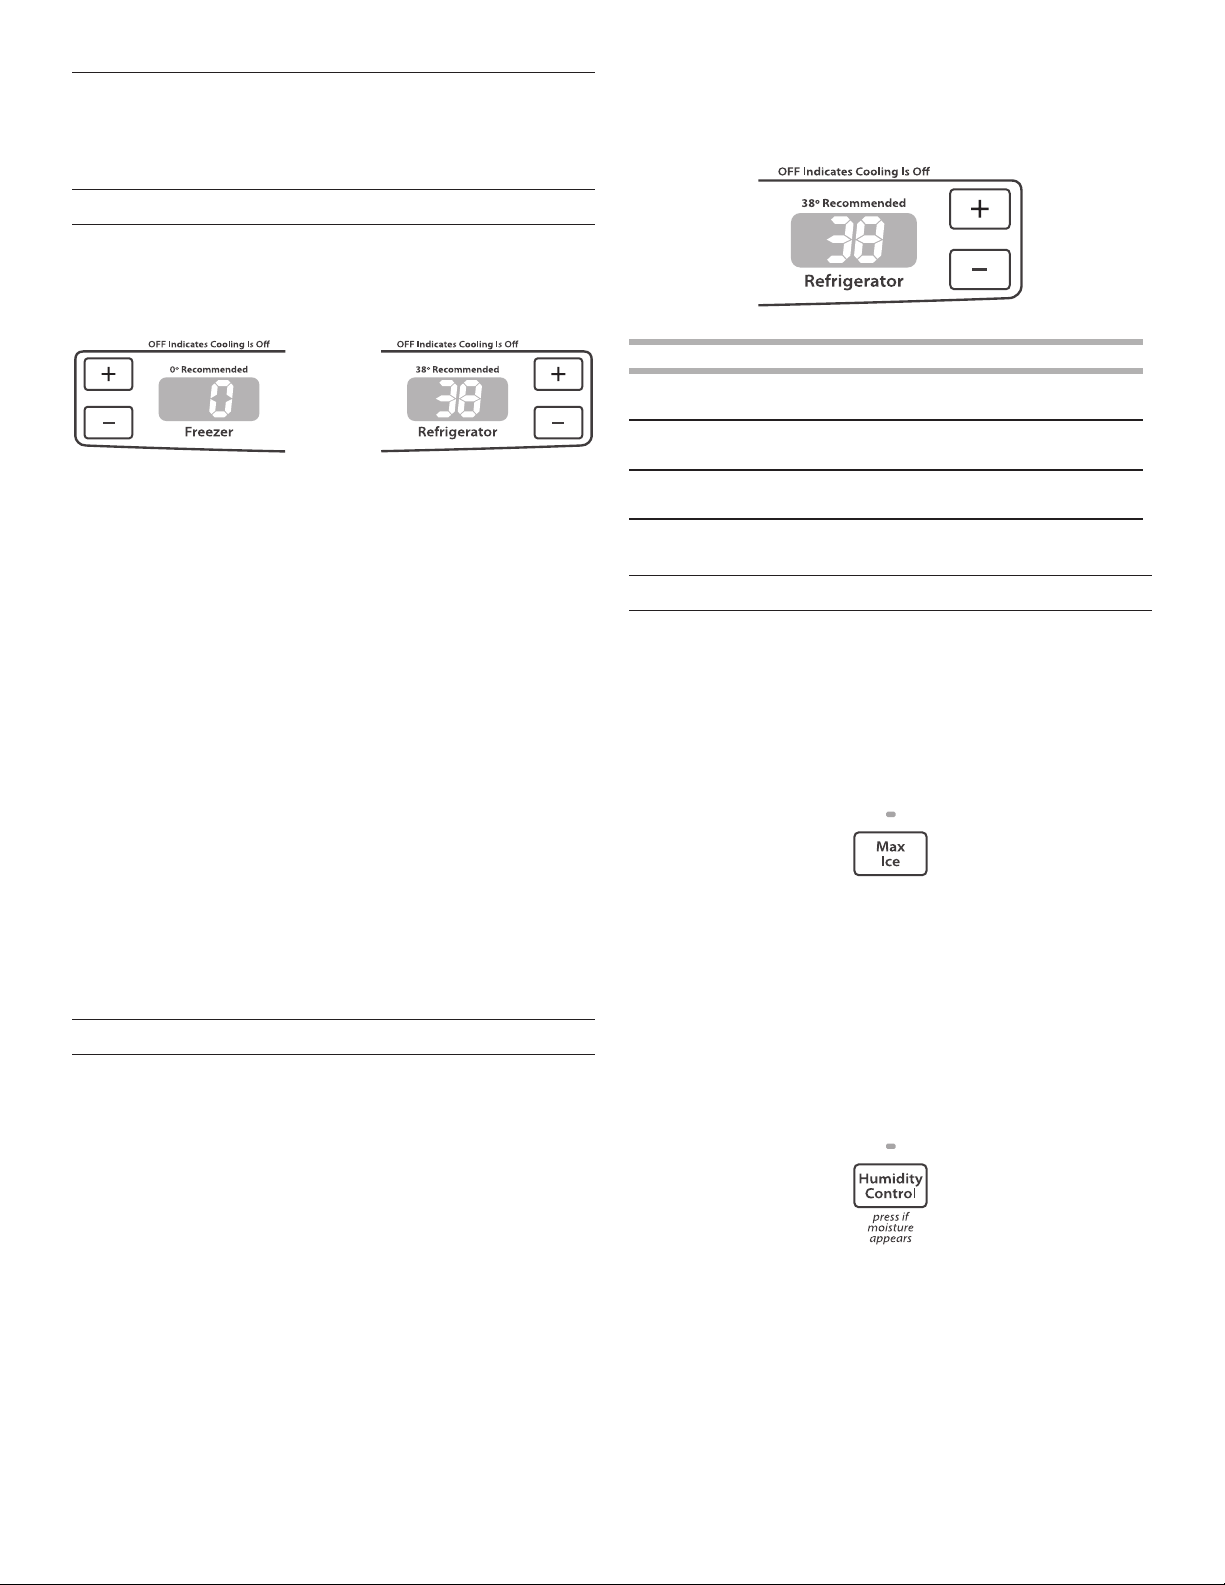
Temperature Controls
For your convenience, your temperature controls are preset at
the factory. When you rst install your refrigerator, make sure the
controls are still set to the recommended set points as shown.
Recommended Settings
IMPORTANT:
■ The recommended settings should be correct for normal
household refrigerator use. The controls are set correctly
when milk or juice is as cold as you like and when ice cream
is rm.
■ When the power is on, the temperature display shows the set
point temperature of the compartment.
■ Wait 24 hours for your refrigerator to cool completely before
adding food. If you add food before the refrigerator has
cooled completely, your food may spoil.
NOTE: Adjusting the refrigerator and freezer temperature
controls to a colder than recommended setting will not cool
the compartments any faster.
■ If the temperature is too warm or too cold in the refrigerator
or freezer, rst check the air vents to be sure they are not
blocked before adjusting the controls.
To Turn Your Refrigerator Off/On:
■ Press the freezer (+) touch pad repeatedly until “OFF”
appears in the freezer display. Allow a few seconds for the
refrigerator to shut off. Neither compartment will cool.
■ Press either the refrigerator or freezer (-) touch pad to turn on
the refrigerator.
Adjusting Controls
The REFRIGERATOR control adjusts the refrigerator
compartment temperature. The FREEZER control adjusts the
freezer compartment temperature.
If you need to adjust the temperature in either the refrigerator
or freezer compartment, use the settings listed in the chart as a
guide.
To Adjust Set Point Temperatures:
The rst touch of the (+) or (-) touch pad displays the current
temperature set point.
■ Press the (+) or (-) touch pads until the desired temperature
set point is displayed.
NOTE: Except when rst turning on the refrigerator, do not
adjust either temperature control more than one setting at a time.
Wait 24 hours between adjustments for the temperature to
stabilize.
CONDITION/REASON: ADJUSTMENT:
REFRIGERATOR too warm REFRIGERATOR Control
1° lower
FREEZER too warm/too little ice Adjust FREEZER Control
1° lower
REFRIGERATOR too cold Adjust REFRIGERATOR
Control 1° higher
FREEZER too cold Adjust FREEZER Control
1° higher
Additional Control Center Features
Max Ice
The Max Ice feature assists with temporary periods of heavy ice
use by increasing ice production.
■ Press the Max Ice feature touch pad to set the freezer to the
lowest temperature setting. Press the Max Ice feature touch
pad again to return to the normal freezer set point.
NOTE: The Max Ice feature will automatically shut off in
approximately 24 hours.
Humidity Control
The Humidity Control feature turns on a heater to help reduce
moisture on the door hinge seal. Use in humid environments
or when you notice moisture on the door hinge seal. The
refrigerator uses more energy when Humidity Control is on.
■ Press Humidity Control when the environment is warm and
more humid, or if you notice moisture on the door hinge seal.
The indicator light will be lit when humidity control is ON.
■ Press Humidity Control to save energy when the environment
is less humid.
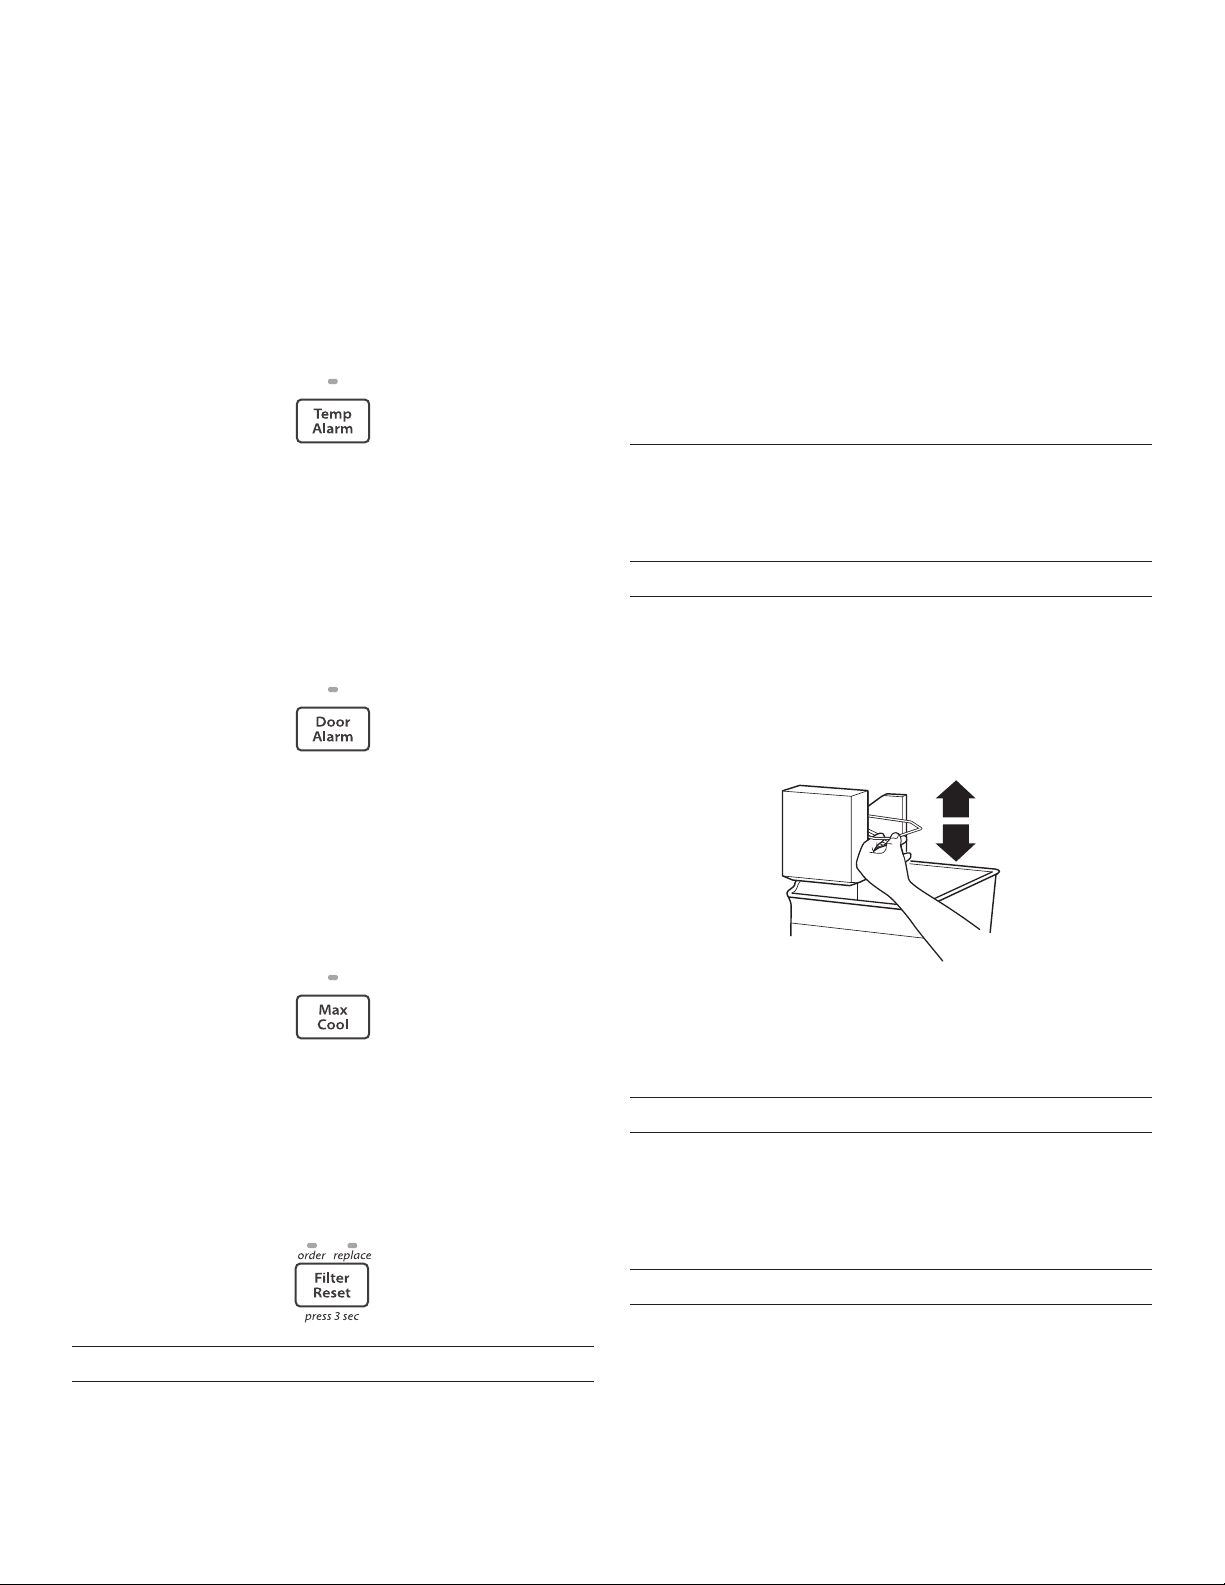
Temp Alarm
The Temp Alarm feature provides temperature information in the
event of a power outage.
Power outage: During a power outage, if the temperatures
in the refrigerator and freezer compartments exceed normal
operating temperatures, the highest temperature reached will be
displayed.
14
■ Press the Temp Alarm touch pad until the indicator light is
lit, to turn on this feature. Press and hold Temp Alarm for
3 seconds until the indicator light goes off to turn off this
feature.
Temperature alarm: An alarm will sound repeatedly if the
freezer or refrigerator compartment temperatures exceed normal
operating temperatures for an hour or more.
The temperature displays will alternately show the current
temperatures and the highest temperatures the compartments
reached.
■ Press the Temp Alarm touch pad once to stop the audible
alarm and alternating temperature displays. The Temp Alarm
light will continue to ash until the refrigerator returns to the
set temperature.
Door Alarm
The Door Alarm feature sounds a chime every few seconds
when the refrigerator door has been left open for 5 continuous
minutes.
The chime will sound until the door is closed or Door Alarm is
turned off.
■ Press the Door Alarm touch pad to turn this feature on or off.
The indicator light will be lit when the Door Alarm feature is
on.
Max Cool
The Max Cool feature assists with periods of high refrigerator
use, full grocery loads, or temporarily warm room temperatures.
■ Press Max Cool to set the freezer and refrigerator to the
lowest temperature settings. Press Max Cool again to return
to the normal refrigerator set point.
NOTE: The Max Cool feature will automatically shut off in
approximately 12 hours.
Filter Reset
The Filter Reset control allows you to restart the water lter
status tracking feature each time you replace your water lter.
See
“Water Filtration System.”
■ Press and hold the Filter Reset touch pad for 3 seconds, until
the Order or Replace light turns off.
User Preferences
The control center allows you to set user preferences, if desired.
Temperature Display (F_C)
This preference allows you to change the temperature display.
F - Temperature in degrees Fahrenheit
C - Temperature in degrees Celsius
Alarm (AL)
This preference allows you to turn off the sound of all alarms.
ON - You will hear the alarm sound.
OFF - You will not hear the alarm sound.
To Access the User Preferences Menu:
1. Press and hold the Door Alarm touch pad for 3 seconds. The
preference name will appear in the Freezer display and the
preference status (F or C) or (ON or OFF) will appear in the
Refrigerator display.
2. Use the Freezer (+) or (-) touch pads to scroll through the
preference names. When the desired preference name is
displayed, press the Refrigerator (+) or (-) touch pads to
change the preference status.
3. Set your preferences by pressing and holding the Door Alarm
touch pad for 3 seconds, or by shutting the refrigerator
compartment door.
Ice Maker
IMPORTANT: Flush the water system before turning on the ice
maker. See “Water Dispenser.”
Turning the Ice Maker On/Off
To turn the ice maker ON, simply lower the wire shutoff arm.
To manually turn the ice maker OFF, lift the wire shutoff arm to
the OFF (arm up) position and listen for the click.
NOTE: Your ice maker has an automatic shutoff. As ice is made,
the ice cubes will ll the ice storage bin and the ice cubes will
raise the wire shutoff arm to the OFF (arm up) position. Do not
force the wire shutoff arm up or down.
NOTE: Turn off the ice maker before removing the ice storage
bin to serve ice or to clean the bin. This will keep the ice
cubes from dropping out of the ice maker and into the freezer
compartment. After replacing the ice storage bin, turn on the ice
maker.
Ice Production Rate
■ The ice maker should produce a complete batch of ice
approximately every 3 hours.
■ To increase ice production, lower the freezer and refrigerator
temperature. See “Using the Controls.” Wait 24 hours
between adjustments.
Remember
■ Allow 24 hours to produce the rst batch of ice. Allow 3 days
to completely ll the ice storage bin. Discard the rst three
batches of ice produced.
■ The quality of your ice will be only as good as the quality
of the water supplied to your ice maker. Avoid connecting
the ice maker to a softened water supply. Water softener
chemicals (such as salt) can damage parts of the ice
maker and lead to poor quality ice. If a softened water
supply cannot be avoided, make sure the water softener is
operating properly and is well maintained.
15
■ Do not store anything on top of the ice maker or in the ice
storage bin.
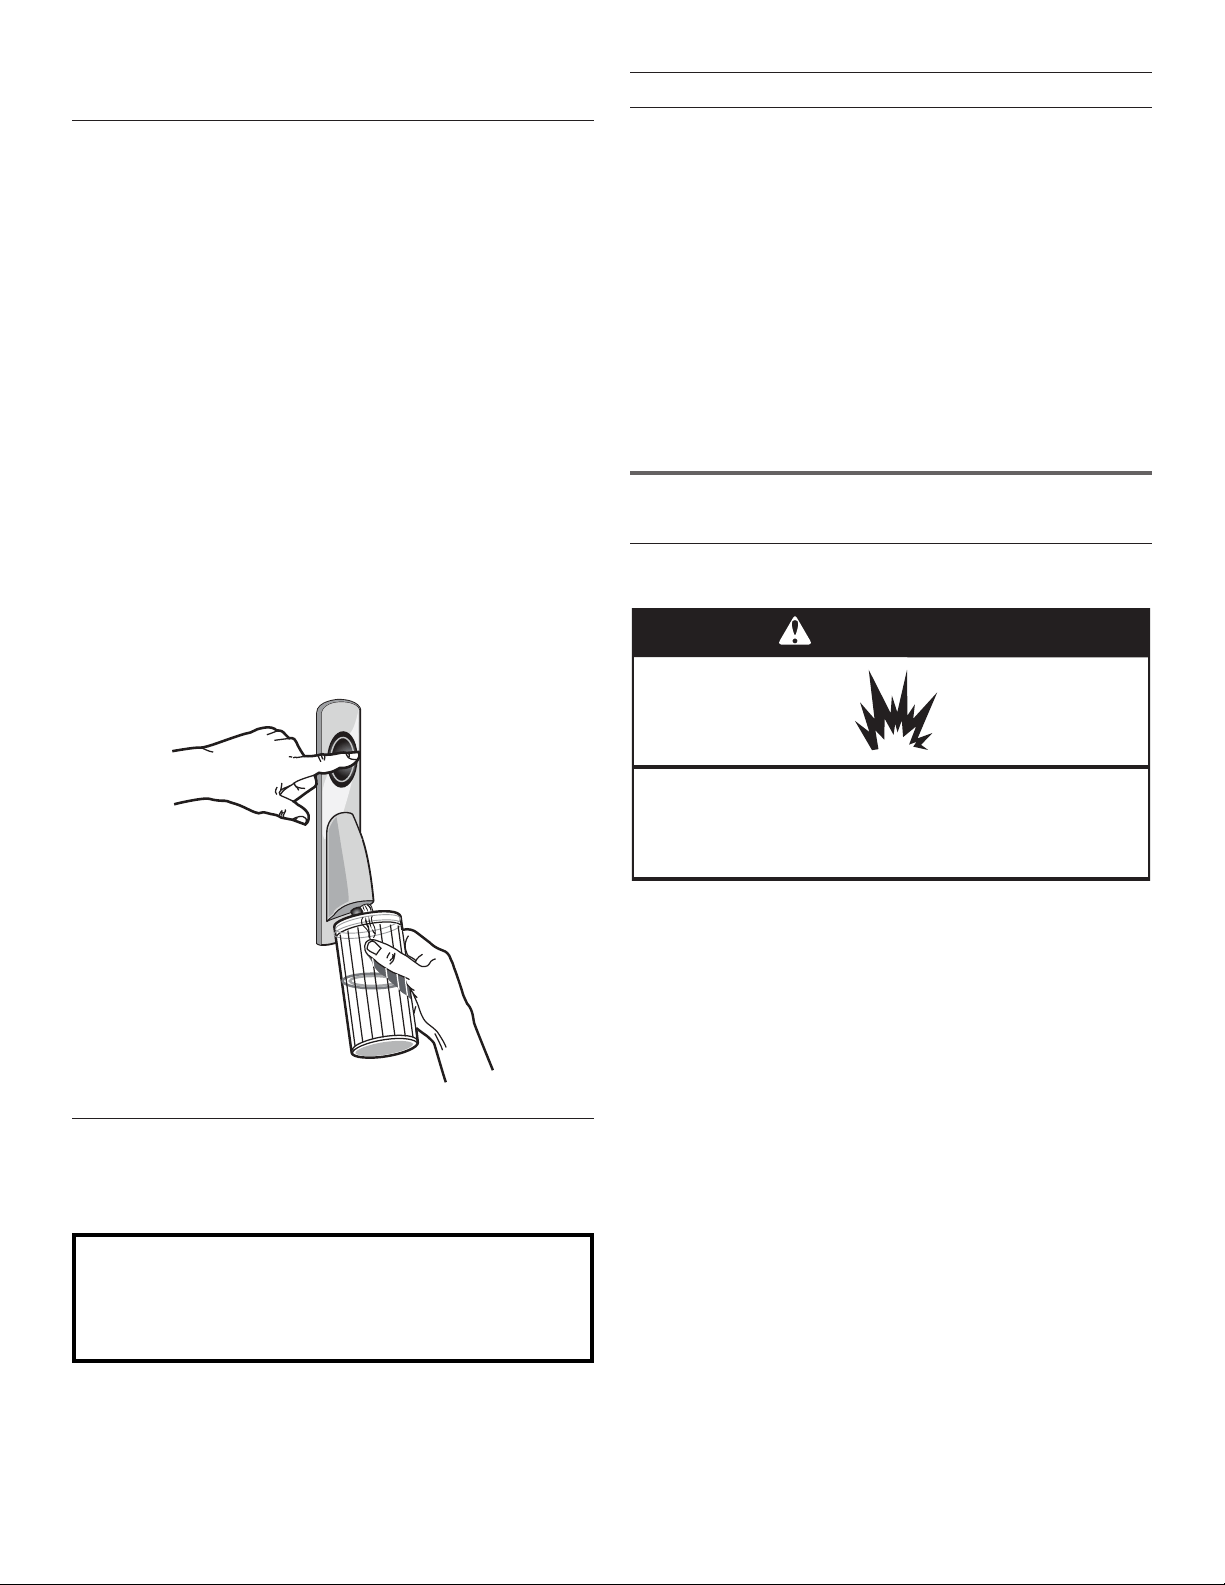
Water Dispenser
IMPORTANT:
■ After connecting the refrigerator to a water source or
replacing the water lter, ush the water system. Use a
sturdy container to depress and hold the water dispenser
lever for 5 seconds, then release it for 5 seconds. Repeat
until water begins to ow. Once water begins to ow,
continue depressing and releasing the dispenser lever (5
seconds on, 5 seconds off) until a total of 4 gal. (15 L) has
been dispensed. This will ush air from the lter and water
dispensing system, and prepare the water lter for use.
Additional ushing may be required in some households. As
air is cleared from the system, water may spurt out of the
dispenser.
NOTE: After 5 minutes of continuous dispensing, the
dispenser will stop dispensing water to avoid ooding. To
continue dispensing, press the dispenser button again.
■ Allow 24 hours for the refrigerator to cool down and chill
water. Dispense enough water every week to maintain a fresh
supply.
Dispensing Water
1. Hold a container under the dispenser while pressing the
button.
2. Release the button to stop dispensing.
Water Filtration System
The water lter is located in the upper right-hand corner of the
refrigerator compartment.
IMPORTANT: The disposable water lter should be replaced at
least every 6 months. If the water ow to the water dispenser or
ice maker decreases noticeably before 6 months have passed,
replace the water lter more often.
Replacing the Water Filter
To purchase replacement water lters, model UKF8001AXX-750
or model UKF8001AXX-200, contact your dealer or call
1-800-253-1301 U.S.A. or 1-800-807-6777 Canada.
IMPORTANT: Air trapped in the water system may cause water
and lter to eject. Always dispense water for at least 2 minutes
before removing the lter or blue bypass cap.
1. Turn lter counterclockwise to remove.
2. Remove sealing label from replacement lter and insert the
lter end into the lter head.
3. Turn the lter clockwise until it stops. Snap the lter cover
closed.
4. Flush the water system. See “Water and Ice Dispenser(s).”
NOTE: The dispenser feature may be used without a water lter
installed. Your water will not be ltered. If this option is chosen,
replace the lter with the blue bypass cap.
REFRIGERATOR CARE
Cleaning
Both the refrigerator and freezer sections defrost automatically.
However, clean both sections about once a month to avoid
buildup of odors. Wipe up spills immediately.
IMPORTANT:
■ Because air circulates between both sections, any odors
formed in one section will transfer to the other. You must
thoroughly clean both sections to eliminate odors. To avoid
odor transfer and drying out of food, wrap or cover foods
tightly.
■ For stainless steel models, stainless steel is corrosion-
resistant and not corrosion-proof. To help avoid corrosion of
your stainless steel, keep your surfaces clean by using the
following cleaning instructions.
To Clean Your Refrigerator:
NOTE: Do not use abrasive or harsh cleaners such as window
sprays, scouring cleansers, ammable uids, muriatic acid,
cleaning waxes, concentrated detergents, bleaches or cleansers
containing petroleum products on exterior surfaces (doors and
cabinet), plastic parts, interior and door liners or gaskets. Do not
use paper towels, scouring pads, or other harsh cleaning tools.
1. Unplug refrigerator or disconnect power.
2. Hand wash, rinse, and dry removable parts and interior
surfaces thoroughly. Use a clean sponge or soft cloth and a
mild detergent in warm water.
Do not use with water that is microbiologically unsafe or
of unknown quality without adequate disinfection before
or after the system. Systems certified for cyst reduction
may be used on disinfected waters that may contain
filterable cysts.
WARNING
Explosion Hazard
Use non-ammable cleaner.
Failure to do so can result in death, explosion, or re.
16
3. Clean the exterior surfaces.
Painted metal: Wash painted metal exteriors with a clean,
soft cloth or sponge and a mild detergent in warm water.
Rinse surfaces with clean, warm water and dry immediately
to avoid water spots.
Stainless steel: Wash stainless steel surfaces with a clean,
soft cloth or sponge and a mild detergent in warm water.
Rinse surfaces with clean, warm water and dry immediately
to avoid water spots.
NOTE: When cleaning stainless steel, always wipe in the
direction of the grain to avoid cross-grain scratching.
4. There is no need for routine condenser cleaning in normal
home operating environments. If the environment is
particularly greasy or dusty, or there is signicant pet trafc
in the home, the condenser should be cleaned every 2 to 3
months to ensure maximum efciency.
If you need to clean the condenser:
■ Remove the base grille.
■ Use a vacuum cleaner with a soft brush to clean the grille, the
open areas behind the grille and the front surface area of the
condenser.
■ Replace the base grille when nished.
5. Plug in refrigerator or reconnect power.
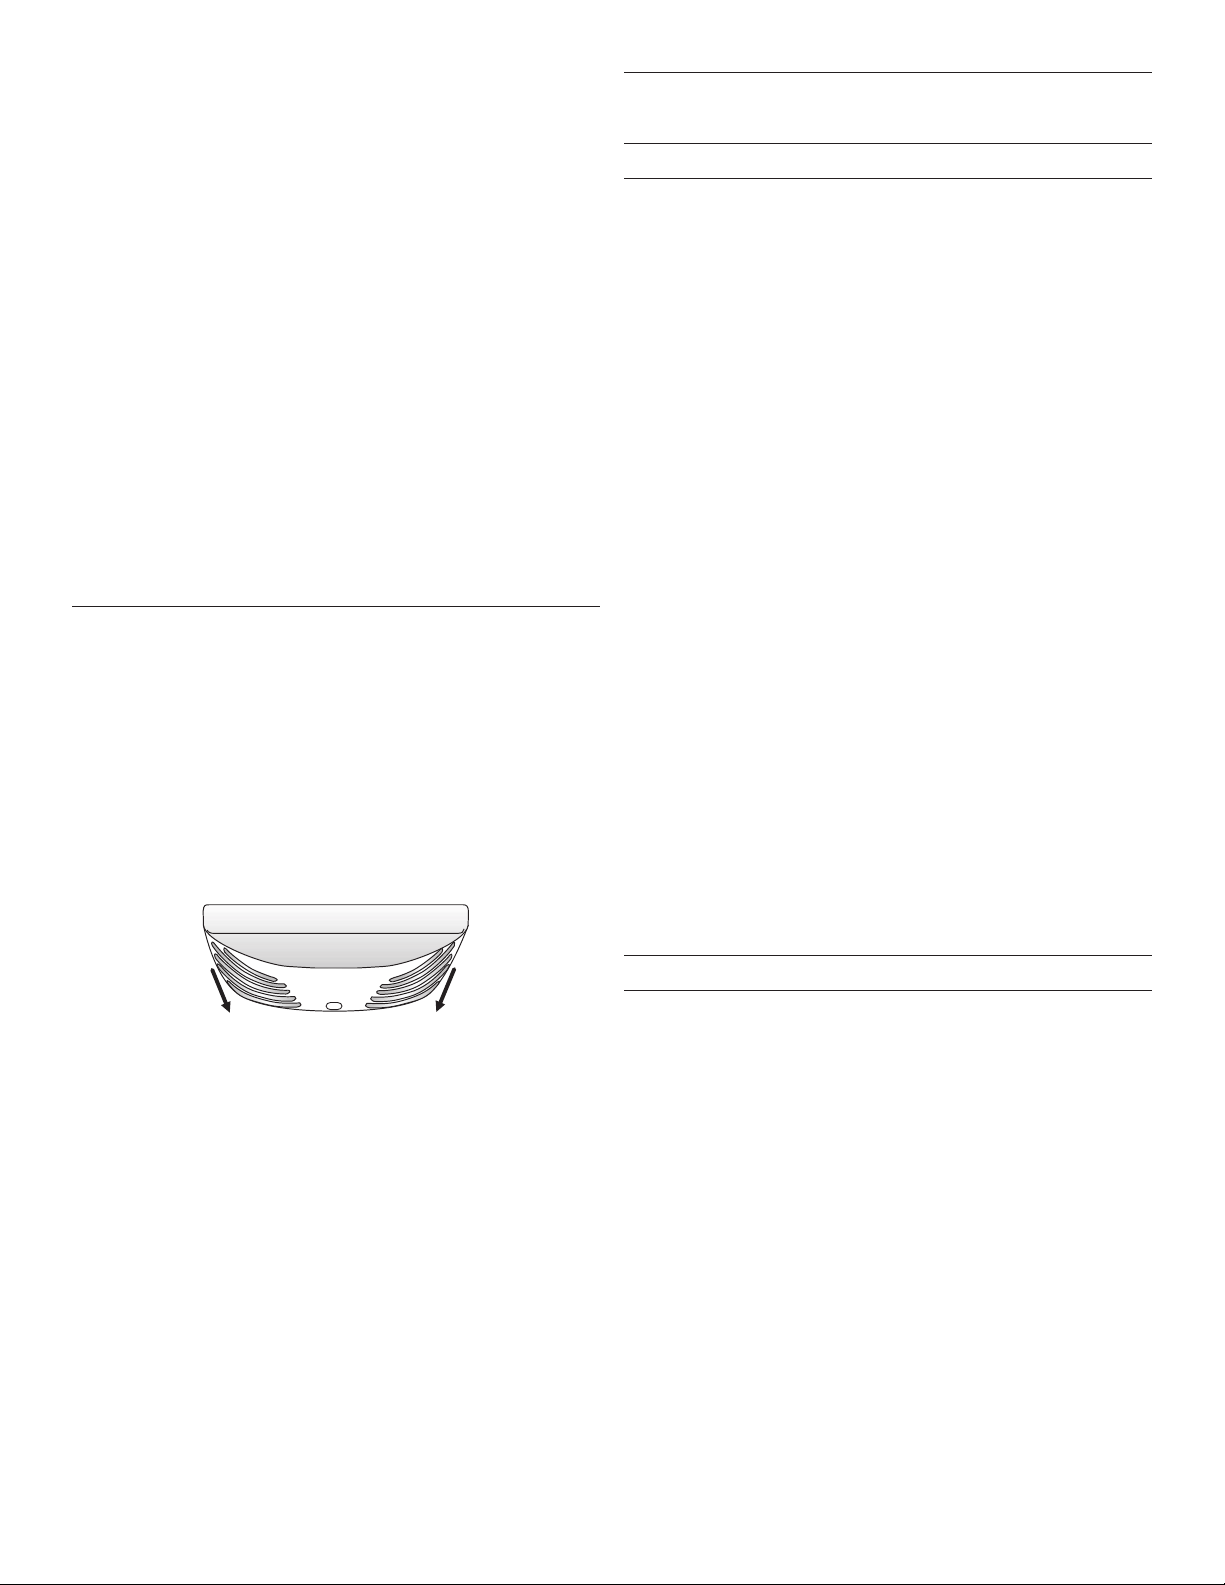
Changing the Light Bulb
IMPORTANT: The light bulbs in both the refrigerator and
freezer compartments of your new refrigerator use LED bulbs,
incandescent bulb or a combination of the two. If the lights do
not illuminate when the refrigerator and/or freezer door is opened,
call for assistance or service. See “Warranty” for phone numbers.
1. Unplug the refrigerator or disconnect power.
2. Remove the light shield (on some models).
■ Top of the refrigerator compartment - Slide the light shield
toward the back of the compartment to release it from the
light assembly.
3. Replace the burned-out bulb(s) with a bulb of the same size,
shape and wattage.
■ To replace the burned-out LED bulb with an LED bulb,
order Part Number W10565137 (3.6 watts).
NOTE: Some LED replacement bulbs are not recommended
for wet/damp environments. The refrigerator and freezer
compartments are considered to be wet/damp environments.
If using a brand of LED bulb other than the recommended
LED bulb, before installation, read and follow all instructions
on the LED packaging.
■ When replacing an incandescent bulb, use only
incandescent bulbs for household appliances with a
maximum of 40 watts. Replace bulb sheild/shroud after
replacing incandescent bulb.
4. Replace the light shield.
5. Plug in refrigerator or reconnect power.
Vacation and Moving Care
Vacations
If You Choose to Leave the Refrigerator On While
You’re
Away:
1. Use up any perishables and freeze other items.
2. If your refrigerator has an automatic ice maker, and is
connected to the household water supply, turn off the water
supply to the refrigerator. Property damage can occur if the
water supply is not turned off.
3. If you have an automatic ice maker, turn off the ice maker.
NOTE: Depending on your model, raise the wire shutoff arm
to OFF (arm up) position, or press the switch to OFF.
4. Empty the ice bin.
Models with Vacation Mode Feature
■ Turn on Vacation mode. See “Using the Controls.”
NOTE: Activating Vacation mode does not turn off the ice
maker.
If You Choose to Turn Off the Refrigerator Before
You Leave:
1. Remove all food from the refrigerator.
2. If your refrigerator has an automatic ice maker:
■ Turn off the water supply to the ice maker at least one day
ahead of time.
■ When the last load of ice drops, raise the wire shutoff
arm to the OFF (up) position or press the switch to OFF,
depending on your model.
3. Empty the ice bin.
4. Turn off the Temperature control(s). See “Using the
Control(s).”
5. Clean refrigerator, wipe it, and dry well.
6. Tape rubber or wood blocks to the tops of both doors to prop
them open far enough for air to get in. This stops odor and
mold from building up.
Moving
When you are moving your refrigerator to a new home, follow
these steps to prepare it for the move.
1. If your refrigerator has an automatic ice maker:
■ Turn off the water supply to the ice maker at least one day
ahead of time.
■ Disconnect the water line from the back of the refrigerator.
■ When the last load of ice drops, raise the wire shutoff
arm to the OFF (up) position or press the switch to OFF,
depending on your model.
2. Remove all food from the refrigerator and pack all frozen food
in dry ice.
3. Empty the ice bin.
4. Turn off the Temperature control(s). See “Using the
Control(s).”
5. Unplug refrigerator.
6. Clean, wipe, and dry thoroughly.
17
7. Take out all removable parts, wrap them well, and tape them
together so they don’t shift and rattle during the move.
8. Depending on the model, raise the front of the refrigerator so
it rolls more easily OR raise the leveling screws so they don’t
scrape the oor. See “Adjust the Door(s)” or “Door Closing
and Door Alignment.”
9. Tape the doors closed and tape the power cord to the back of
the refrigerator.
When you get to your new home, put everything back and refer to
the “Installation Instructions” section for preparation instructions.
Also, if your refrigerator has an automatic ice maker, remember to
reconnect the water supply to the refrigerator.
TROUBLESHOOTING
First try the solutions suggested here. If you need further assistance or more recommendations that may help you avoid a service call,
refer to the warranty page in this manual and scan the code with your mobile device, or visit www.whirlpool.com/product_help.
In Canada, visit www.whirlpool.ca.
Contact us by mail with any questions or concerns at the address below:
In the U.S.A.:
Whirlpool Brand Home Appliances
Customer eXperience Center
553 Benson Road
Benton Harbor, MI 49022-2692
Please include a daytime phone number in your correspondence.
Refrigerator Operation
The refrigerator will not operate
■ Power cord unplugged? Plug into a grounded 3 prong
outlet.
■ Is outlet working? Plug in a lamp to see if the outlet is
working.
■ Household fuse blown or circuit breaker tripped? Replace
the fuse or reset the circuit breaker. If the problem continues,
call an electrician.
■ Are controls on? Make sure the refrigerator controls are on.
See “Using the Control(s).”
■ New installation? Allow 24 hours following installation for the
refrigerator to cool completely.
NOTE: Adjusting the temperature controls to coldest setting
will not cool either compartment more quickly.
In Canada:
Whirlpool Brand Home Appliances
Customer eXperience Centre
200 – 6750 Century Ave.
Mississauga, Ontario L5N 0B7
The motor seems to run too much
Your new refrigerator may run longer than your old one due to
its high-efciency compressor and fans. The unit may run even
longer if the room is warm, a large food load is added, doors are
opened often, or if the doors have been left open.
The refrigerator seems noisy
Refrigerator noise has been reduced over the years. Due to
this reduction, you may hear intermittent noises from your new
refrigerator that you did not notice from your old model. Below
are listed some normal sounds with explanations.
■ Buzzing - heard when the water valve opens to ll the ice
maker
■ Pulsating - fans/compressor adjusting to optimize
performance
■ Hissing/Rattling - ow of refrigerant, movement of water
lines, or from items placed on top of the refrigerator
■ Sizzling/Gurgling - water dripping on the heater during
defrost cycle
■ Popping - contraction/expansion of inside walls,
especially during initial cool-down
■ Water running - may be heard when ice melts during the
defrost cycle and water runs into the drain pan
■ Creaking/Cracking - occurs as ice is being ejected from
the ice maker mold.
The doors will not close completely
■ Door blocked open? Move food packages away from
door.
■ Bin or shelf in the way? Push bin or shelf back in the
correct position.
Electrical Shock Hazard
Plug into a grounded 3 prong outlet.
Do not remove ground prong.
Do not use an adapter.
Do not use an extension cord.
Failure to follow these instructions can result in death,
fire, or electrical shock.
WARNING

18
The doors are difcult to open
■ Gaskets dirty or sticky? Clean gaskets and contact surfaces
with mild soap and warm water. Rinse and dry with soft cloth.
Temperature and Moisture
Temperature is too warm
■ New installation? Allow 24 hours following installation for the
refrigerator to cool completely.
■ Door(s) opened often or left open? Allows warm air to enter
refrigerator. Minimize door openings and keep doors fully
closed.
■ Large load of food added? Allow several hours for
refrigerator to return to normal temperature.
■ Controls set correctly for the surrounding conditions?
Adjust the controls a setting colder. Check temperature in 24
hours. See “Using the Control(s).”
There is interior moisture buildup
NOTE: Some moisture buildup is normal.
■ Humid room? Contributes to moisture buildup.
■ Door(s) opened often or left open? Allows humid air to
enter refrigerator. Minimize door openings and keep doors
fully closed.
Ice and Water
The ice maker is not producing ice or not enough ice
■ Refrigerator connected to a water supply and the supply
shutoff valve turned on? Connect refrigerator to water
supply and turn water shutoff valve fully open.
■ Kink in the water source line? A kink in the line can reduce
water ow. Straighten the water source line.
■ Ice maker turned on? Make sure wire shutoff arm or switch
(depending on model) is in the ON position.
■ New installation? Wait 24 hours after ice maker installation
for ice production to begin. Wait 72 hours for full ice
production.
■ Freezer door closed completely? Firmly close the freezer
compartment door. If the freezer compartment door will not
close all the way, see “The doors will not close completely,”
earlier in this section.
■ Large amount of ice recently removed? Allow 24 hours for
ice maker to produce more ice.
■ Ice cube jammed in the ice maker ejector arm?
Remove ice from the ejector arm with a plastic utensil.
■ Water lter installed on the refrigerator? Remove lter and
operate ice maker. If ice volume improves, then the lter may
be clogged or incorrectly installed. Replace lter or reinstall it
correctly.
■ Reverse osmosis water ltration system connected to
your cold water supply? This can decrease water pressure.
See “Water Supply Requirements.”
The ice cubes are hollow or small
NOTE: This is an indication of low water pressure.
■ Water shutoff valve not fully open? Turn the water shutoff
valve fully open.
■ Kink in the water source line? A kink in the line can reduce
water ow. Straighten the water source line.
■ Water lter installed on the refrigerator? Remove lter and
operate ice maker. If ice quality improves, then the lter may
be clogged or incorrectly installed. Replace lter or reinstall it
correctly.
■ Reverse osmosis water ltration system connected to
your cold water supply? This can decrease water pressure.
See “Water Supply Requirements.”
■ Questions remain regarding water pressure? Call a
licensed, qualied plumber.
Off-taste, odor or gray color in the ice
■ New plumbing connections? New plumbing connections
can cause discolored or off-avored ice.
■ Ice stored too long? Discard ice. Wash ice bin. Allow 24
hours for ice maker to make new ice.
■ Odor transfer from food? Use airtight, moisture proof
packaging to store food.
■ Are there minerals (such as sulfur) in the water? A water
lter may need to be installed to remove the minerals.
■ Water lter installed on the refrigerator? Gray or dark
discoloration in ice indicates that the water ltration system
needs additional ushing. Flush the water system before
using a new water lter. Replace water lter when indicated.
See “Water Filtration System.”
The water dispenser will not operate properly
■ Refrigerator connected to a water supply and the supply
shutoff valve turned on? Connect refrigerator to water
supply and turn water shutoff valve fully open.
■ Kink in the water source line? Straighten the water source
line.
■ New installation? Flush and ll the water system. See “Water
Dispenser.”
■ Is the water pressure at least 35 psi (241 kPa)? The water
pressure to the home determines the ow from the dispenser.
See “Water Supply Requirements.”
■ Water lter installed on the refrigerator? Remove lter and
operate dispenser. If water ow increases, the lter may be
clogged or incorrectly installed. Replace lter or reinstall it
correctly.
■ Refrigerator door closed completely? Close the door rmly.
If it does not close completely, see “The doors will not close
completely,” earlier in this section.
WARNING
Explosion Hazard
Use non-ammable cleaner.
Failure to do so can result in death, explosion, or re.

19
■ Recently removed the doors? Make sure the water
dispenser wire/tube assembly has been properly
reconnected. See “Refrigerator Door(s) and Drawer.”
■ Reverse osmosis water ltration system connected to your
cold water supply? This can decrease water pressure. See
“Water Supply Requirements.”
Water is leaking from the dispenser system
NOTE: One or two drops of water after dispensing is normal.
■ Glass not being held under the dispenser long enough?
Hold the glass under the dispenser 2 to 3 seconds after
releasing the dispenser lever.
■ New installation? Flush the water system. See “Water
Dispenser.”
■ Recently changed water lter? Flush the water system.
■ See “Water Dispenser.”
■ Water on the oor near the base grille? Make sure the
water dispenser tube connections are fully tightened.
See “Refrigerator Door(s) and Drawer.”
Water from the dispenser is warm
NOTE: Water from the dispenser is only chilled to 50°F (10°C).
■ New installation? Allow 24 hours after installation for the
water supply to cool completely.
■ Recently dispensed large amount of water? Allow 24 hours
for water supply to cool completely.
■ Water not been recently dispensed? The rst glass of water
may not be cool. Discard the rst glass of water.
■ Refrigerator connected to a cold water pipe? Make sure
the refrigerator is connected to a cold water pipe.
See “Water Supply Requirements.”

20
PERFORMANCE DATA SHEETS
Interior Water Filtration System
Model UKF8001AXX-750 Capacity 750 Gallons (2839 Liters)
This system has been tested according to NSF/ANSI Standards 42, 53, 401 and CSA B483.1 for the reduction of the substances listed
below. The concentration of the indicated substances in water entering the system was reduced to a concentraion less than or equal
to the permissible limit for water leaving the system, as specied in NSF/ANSI Standards 42, 53, 401 and CSA B483.1.
Substance Reduction
Aesthetic Effects
NSF
Reduction
Requirements
Average
Inuent
Inuent Challenge
Concentration
Maximum
Efuent
Average
Efuent
Minimum%
Reduction
Average%
Reduction
Chlorine Taste/Odor
Particulate Class I*
50% reduction
85% reduction
2.00 mg/L
14,000,000 #/mL
2.0 mg/L ± 10%
At least
10,000 particles/mL
0.06 mg/L
370,000 #/mL**
0.050625 mg/L
196,666 #/mL
97.00%
97.40%
97.52%
99.00%
Contaminant
Reduction
NSF Reduction
Requirements
Average Inuent Inuent Challenge
Concentration
Maximum
Efuent
Average
Efuent
Minimum%
Reduction
Average%
Reduction
Lead: @ pH 6.5
Lead: @ pH 8.5
0.010 mg/L
0.010 mg/L
0.150 mg/L
†
0.150 mg/L
†
0.15 mg/L ± 10%
0.15 mg/L ± 10%
< 0.001 mg/L
< 0.001 mg/L
< 0.001 mg/L
< 0.001 mg/L
>99.30%
>99.30%
>99.30%
>99.30%
Mercury: @ pH 6.5
Mercury: @ pH 8.5
0.002 mg/L
0.002 mg/L
0.006 mg/L
0.0059 mg/L
0.006 mg/L ± 10%
0.006 mg/L ± 10%
0.0005 mg/L
0.0018 mg/L
0.0003 mg/L
0.00073 mg/L
91.70%
69.20%
95.00%
88.10%
Benzene 0.005 mg/L 0.0133 mg/L 0.015 mg/L ± 10% 0.0005 mg/L 0.0005 mg/L 96.10% 96.30%
p-Dichlorobenzene 0.075 mg/L 0.210 mg/L 0.225 mg/L ± 10% < 0.0005 mg/L < 0.0005 mg/L >99.80% >99.80%
Carbofuran 0.040 mg/L 0.0753 mg/L 0.08 mg/L ± 10% 0.027 mg/L 0.008 mg/L 64.60% 73.45%
Toxaphene 0.003 mg/L 0.015 mg/L 0.015 ± 10% < 0.001 mg/L < 0.001 mg/L >93.3% >93.3%
Atrazine 0.003 mg/L 0.0102 mg/L 0.009 mg/L ± 10% 0.0027 mg/L 0.00105 mg/L 76.30% 89.40%
Asbestos >99% 126.5 MF/L 107 to 108 bers/L
††
< 0.17 MF/L < 0.17 MF/L >99.99% >99.99%
Live Cysts
‡
Turbidity
>99.95%
0.5 NTU
122,500 #/L
10.5 NTU
50,000/L min.
11 ± 1 NTU
< 1 #/L
‡
0.30 NTU
< 1 #/L
‡
0.125 NTU
>99.99%
97.30%
>99.99%
98.80%
Lindane 0.0002 mg/L 0.0019 mg/L 0.002 ± 10% < 0.00016 mg/L 0.000035 mg/L 91.80% 97.90%
Tetrachloroethylene 0.005 mg/L 0.015 mg/L 0.015 mg/L ± 10% < 0.0005 mg/L < 0.0005 mg/L >96.6% >96.6%
Test Parameters: pH = 7.5 ± 0.5 unless otherwise noted. Flow = 0.78 gpm (2.9 Lpm). Pressure = 60 psig (413.7 kPa). Temp. = 68°F ± 5°F (20°C ± 3°C).
■ It is essential that operational, maintenance, and lter replacement
requirements be carried out for the product to perform as advertised.
■ The disposable water lter should be replaced at least every 6
months.
■ The lter monitor system measures the amount of water that passes
through the lter and alerts you to replace the lter. When 90% of
the lter’s rated life is used, the yellow (Order) light comes on. When
100% of the lter’s rated life is used, the red (Replace) light comes
on, and it is recommended that you replace the lter. For models
without lter status lights, replace the lter every 6 months. Use
replacement lter model UKF8001. 2015 suggested retail price of
$44.99 U.S.A./ $49.95 Canada. Prices are subject to change without
notice.
■ The product is for cold water use only.
■ Do not use with water that is microbiologically unsafe or of unknown
quality without adequate disinfection before or after the system.
Systems certied for cyst reduction may be used on disinfected
waters that may contain lterable cysts.
*Class I particle size: >0.5 to <1 um
**Test requirement is at least 100,000 particles/mL of AC Fine Test Dust.
†
These contaminants are not necessarily in your water supply
Performance may vary based on local water conditions.
†
Fibers greater than 10 um in length
‡
Based on the use of Cryptosporidium parvum oocysts
®
NSF is a registered trademark of NSF International.
■ Refer to the “Water Filtration System” section for the Manufacturer’s
name and telephone number.
■ Refer to the “Warranty” section for the Manufacturer’s limited
warranty.
Application Guidelines/Water Supply Parameters
Water Supply
Water Pressure
Water Temperature
Service Flow Rate
Potable City or Well
35 - 120 psi (241 - 827 kPa)
33° - 100°F (1° - 38°C)
0.78 gpm (2.9 L/min.) @ 60 psi
System tested and certied by NSF International against NSF/ANSI
Standard 42, 53, 401 and CSA B483.1 for the reduction of
contaminants specied on the Performance Data Sheet.

21
System tested and certied by NSF International against NSF/ANSI
Standard 42, 53, 401 and CSA B483.1 for the reduction of
contaminants specied on the Performance Data Sheet.
Water Filtration System
Model UKF8001AXX-200/UKF8001 Capacity 200 Gallons (757 Liters)
This system has been tested according to NSF/ANSI Standards 42, 53, 401 and CSA B483.1 for the reduction of the substances
listed below. The concentration of the indicated substances in water entering the system was reduced to a concentraion less than or
equal to the permissible limit for water leaving the system, as specied in NSF/ANSI Standards 42, 53, 401 and CSA B483.1.
Substance Reduction
Aesthetic Effects
Inuent Challenge Concentration Maximum Permissable
Product Water Concentration
Average% Reduction
Chlorine Taste/Odor 2.0 mg/L ± 10% 50% reduction 97.6%
Particulate Class I* At least 10,000 particles/mL 85% reduction 98.8%
Contaminant Reduction Inuent Challenge Concentration Maximum Permissable
Product Water Concentration
Average% Reduction
Lead***: @ pH 6.5 / @ pH 8.5 0.150 mg/L ± 10% 0.010 mg/L 99.3% / 99.3%
Mercury: @ pH 6.5 / @ pH 8.5 0.006 mg/L ± 10% 0.002 mg/L 95.1% / 95.0%
Asbestos 107 to 108 bers/L†† >99% >99%
Cysts† 50,000/L min. >99.95% 99.99%
Turbidity 11 NTU ± 10% 0.5 NTU 98.1%
Atrazine 0.009 mg/L ± 10% 0.003 mg/L 94.4%
Benzene 0.015 mg/L ± 10% 0.005 mg/L 96.6%
Carbofuran 0.080 mg/L ± 10% 0.040 mg/L 86.8%
Lindane 0.002 mg/L ± 10% 0.0002 mg/L 98.8%
P-Dichlorobenzene 0.225 mg/L ± 10% 0.075 mg/L 99.7%
Tetrachloroethylene 0.015 mg/L ± 10% 0.005 mg/L 96.0%
Toxaphene 0.015 mg/L ± 10% 0.003 mg/L 93.8%
Atenolol 200 ± 20% 30 ng/L >95.9%
Endrin 0.006 mg/L± 10% 0.002 mg/L 96.7%
Ethylbenzene 2.1 mg/L ± 10% 0.7 mg/L 99.9%
o-Dichlorobenzene 1.8 mg/L± 10% 0.6 mg/L 99.9%
2,4 - D 0.210 mg/L ± 10% 0.07 mg/L 97%
Carbamazepine 1400 ± 20% 200 ng/L >98.6%
DEET 1400 ± 20% 200 ng/L >98.5%
Linuron 140 ± 20% 20 ng/L >96.8%
Meprobamate 400 ± 20% 60 ng/L 94.6%
Metolachor 1400 ± 20% 200 ng/L 98.3%
Trimethoprim 140 ± 20% 20 ng/L >96.4%
Bisphenol A 2000 ± 20% 300 ng/L 99.4%
Estrone 140 ± 20% 20 ng/L >96.7%
Nonylphenol 1400 ± 20% 200 ng/L >98.9%
Ibuprofen 400 ± 20% 60 ng/L 92.9%
Naproxen 140 ± 20% 20 ng/L >96.3%
Phenytoin 200 ± 20% 30 ng/L >94.8%
Test Parameters: pH = 7.5 ± 0.5 unless otherwise noted. Flow = 0.78 gpm (2.95 Lpm). Pressure = 60 psig (413.7 kPa).
Temp. = 68°F to 71.6°F (20°C to 22°C). Rated service capacity = 200 gallons (757 liters).
The compounds certied under NSF 401 have been deemed as “emerging compounds/incidental contaminants.” Emerging compounds/incidental
contaminants are those compounds that have been detected in drinking water supplies at trace levels. While occurring at only trace levels, these
compounds can affect the public acceptance/perception of drinking water quality.
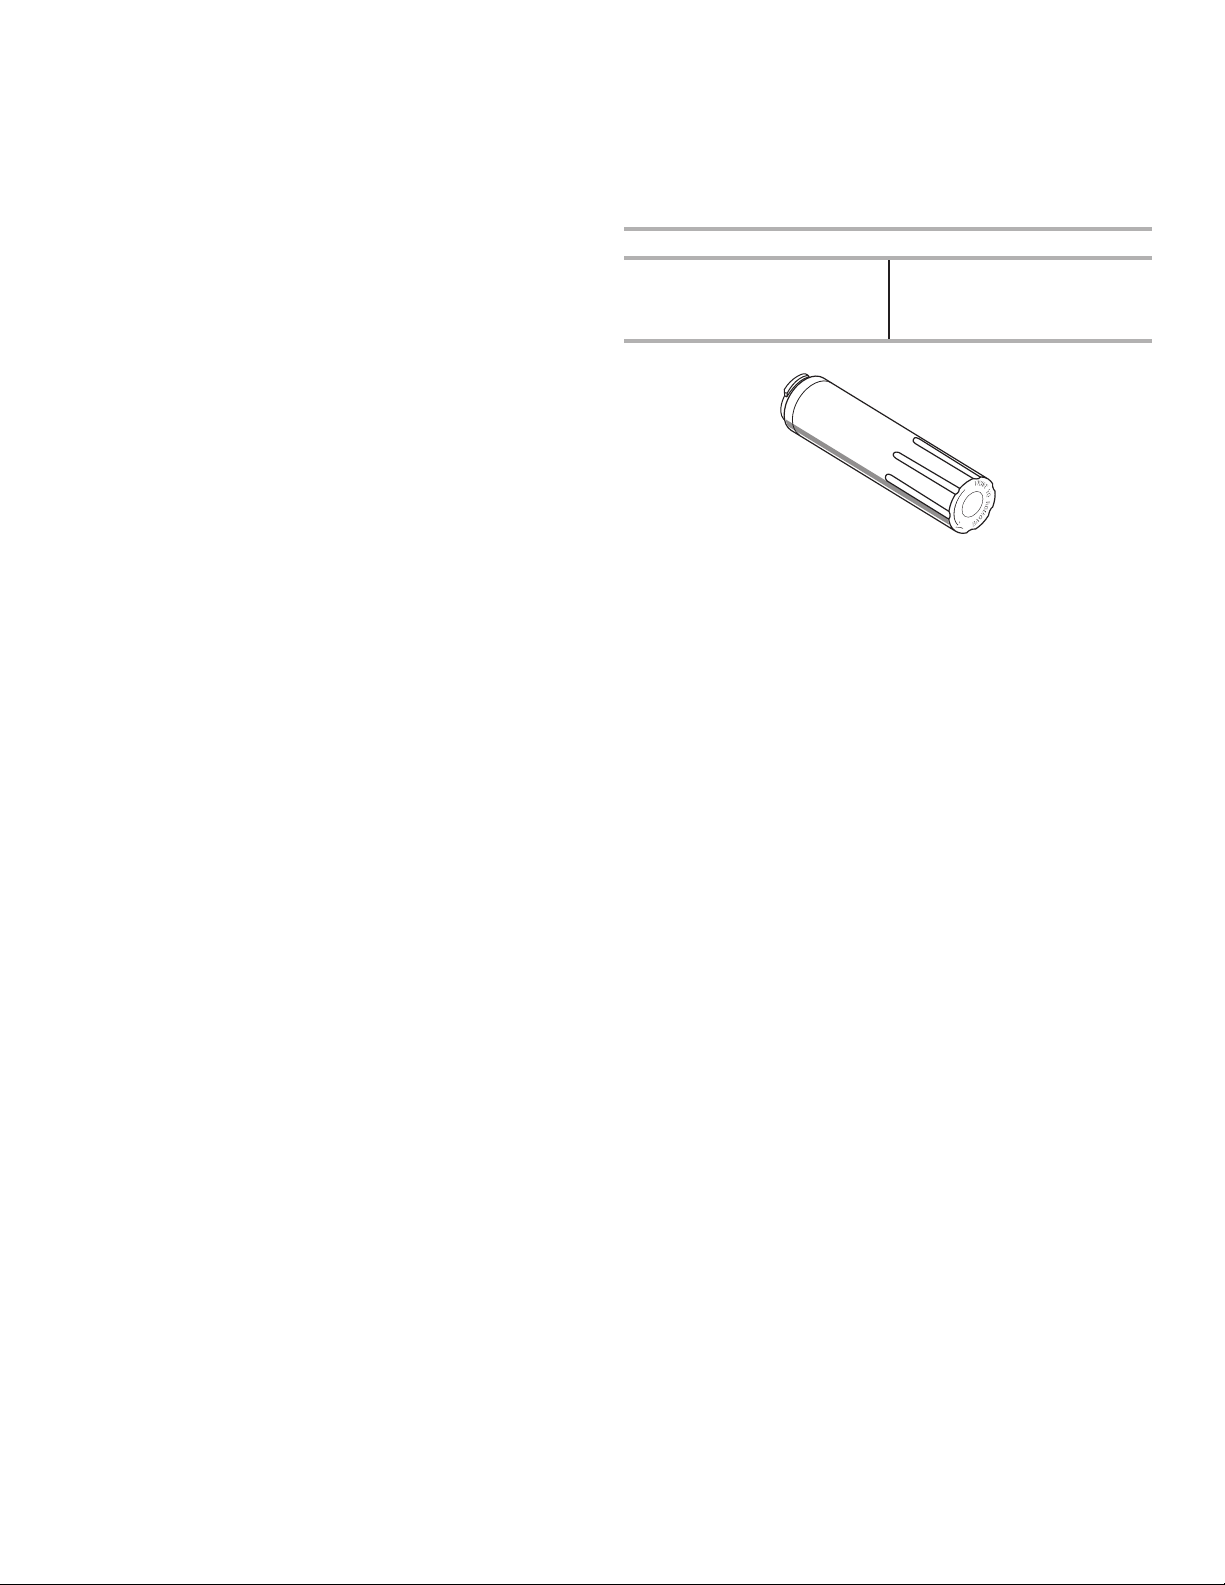
22
■ It is important that operational, maintenance, and lter replacement
requirements be carried out for the product to perform as advertised.
Property damage can occur if all instructions are not followed.
■ The disposable cartridge must be changed at least every 6 months.
■ Use replacement lter UKF8001, Part #EDR4RXD1/EDR4RXD1B.
2015 suggested retail price of $49.99 U.S.A./$49.95 Canada. Prices
are subject to change without notice.
■ The lter monitor system measures the amount of water that passes
through the lter and alerts you when it is time to replace the lter. To
learn how to check the water lter status, see “Using the Controls” or
“Water FiltrationSystem” in the User Instructions or User Guide.
■ After changing the water lter, ush the water system. See “Water
and Ice Dispensers” or “Water Dispenser” in the User Instructions or
User Guide.
■ These contaminants are not necessarily in your water supply. While
testing was performed under standard laboratory conditions, actual
performance may vary.
■ The product is for cold water use only.
■ The water system must be installed in compliance with state and
local laws and regulations.
* Class I particle size: >0.5 to <1 um
*** Compliant for Lead reduction requirements under NSF/ANSI Standard
53 as tested by Pace Analytical Services, Inc.
†Based on the use of Cryptosporidium parvum oocysts
†† Fibers greater than 10 um in length
®
NSF is a registered trademark of NSF International.
■ Do not use with water that is microbiologically unsafe or of unknown
quality without adequate disinfection before or after the system.
Systems certied for cyst reduction may be used on disinfected
waters that may contain lterable cysts. EPA Est. No. 10350-MN-005.
■ Refer to the “Warranty” section (in the User Instructions or User
Guide) for the Manufacturer’s limited warranty, name and telephone
number.
Application Guidelines/Water Supply Parameters
Water Supply
Water Pressure
Water Temperature
Service Flow Rate
Potable City or Well
35 - 120 psi (241 - 827 kPa)
33° - 100°F (1° - 38°C)
0.78 gpm (2.9 L/min.) @ 60 psi

23
02/17
IF YOU NEED SERVICE:
1. Before contacting us to arrange service, please determine whether your product requires repair. Some questions can be addressed without
service. Please take a few minutes to review the Troubleshooting section of the Use and Care Guide or visit producthelp.whirlpool.com.
2. All warranty service is provided exclusively by our authorized Whirlpool Service Providers. IntheU.S.and Canada, direct all requests for
warranty service to:
Whirlpool Customer eXperience Center
In the U.S.A., call 1-800-253-1301. In Canada, call 1-800-807-6777.
If outside the 50 United States or Canada, contact your authorized Whirlpool dealer to determine whether another warranty applies.
WHIRLPOOL
®
REFRIGERATION LIMITED
WARRANTY
ATTACH YOUR RECEIPT HERE. PROOF OF PURCHASE IS
REQUIRED TO OBTAIN WARRANTY SERVICE.
Please have the following information available when you call the
Customer eXperience Center:
■ Name, address, and telephone number
■ Model number and serial number
■ A clear, detailed description of the problem
■ Proof of purchase, including dealer or retailer name and address
FIVE YEAR LIMITED WARRANTY
WHAT IS COVERED WHAT IS NOT COVERED
ONE YEAR LIMITED WARRANTY
For one year from the date of purchase, when this major
appliance is installed, operated, and maintained according
to instructions attached to or furnished with the product,
Whirlpool Corporation or Whirlpool Canada LP (hereafter
“Whirlpool”) will pay for factory specied replacement parts
and repair labor to correct defects in materials or workmanship
that existed when this major appliance was purchased or,
at its sole discretion, replace the product. In the event of
product replacement, your appliance will be warranted for the
remaining term of the original unit’s warranty period.
SECOND THROUGH FIFTH YEAR LIMITED WARRANTY ON
CAVITY LINER AND SEALED REFRIGERATION SYSTEM
In the second through fth years from the date of purchase,
when this major appliance is installed, operated, and
maintained according to the instructions attached to or
furnished with the product, Whirlpool brand will pay for factory
specied replacement parts and repair labor for the following
components to correct non-cosmetic defects in materials
and workmanship in this part that prevent function of the
refrigerator and that existed when this major appliance was
purchased:
■ Refrigerator/freezer cavity liner if the part cracks due
to defective materials or workmanship
■ Sealed Refrigeration system (includes compressor,
evaporator, condenser, dryer, and connecting tubing)
YOUR SOLE AND EXCLUSIVE REMEDY UNDER THIS
LIMITED WARRANTY SHALL BE PRODUCT REPAIR AS
PROVIDED HEREIN. Service must be provided by a Whirlpool
designated service company. This limited warranty is valid
only in the United States or Canada and applies only when
the major appliance is used in the country in which it was
purchased. This limited warranty is effective from the date of
original consumer purchase. Proof of original purchase date is
required to obtain service under this limited warranty.
1. Commercial, non-residential, or multiple-family use, or use inconsistent with
published user, operator, or installation instructions.
2. In-home instruction on how to use your product.
3. Service to correct improper product maintenance or installation, installation
not in accordance with electrical or plumbing codes, or correction of
household electrical or plumbing (e.g., house wiring, fuses, or water
inlet hoses).
4. Consumable parts (e.g., light bulbs, batteries, air or water lters, preservation
solutions, etc.).
5. Defects or damage caused by the use of non-genuine Whirlpool parts
or accessories.
6. Damage from accident, misuse, abuse, re, oods, acts of God, or use with
products not approved by Whirlpool.
7. Repairs to parts or systems to correct product damage or defects caused
by unauthorized service, alteration, or modication of the appliance.
8. Cosmetic damage, including scratches, dents, chips, and other damage to
the appliance nishes, unless such damage results from defects in materials
and workmanship and is reported to Whirlpool within 30 days.
9. Discoloration, rust, or oxidation of surfaces resulting from caustic or
corrosive environments including, but not limited to, high salt concentrations,
high moisture or humidity, or exposure to chemicals.
10. Food or medicine loss due to product failure.
11. Pickup or delivery. This product is intended for in-home repair.
12. Travel or transportation expenses for service in remote locations where
an authorized Whirlpool servicer is not available.
13. Removal or reinstallation of inaccessible appliances or built-in xtures
(e.g., trim, decorative panels, ooring, cabinetry, islands, countertops,
drywall, etc.) that interfere with servicing, removal, or replacement of
the product.
14. Service or parts for appliances with original model/serial numbers removed,
altered, or not easily determined.
The cost of repair or replacement under these excluded circumstances
shall be borne by thecustomer.
DISCLAIMER OF IMPLIED WARRANTIES
IMPLIED WARRANTIES, INCLUDING ANY IMPLIED WARRANTY OF MERCHANTABILITY OR IMPLIED WARRANTY OF FITNESS FOR A
PARTICULAR PURPOSE, ARE LIMITED TO FIVE YEARS OR THE SHORTEST PERIOD ALLOWED BY LAW. Some states and provinces do
not allow limitations on the duration of implied warranties of merchantability or tness, so this limitation may not apply to you. This warranty
gives you specic legal rights, and you also may have other rights that vary from state to state or province to province.
DISCLAIMER OF REPRESENTATIONS OUTSIDE OF WARRANTY
Whirlpool makes no representations about the quality, durability, or need for service or repair of this major appliance other than the
representations contained in this warranty. If you want a longer or more comprehensive warranty than the limited warranty that comes with this
major appliance, you should ask Whirlpool or your retailer about buying an extended warranty.
LIMITATION OF REMEDIES: EXCLUSION OF INCIDENTAL AND CONSEQUENTIAL DAMAGES
YOUR SOLE AND EXCLUSIVE REMEDY UNDER THIS LIMITED WARRANTY SHALL BE PRODUCT REPAIR AS PROVIDED HEREIN.
WHIRLPOOL SHALL NOT BE LIABLE FOR INCIDENTAL OR CONSEQUENTIAL DAMAGES. Some states and provinces do not allow the
exclusion or limitation of incidental or consequential damages, so these limitations and exclusions may not apply to you. This warranty gives
you specic legal rights, and you also may have other rights that vary from state to state or province to province.
24
Risque possible de décès ou de blessure grave si vous ne
suivez pas immédiatement les instructions.
Risque possible de décès ou de blessure grave si vous
ne suivez pas les instructions.
Tous les messages de sécurité vous diront quel est le danger potentiel et vous disent comment réduire le risque de blessure et
ce qui peut se produire en cas de non-respect des instructions.
Votre sécurité et celle des autres est très importante.
Nous donnons de nombreux messages de sécurité importants dans ce manuel et sur votre appareil ménager. Assurez-vous de
toujours lire tous les messages de sécurité et de vous y conformer.
AVERTISSEMENT
DANGER
Voici le symbole d’alerte de sécurité.
Ce symbole d’alerte de sécurité vous signale les dangers potentiels de décès et de blessures graves à vous
et à d’autres.
Tous les messages de sécurité suivront le symbole d’alerte de sécurité et le mot “DANGER” ou
“AVERTISSEMENT”. Ces mots signifient :
Nous vous REMERCIONS d’avoir acheté ce produit de haute qualité. Enregistrer votre nouveau réfrigérateur au www.whirlpool.com.
Au Canada, enregistrer votre réfrigérateur au www.whirlpool.ca.
Pour référence ultérieure, consignez par écrit les numéros de modèle et de série de votre produit. Ceux-ci se trouvent sur la paroi
interne du compartiment de réfrigération.
Numéro de modèle ___________________________ Numéro de série_____________________________
REFRIGERATOR USER INSTRUCTIONS
Para obtener acceso a “Instrucciones para el usuario del refrigerador” en español, o para obtener información adicional acerca de
su producto, visite: www.whirlpool.com.
Necesitará su número de modelo y de serie, ubicado en el interior del compartimiento del refrigerador.
INSTRUCTIONS D’UTILISATION
DURÉFRIGÉRATEUR
SÉCURITÉ DU RÉFRIGÉRATEUR
25
Avertissements de la proposition 65 de l'État de Californie :
AVERTISSEMENT : Ce produit contient au moins un produit chimique connu par l’État de Californie pour être à l’origine de
cancers.
AVERTISSEMENT : Ce produit contient au moins un produit chimique connu par l’État de Californie pour être à l’origine de
malformations et autres déficiences de naissance.
AVERTISSEMENT :
Pour réduire le risque d’incendie, de choc électrique ou de blessure dans le cadre de l’utilisation du
réfrigérateur, suivre les consignes de base suivantes :
IMPORTANTES INSTRUCTIONS DE SÉCURITÉ
CONSERVEZ CES INSTRUCTIONS
■
Brancher sur une prise de terre (reliée à la masse).
■
Ne pas retirer la broche de terre.
■
Ne pas utiliser d’adaptateur.
■
Ne pas utiliser de rallonge.
■ Débrancher la source de courant électrique avant l'entretien.
■ Replacer pièces et panneaux avant de faire la remise en marche.
■ Enlever les portes de votre vieux réfrigérateur.
■ Utiliser un produit de nettoyage ininflammable.
■
Ne pas utiliser ou conserver d’essence ni de liquides ou gaz
inflammables à proximité de cet ou d’autres appareils électriques. Les
fumées peuvent causer des incendies ou des explosions.
■
Ne pas conserver de substances explosives, par exemple des bombes
aérosols contenant un agent propulseur, dans ce réfrigérateur.
■
Ne pas utiliser ni placer dans les compartiments du réfrigérateur des
dispositifs électriques d’un type autre que celui expressément autorisé
par le fabricant.
■ Utiliser deux ou plus de personnes pour déplacer et installer le
réfrigérateur.
■ Débrancher le réfrigérateur avant l'installation de la machine à
glaçons (seulement pour modèles prêts à recevoir une machine
à glaçons).
■
Un technicien qualifié doit installer le tuyau d’eau et le
distributeur de glaçons.
Consulter les instructions
d’installation fournies avec la trousse de machine à
glaçons IC13B pour tous les détails.
■
Raccorder uniquement à une arrivée d’eau potable.
■ Utiliser un verre robuste pour prendre des glaçons (sur
certains modèles).
■ Cet appareil ne convient pas à une utilisation par des
personnes (y compris des enfants) à capacités physiques,
sensorielles ou mentales réduites, ou possédant un
manque d'expérience et de connaissances, à moins
qu'elles ne soient placées sous supervision ou qu'elles
aient reçu des instructions concernant l’utilisation de
l'appareil par une personne responsable de leur sécurité.
■ Les enfants doivent être placés sous surveillance afin de
s'assurer qu'ils ne jouent pas avec l'appareil.
■
Pour éviter le risque que des enfants restent enfermés à
l’intérieur et s’asphyxient, ne pas les laisser jouer ou se cacher
dans le réfrigérateur.
■
Si le cordon d’alimentation est endommagé, il doit être remplacé
par le fabricant ou son technicien d’entretien ou une personne
présentant une qualification similaire.
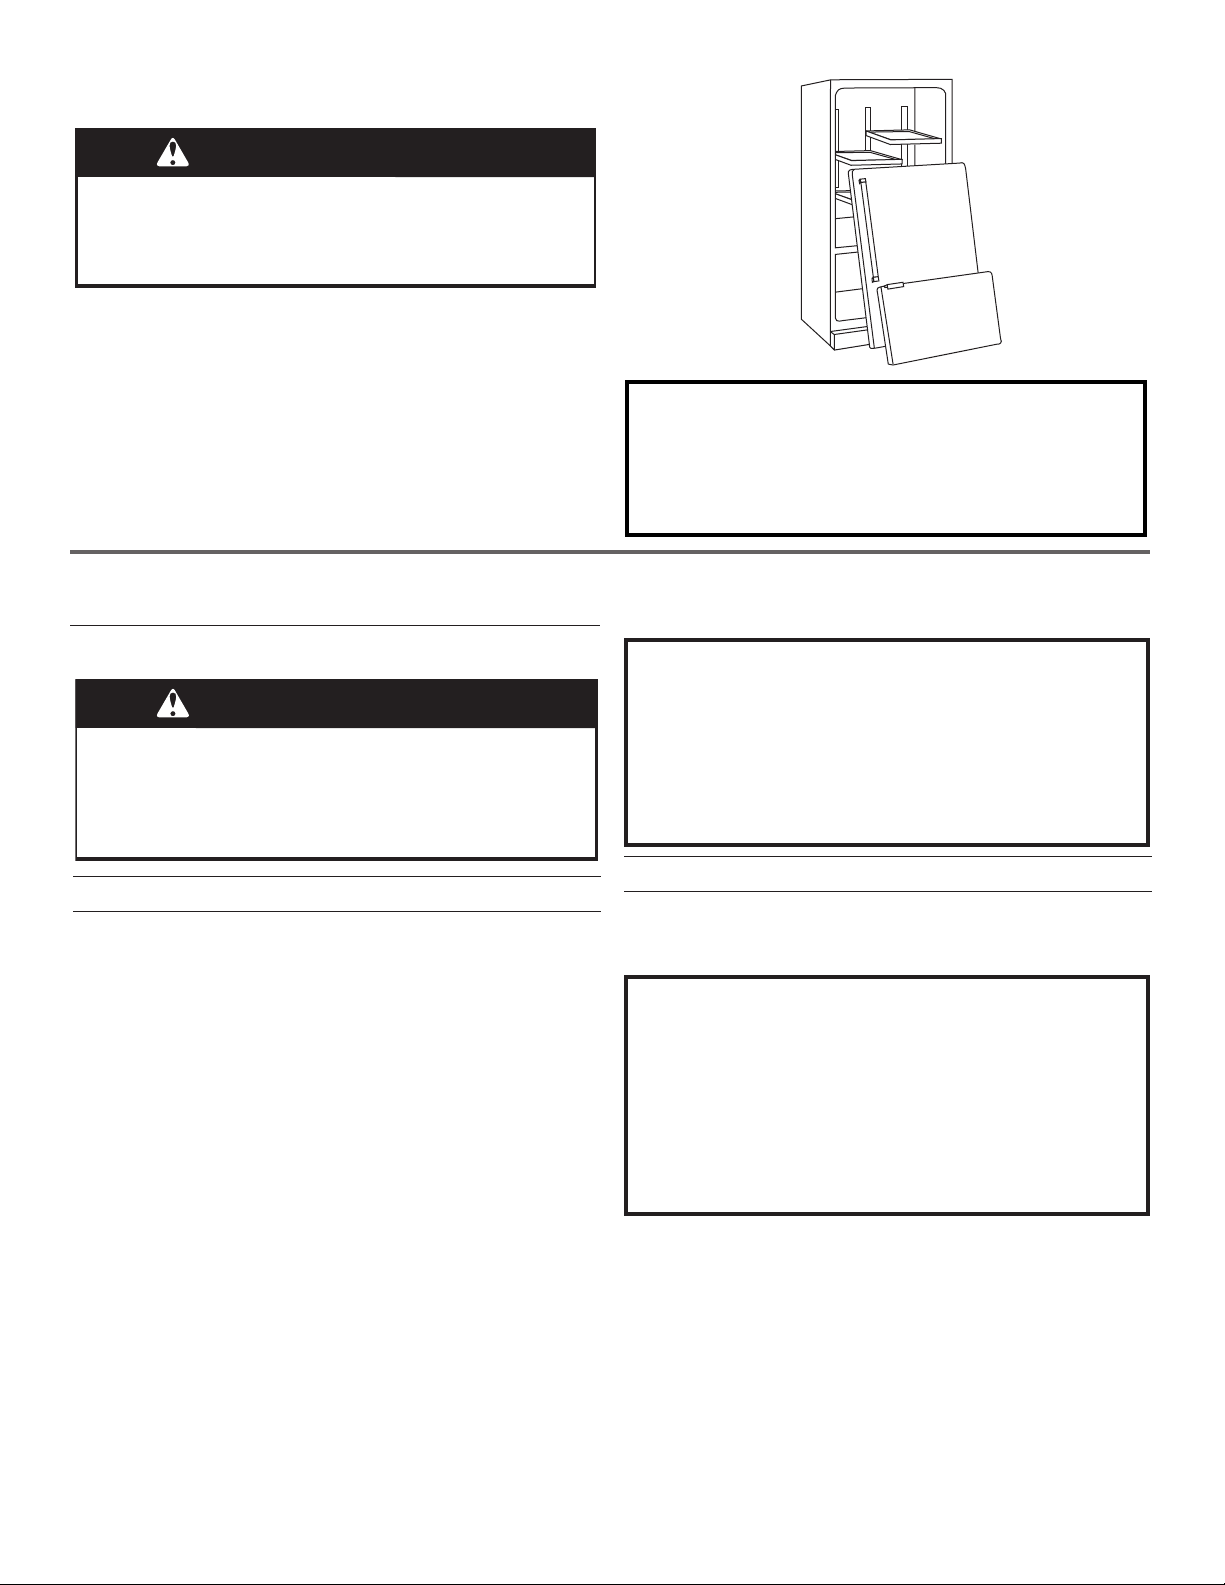
26
Mise au rebut de votre vieux réfrigérateur
AVERTISSEMENT
Risque d’asphyxie
Retirer les portes de votre vieux réfrigérateur.
Le non-respect de cette instruction peut entraîner la
mort ou une lésion cérébrale.
IMPORTANT: Le risque qu’un enfant puisse se retrouver coincé
et suffoquer n’est pas chose du passé. Les réfrigérateurs jetés
ou abandonnés restent dangereux, même s’ils ne restent à
l’extérieur que pour “quelques jours seulement”. Si vous vous
débarrassez de votre ancien réfrigérateur, veuillez suivre les
instructions suivantes an d’éviter les accidents.
Avant de jeter votre vieux réfrigérateur ou congélateur :
■ Enlever les portes.
■ Laisser les tablettes en place de sorte que les enfants ne
puissent pas y pénétrer facilement.
INSTRUCTIONS D’INSTALLATION
Déballage du réfrigérateur
Retrait des matériaux d’emballage
■ Enlever tout résidu de ruban adhésif et de colle des surfaces
du réfrigérateur avant de le mettre en marche. À l’aide de
votre doigt, frotter une petite quantité de savon liquide à
vaisselle sur l’adhésif. Rincer à l’eau tiède et sécher.
■ Ne pas utiliser d’instruments coupants, d’alcool à friction,
de liquides inammables ou de nettoyants abrasifs pour
enlever le ruban adhésif ou la colle. Ces produits peuvent
endommager la surface du réfrigérateur. Pour plus de
renseignements, voir la section “Sécurité du réfrigérateur”.
■ Éliminer/recycler tous les matériaux d’emballage.
Lors du déplacement de votre réfrigérateur :
Votre réfrigérateur est lourd. Lors du déplacement de votre
réfrigérateur pour un nettoyage, un entretien ou une réparation,
veiller à recouvrir le plancher avec du carton ou un panneau
de bre dur pour éviter qu’il ne subisse tout dommage.
Toujourstirer le réfrigérateur tout droit lors du déplacement.
Nepas incliner le réfrigérateur d’un côté ou de l’autre ni le
“fairemarcher” en essayant de le déplacer, car le sol pourrait
être endommagé.
Informations importantes à propos des tablettes et des
couvercles en verre :
Ne pas nettoyer les tablettes ou les couvercles de verre
avec de l’eau tiède lorsqu’ils sont froids. Les tablettes
et couvercles peuvent se briser s’ils sont exposés à un
changement de températures ou impact soudain, tel qu’une
chute. Le verre trempé est conçu pour se briser en de
multiples petits morceauxde la taille de gravillons. Ceci est
normal. Lestablettes en verre et les couvercles sont lourds.
Employerles deux mains lorsqu’on les retire an d’éviter de
lesfaire tomber.
Nettoyage avant utilisation
Après avoir enlevé tous les matériaux d’emballage, nettoyer
l’intérieur du réfrigérateur avant de l’utiliser. Voir les instructions
de nettoyage dans “Entretien du réfrigérateur”.
Renseignements importants à propos de la mise au
rebut des fluides réfrigérants :
Mettre le réfrigérateur au rebut conformément à la
réglementation fédérale et locale. Les fluides réfrigérants
doivent être évacués par un technicien certifié et agréé par
l’EPA conformément aux procédures établies.
AVERTISSEMENT
Risque de poids excessif
Utiliser au moins deux personnes pour déplacer et
installer le réfrigérateur.
Le non-respect de cette instruction peut entraîner une
blessure au dos ou d’autres blessures.
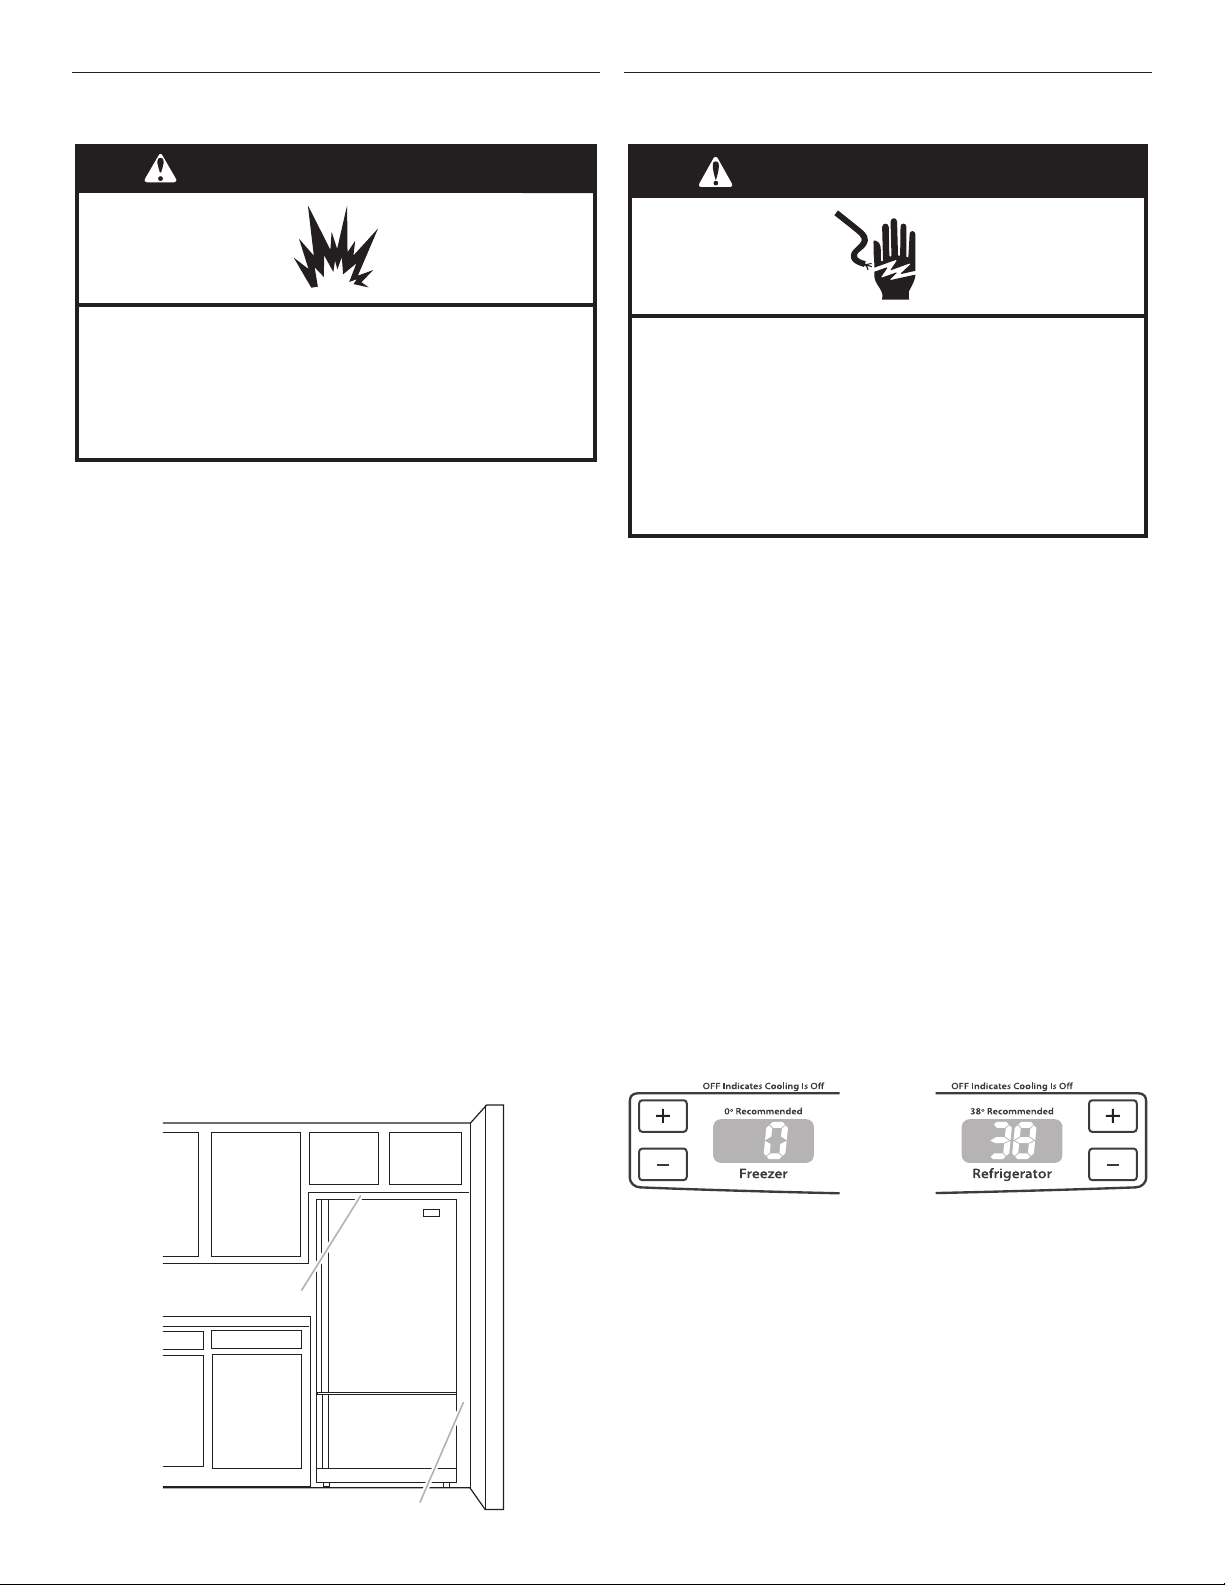
27
Exigences d’emplacement
IMPORTANT: Ce réfrigérateur est conçu pour un usage
domestique, à l’intérieur uniquement.
Cet appareil est destiné à un usage domestique et à d’autres
usages similaires tels que:
■ Espace de cuisine pour personnel de boutiques, bureaux et
autres environnements professionnels.
■ Résidences fermières et utilisation par les clients d’hôtels,
demotels et d’autres types de résidences.
■ Environnements de type chambres d’hôtes.
■ Banquets et autres utilisations non commerciales semblables.
Pour obtenir une aération appropriée pour votre réfrigérateur,
laisser un espace de 1/2 po (1,25cm) de chaque côté et
au sommet. Laisser un espace de 1po (2,54cm) derrière
le réfrigérateur. Si le réfrigérateur comporte une machine
à glaçons, s’assurer qu’un espace additionnel est prévu à
l’arrière pour permettre les raccordements des conduits d’eau.
Encas d’installation du réfrigérateur près d’un mur xe, laisser
un minimum de 2 1/2 po (6,3cm) du côté de la charnière
(certainsmodèles nécessitent davantage d’espace) pour
permettre à la porte de s’ouvrir sans obstruction.
REMARQUE: Ce réfrigérateur est conçu pour être utilisé dans
un endroit où la température est comprise entre un minimum
de 55°F (13°C) et un maximum de 110°F (43°C). La plage de
température ambiante idéale pour un rendement optimal est
comprise entre 60°F (15°C) et 90°F (32°C). Respecter cette
plage de température permet aussi de réduire la consommation
d’électricité et d’optimiser l’efcacité du refroidissement. Il est
recommandé de ne pas installer le réfrigérateur près d’une source
de chaleur comme un four ou un radiateur.
2¹⁄₂" (6,3 cm)
¹⁄₂" (1,25 cm)
Spécications électriques
Avant de déplacer le réfrigérateur à son emplacement nal, ilest
important de s’assurer qu’une prise électrique adéquate est
accessible.
Si le cordon d’alimentation est endommagé, il doit être remplacé
par le fabricant, son agent de service ou toute autre personne
qualiée. Ne pas utiliser un cordon craquelé ou qui présente des
dommages d’abrasion sur la gaine, la che ou le connecteur.
Méthode recommandée de liaison à la terre
Chaque appareil doit être alimenté par un circuit à 115V CA à
60Hz relié à la terre et protégé par un fusible de 15A ou 20A.
Il est recommandé d’utiliser un circuit distinct pour alimenter
le réfrigérateur uniquement. Utiliser une prise de courant dont
l’alimentation ne peut pas être interrompue par un interrupteur.
Ne pas utiliser de rallonge.
REMARQUE: Avant de procéder à tout type d’installation, de
nettoyage ou de changement d’ampoule, mettre le réfrigérateur
àl’arrêt. Selon votre modèle, placer la commande du congélateur
à OFF ou appuyer sur sur le symbole moins jusqu’à ce qu’un tiret
(–) apparaisse sur l’afchage du réfrigérateur et du congélateur
– voir l’illustration. Déconnecter le réfrigérateur de la source de
courant électrique. Une fois l’opération terminée, reconnecter
le réfrigérateur à la source de courant électrique et remettre la
commande de température au réglage désiré. Voir la section
“Utilisation des commandes”.
Risque d'explosion
Garder les matériaux et les vapeurs inflammables, telle
que l'essence, loin du réfrigérateur.
Le non-respect de cette instruction peut causer
un décès, une explosion ou un incendie.
AVERTISSEMENT
AVERTISSEMENT
Risque de choc électrique
Brancher sur une prise à 3 alvéoles reliée à la terre.
Ne pas enlever la broche de liaison à la terre.
Ne pas utiliser un adaptateur.
Ne pas utiliser un câble de rallonge.
Le non-respect de ces instructions peut causer
un décès, un incendie ou un choc électrique.
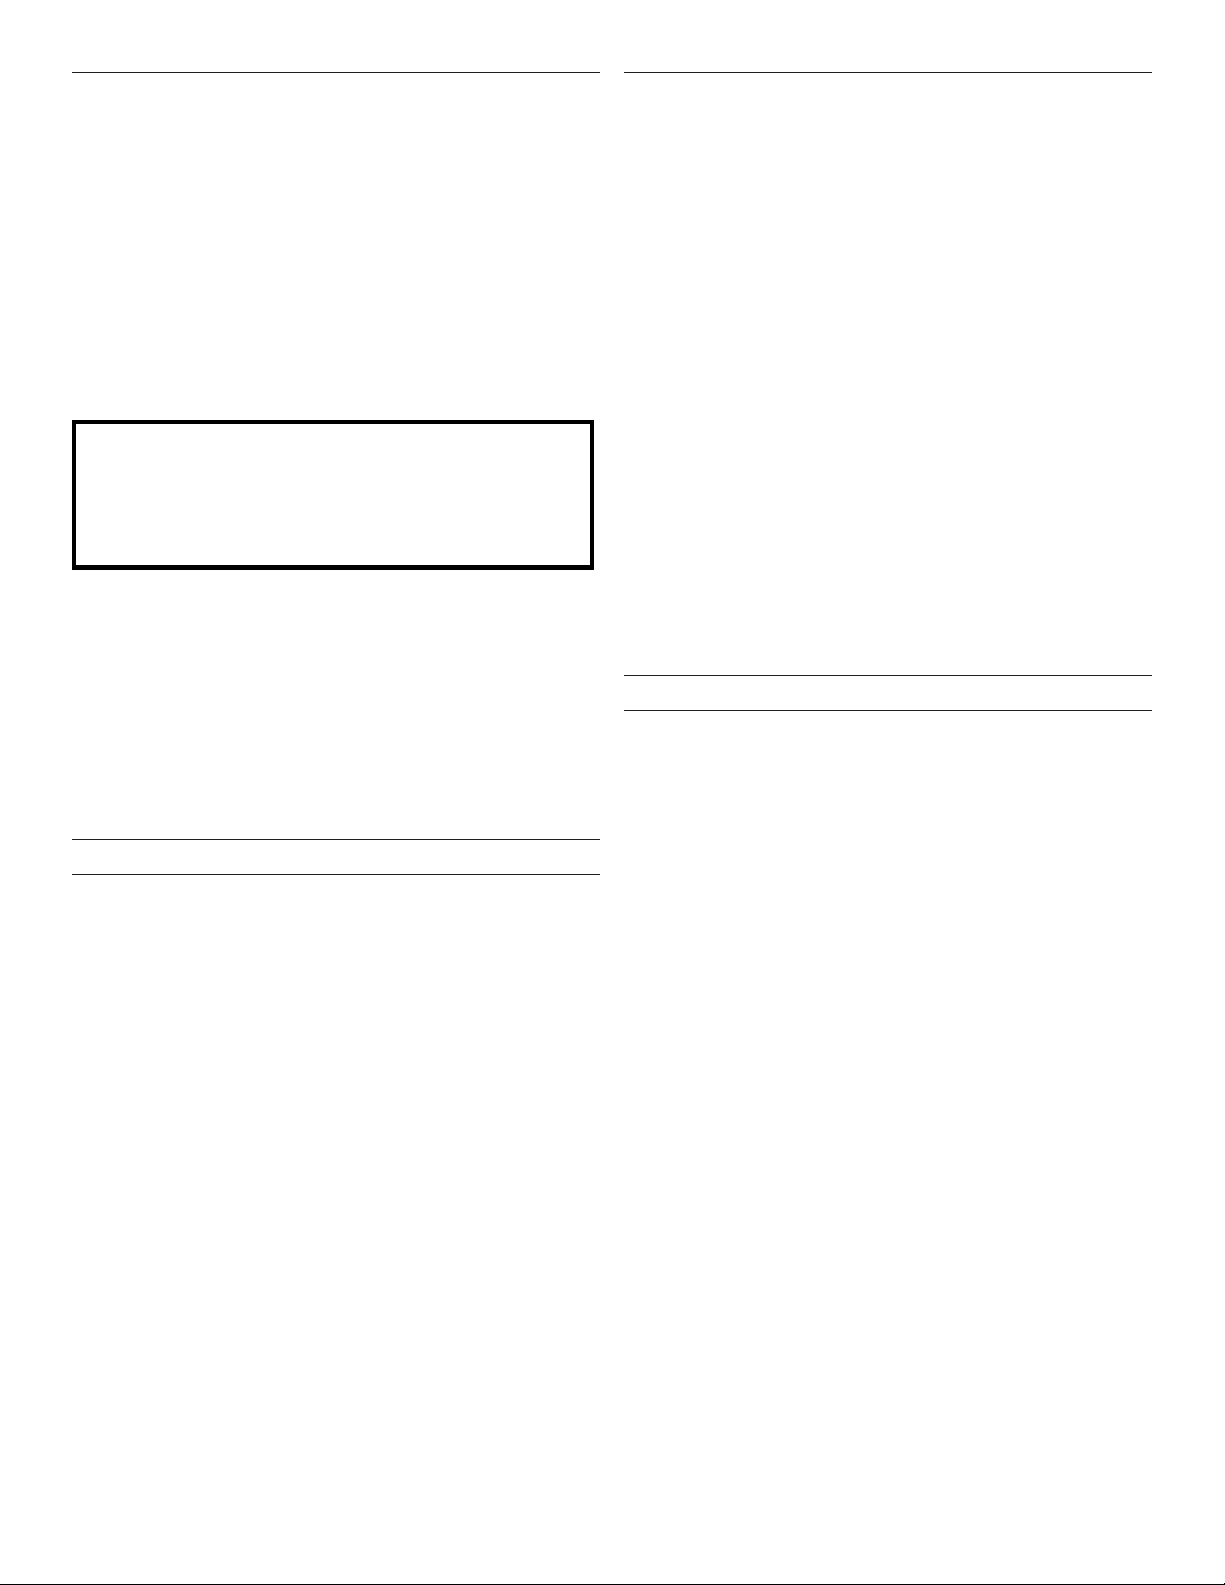
28
Spécications de l’alimentation en eau
Rassembler les outils et pièces nécessaires avant d’entreprendre
l’installation. Lire et observer les instructions fournies avec
chacun des outils de la liste ci-dessous.
OUTILS REQUIS:
■ Tournevis à lame plate ■ Tourne-écrou de ¹⁄4po
■ Clés plates de
7
⁄16po et ½po
ou deux clés à molette
■ Foret de ¹⁄4po
■ Perceuse sans l
IMPORTANT:
■ Raccorder à la canalisation d’arrivée d’eau potable
uniquement.
■ Toutes les installations doivent être conformes aux exigences
des codes locaux de plomberie.
■ Ne pas employer de robinet d’arrêt à étrier de ³⁄16po (4,76mm)
ou de type à percer – ils réduisent le débit d’eau ets’obstruent
plus facilement.
■ Utiliser un tube en cuivre et vérier qu’il n’y a pas de
fuites. Installer seulement des tuyaux en cuivre là où les
températures resteront au-dessus du point de congélation.
■ Pour les modèles avec ltre à eau, le ltre à eau jetable doit
être remplacé au moins tous les 6 mois.
Pression d’eau
Une alimentation en eau froide avec une pression entre 35 et
120lb/po² (241 à 827kPa) est nécessaire pour faire fonctionner
le distributeur d’eau et la machine à glaçons. Si vous avez des
questions au sujet de la pression de votre eau, faire appel à un
plombier qualié agréé.
Alimentation en eau par osmose inverse
IMPORTANT: La pression de l’alimentation en eau entre
le système d’osmose inverse et la valve d’arrivée d’eau du
réfrigérateur doit être entre 30 et 120lb/po² (207-827kPa).
Si un système de ltration de l’eau par osmose inverse est
raccordé à votre alimentation en eau froide, la pression de l’eau au
système doit être d’un minimum de 40 à 60lb/po² (276 à 414kPa).
Si la pression d’eau au système de ltration par osmose inverse
est inférieure à 40 - 60lb/po² (276 - 414kPa):
■ Vérier que le ltre à sédiment dans le système à osmose
inverse n’est pas obstrué. Remplacer le ltre si nécessaire.
■ Laisser le réservoir du système d’osmose inverse se remplir
après une utilisation intense.
■ Si votre réfrigérateur comporte un ltre à eau, celui-ci peut
réduire la pression de l’eau lorsqu’il est utilisé avec un
système d’osmose inverse. Enlever le ltre à eau. Voir la
section “Système de ltration de l’eau”.
Si vous avez des questions au sujet de la pression de votre eau,
faire appel à un plombier qualié agréé.
Raccordement à la canalisation d’eau
Lire toutes les instructions avant de commencer.
IMPORTANT:
■ Réaliser l’installation de plomberie conformément aux
prescriptions du International Plumbing Code et des normes
et codes locaux en vigueur.
■ Le tuyau d’eau gris situé à l’arrière du réfrigérateur (et utilisé
pour raccorder l’appareil à la canalisation d’eau du domicile)
est un tuyau en polyéthylène réticulé. Il est possible d’utiliser
des raccords en cuivre ou en polyéthylène réticulé pour
le raccordement de la canalisation d’eau du domicile au
réfrigérateur – ils contribuent à éviter que l’eau ait un goût
ouune odeur désagréable. Vérier qu’il n’y a pas de fuites.
Si l’on utilise un tuyau en polyéthylène réticulé au lieu d’un
tuyau de cuivre, nous recommandons les numéros de pièce
suivants:
W10505928RP (PEX chemisé de 7pi [2,14m]),
8212547RP (PEX de 5pi [1,52m]) ou
W10267701RP (PEX de 25pi [7,62m]).
■ Installer des tuyaux seulement là où les températures
resteront au-dessus du point de congélation.
■ Si l’on met en marche le réfrigérateur avant que la
canalisation d’eau ne soit raccordée, éteindre la machine
à glaçons pour éviter tout bruit excessif ou éviter
d’endommager le robinet d’eau.
Raccordement à la canalisation d’eau
1. Débrancher le réfrigérateur ou déconnecter la source de
courant électrique.
2. FERMER le robinet principal d’alimentation en eau.
OUVRIRle robinet le plus proche pendant une période
sufsante pour purger toute l’eau de la canalisation.
3. Identier une canalisation d’eau froide verticale de ¹⁄2po à
1¹⁄4po (12,7cm à 31,8cm) à proximité du réfrigérateur.
IMPORTANT:
■ Vérier qu’il s’agit d’une canalisation d’eau froide.
■ Un conduit horizontal fonctionnera, mais on doit
observer le procédé suivant: Percer par le dessus de
la canalisation et non pas par le dessous. Ainsi, l’eau
ne risquera pas d’arroser la perceuse. Ceci empêche
également les sédiments qu’on trouve normalement dans
l’eau de s’accumuler dans le robinet d’arrêt.
4. Déterminer la longueur de tube de cuivre à utiliser.
Mesurerdepuis le point de connexion (angle inférieur arrière
droit du réfrigérateur) et la canalisation d’eau. Ajouter7pi
(2,1m) pour permettre les opérations de nettoyage.
Utiliserunconduit de cuivre exible de ¹⁄4po (6,35mm)
de diamètre extérieur. Veiller à ce que le tube soit coupé
d’équerre aux deux extrémités.
5. À l’aide d’une perceuse à piles, percer un trou de ¹⁄4po
(6,35mm) dans la canalisation d’eau froide sélectionnée.
Ne pas utiliser pour le filtrage d'une eau
microbiologiquement polluée ou de qualité inconnue en
l'absence d'un dispositif de désinfection adéquat avant ou
après le système. Les systèmes certifiés pour la réduction
de kyste peuvent être utilisés pour l'eau désinfectée qui
peut contenir des kystes filtrables.
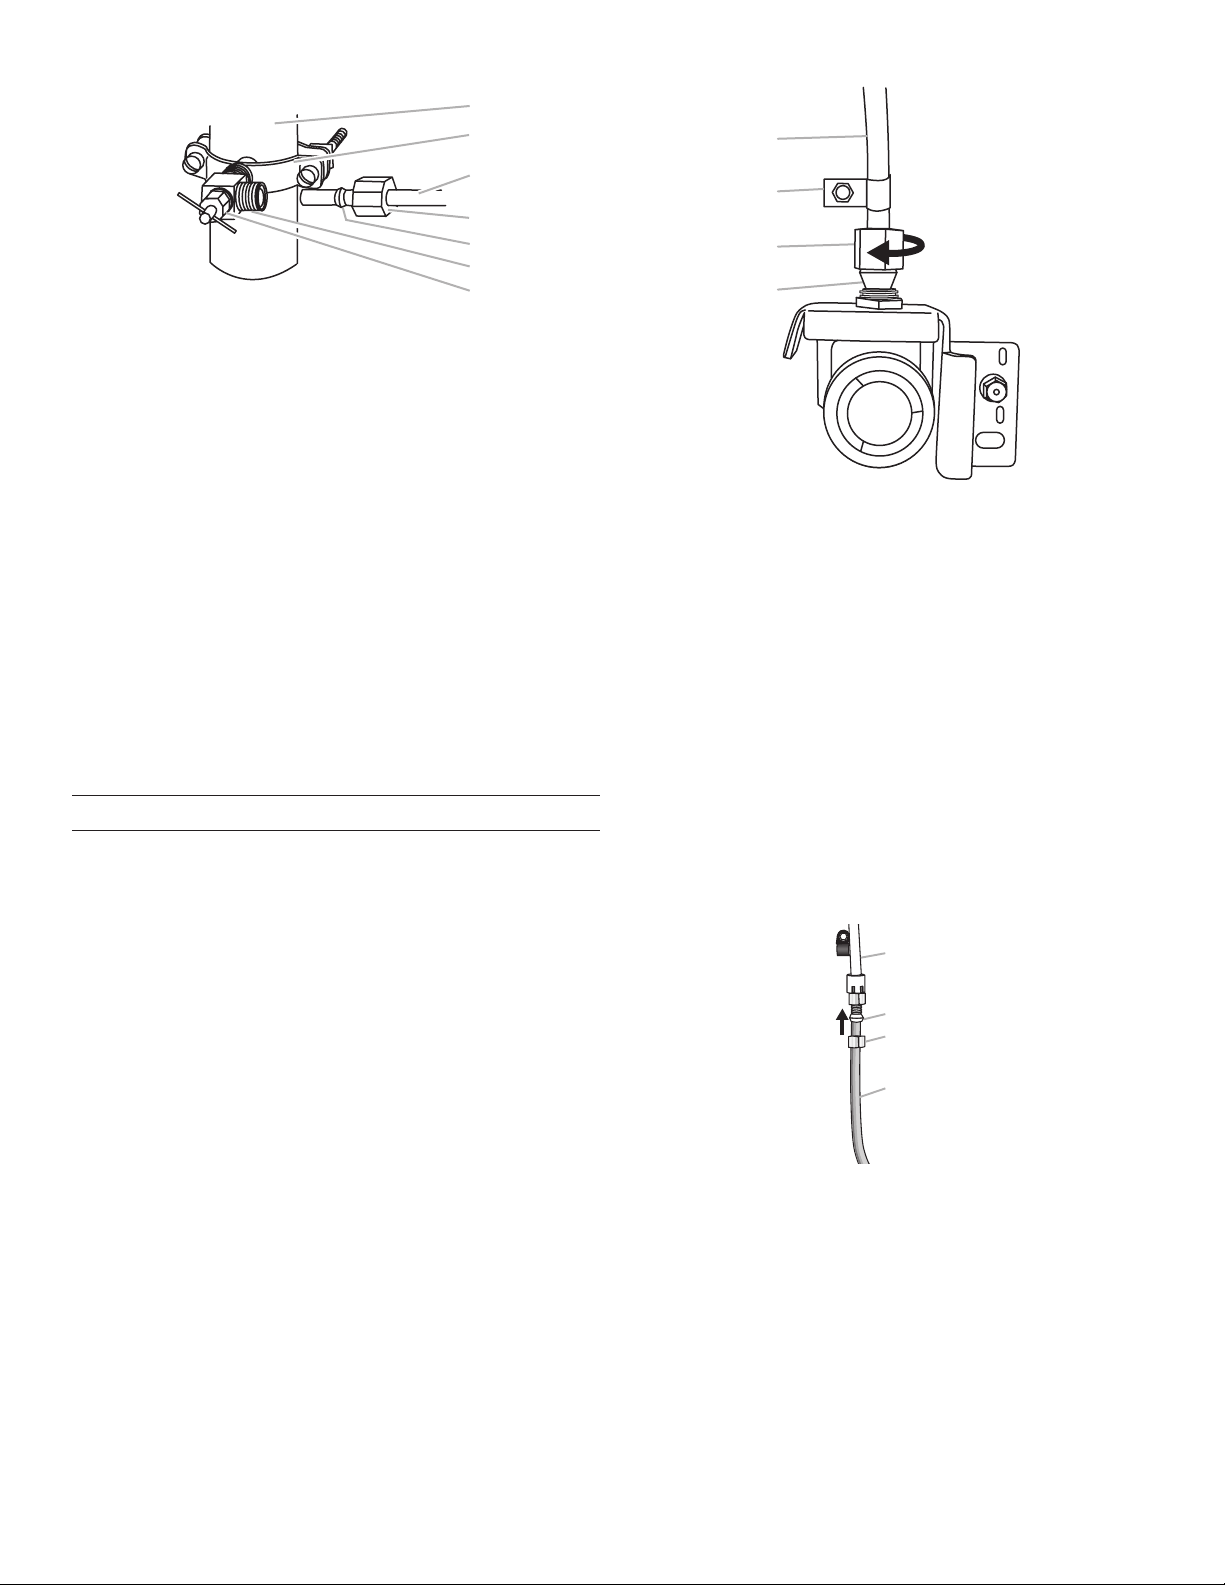
29
F
G
A
B
C
D
E
6. Fixer le robinet d’arrêt sur la canalisation d’eau froide avec
la bride de tuyau. Vérier que le raccord du robinet est bien
engagé dans le trou de ¹⁄4po percé dans la canalisation
d’eau et que la rondelle d’étanchéité se trouve sous la bride
du tuyau. Serrer l’écrou de serrage. Serrer lentement et
uniformément les vis xant la bride de tuyau sur le tuyau an
d’assurer l’étanchéité du joint. Ne pas serrer excessivement.
7. Enler la bague et l’écrou de compression sur le tube en cuivre
comme illustré. Insérer l’extrémité du tube directement dans
l’extrémité de sortie, aussi loin que possible. Visserl’écrou de
compression sur l’extrémité de sortie du raccord à l’aide d’une
clé à molette. Ne pas serrer excessivement, car ceci pourrait
provoquer l’écrasement du tube en cuivre.
8. Placer le bout libre du tube dans un contenant ou évier
et OUVRIR le robinet principal d’alimentation en eau.
Laisserl’eau s’écouler par le tube jusqu’à ce qu’elle soit
limpide. Fermer le robinet d’arrêt de la canalisation d’eau.
Raccordement au réfrigérateur
Selon votre modèle, la canalisation d’eau peut être orientée
de bas en haut ou de haut en bas. Suivre les instructions de
raccordement de votre modèle.
Style1
1. Ôter le bouchon de plastique de l’orice d’entrée d’eau.
Raccorder le tube de cuivre au robinet d’arrivée d’eau à l’aide
d’un écrou et d’une bague de compression, comme illustré.
Serrer l’écrou de compression. Ne pas serrer excessivement.
Vérier la solidité du raccordement en tirant sur le tube en
cuivre.
2. Créer une boucle de service avec le tube en cuivre. Éviterde
déformer le tube de cuivre en l’enroulant. Fixer le tube en
cuivre à la caisse du réfrigérateur à l’aide d’une bride “P”.
B
A
C
D
3. Ouvrir l’arrivée d’eau alimentant le réfrigérateur et vérier
l’absence de fuites. Éliminer toute fuite détectée.
Style 2
1. Créer une boucle de service (diamètre minimum de 2pi
[61cm]) avec le tube en cuivre. Éviter de déformer le tube
decuivre en l’enroulant.
2. Ôter le capuchon de plastique de l’orice d’entrée d’eau.
Placer un écrou et un manchon à compression sur le tube
decuivre.
3. Insérer l’extrémité du tube de cuivre dans l’orice d’entrée
d’eau. Mettre doucement en forme le tube de façon à ce
qu’il pénètre directement dans l’orice an d’éviter les
déformations.
4. Faire glisser l’écrou de compression sur le manchon et
levisser sur l’orice d’entrée d’eau.
B
A
C
D
5. À l’aide d’une clé à molette, immobiliser l’écrou sur la
canalisation d’eau en plastique pour l’empêcher de se
déplacer. Puis, à l’aide d’une deuxième clé, tourner l’écrou
de compression sur le tube en cuivre dans le sens antihoraire
pour serrer complètement. Ne pas serrer excessivement.
A. Canalisation d’eau froide
B. Bride de tuyau
C. Tube en cuivre
D. Écrou de compression
E. Bague de compression
F. Robinet d’arrêt
G. Écrou de serrage
A. Tube en cuivre
B. Bride en “P”
C. Écrou à compression
D. Bague de compression
A. Canalisation d’eau
enplastique
B. Manchon
C. Écrou à compression
D. Tube en cuivre
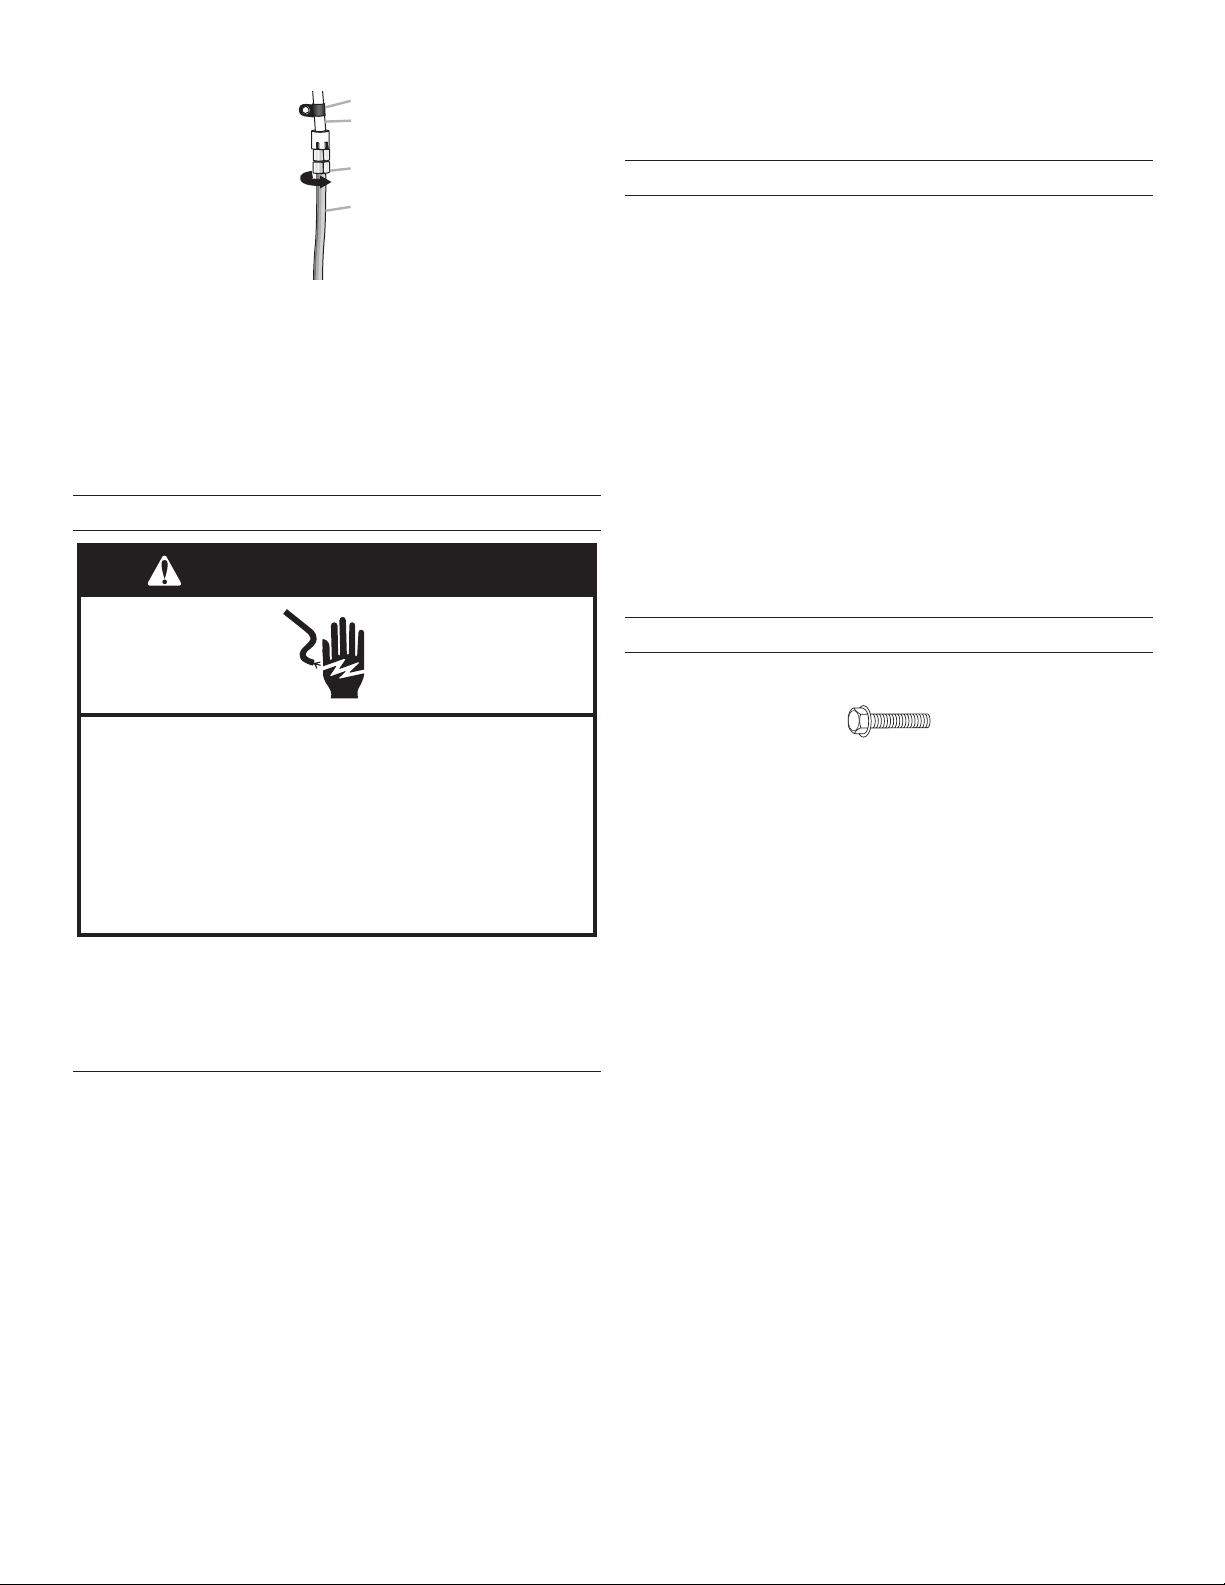
30
B
C
D
A
6. Vérier le raccordement en tirant sur le tube en cuivre. Fixer la
canalisation d’eau en plastique à la caisse du réfrigérateur à
l’aide d:une bride en “P”.
7. Ouvrir l’arrivée d’eau alimentant le réfrigérateur et vérier
l’absence de fuites. Éliminer toute fuite détectée.
Achever l’installation
AVERTISSEMENT
Risque de choc électrique
Brancher sur une prise à 3 alvéoles reliée à la terre.
Ne pas enlever la broche de liaison à la terre.
Ne pas utiliser un adaptateur.
Ne pas utiliser un câble de rallonge.
Le non-respect de ces instructions peut causer
un décès, un incendie ou un choc électrique.
1. Brancher sur une prise de courant à 3 alvéoles, reliée à la terre.
REMARQUE: Prévoir un délai de 24 heures pour la production
du premier lot de glaçons. Jeter les trois premiers lots de glaçons
produits. Prévoir un délai de 3jours pour le remplissage complet
du bac d’entreposage.
Porte et tiroir du réfrigérateur
OUTILS REQUIS: Clé à douille à tête hexagonale de
5
⁄16po,
3
⁄8po
et ¹⁄4po Tournevis cruciforme no2 et un tournevis à lame plate.
IMPORTANT:
■ Votre réfrigérateur est muni d’une porte réversible normale
avec une porte ou un tiroir de congélateur ou des portes
françaises. Suivre les instructions suivantes selon le style
deporte de votre modèle.
■ Toutes les illustrations mentionnées dans les instructions
suivantes sont incluses plus loin dans cette section après
“Étapes nales”. Les illustrations correspondent à une porte
normale s’ouvrant à droite (charnières installées à droite à
l’usine).
■ Si vous désirez seulement enlever et réinstaller les portes,
voir les sections “Démontage – Portes et charnières” et
“Réinstallation - Portes et charnières”.
■ Avant de commencer, tourner la commande du réfrigérateur
à OFF (arrêt) et retirer les aliments et tout balconnet réglable
ou compartiment utilitaire des portes. Replacer et enlever
lespoignées.
Replacer et enlever les poignées
Porte standard
■ Pour replacer la poignée, aligner la poignée sur la porte ou le
tiroir comme indiqué. À l’aide d’un tournevis cruciforme, xer
la poignée à l’aide des vis de la poignée.
■ Pour replacer la garniture de poignée, à l’aide de vos mains,
appliquer une pression ferme à la surface de la garniture et
laglisser vers le centre de la poignée.
■ Pour enlever les poignées, reprendre ces instructions en sens
inverse.
Portes à double battant
■ Pour retirer la poignée, desserrer les deux vis de blocage
situées sur le côté de la poignée à l’aide d’une clé
hexagonale de
3
⁄32 po. Tirer sur la poignée tout droit pour
l’extraire de la porte ou du tiroir. Veiller à conserver les vis
pour la réinstallation des poignées. Voir les illustrations1
et2de la poignée.
■ Pour remettre les poignées en place, inversion les directions.
Démontage – Portes et charnières
Porte standard
Modèle avec tiroir de congélateur
1. Débrancher le réfrigérateur ou déconnecter la source de
courant électrique.
2. Laisser le réfrigérateur fermé jusqu’à ce vous soyez prêt à
lesoulever de la caisse.
REMARQUE: Prévoir un support additionnel de la porte
pendant le déplacement des charnières. La force d’attraction
des aimants de la porte ne suft pas à la maintenir en place
pendant la manutention.
3. Enlever les pièces de la charnière supérieure – voir l’illustration
de la charnière supérieure. Soulever la porte duréfrigérateur
pour la séparer de la caisse.
4. Réinstaller les pièces pour la charnière inférieure comme
indiqué sur l’illustration de la charnière inférieure.
Modèle avec porte de congélateur
1. Débrancher le réfrigérateur ou déconnecter la source de
courant électrique.
2. Laisser la porte du congélateur fermée jusqu’à ce que vous
soyez prêt à la soulever pour la dégager de la caisse.
REMARQUE: Prévoir un support additionnel de la porte
pendant le déplacement des charnières. La force d’attraction
des aimants de la porte ne suft pas à la maintenir en place
pendant la manutention.
3. Enlever les pièces de la charnière supérieure - voir l’illustration
de la charnière supérieure. Soulever la porte du réfrigérateur
pour la séparer de la caisse.
4. Enlever l’axe de la charnière centrale et les vis de la charnière
comme indiqué sur l’image de la charnière du centre.
Soulever la porte du congélateur pour la séparer de la caisse.
A. Bride en “P”
B. Canalisation d’eau
enplastique
C. Écrou à compression
D. Tube en cuivre
Vis de charnière supérieure à tête hexagonale
31
5. Retirer la grille de la base en la saisissant fermement à deux
mains et en la tirant vers soi.
6. Réinstaller les pièces pour la charnière inférieure comme
indiqué sur l’illustration de la charnière inférieure.
Portes à double battant
AVERTISSEMENT
Risque de choc électrique
Couper l’alimentation avant de retirer les portes.
Le non-respect de cette instruction peut entraîner la
mort ou un choc électrique.
1. Débrancher le réfrigérateur ou déconnecter la source de
courant électrique.
2. Laisser les portes du réfrigérateur fermées jusqu’à ce vous
soyez prêt à les détacher de la caisse.
REMARQUE: Prévoir un support supplémentaire pour
laporte du réfrigérateur pendant le retrait des charnières.
Laforce d’attraction des aimants de la porte ne suft pas
àlamaintenir en place pendant la manutention.
3. En commençant par la porte du côté droit, ôter les pièces
de la charnière supérieure – voir l’illustration de la charnière
supérieure. Soulever la porte du réfrigérateur de l’axe de la
charnière inférieure.
4. Ôter le bouchon d’obturation d’axe de charnière de l’axe
de la charnière inférieure et le conserver pour utilisation
ultérieure. Voir l’illustration de la charnière inférieure.
5. Avant de retirer la porte du côté gauche, déconnecter la
prise de câbles située sur la partie supérieure de la charnière
supérieure en coinçant un tournevis à lame plate ou un ongle
entre les deux sections. Voir l’illustration de la che de câblage.
REMARQUE: Les conducteurs vert et de liaison à la terre
restent xés à la charnière.
6. Enlever les pièces de la charnière du côté gauche comme
indiqué dans l’illustration de la charnière supérieure.
Souleverla porte de l’axe de la charnière inférieure.
REMARQUE: Ôter le bouchon d’obturation d’axe de
charnière de l’axe de la charnière inférieure et le conserver
pour utilisation ultérieure. Voir l’illustration de la charnière
inférieure.
Inversion du sens d’ouverture de la porte –
portestandard (optionnel)
IMPORTANT: Si on souhaite inverser le sens d’ouverture d’une
porte pour pouvoir l’ouvrir du côté opposé, procéder comme suit.
S’il n’est pas nécessaire de changer l’orientation de la porte, voir
la section “Réinstallation – porte et charnières”.
Armoire
1. Enlever les vis de charnière du côté poignée et les transférer
du côté opposé. Voir l’illustration1.
Porte du réfrigérateur
1. Enlever la poignée du réfrigérateur (voir l’illustration2).
Conserver toutes les pièces ensemble.
2. Enlever l’avant de la vis d’obturation de la poignée de porte.
La transférer du côté opposé de la porte du réfrigérateur
(voirillustration5).
3. Enlever la butée de porte. La transférer du côté opposé de
laporte du réfrigérateur (voir illustration3).
4. Fixer la poignée de porte du réfrigérateur sur le côté
opposé de la porte à l’aide des deux vis (voir l’illustration2).
Repositionner la garniture de poignée (voir illustration).
5. Serrer toutes les vis. Conserver la porte à part jusqu’à la mise
en place des charnières et du tiroir de congélateur.
Porte du congélateur
1. Enlever la poignée du congélateur (voir l’illustration4).
Conserver toutes les pièces ensemble.
2. Enlever la butée de porte. La transférer du côté opposé de
laporte du congélateur (voir illustration3).
3. Fixer la poignée du côté opposé de la porte du congélateur.
4. Serrer toutes les vis. Mettre la porte de côté.
5. Retirer la grille de la base en la saisissant fermement à deux
mains et en la tirant vers soi.
REMARQUE: Placer une cale sous la rive avant inférieure du
réfrigérateur pour libérer le poids des brides de roulettes
6. Ôter les vis des deux brides de roulettes. Voir l’illustration6.
7. Retirer la plaque de charnière située derrière la bride de
roulette et la placer sur le côté opposé du réfrigérateur.
Placerl’axe de charnière et la cale dans le trou externe
delaplaque de charnière. Voir l’illustration6.
Vis de butée de porte
Poignée de porte Vis de
scellement Avant
Vis de poignée à tête plate
Bouchon d'obturation de
charnière de caisse
32
Réinstallation des portes et charnières
Porte standard
REMARQUE: Si on inverse le sens d’ouverture de la porte,
considérer l’image symétrique.
Modèle avec tiroir de congélateur
1. Replacer les pièces de la charnière inférieure comme illustré.
Resserrer les vis.
REMARQUE: Fournir un support additionnel à la porte lors
du déplacement des charnières. La force d’attraction des
aimants de la porte ne suft pas à maintenir les portes en
place.
2. Assembler les pièces de la charnière supérieure comme
indiqué dans l’illustration de la charnière supérieure. Ne pas
complètement serrer les vis.
3. Positionner la porte de façon à ce que le bas des portes
du réfrigérateur soit bien aligné avec le sommet du tiroir de
congélation. Serrer toutes les vis.
Modèle avec porte de congélateur
1. S’assurer que la plaque de charnière est solidement xée
derrière la bride de roulette et que l’axe de charnière est
inséré dans le trou externe. Serrer complètement toutes
lesvis des brides de roulettes. Voir l’illustration6.
2. Retirer la cale précédemment placée sous la rive avant de la
caisse du réfrigérateur. Réinstaller la porte du congélateur.
REMARQUE: Fournir un support additionnel à la porte lors du
déplacement des charnières. La force d’attraction des aimants
de la porte ne suft pas à maintenir les portes en place.
3. Assembler les pièces de la charnière centrale comme indiqué
dans l’illustration de la charnière centrale et serrer les vis.
Replacer la porte du réfrigérateur.
4. Assembler les pièces de la charnière supérieure comme
illustré. Ne pas complètement serrer les vis.
5. Positionner les portes de façon à ce que le bas des portes
du réfrigérateur soit bien aligné avec le sommet du tiroir de
congélation. Serrer toutes les vis.
Portes à double battant
1. Assembler les pièces des charnières supérieures comme
indiqué à l’illustration de la charnière supérieure. Ne pas
complètement serrer les vis.
2. Réinstaller les pièces pour les charnières inférieures
comme indiqué sur l’illustration de la charnière inférieure.
Resserrerles vis. Replacer les portes du réfrigérateur.
REMARQUE: Prévoir un support supplémentaire pour
les portes du réfrigérateur pendant le déplacement des
charnières. La force d’attraction des aimants de la porte ne
suft pas à les maintenir en place pendant la manutention.
3. Aligner chaque porte de façon à ce que le bas de la porte
du réfrigérateur soit bien aligné avec le sommet du tiroir de
congélation. Serrer toutes les vis.
4. Reconnecter la che de câblage sur la partie supérieure de
laporte du côté gauche du réfrigérateur.
5. Réinstaller les couvre-charnière supérieurs.
Retrait et remplacement du tiroir de congélation
IMPORTANT:
■ Il faudra peut-être deux personnes pour déplacer et
réinstaller le tiroir de congélation.
■ Toutes les illustrations sont incluses plus loin dans cette
section après le point “Étapes nales”.
Retrait de l’avant du tiroir
1. Ouvrir le tiroir du congélateur complètement.
2. Desserrer les quatre vis xant les glissières de tiroir à l’avant
du tiroir. Voir l’illustration du retrait de l’avant du tiroir.
REMARQUE: Dévisser les vis de trois ou quatre tours.
Garder les vis insérées dans
la façade du tiroir.
3. Soulever l’avant du tiroir vers le haut et le dégager des vis.
Voir l’illustration du retrait de l’avant du tiroir.
Réinstallation de l’avant du tiroir
1. Retirer les glissières de tiroir du compartiment de congélation
en les faisant glisser. Insérer les vis du sommet de l’avant du
tiroir dans les fentes des supports du tiroir. Voir l’illustration
du remplacement de l’avant du tiroir.
2. Tirer les deux supports de tiroir vers soi pour insérer les
deux vis du fond de l’avant du tiroir dans les supports. Voir
l’illustration du remplacement de l’avant du tiroir.
3. Serrer complètement les quatre vis.
Étapes nales
1. Inspecter tous les trous. Vérier que tous les bouchons
d’obturation et vis sont en place. Réinstaller le couvre-
charnière supérieur, comme indiqué sur l’illustration de la
charnière supérieure.
2. Réinstaller la grille de base.
AVERTISSEMENT
Risque de choc électrique
Brancher sur une prise à 3 alvéoles reliée à la terre.
Ne pas enlever la broche de liaison à la terre.
Ne pas utiliser un adaptateur.
Ne pas utiliser un câble de rallonge.
Le non-respect de ces instructions peut causer
un décès, un incendie ou un choc électrique.
3. Brancher sur une prise de courant à 3 alvéoles, reliée à la
terre.
4. Réinstaller l’ensemble des pièces de porte amovibles sur la
porte et remettre les aliments dans le réfrigérateur.

33
Porte ordinaire – porte de congélateur
A
B
C
D
E
B
A
C
D
A
B
C
3
A
B
1
1
A
5
4
2
A
B
C
A
A
C
6
A
B
C
D
E
A. Vis du couvre-charnière
B. Couvre-charnière supérieur
C. Vis de charnière à tête hexagonale
de
5
/16 po
D. Charnière supérieure
A. Couvercle d’axe de charnière
B. Charnière centrale
C. Vis de charnière
A. Cale d’axe de charnière
B. Charnière inférieure
C. Plaque de charnière
D. Bride du déecteur
E. Vis de charnière à tête hexagonale
de ³⁄8po
A. Garniture de poignée
B. Poignée de porte du
réfrigérateur
C. Vis de poignée à tête plate
A. Vis de butée de porte
B. Butée de porte
A. Vis de poignée
à tête plate
Poignée de porte
Vis de scellement
Avant
A. Cale d’axe de charnière
B. Charnière inférieure
C. Plaque de charnière
D. Bride du déecteur
E. Vis de charnière à tête hexagonale de ³⁄8 po
Vue avant Vue de côté
Charnière supérieure
Charnière centrale
Charnière inférieure
Inversion du sens d’ouverture de la porte (facultatif)Dépose et réinstallation
de la porte
A. Vis de charnière à tête
hexagonale de
5
/16 po

34
Porte ordinaire – tiroir de congélateur
3
A
B
A
1
A
5
2
C
B
A
A
B
B
A
C
D
A
B
C
4
C B AAB
A
A. Vis du couvre-charnière
B. Couvre-charnière supérieur
C. Vis de charnière à tête hexagonale
de
5
/16 po
D. Charnière supérieure
Charnière supérieure
Dépose et réinstallation
de la porte
A. Couvercle d’axe de charnière
B. Charnière inférieure
C. Vis de charnière
Charnière inférieure
Inversion du sens d’ouverture de la porte (facultatif)
A. Garniture de poignée
B. Vis de poignée à tête plate
C. Poignée de porte du
réfrigérateur
A. Vis de butée de porte
B. Butée de porte
Vue avant Vue de côté
A. Garniture de poignée
B. Vis de poignée à tête plate
C. Poignée du tiroir du congélateur
Poignée de porte
Vis de scellement
Avant
Retrait du tiroir
Réinstallation de l’avant du tiroir
A. 4 vis de support de
porte desserrées
A. Vis de charnière

35
Portes à double battant
AVERTISSEMENT
Risque de choc électrique
Déconnecter la source de courant électrique avant d'enlever les portes.
Le non-respect de cette instruction peut causer un décès ou un choc électrique.
A
1
B
A
C
D
A
B
C
A
A
2
Retrait et réinstallation des portes
Charnière supérieure
Fiche de câblage
Charnière inférieure
A. Vis de blocage de
3
⁄32po ou
1
⁄8po
A. Vis de blocage de
3
⁄32po ou
1
⁄8po
Retrait du tiroir
Réinstallation de l’avant du tiroir
A. Vis du couvre-charnière
B. Couvre-charnière supérieur
C. Vis de charnière à tête hexagonale
de 5/16"
D. Charnière supérieure
A. Couvercle d’axe de charnière
B. Charnière inférieure
C. Vis de charnière
A. 4 vis de support de porte
desserrées

36
Fermeture et alignement de la porte
La grille de la base recouvre les vis de nivellement et les roulettes
situées sous la caisse du réfrigérateur, sous la porte ou le tiroir
du compartiment de congélation. Avant de réaliser les réglages,
retirer la grille de la base et déplacer le réfrigérateur à son
emplacement dénitif.
1. Retirer les deux vis xant la grille de la base au placard,
etmettre les vis de côté. Saisir la grille et la tirer vers soi.
2. Déplacer le réfrigérateur jusqu’à sa position de service nale.
REMARQUE: An que le réfrigérateur puisse rouler plus
facilement, soulever les pieds de nivellement en tournant
les vis de nivellement dans le sens antihoraire. Les roulettes
avant toucheront le plancher.
3. An que les portes ferment plus facilement, utiliser un
tourne-écrou à tête hexagonale de ¹⁄4 po pour tourner
les vis de nivellement dans le sens horaire. Ce réglage
soulèvera légèrement l’avant du réfrigérateur et l’inclinera
ainsi légèrement sur sa partie arrière. Régler les deux vis
denivellement à la même hauteur.
REMARQUE: Le fait d’exercer une pression contre le dessus
du réfrigérateur permet d’alléger le poids appliqué aux vis de
nivellement. Ceci facilite le réglage des vis.
A
¹⁄₄"
B
4. Ouvrir et fermer les portes pour vérier que leur fermeture
est aussi aisée que vous le souhaitez. Si ce n’est pas le cas,
augmenter l’inclinaison du réfrigérateur en tournant les deux
vis de nivellement dans le sens horaire. Il est possible qu’il
faille appliquer plusieurs tours aux vis de nivellement pour
faciliter la fermeture des portes.
5. Vérier l’alignement de la porte. Si une porte est plus
basse que l’autre, ajuster la vis de nivellement du côté du
réfrigérateur le plus bas. À l’aide d’un tourne-écrou à tête
hexagonale de ¹⁄4po, tourner la vis de nivellement dans le sens
horaire an d’élever ce côté du réfrigérateur, jusqu’à ce que les
portes soient alignées. Il faudra peut-être appliquer plusieurs
tours à la vis de nivellement pour soulever le réfrigérateur.
REMARQUE: Le fait d’exercer une pression contre le dessus
du réfrigérateur permet d’alléger le poids appliqué aux vis de
nivellement. Ceci facilite le réglage des vis.
¹⁄₄"
6. S’assurer que le réfrigérateur est stable. Si le réfrigérateur
semble instable ou qu’il roule vers l’avant lorsqu’on ouvre la
porte ou le tiroir, ajuster les vis de nivellement. À l’aide d’un
tourne-écrou à tête hexagonale de ¹⁄4po, tourner les vis de
nivellement dans le sens horaire de chaque côté jusqu’à ce
que les pieds de nivellement soient en contact ferme avec
leplancher.
7. Replacer la grille de base en alignant les trous de la grille et
les trous du cabinet, puis serrer en utilisant les vis enlevées
àl’étape1.
UTILISATION DU
RÉFRIGÉRATEUR
Ouverture et fermeture des portes
(Modèles avec porte à double battant)
Il y a deux portes pour le compartiment de réfrigération. Les portes
peuvent être ouvertes et fermées séparément ou ensemble.
Il y a sur la porte de gauche du réfrigérateur un joint à charnière
verticale.
■ Lors de l’ouverture de la porte du côté gauche, le joint à
charnière se replie automatiquement vers l’intérieur pour
qu’iln’y ait pas d’interférence.
■ Lorsque les deux portes sont fermées, le joint à charnière
assure automatiquement l’étanchéité entre les deux portes.
A
A. Vis de nivellement
B. Roulette avant
A. Joint à charnière

37
Utilisation des commandes
Le centre de commandes est situé dans la partie supérieure
avant du compartiment de réfrigération.
Commandes de température
Pour votre commodité, les commandes de température sont
préréglées à l’usine. Lors de l’installation initiale du réfrigérateur,
s’assurer que les commandes sont encore préréglées aux points
de réglage recommandés comme illustré.
Réglages recommandés
IMPORTANT:
■ Les réglages recommandés devraient être corrects pour une
utilisation domestique normale du réfrigérateur. Les réglages
sont faits correctement lorsque le lait ou le jus sont aussi
froids que désiré et lorsque la crème glacée est ferme.
■ Lorsque l’appareil est sous tension, l’afcheur de température
indique la température réglée du compartiment.
■ Attendre 24 heures pour que le réfrigérateur refroidisse
complètement avant d’y placer des aliments. Si on ajoute
des aliments avant que le réfrigérateur ne soit complètement
refroidi, les aliments risquent de se gaspiller.
REMARQUE: Le fait d’ajuster les commandes de
température du réfrigérateur et du congélateur à un réglage
plus froid que le réglage recommandé ne refroidira pas les
compartiments plus rapidement.
■ Si la température est trop tiède ou trop froide dans le
réfrigérateur ou le congélateur, vérier d’abord les évents
pour s’assurer qu’ils ne sont pas bloqués, avant de régler
lescommandes.
Désactivation/activation du réfrigérateur:
■ Appuyer à plusieurs reprises sur la touche (+) du congélateur
jusqu’à l’apparition de “OFF” sur l’afchage du congélateur.
Le réfrigérateur s’arrêtera au bout de quelques secondes.
Aucun compartiment ne refroidira.
■ Appuyer sur la touche (–) du réfrigérateur ou du congélateur
pour mettre le réfrigérateur en marche.
Réglage des commandes
La commande du RÉFRIGÉRATEUR règle la température du
compartiment de réfrigération. La commande du CONGÉLATEUR
règle la température du compartiment de congélation.
Pour ajuster la température du compartiment de réfrigération
ou de congélation, utiliser les réglages indiqués dans le tableau
comme guide.
Pour ajuster les points de réglage de température:
Lorsqu’on appuie une première fois sur la touche (+) ou (–),
lepoint de réglage actuel de la température s’afche.
■ Appuyer sur les touches (+) ou (–) jusqu’à l’afchage du point
de réglage désiré de la température.
REMARQUE: Ne pas ajuster les commandes de température de
plus d’un cran à la fois, sauf lors de la mise en marche initiale du
réfrigérateur. Attendre 24 heures entre les réglages pour que la
température puisse se stabiliser.
CONDITION/RAISON: RÉGLAGE:
RÉFRIGÉRATEUR trop tiède Commande RÉFRIGÉRATEUR
1° plus bas
CONGÉLATEUR trop tiède/
trop peu de glaçons
Réglage Commande
CONGÉLATEUR 1° plus bas
RÉFRIGÉRATEUR trop froid Réglage commande
RÉFRIGÉRATEUR 1° plus élevé
CONGÉLATEUR trop froid Réglage commande
CONGÉLATEUR 1° plus élevé
Autres caractéristiques du centre de commandes
Max Ice (production de glaçons maximale)
La fonction “Max Ice” augmente la production de glaçons, ce qui
est utile en période d’utilisation intense de glaçons.
■ Appuyer sur la touche Max Ice pour régler le congélateur au
réglage de température le plus bas. Appuyer à nouveau sur
la touche Max Ice pour revenir au point de réglage normal
ducongélateur.
REMARQUE: La caractéristique Max Ice s’éteint
automatiquement au bout de 24heures environ.
Humidity Control (contrôle de l’humidité)
La caractéristique de commande d’humidité met en marche un
dispositif de chauffage pour aider à réduire l’humidité sur le joint
de la charnière de porte. À utiliser dans des environnements
humides ou en cas d’observation d’humidité sur le joint de la
charnière de porte. Le réfrigérateur consomme plus d’énergie
lorsque la commande d’humidité est activée.
■ Appuyer sur Humidity control lorsque l’environnement est
chaud et plus humide, ou si l’on remarque de l’humidité sur
le joint de la charnière de porte. Le témoin lumineux s’allume
lorsque la fonction de contrôle d’humidité est placée à ON
(marche).
■ Appuyer sur Humidity Control pour économiser de l’énergie
lorsque l’environnement est moins humide.
Temp Alarm (alarme de dépassement de température)
La caractéristique Temp Alarm (alarme de dépassement de
température) fournit des renseignements sur la température en
cas de panne de courant.
Panne de courant: Au cours d’une panne de courant, si les
températures dans les compartiments de réfrigération et de
congélation excèdent les températures de fonctionnement
normales, la plus haute température atteinte sera afchée.
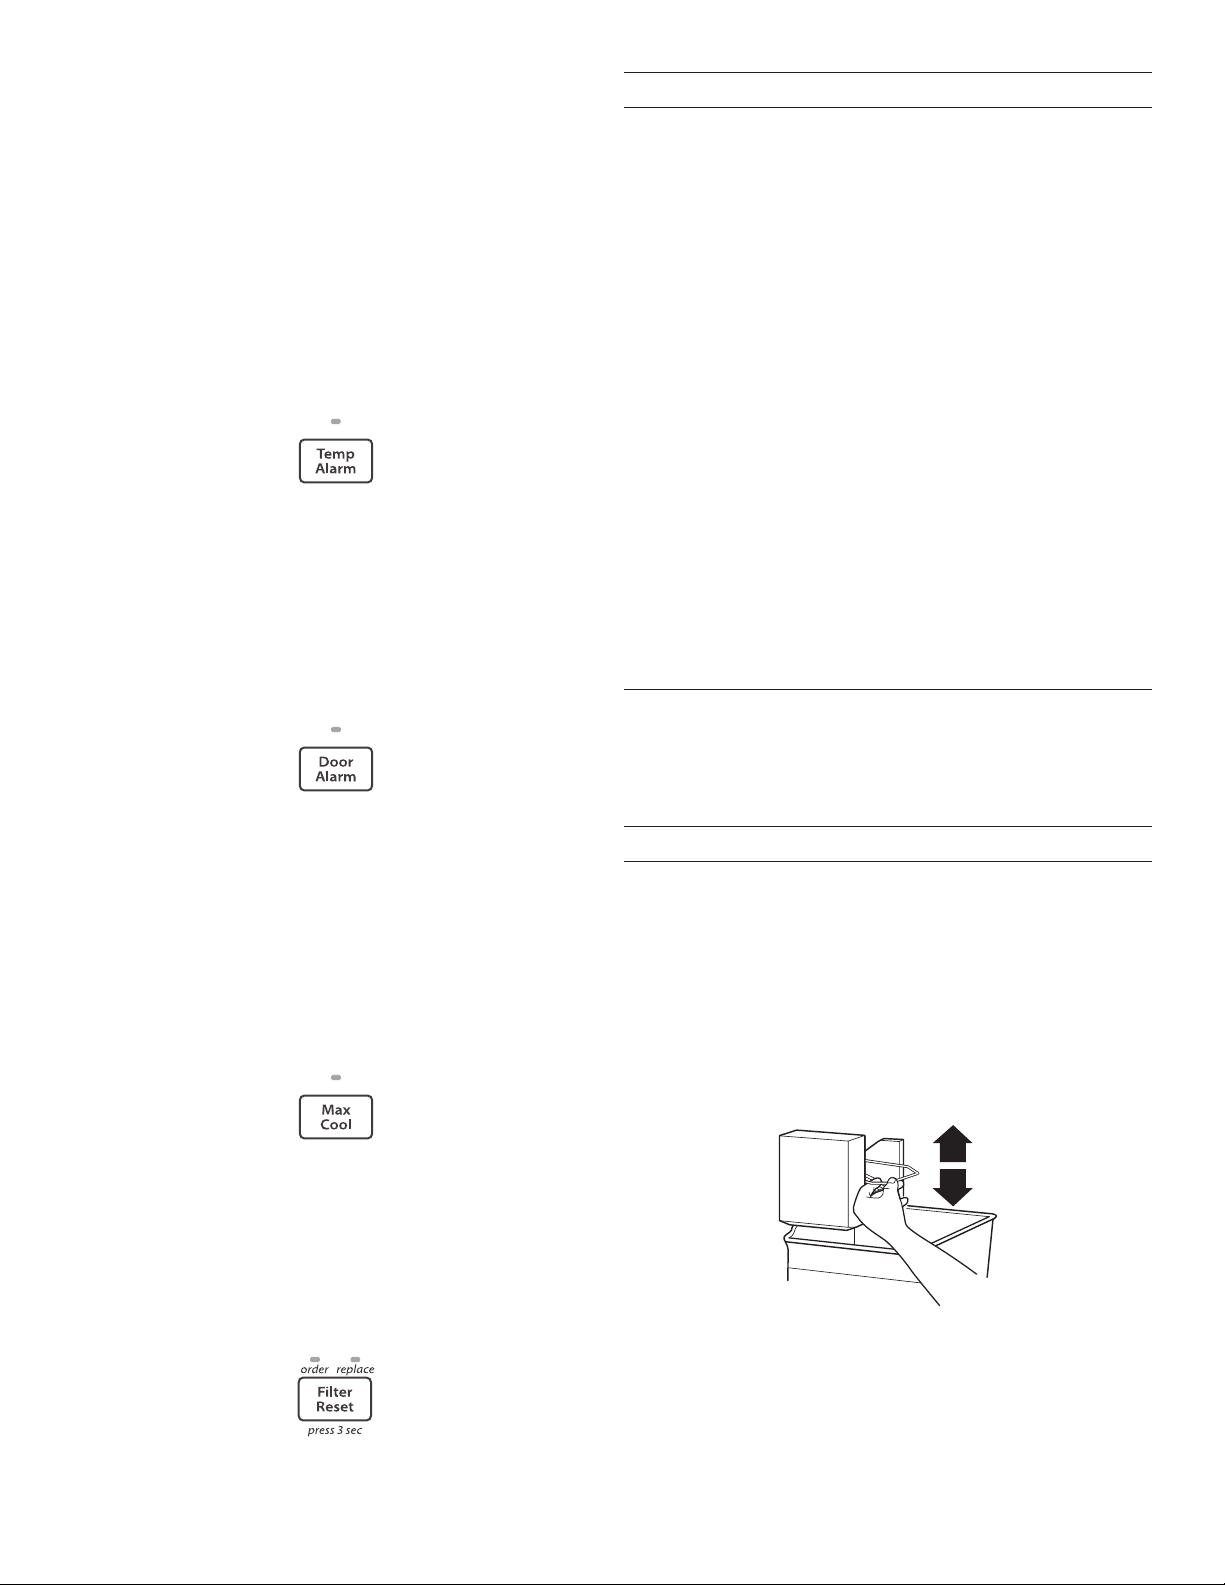
38
■ Pour activer cette caractéristique, appuyer sur la touche
Temp Alarm jusqu’à ce que le témoin lumineux s’allume.
Pour désactiver cette caractéristique, appuyer sur Temp
Alarm pendant 3 secondes jusqu’à ce que le témoin
lumineuxs’éteigne.
Alarme de température: Un signal d’alarme sera émis à
plusieurs reprises si les températures des compartiments de
réfrigération ou de congélation excèdent les températures de
fonctionnement normales pendant une heure ou plus.
L’afchage indique alternativement les températures actuelles
et les températures les plus élevées atteintes dans les
compartiments.
■ Appuyer une fois sur la touche Temp Alarm pour arrêter le
signal sonore et l’alternance d’afchage des températures.
Letémoin Temp Alarm continue de clignoter jusqu’à ce que
leréfrigérateur revienne à la température réglée.
Door Alarm (alarme de la porte)
La caractéristique Door Alarm fait retentir une sonnerie toutes les
quelques secondes lorsque la porte du réfrigérateur a été laissée
ouverte continuellement pendant 5 minutes.
La sonnerie retentira jusqu’à ce que la porte soit fermée ou que la
caractéristique Door Alarm soit désactivée.
■ Appuyer sur la touche Door Alarm pour activer ou désactiver
cette caractéristique. Le témoin lumineux est allumé lorsque
la caractéristique Door Alarm est activée.
Max Cool (refroidissement maximal)
La caractéristique Max Cool (refroidissement maximal) est utile
lors de périodes d’utilisation intense du réfrigérateur, de l’ajout
d’une grande quantité d’aliments ou de l’élévation temporaire
dela température de la pièce.
■ Appuyer sur la touche Max Cool pour régler le congélateur
et le réfrigérateur aux réglages de température les plus bas.
Appuyer de nouveau sur Max Cool pour retourner au réglage
normal de réfrigérateur.
REMARQUE: La caractéristique Max Cool s’éteint
automatiquement au bout de 12 heures environ.
Réinitialisation du ltre
La commande de réinitialisation du ltre à eau permet de
réinitialiser la caractéristique de suivi du statut du ltre à eau
chaque fois que l’on change le ltre à eau. Voir la section
“Système de ltration d’eau”.
■ Appuyer sur la touche de réinitialisation du ltre pendant
3secondes, jusqu’à ce que le témoin lumineux Order
(commander) ou Replace (changer) s’éteigne.
Préférences de l’utilisateur
Le centre de commandes vous permet de régler les préférences
de l’utilisateur, si désiré.
Afchage de la température (F_C)
Cette préférence vous permet de modier l’afchage de la
température.
F – Température en degrés Fahrenheit
C – Température en degrés Celsius
Alarme (AL)
Cette préférence vous permet de désactiver le son de toutes les
alarmes.
ON (marche) – Le son de l’alarme sera audible.
OFF (arrêt) – Le son de l’alarme ne sera pas audible.
Pour accéder au menu des préférences de l’utilisateur:
1. Appuyer sur la touche Door Alarm (avertisseur de la porte)
pendant 3 secondes. Le nom de la préférence apparaît sur
l’afchage du congélateur et le statut de la préférence (F/C)
ou (ON/OFF) apparaît sur l’afchage du réfrigérateur.
2. Utiliser les touches (+) ou (–) du congélateur pour faire déler
les noms de préférence. Lorsque le nom de la préférence
désirée s’afche, appuyer sur les touches (+) ou (–) du
réfrigérateur pour modier le statut de la préférence.
3. Enregistrer les préférences en appuyant sur la touche
Door Alarm pendant 3 secondes ou en fermant la porte
ducompartiment de réfrigération.
Machine à glaçons
IMPORTANT: Purger le système d’approvisionnement en eau
avant de mettre en marche la machine à glaçons. Voir la section
“Distributeur d’eau”.
Mise en marche/arrêt de la machine à glaçons
Pour mettre la machine à glaçons en marche, il suft d’abaisser
lebras de commande d’arrêt métallique.
Pour éteindre manuellement la machine à glaçons, soulever le
bras de commande à d’arrêt métallique à la position OFF (arrêt/
position haute) et attendre l’émission d’un clic.
REMARQUE: La machine à glaçons comporte un système
d’arrêt automatique. Au fur et à mesure de la production de
glace, les glaçons remplissent le bac d’entreposage de glaçons.
Les glaçons soulèvent le bras de commande d’arrêt métallique
àla position OFF (élevée). Ne pas forcer le bras de commande
d’arrêt métallique vers le haut ou vers le bas.
REMARQUE: Éteindre la machine à glaçons avant de retirer
le bac d’entreposage pour servir des glaçons ou pour nettoyer
le bac. Ceci empêchera les glaçons de tomber de la machine
à glaçons et dans le compartiment de congélation. Après avoir
remplacé le bac d’entreposage, mettre en marche la machine
àglaçons.
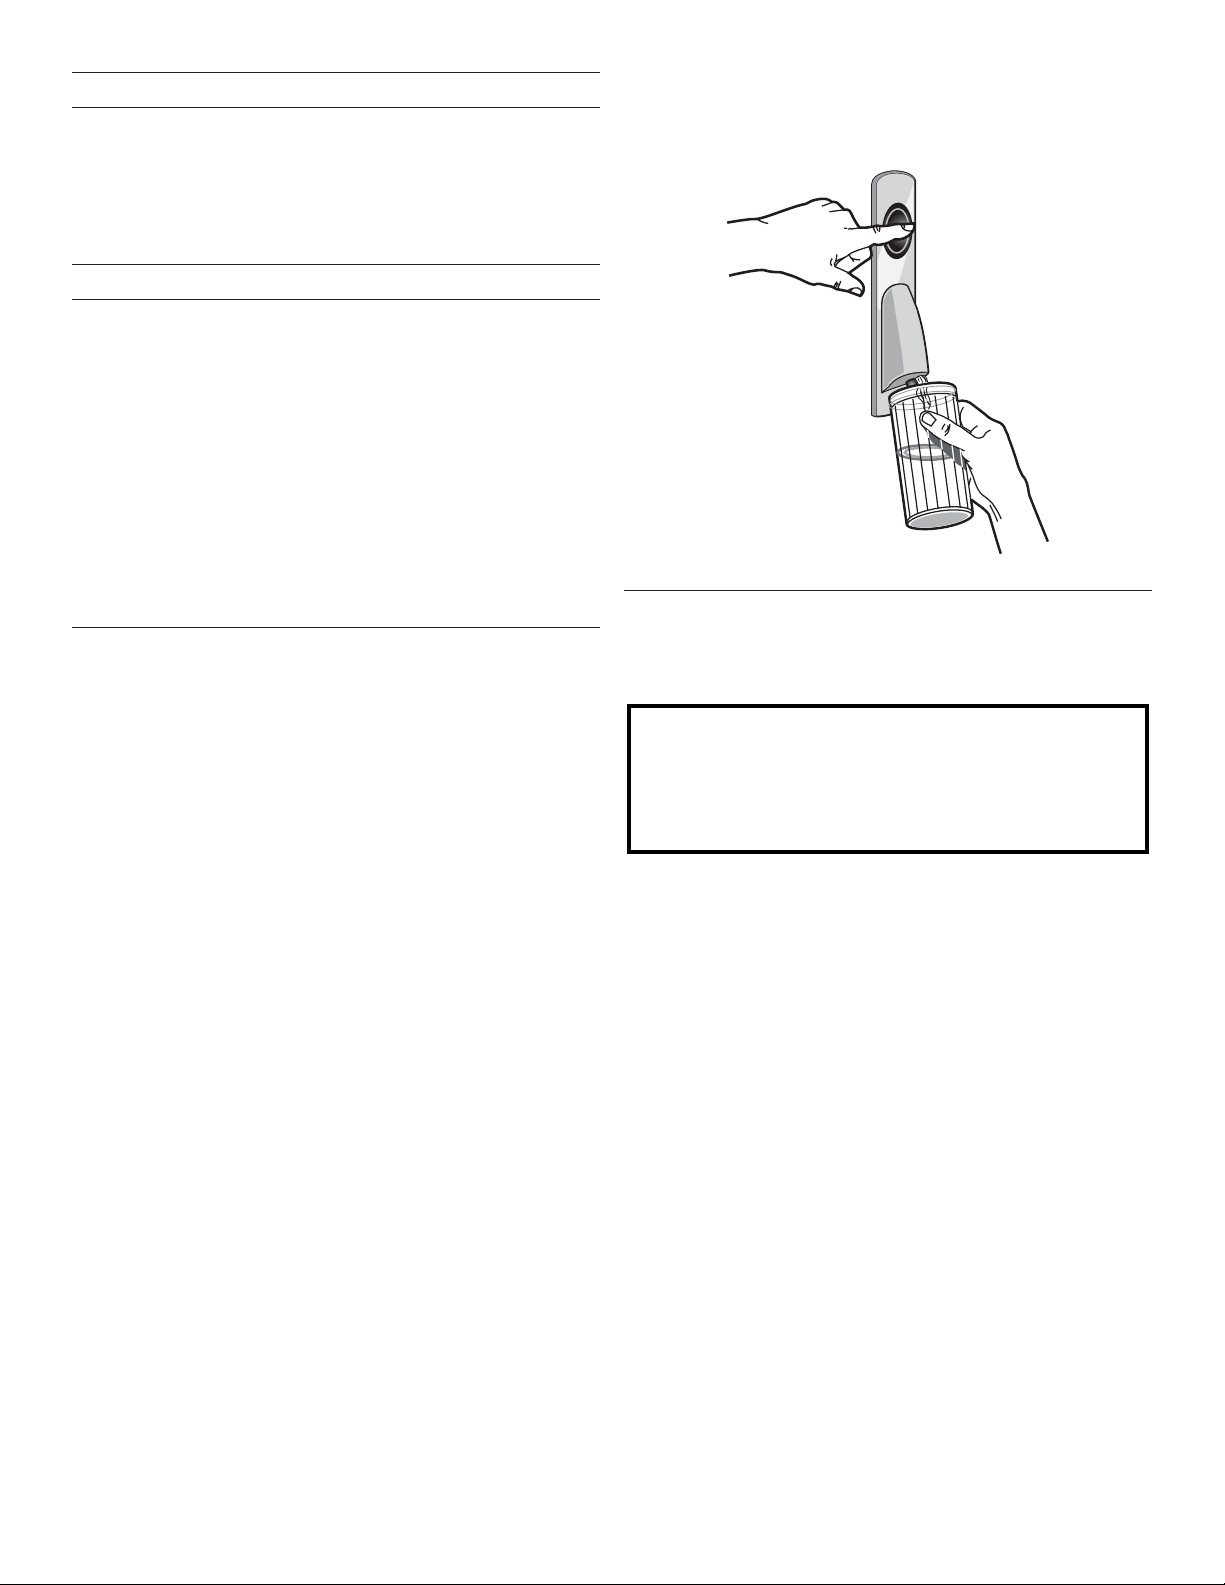
39
Taux de production des glaçons
■ La machine à glaçons doit produire un lot de glaçons complet
environ toutes les 3 heures.
■ Pour augmenter la production de glaçons, diminuer la
température du congélateur et du réfrigérateur. Voir la section
“Utilisation des commandes”. Attendre 24 heures entre les
ajustements.
Ne pas oublier
■ Prévoir un délai de 24 heures pour la production du premier
lot de glaçons. Prévoir un délai de 3 jours pour le remplissage
complet du bac d’entreposage. Jeter les trois premiers lots
de glaçons produits.
■ La qualité des glaçons dépend de la qualité de l’eau fournie
à la machine à glaçons. Éviter de connecter la machine à
glaçons à une alimentation en eau adoucie. Lesproduits
chimiques adoucisseurs d’eau (comme le sel) peuvent
endommager certaines pièces de la machine à glaçons et
entraîner une mauvaise qualité de glaçons. Sil’alimentation en
eau adoucie ne peut être évitée, s’assurer que l’adoucisseur
d’eau fonctionne bien et qu’il est bien entretenu.
■ Ne pas entreposer quoi que ce soit sur le dessus de la
machine à glaçons ou dans le bac à glaçons.
Distributeur d’eau
IMPORTANT:
■ Après avoir raccordé le réfrigérateur à une source
d’alimentation en eau ou remplacé le ltre à eau, vidanger
le circuit d’eau. Utiliser un récipient robuste pour appuyer
sur le levier du distributeur d’eau pendant 5 secondes, puis
relâcher le levier pendant 5 secondes. Répéter l’opération
jusqu’à ce que l’eau commence à couler. Une fois que l’eau
commence à couler, continuer d’appuyer puis de relâcher le
levier du distributeur (appui pendant 5 secondes, relâchement
pendant 5 secondes) jusqu’à ce qu’un total de 4gal. (15L)
soit distribué. Ceci évacue l’air du ltre et du système
de distribution d’eau et rend le ltre à eau opérationnel.
Unamorçage supplémentaire peut s’avérer nécessaire dans
certains domiciles. Pendant l’évacuation de l’air du système,
de l’eau peut gicler du distributeur.
REMARQUE: Après 5 minutes de distribution continue,
ledistributeur cesse de distribuer de l’eau an d’éviter une
inondation. Pour poursuivre la distribution, réappuyer sur le
bouton de distribution.
■ Attendre 24heures pour que le réfrigérateur et l’eau
refroidissent. Puiser une quantité sufsante d’eau chaque
semaine pour maintenir un approvisionnement frais.
Distribution d’eau
1. Placer un récipient sous le distributeur tout en appuyant sur
le bouton.
2. Relâcher le bouton pour arrêter la distribution.
Système de ltration d’eau
Le ltre à eau se trouve dans l’angle supérieur droit du
compartiment de réfrigération.
IMPORTANT: Le ltre à eau jetable doit être remplacé au moins
tous les 6 mois. Si le débit d’eau au distributeur d’eau ou à la
machine à glaçons diminue de façon marquée avant que 6 mois
ne se soient écoulés, remplacer le ltre à eau plus souvent.
Remplacement du ltre à eau
Pour acheter des ltres à eau de remplacement,
modèleUKF8001AXX-750 ou UKF8001AXX-200, communiquer
avec votre fournisseur ou composer le
1800253-1301 aux É.-U. ou le 1800807-6777 au Canada.
IMPORTANT: De l’air piégé dans le système d’alimentation en
eau peut entraîner l’éjection de l’eau et du ltre. Toujours faire
couler l’eau pendant au moins 2 minutes avant de retirer le ltre
ou le bouchon de dérivation bleu.
1. Tourner le ltre dans le sens antihoraire pour le retirer.
2. Retirer l’étiquette de scellement du ltre de rechange et
insérer l’extrémité du ltre dans la tête du ltre.
3. Faire pivoter le ltre dans le sens horaire jusqu’à la butée
d’arrêt. Fermer le couvercle du ltre en l’emboîtant.
4. Rincer le système de distribution d’eau. Voir la section
“Distributeur d’eau et de glaçons”.
REMARQUE: La fonction du distributeur peut être utilisée sans
qu’un ltre à eau soit installé. L’eau ne sera pas ltrée. Si l’on
choisit cette option, remettre le ltre en place avec le bouchon
dedérivation bleu.
Ne pas utiliser pour le filtrage d'une eau
microbiologiquement polluée ou de qualité inconnue en
l'absence d'un dispositif de désinfection adéquat avant ou
après le système. Les systèmes certifiés pour la réduction
de kyste peuvent être utilisés pour l'eau désinfectée qui
peut contenir des kystes filtrables.
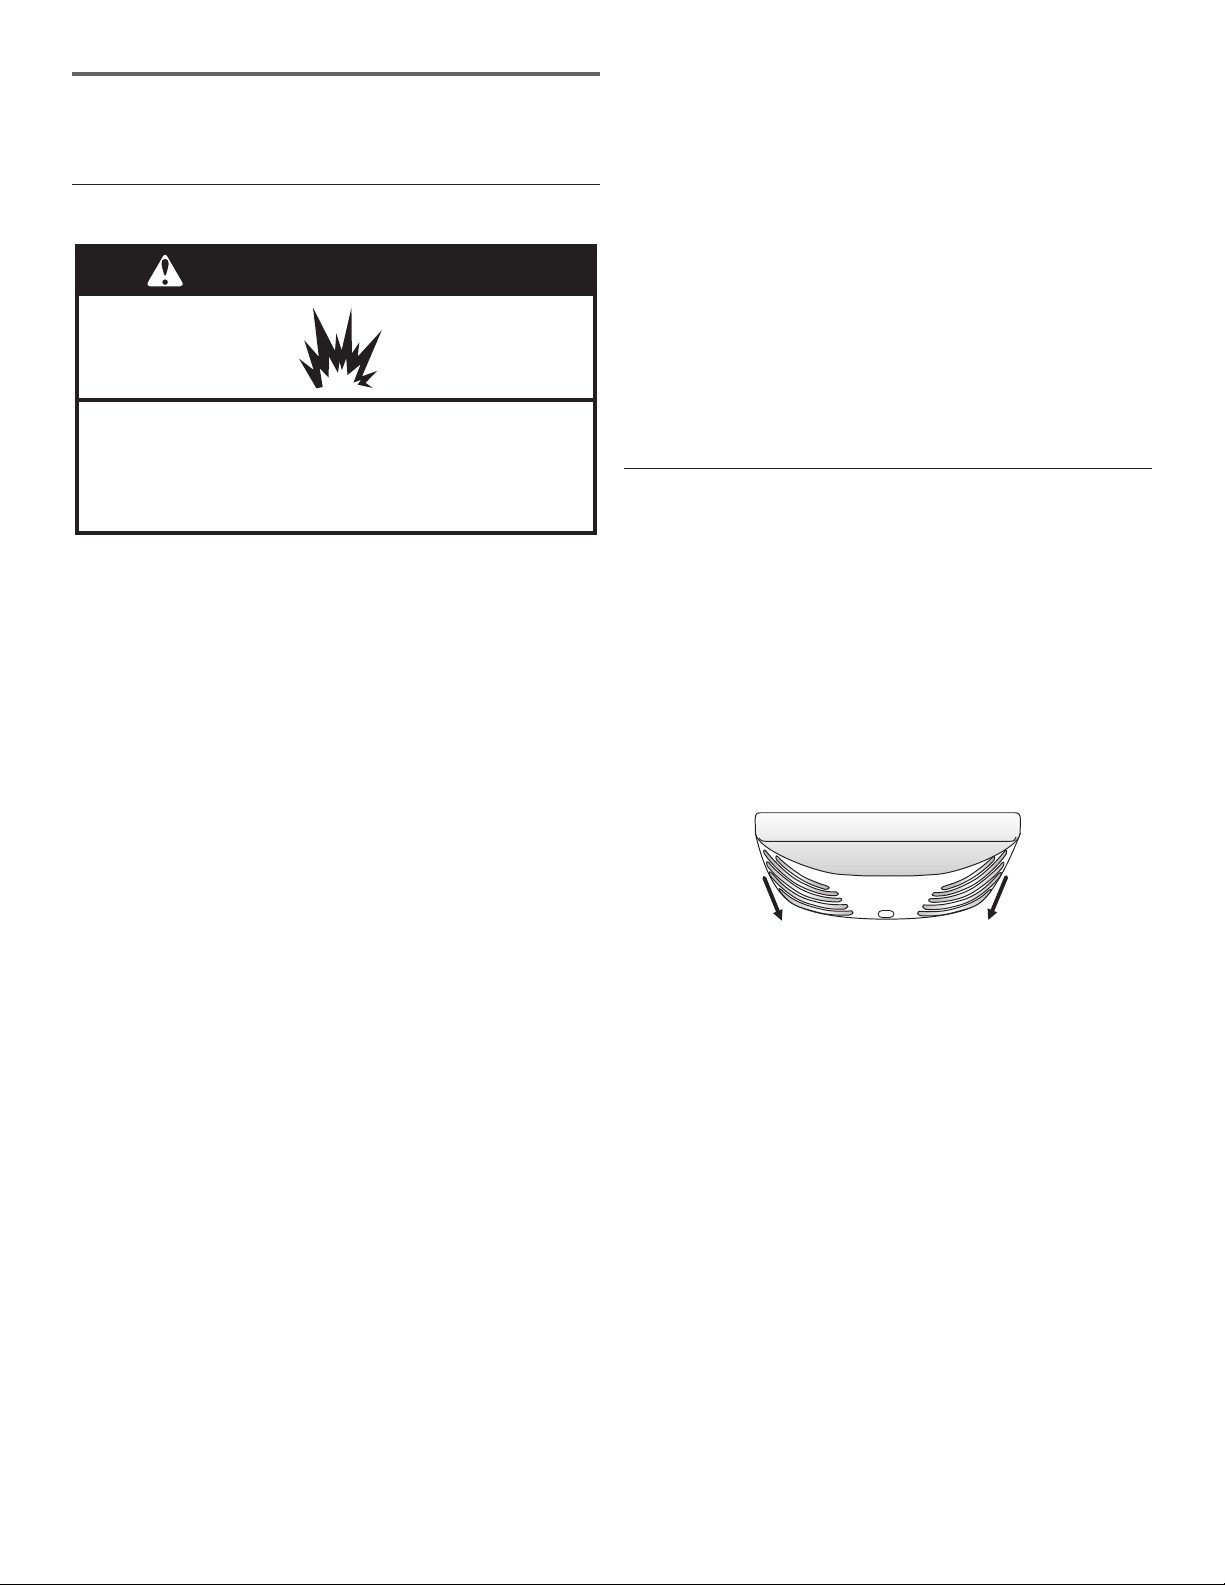
40
ENTRETIEN DU
RÉFRIGÉRATEUR
Nettoyage
Les sections de réfrigération et de congélation se dégivrent
automatiquement. Toutefois, nettoyer les deux compartiments
environ une fois par mois an d’éviter une accumulation
d’odeurs. Essuyer les renversements immédiatement.
IMPORTANT:
■ Comme l’air circule entre les deux sections, toutes les
odeurs formées dans une section seront transférées à
l’autre. Lesdeux sections doivent être nettoyées avec soin
pour éliminer les odeurs. Pour éviter le transfert d’odeurs
et l’assèchement des aliments, envelopper ou recouvrir
hermétiquement les aliments.
■ Pour les modèles en acier inoxydable, l’acier inoxydable
estrésistant à la corrosion et non anticorrosion. An d’éviter
l’oxydation de l’acier inoxydable, veiller à ce que les surfaces
restent propres en suivant les instructions de nettoyage
suivantes.
Nettoyage du réfrigérateur:
REMARQUE: Ne pas utiliser de nettoyants puissants ou abrasifs
tels que les nettoyants à vitre en atomiseurs, nettoyants à récurer,
liquides inammables, acide chlorhydrique, cires nettoyantes,
détergents concentrés, agents de blanchiment ou nettoyants
contenant du pétrole sur les surfaces extérieures (portes et caisse
de l’appareil), pièces en plastique, les garnitures intérieures et
garnitures de portes ou sur les joints de portes. Ne pas utiliser
d’essuie-tout, tampons à récurer ou autres outils de nettoyage
abrasifs.
1. Débrancher le réfrigérateur ou déconnecter la source de
courant électrique.
2. Laver à la main, rincer et sécher les pièces amovibles et les
surfaces internes soigneusement. Utiliser une éponge propre
ou un linge doux et un détergent doux dans de l’eau tiède.
3. Nettoyer les surfaces extérieures.
Métal peint: Laver les parties métalliques extérieures à l’aide
d’un chiffon doux ou d’une éponge douce et propre et d’un
détergent doux dans de l’eau tiède. Rincer les surfaces avec
une eau propre et tiède et sécher immédiatement an d’éviter
d’éventuelles taches laissées par l’eau.
Acier inoxydable: Laver les surfaces en acier inoxydable à
l’aide d’un chiffon doux ou d’une éponge douce et propre et
d’un détergent doux dans de l’eau tiède. Rincer les surfaces
avec une eau propre et tiède et sécher immédiatement an
d’éviter d’éventuelles taches laissées par l’eau.
REMARQUE: Lors du nettoyage de l’acier inoxydable,
toujours frotter dans le sens du grain an d’éviter d’éraer
lasurface.
4. Le condensateur n’a pas besoin d’être nettoyé souvent
dans des conditions de fonctionnement domestique
normales. Sil’environnement est particulièrement graisseux,
poussiéreux ou s’il y a des animaux domestiques dans la
maison, le condenseur devrait être nettoyé tous les 2 ou
3mois pour assurer une efcacité maximum.
Si l’on doit nettoyer le condensateur:
■ Retirer le casier de la base.
■ Utiliser un aspirateur à brosse douce pour nettoyer la grille,
les endroits ouverts derrière la grille et la surface à l’avant
ducondensateur.
■ Replacer la grille de la base lorsque vous avez terminé.
5. Brancher le réfrigérateur ou reconnecter la source de courant
électrique.
Remplacer l’ampoule d’éclairage
IMPORTANT: Le réfrigérateur et le congélateur de votre nouveau
réfrigérateur utilisent des ampoules à DEL, incandescentes ou
une combinaison des deux. Si les lampes ne s’allument pas
lorsqu’on ouvre la porte du réfrigérateur et/ou congélateur,
composer les numéros fournis pour assistance ou dépannage.
Consulter la “garantie” pour connaître les numéros de téléphone.
1. Débrancher le réfrigérateur ou déconnecter la source de
courant électrique.
2. Retirer le protège-ampoule (sur certains modèles).
■ Sommet du compartiment de réfrigérateur – Faire glisser
le protège-ampoule vers l’arrière du compartiment pour
lelibérer de l’ensemble d’éclairage.
3. Remplacer les ampoules grillées à l’aide d’ampoules de la
même taille, forme et puissance.
■ Pour remplacer une ampoule à DEL par une
autre ampoule à DEL, commander le numéro de
pièceW10565137 (3,6 W).
REMARQUE: Certaines ampoules DEL de rechange
ne sont pas recommandées pour des environnements
humides/mouillés. Les compartiments de réfrigération et
decongélation sont considérés comme des environnements
humides/mouillés. Si l’on utilise une marque d’ampoules
DEL différente de celle recommandée, lire et suivre toutes
les instructions de l’emballage des ampoules DEL avant de
procéder à l’installation.
■ Pour le remplacement d’une ampoule incandescente,
utiliser uniquement des ampoules incandescentes pour
les appareils ménagers d’une puissance maximum de
40W. Replacer le protecteur/l’enveloppe d’ampoule
aprèsavoir remplacé l’ampoule incandescente.
4. Réinstaller le protège-ampoule.
5. Brancher le réfrigérateur ou reconnecter la source de courant
électrique.
AVERTISSEMENT
Risque d'explosion
Utiliser un produit de nettoyage ininflammable.
Le non-respect de cette instruction peut causer un décès,
une explosion ou un incendie.

41
Précautions à prendre pour
lesvacances ou le déménagement
Vacances
Si le réfrigérateur est laissé en marche pendant votre
absence:
1. Consommer toutes les denrées périssables et congeler les
autres articles.
2. Si le réfrigérateur comporte une machine à glaçons
automatique et qu’il est raccordé à la source
d’approvisionnement en eau du domicile, fermer la source
d’approvisionnement en eau du réfrigérateur. Des dommages
matériels peuvent subvenir si l’alimentation en eau n’est pas
coupée.
3. Si votre machine à glaçons est automatique, éteindre la
machine à glaçons.
REMARQUE: Selon votre modèle, soulever le bras de
commande métallique à la position OFF (arrêt) (position
élevée), ou placer le commutateur sur OFF.
4. Vider le bac à glaçons.
Modèles avec fonction “Vacances”
■ Activer le mode “Vacances”. Voir la section “Utilisation
des commandes”.
REMARQUE: L’activation du mode “vacances” ne désactive
pas la machine à glaçons.
Si vous choisissez d’arrêter le réfrigérateur avant
votreabsence:
1. Enlever tous les aliments du réfrigérateur.
2. Si votre réfrigérateur est équipé d’une machine à glaçons
automatique:
■ Fermer l’approvisionnement en eau de la machine à
glaçons au moins un jour à l’avance.
■ Lorsque la dernière quantité de glaçons est déposée,
soulever le bras de commande d’arrêt métallique à la
position OFF (élevée) ou placer le commutateur sur OFF
(arrêt), selon votre modèle.
3. Vider le bac à glaçons.
4. Éteindre la/les commande(s) de température. Voir la section
“Utilisation de la/des commande(s)”.
5. Nettoyer le réfrigérateur, l’essuyer et bien le sécher.
6. À l’aide d’un ruban adhésif, placer des blocs de caoutchouc
ou de bois dans la partie supérieure de chaque porte de
façon à ce qu’elles soient sufsamment ouvertes pour
permettre à l’air d’entrer et d’éviter l’accumulation d’odeur
oude moisissure.
Déménagement
En cas de déménagement et de déplacement du réfrigérateur
dans une nouvelle habitation, suivre ces étapes pour préparer
ledéménagement.
1. Si votre réfrigérateur est équipé d’une machine à glaçons
automatique:
■ Fermer l’approvisionnement en eau de la machine à
glaçons au moins un jour à l’avance.
■ Débrancher la canalisation d’eau de l’arrière du
réfrigérateur.
■ Lorsque la dernière quantité de glaçons est déposée,
soulever le bras de commande d’arrêt métallique à la
position OFF (élevée) ou placer le commutateur sur OFF
(arrêt), selon votre modèle.
2. Retirer tous les aliments du réfrigérateur et placer tous les
aliments congelés dans de la neige carbonique.
3. Vider le bac à glaçons.
4. Éteindre la/les commande(s) de température. Voir la section
“Utilisation de la/des commande(s)”.
5. Débrancher le réfrigérateur.
6. Bien nettoyer, essuyer et sécher.
7. Retirer toutes les pièces amovibles, bien les envelopper et
les attacher ensemble avec du ruban adhésif pour qu’elles ne
bougent et ne s’entrechoquent pas durant le déménagement.
8. Selon le modèle, soulever l’avant du réfrigérateur pour qu’il
roule plus facilement OU soulever les pieds de nivellement
pour qu’ils n’égratignent pas le plancher. Voir les sections
“Ajustement des portes” ou “Fermeture et alignement des
portes”.
9. Fermer les portes à l’aide de ruban adhésif et xer le cordon
d’alimentation à la partie arrière du réfrigérateur.
Lors de l’arrivée à votre nouveau domicile, remettre tout
en place et consulter la section “Instructions d’installation”
pour les instructions de préparation. Aussi, si le réfrigérateur
comporte une machine à glaçons automatique, ne pas oublier
derebrancher l’approvisionnement en eau au réfrigérateur.
42
DÉPANNAGE
Essayer d’abord les solutions suggérées ici. Pour obtenir de l’aide ou des conseils qui permettront peut-être d’éviter une intervention
de dépannage, consulter la page de garantie de ce manuel et balayer le code avec votre appareil mobile ou visiter le www.whirlpool.
com/product_help.
Au Canada, visiter le www.whirlpool.ca.
Il est possible d’adresser ses commentaires ou questions par courrier à l’adresse ci-dessous:
Aux États-Unis:
Whirlpool Brand Home Appliances
Customer eXperience Center
553 Benson Road
Benton Harbor, MI 49022-2692
Veuillez indiquer dans votre correspondance un numéro de
téléphone où l’on peut vous joindre dans la journée.
Fonctionnement du réfrigérateur
Le réfrigérateur ne fonctionne pas
■ Le cordon d’alimentation électrique est-il débranché?
Brancher sur une prise de courant à 3 alvéoles, reliée à la
terre.
■ La prise électrique fonctionne-t-elle? Brancher une lampe
pour voir si la prise fonctionne.
■ Un fusible du domicile est-il grillé ou un disjoncteur s’est-
il ouvert? Remplacer le fusible ou réenclencher le disjoncteur.
Si le problème persiste, appeler un électricien.
■ Les commandes sont-elles activées? S’assurer que les
commandes du réfrigérateur sont sur ON (allumés). Voir la
section “Utilisation de la/des commande(s)”.
■ S’agit-il d’une nouvelle installation? Accorder 24heures
après l’installation pour que le réfrigérateur se refroidisse
complètement.
REMARQUE: Le fait d’ajuster les commandes de température
sur le réglage le plus froid ne refroidira pas le compartiment
plus rapidement.
Au Canada:
Whirlpool Brand Home Appliances
Customer eXperience Centre
200 – 6750 Century Ave.
Mississauga, Ontario L5N 0B7
Le moteur semble fonctionner excessivement
Il se peut que votre nouveau réfrigérateur fonctionne plus
longtemps que l’ancien en raison du compresseur et des
ventilateurs à haute efcacité. L’appareil peut fonctionner plus
longtemps encore si la température de la pièce est élevée, si une
grande quantité de nourriture a été ajoutée, si les portes sont
fréquemment ouvertes ou si elles ont été laissées ouvertes.
Le réfrigérateur semble bruyant
Le bruit émis par les réfrigérateurs a été réduit au cours des
années. Du fait de cette réduction, il est possible d’entendre des
bruits intermittents provenant de votre nouveau réfrigérateur qui
n’avaient pas été décelés avec votre ancien modèle. Voici une
liste de sons normaux, accompagnée d’explications.
■ Bourdonnement – entendu lorsque le robinet d’arrivée
d’eau s’ouvre pour remplir la machine à glaçons
■ Pulsation – les ventilateurs/le compresseur se règlent an
d’optimiser la performance
■ Sifement/cliquetis - écoulement de liquide réfrigérant,
mouvement des conduites d’eau ou d’objets posés sur
ledessus du réfrigérateur
■ Grésillement/gargouillement – de l’eau tombe sur
l’élément de chauffage durant le programme de dégivrage
■ Bruit d’éclatement – contraction/expansion des parois
internes, particulièrement lors du refroidissement initial
■ Bruit d’écoulement d’eau – peut être entendu lorsque la
glace fond lors du programme de dégivrage et que l’eau
s’écoule dans le plateau de dégivrage
■ Grincement/craquement – se produit lorsque la glace
est éjectée du moule à glaçons.
Les portes ne ferment pas complètement
■ La porte est-elle bloquée en position ouverte?
Déplacerles emballages d’aliments pour libérer la porte.
■ Un compartiment ou une tablette bloquent-ils le
passage? Replacer le compartiment ou la tablette en
position correcte.
AVERTISSEMENT
Risque de choc électrique
Brancher sur une prise à 3 alvéoles reliée à la terre.
Ne pas enlever la broche de liaison à la terre.
Ne pas utiliser un adaptateur.
Ne pas utiliser un câble de rallonge.
Le non-respect de ces instructions peut causer
un décès, un incendie ou un choc électrique.
43
Les portes sont difciles à ouvrir
■ Les joints d’étanchéité sont-ils sales ou collants?
Nettoyerles joints et les surfaces de contact au savon doux
et à l’eau tiède. Rincer et sécher avec un linge doux.
Température et humidité
La température est trop élevée
■ S’agit-il d’une nouvelle installation? Accorder 24heures
après l’installation pour que le réfrigérateur se refroidisse
complètement.
■ Porte(s) ouverte(s) souvent ou laissée(s) ouverte(s)?
Ceci permet à l’air chaud de pénétrer dans le réfrigérateur.
Minimiser les ouvertures de porte et garder les portes
complètement fermées.
■ A-t-on ajouté une grande quantité d’aliments?
Attendrequelques heures pour permettre au réfrigérateur de
revenir à une température normale.
■ Les réglages sont-ils corrects pour les conditions
existantes? Régler les commandes à un cran plus froid.
Vérier la température au bout de 24 heures. Voir la section
“Utilisation de la/des commande(s)”.
Il y a accumulation d’humidité à l’intérieur
REMARQUE: Une certaine accumulation d’humidité est normale.
■ La pièce est-elle humide? Ceci contribue à l’accumulation
de l’humidité.
■ Porte(s) ouverte(s) souvent ou laissée(s) ouverte(s)?
Ceci permet à l’air chaud de pénétrer dans le réfrigérateur.
Minimiser les ouvertures de porte et garder les portes
complètement fermées.
Glaçons et eau
La machine à glaçons ne produit pas ou pas
sufsamment de glaçons
■ Le réfrigérateur est-il connecté à l’alimentation en
eauet le robinet d’arrêt d’eau est-il ouvert? Brancher le
réfrigérateur à l’alimentation en eau et ouvrir le robinet d’arrêt
d’eau complètement.
■ La canalisation de la source d’eau du domicile
comporte-t-elle une déformation? Une déformation dans
la canalisation peut réduire l’écoulement d’eau. Redresser la
canalisation d’eau.
■ La machine à glaçons est-elle allumée? S’assurer que le bras
de commande à broche ou le commutateur (selon le modèle)
est en position ON.
■ S’agit-il d’une nouvelle installation? Attendre 24 heures
après l’installation de la machine à glaçons pour que la
production de glaçons commence. Attendre 72 heures
pourque la production de glaçons soit complète.
■ Porte du congélateur complètement fermée? Bien fermer
la porte du compartiment de congélation. Si la porte du
compartiment de congélation ne se ferme pas complètement,
voir le point “Les portes ne ferment pas complètement” plus
haut dans cette section.
■ A-t-on récemment prélevé une grande quantité de
glaçons? Attendre 24 heures pour que la machine à glaçons
produise plus de glaçons.
■ Un glaçon est-il coincé dans le bras éjecteur de la
machine à glaçons? Enlever le glaçon du bras éjecteur avec
un ustensile en plastique.
■ Un ltre à eau est-il installé sur le réfrigérateur? Enleverle
ltre et faire fonctionner la machine à glaçons. Si le volume
de glace augmente, le ltre est probablement obstrué ou mal
installé. Remplacer le ltre ou le réinstaller correctement.
■ Un système de ltration de l’eau à osmose inverse est-il
connecté à votre alimentation en eau froide? Ceci peut
réduire la pression de l’eau.
Voir la section “Spécications de l’alimentation en eau”.
Les glaçons sont creux ou petits
REMARQUE: Cela indique une faible pression d’eau.
■ La valve de la canalisation d’eau n’est-elle pas
complètement ouverte? Ouvrir le robinet d’arrêt
complètement.
■ La canalisation de la source d’eau du domicile
comporte-t-elle une déformation? Une déformation dans
la canalisation peut réduire l’écoulement d’eau. Redresser la
canalisation d’eau.
■ Un ltre à eau est-il installé sur le réfrigérateur? Enleverle
ltre et faire fonctionner la machine à glaçons. Si la qualité
des glaçons s’améliore, le ltre est probablement obstrué ou
mal installé. Remplacer le ltre ou le réinstaller correctement.
■ Un système de ltration de l’eau à osmose inverse est-il
connecté à votre alimentation en eau froide? Ceci peut
réduire la pression de l’eau.
Voir la section “Spécications de l’alimentation en eau”.
■ D’autres questions concernant la pression de l’eau?
Appeler un plombier agréé et qualié.
AVERTISSEMENT
Risque d'explosion
Utiliser un produit de nettoyage ininflammable.
Le non-respect de cette instruction peut causer un décès,
une explosion ou un incendie.

44
Goût, odeur ou couleur grise des glaçons
■ Les raccords de plomberie sont-ils neufs? Des raccords
de plomberie neufs peuvent entraîner une décoloration ou
unmauvais goût des glaçons.
■ Les glaçons ont-ils été gardés trop longtemps? Jeterles
glaçons. Laver le compartiment à glaçons. Attendre 24heures
pour la fabrication de nouveaux glaçons.
■ Y a-t-il un transfert d’odeurs de nourriture? Utiliser des
emballages hermétiques et à l’épreuve de l’humidité pour
conserver les aliments.
■ L’eau contient-elle des minéraux (tels que le soufre)?
L’installation d’un ltre à eau peut être requise an d’enlever
les minéraux.
■ Un ltre à eau est-il installé sur le réfrigérateur?
Unedécoloration grise ou foncée de la glace indique
que le système de ltration de l’eau nécessite un rinçage
supplémentaire. Rincer le circuit d’eau avant d’utiliser un
nouveau ltre. Remplacer le ltre à eau à la date indiquée.
Voir la section “Système de ltration de l’eau”.
Le distributeur d’eau ne fonctionne pas correctement
■ Le réfrigérateur est-il connecté à l’alimentation en eau
et le robinet d’arrêt d’eau est-il ouvert? Brancher le
réfrigérateur à l’alimentation en eau et ouvrir le robinet d’arrêt
d’eau complètement.
■ La canalisation de la source d’eau du domicile comporte-t-
elle une déformation? Redresser la canalisation d’eau.
■ S’agit-il d’une nouvelle installation? Rincer et remplir le
système de distribution d’eau. Voir la section “Distributeur
d’eau”.
■ La pression en eau est-elle d’au moins 35lb/po²
(241kPa)? La pression de l’eau du domicile détermine
l’écoulement d’eau du distributeur. Voir la section
“Spécications de l’alimentation en eau”.
■ Un ltre à eau est-il installé sur le réfrigérateur? Enleverle
ltre et faire fonctionner le distributeur. Si le débit d’eau
augmente, le ltre est probablement obstrué ou mal installé.
Remplacer le ltre ou le réinstaller correctement.
■ Porte du congélateur complètement fermée? Bien fermer
la porte. Si elle ne ferme pas complètement, voir le point
“Lesportes ne ferment pas complètement” plus haut dans
cette section.
■ A-t-on récemment ôté les portes? Vérier que l’assemblage
câble/tuyau du distributeur d’eau a été correctement
reconnecté. Voir la section “Porte(s) du réfrigérateur et tiroir”.
■ Un système de ltration de l’eau à osmose inverse est-il
connecté à votre alimentation en eau froide? Ceci peut
réduire la pression de l’eau. Voir la section “Spécications
del’alimentation en eau”.
De l’eau suinte du système de distribution
REMARQUE: Il est normal de constater l’apparition d’une ou
deux gouttes d’eau après la distribution d’eau.
■ Le verre n’a pas été maintenu sous le distributeur assez
longtemps? Maintenir le verre sous le distributeur2 à
3secondes après avoir relâché le levier du distributeur.
■ S’agit-il d’une nouvelle installation? Rincer le système de
distribution d’eau. Voir la section “Distributeur d’eau”.
■ Le ltre à eau a-t-il été récemment changé? Rincer le
système de distribution d’eau.
■ Voir la section “Distributeur d’eau”.
■ Y a-t-il de l’eau sur le sol, près de la grille de la base?
S’assurer que les raccordements de canalisation du
distributeur d’eau sont complètement serrés.
Voir la section “Porte(s) du réfrigérateur et tiroir”.
L’eau du distributeur est tiède
REMARQUE: L’eau du distributeur est seulement réfrigérée à
50°F (10°C).
■ S’agit-il d’une nouvelle installation? Attendre 24heures
après l’installation pour que l’alimentation en eau refroidisse
complètement.
■ A-t-on récemment distribué une grande quantité d’eau?
Attendre 24 heures pour que l’alimentation d’eau refroidisse
complètement.
■ Y a-t-il longtemps que de l’eau n’a pas été servie?
Lepremier verre d’eau peut ne pas être froid. Jeter le premier
verre d’eau.
■ Le réfrigérateur est-il raccordé à la canalisation d’arrivée
d’eau froide? S’assurer que le réfrigérateur est raccordé à la
canalisation d’arrivée d’eau froide.
Voir la section “Spécications de l’alimentation en eau”.
45
FEUILLES DE DONNÉES SUR LA PERFORMANCE
Système de ltration d’eau intérieur
ModèleUKF8001AXX-750 d’une capacité de 750 gallons (2839 litres)
Ce système a été testé selon les normes NSF/ANSI 42, 53, 401 et CSAB483.1 pour la réduction des substances énumérées ci-dessous.
La concentration des substances indiquées dans l’eau entrant dans le système a été réduite à une concentration inférieure ou égale à la
limite permissible pour l’eau qui quitte le système, comme spécié par les normes ANSI/NSF42, 53 et 401, ainsi que CSAB483.1.
Réduction
concentration produits
de désinfection
Critères de
réduction NFS
Afuent moyen Concentration
dans l’eau à traiter
Efuent
maximal
Efuent moy. % de réd.
minimale
Réduction du
pourcentage
moyen
Goût/odeur de chlore
Particules Classe I*
Réduction de
50% réduction
de 85%
2,00mg/L
14000000 #/mL
2mg/L± 10 %
Au moins
10000particules/mL
0,06mg/L
370000 #/mL**
0,050625mg/L
196666 #/mL
97,00%,
97,40%
97,52%,
99,00%
Réduction des
contaminants
Critères de
réduction NFS
Afuent moyen Concentration
dans l’eau à traiter
Efuent
maximal
Efuent moy. % de réd.
minimale
Réduction du
pourcentage
moyen
Plomb: à pH6,5
Plomb: à pH8,5
0,010mg/L
0,010 mg/L
0,150mg/L
†
0,150mg/L
†
0,15mg/L± 10 %
0,15mg/L± 10 %
< 0,001 mg/L
< 0,001 mg/L
< 0,001 mg/L
< 0,001 mg/L
>99,30%
>99,30%
>99,30%
>99,30%
Mercure: à pH6,5
Mercure: à pH8,5
0,002mg/L
0,002 mg/L
0,006mg/L
0,0059mg/L
0,006mg/L± 10 %
0,006mg/L± 10 %
0,0005mg/L
0,0018mg/L
0,0003mg/L
0,00073mg/L
91,70%
69,20%
95,00%
88,10%
Benzène 0,005mg/L 0,0133mg/L 0,015mg/L± 10% 0,0005mg/L 0,0005mg/L 96,10% 96,30%
p-dichlorobenzène 0,075mg/L 0,210mg/L 0,225mg/L± 10% < 0,0005mg/L < 0,0005mg/L > 99,80% > 99,80%
Carbofurane 0,040mg/L 0,0753mg/L 0,08mg/L± 10% 0,027mg/L 0,008mg/L 64,60% 73,45%
Toxaphène 0,003mg/L 0,015mg/L 0,015 ± 10% < 0,001mg/L < 0,001mg/L > 93,3 % > 93,3 %
Atrazine 0,003mg/L 0,0102mg/L 0,009mg/L± 10% 0,0027mg/L 0,00105mg/L 76,30% 89,40%
Amiante > 99% 126,5 MF/L 107 à 108 bres/L
††
<0,17 MF/L <0,17 MF/L > 99,99% > 99,99%
Kystes opérationnels
‡
Turbidité
>99,95%
0,5NTU
122 500 #/L
10,5NTU
50000/L min.
11 ± 1NTU
< 1 #/L
‡
0,30NTU
< 1 #/L
‡
0,125NTU
>99,99 %
97,30 %
>99,99 %
98,80 %
Lindane 0,0002mg/L 0,0019mg/L 0,002 ± 10% < 0,00016mg/L 0,000035mg/L 91,80% 97,90%
Tétrachloroéthène 0,005mg/L 0,015mg/L 0,015mg/L± 10% < 0,000 5mg/L < 0,000 5mg/L > 96,6% > 96,6%
Paramètres de tests: pH = 7,5 ± 0,5 à moins d’indications contraires. Débit = 0,78 gpm (2,9 Lpm). Pression = 60lb/po² (413,7kPa). Temps. = 20°C
±3°C (68°F ± 5°F).
■ Il est essentiel que les exigences de fonctionnement, d’entretien
etderemplacement de ltre soient respectées pour que ce produit
donne le rendement annoncé.
■ Le ltre à eau jetable doit être remplacé au moins tous les 6 mois.
■ Le système de contrôle du ltre mesure la quantité d’eau qui passe par
le ltre et vous alerte lorsqu’il faut remplacer le ltre. Lorsque90% de
la vie estimée du ltre sont utilisés, le témoin jaune (order/commander)
s’allume. Lorsque 100% de la vie estimée du ltre sont utilisés, le
témoin rouge (replace/remplacer) s’allume et il est recommandé
de remplacer le ltre. Pour les modèles sans témoin d’état de ltre,
remplacer le ltre tous les 6 mois. Utiliser le modèle de ltre de
rechangeUKF8001. Prix suggéré au détail en 2015 de 49,99$ US/
54,95$ CAN. Les prix sont indiqués sous réserve de modication.
■ Le produit doit être utilisé pour l’eau froide seulement.
*Classe I – taille des particules: >0,5 à <1um
** Exigence de test: au moins 100000 particules/mL (poussière de test
ne AC).
†
Ces contaminants ne sont pas nécessairement présents dans
votre approvisionnement d’eau. Le rendement peut varier selon les
caractéristiques de l’eau locale.
†
Fibres de longueur supérieure à 10um
‡
Sur la base de la ltration de kystes de Cryptosporidium parvum
®
NSF est une marque déposée de NSF International.
■ Ne pas utiliser ce produit pour ltrer une eau microbiologiquement
polluée ou de qualité inconnue en l’absence d’un dispositif de
désinfection adéquat en amont ou en aval du système. Les systèmes
certiés pour la réduction des kystes peuvent être utilisés pour une
eau désinfectée susceptible de contenir des kystes ltrables.
■ Consulter la section “Système de ltration de l’eau” pour obtenir
lenom, l’adresse et le numéro de téléphone du fabricant.
■ Consulter la section “Garantie” pour voir la garantie limitée du fabricant.
Directives d’application/paramètres d’approvisionnement
en eau
Source d’eau
Pression d’eau
Température de l’eau
Débit nominal
Puits ou collectivité
35 - 120 kPa (241 - 827lb/po²)
33° - 100°C (1° - 38°F)
0,78L/min. (2,9gpm) à 60lb/po²
Système testé et homologué par NSF International en vertu des normes
NSF/ANSI42, 53 et 401, ainsi que CSAB483.1 pour la réduction de
contaminants spéciés sur la che de données de performance.
46
Système testé et homologué par NSF International en vertu des normes
NSF/ANSI42, 53 et 401, ainsi que CSAB483.1 pour la réduction de
contaminants spéciés sur la che de données de performance.
Système de filtration d’eau
Modèle UKF8001AXX-200/UKF8001 d’une capacité de 200 gallons (757 litres)
Ce système a été testé selon les normes NSF/ANSI 42, 53, 401 et CSAB483.1 pour la réduction des substances énumérées ci-
dessous. Laconcentration des substances indiquées dans l’eau entrant dans le système a été réduite à une concentration inférieure
ou égale à la limite permissible pour l’eau qui quitte le système, tel que spécié par les normes ANSI/NSF 42, 53 et 401, ainsi que CSA
B483.1.
Réduction concentration
produits de désinfection
Concentration dans l’eau à traiter Limite permissible de concentration du produit
dans l’eau
Réduction du pourcentage moyen
Chlore goût/odeur 2,0mg/L± 10% Réduction de 50% 97,6%
Particules (classe I*) Au moins 10000particules/mL Réduction de 85% 98,8%
Réduction des contaminants Concentration dans l’eau à traiter Limite permissible de concentration du produit
dans l’eau
Réduction du pourcentage moyen
Plomb***: à pH6,5/à pH8,5 0,150mg/L± 10% 0,010mg/L 99,3%/99,3%
Mercure: à pH6,5/à pH8,5 0,006mg/L± 10% 0,002mg/L 95,1%/95,0%
Amiante 107 à 108 bres/L†† > 99% > 99%
Kystes† 50000/L min > 99,95% 99,99%
Turbidité 11NTU± 10 % 0,5NTU 98,1%
Atrazine 0,009mg/L± 10% 0,003mg/L 94,4%
Benzène 0,015mg/L± 10% 0,005mg/L 96,6%
Carbofurane 0,080mg/L± 10% 0,040mg/L 86,8%
Lindane 0,002mg/L± 10% 0,0002mg/L 98,8%
p-dichlorobenzène 0,225mg/L± 10% 0,075mg/L 99,7%
Tétrachloroéthène 0,015mg/L± 10% 0,005mg/L 96,0%
Toxaphène 0,015mg/L± 10% 0,003mg/L 93,8%
Aténolol 200 ± 20% 30ng/L > 95,9%
Endrin 0,006mg/L± 10 % 0,002mg/L 96,7%
Ethylbenzène 2,1mg/L± 10% 0,7mg/L 99,9%
o-dichlorobenzène 1,8mg/L± 10 % 0,6mg/L 99,9%
2,4 - D 0,210mg/L± 10% 0,07mg/L 97%
Carbamazépine 1400 ± 20% 200ng/L > 98,6 %
Diéthyltoluamide 1400 ± 20% 200ng/L > 98,5 %
Linuron 140 ± 20% 20ng/L > 96,8 %
Méprobamate 400 ± 20% 60ng/L 94,6%
Métolachlore 1400 ± 20% 200ng/L 98,3%
Triméthoprime 140 ± 20% 20ng/L > 96,4 %
Bisphénol A 2000 ± 20% 300ng/L 99,4%
Estrone 140 ± 20% 20ng/L > 96,7 %
Nonylphénol 1400 ± 20% 200ng/L > 98,9%
Ibuprofène 400 ± 20% 60ng/L 92,9%
Naproxène 140 ± 20% 20ng/L > 96,3%
Phénytoïne 200 ± 20% 30ng/L > 94,8%
Paramètres de tests: pH = 7,5 ± 0,5 à moins d’indications contraires. Débit = 0,78 gpm (2,95 Lpm). Pression = 60lb/po² (413,7kPa).
Temps. = 20°C à 22°C (68°F à 71,6°F). Capacité de service nominale = 200 gallons (757 litres).
Les composés certiés en vertu de la norme NSF401 sont considérés comme appartenant à la catégorie des “composés émergents/contaminants
secondaires”. Les“composés émergents/contaminants secondaires” sont des composés qui ont été détectés à de faibles concentrations dans
des sources d’approvisionnement en eau potable; Même s’ils n’apparaissent qu’à de faibles concentrations, ces composés peuvent inuencer la
perception et le niveau d’acceptation de la qualité de l’eau deconsommation par le public.
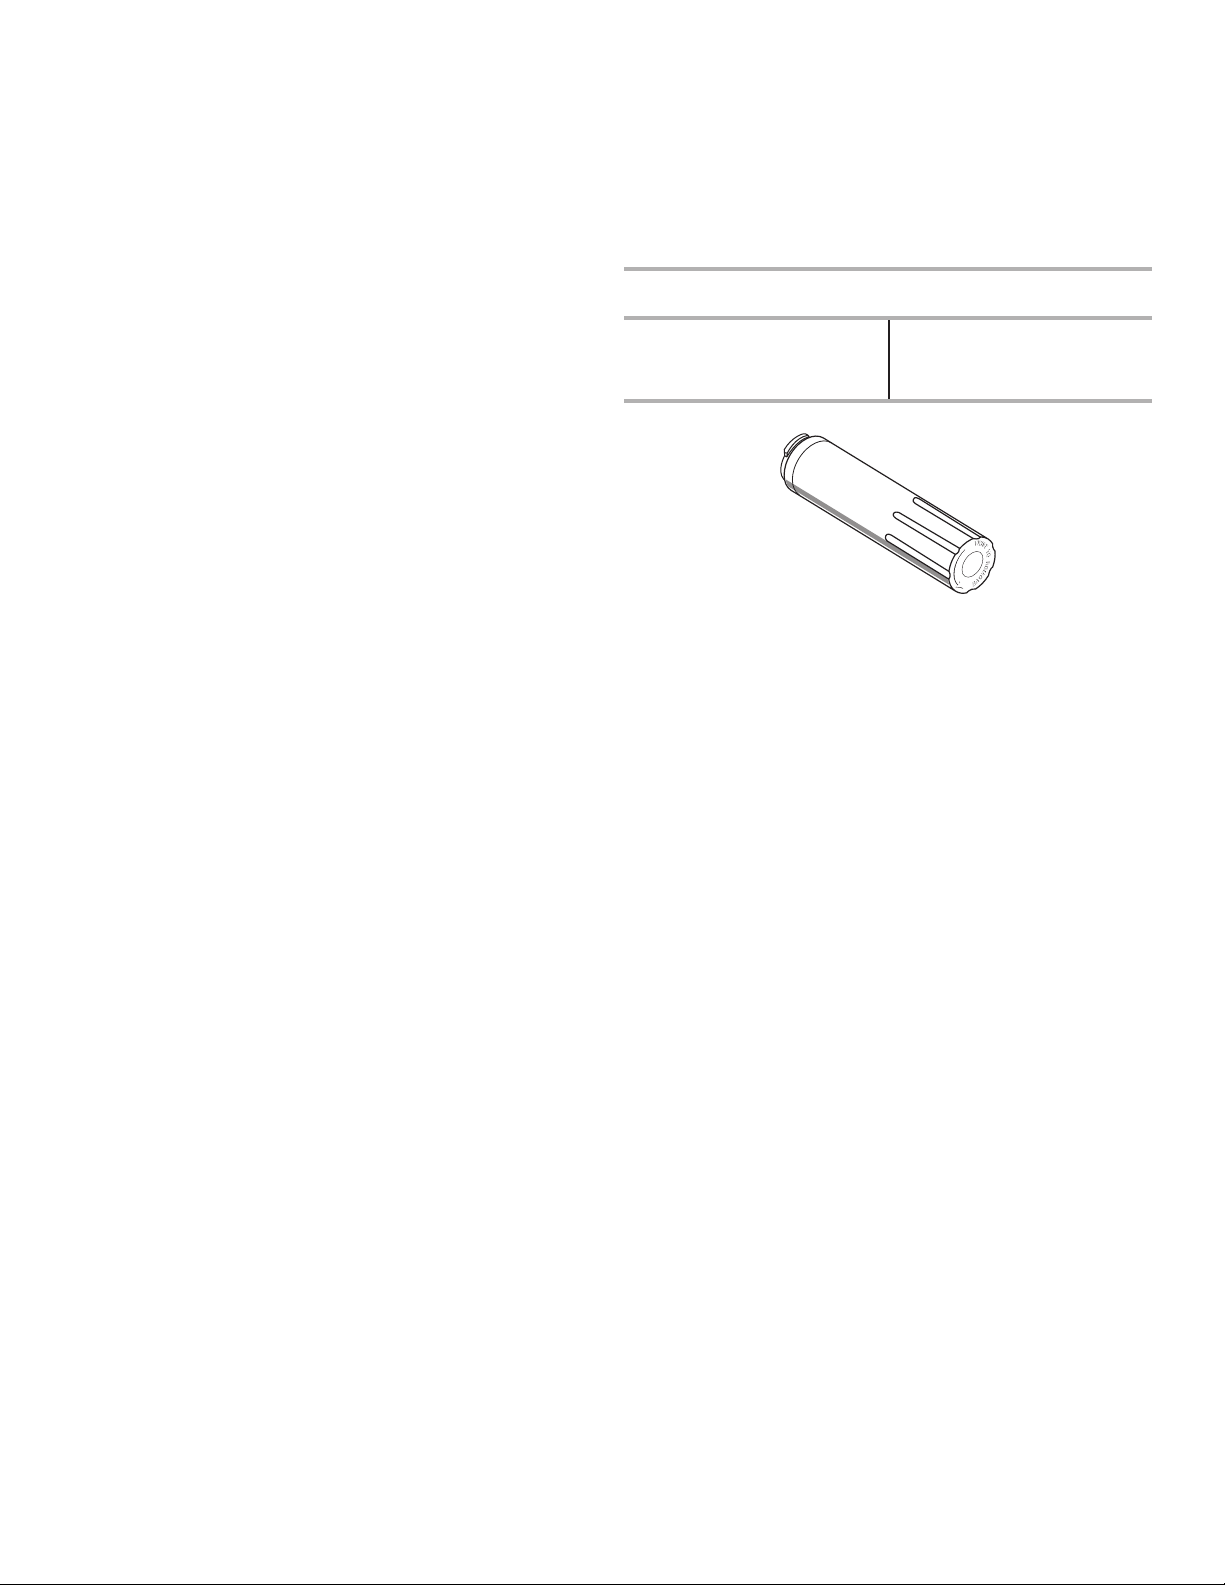
47
■ Il est important que les critères de fonctionnement, d’entretien et de
remplacement du ltre soient respectés pour que le produit donne le
rendement annoncé. Des dommages matériels peuvent subvenir si
toutes lesinstructions ne sont pas respectées.
■ La cartouche jetable doit être changée au moins tous les 6 mois.
■ Utiliser le ltre de remplacementUKF8001, no de pièceEDR4RXD1/
EDR4RXD1B. Prix suggéré au détail en 2015 de 49,99$ US/49,95 $
CAN. Lesprix sont indiqués sous réserve de modication.
■ Le système de contrôle du ltre mesure la quantité d’eau qui passe
par le ltre et vous alerte lorsque vient le temps de remplacer le ltre.
Pour savoir comment vérier l’état du ltre, consulter “Utiliser les
commandes” ou “Système de ltration d’eau” dans les instructions
d’utilisation oule guide d’utilisation.
■ Après avoir remplacé le ltre à eau, purger le système d’eau. Voir les
sections “Distributeur d’eau et de glaçons” ou “Distributeur d’eau”
dans les instructions d’utilisation ou le guide d’utilisation.
■ Ces contaminants ne sont pas nécessairement présents dans votre
approvisionnement d’eau. Même si le test a été effectué dans des
conditions de laboratoires standard, le rendement réel peut varier.
■ Le produit doit être utilisé pour l’eau froide seulement.
■ Le circuit d’eau doit être installé conformément aux lois et règlements
locaux età ceux de l’État concerné.
* Classe I – taille des particules : >0,5 à <1 um
***Conforme aux exigences de réduction du plomb de la norme NSF/
ANSI Standard 53 (testé par Pace Analytical Services, Inc.)
† Sur la base de la ltration de kystes de Cryptosporidium parvum
†† Fibres de longueur supérieure à 10 um
®
NSF est une marque déposée de NSF International.
■ Ne pas utiliser ce produit pour ltrer une eau microbiologiquement
polluée ou de qualité inconnue en l’absence d’un dispositif de
désinfection adéquat en amont ou en aval du système. Les systèmes
certiés pour la réduction des kystes peuvent être utilisés pour une
eau désinfectée susceptible de contenir des kystes ltrables. Étab.
EPA no 10350-MN-005
■ Consulter la section “Garantie” (dans les instructions d’utilisation ou
le guide d’utilisation) pour connaître la garantie limitée, le nom et le
numéro detéléphone du fabricant.
Directives d’application/paramètres d’approvisionnement
en eau
Source d’eau
Pression d’eau
Température de l’eau
Débit nominal
Puits ou collectivité
35 - 120 kPa (241 - 827lb/po²)
33° - 100°C (1° - 38°F)
0,78L/min. (2,9gpm) à 60lb/po²
48
SI VOUS AVEZ BESOIN DE SERVICE :
1. Avant de nous contacter pour obtenir un dépannage, veuillez déterminer si des réparations sont nécessaires pour votre produit.
Certains problèmes peuvent être résolus sans intervention de dépannage. Prenez quelques minutes pour parcourir la section
Dépannage ou Résolution de problèmes du guide d’utilisation et d’entretien ou rendez-vous sur le site http://www.whirlpool.ca.
2. Tout service sous garantie doit être effectué exclusivement par nos fournisseurs de dépannage autorisés Whirlpool.
Aux É.-U. et au Canada, dirigez toutes vos demandes de service sous garantie au :
Centre d’eXpérience de la clientèle Whirlpool
Aux É.-U., composer le 1 800 253-1301. Au Canada, composer le 1 800 807-6777.
Si vous résidez à l’extérieur du Canada et des 50 États des États-Unis, contactez votre marchand Whirlpool autorisé pour déterminer
si une autre garantie s’applique.
GARANTIE LIMITÉE DES
APPAREILS DE
RÉFRIGÉRATION
WHIRLPOOL
®
ATTACHEZ ICI VOTRE REÇU DE VENTE. UNE PREUVE D’ACHAT EST
OBLIGATOIRE POUR OBTENIR L’APPLICATION DE LA GARANTIE.
Lorsque vous appelez le centre d’eXpérience à la clientèle, veuillez
garderà disposition les renseignements suivants :
■ Nom, adresse et numéro de téléphone
■ Numéros de modèle et de série
■ Une description claire et détaillée du problème rencontré
■ Une preuve d’achat incluant le nom et l’adresse du marchand
oududétaillant
GARANTIE LIMITÉE DE CINQ ANS
CE QUI EST COUVERT CE QUI N’EST PAS COUVERT
GARANTIE LIMITÉE DE UN AN
Pendant un an à compter de la date d’achat, lorsque ce
gros appareil ménager est installé, utilisé et entretenu
conformément aux instructions jointes à ou fournies avec
le produit, Whirlpool Corporation ou Whirlpool Canada
LP (ci-après désignées “Whirlpool”) décidera à sa seule
discrétion de remplacer le produit ou de couvrir le coût des
pièces de remplacement spéciées par l’usine et de la main-
d’oeuvre nécessaires pour corriger les vices de matériaux
ou de fabrication qui existaient déjà lorsque ce gros appareil
ménager a été acheté. S’il est remplacé, votre appareil restera
sous garantie pour la durée restant à courir de la période de
garantie sur le produit d’origine.
GARANTIE LIMITÉE DE LA DEUXIÈME
À LA CINQUIÈME ANNÉE INCLUSIVEMENT
SUR LA DOUBLURE DE LA CAVITÉ ET SUR
LE SYSTÈME DE RÉFRIGÉRATION SCELLÉ
De la deuxième à la cinquième année inclusivement à
compter de la date d’achat initiale, lorsque ce gros appareil
ménager est installé, utilisé et entretenu conformément aux
instructions jointes au produit ou fournies avec, la marque
Whirlpool paiera pour les pièces de rechange spéciées
par l’usine et la main d’oeuvre concernant les composants
suivants pour corriger les défauts non esthétiques de
matériau ou de fabrication de ladite pièce qui empêchent
le réfrigérateur de fonctionner et qui étaient déjà présents
lorsque ce gros appareil ménager a été acheté :
■ Doublure de la cavité du réfrigérateur/congélateur si
la pièce se ssure en raison d’un vice de matériau ou
de fabrication.
■ Système de réfrigération scellé (y compris le compresseur,
l’évaporateur, le condenseur, le séchoir et les conduits
de connexion).
LE SEUL ET EXCLUSIF RECOURS DU CLIENT DANS LE
CADRE DE LA PRÉSENTE GARANTIE LIMITÉE CONSISTE
EN LA RÉPARATION PRÉVUE PAR LA PRÉSENTE. Le service
doit être fourni par une compagnie de service désignée par
Whirlpool. Cette garantie limitée est valide uniquement aux
États-Unis ou au Canada et s’applique exclusivement lorsque
le gros appareil ménager est utilisé dans le pays où il a été
acheté. La présente garantie limitée est valable à compter de
la date d’achat initial par le consommateur. Une preuve de
la date d’achat initial est exigée pour obtenir un dépannage
dans le cadre de la présente garantie limitée.
1. Usage commercial, non résidentiel ou par plusieurs familles, ou non-respect
des instructions d’utilisation, de fonctionnement ou d’installation.
2. Visite à domicile pour montrer à l’utilisateur comment utiliser l’appareil.
3. Visites de service pour rectier une installation ou un entretien fautifs
du produit, une installation non conforme aux codes d’électricité ou de
plomberie, ou la rectication de l’installation électrique ou de la plomberie
du domicile (ex : câblage électrique, fusibles ou tuyaux d’arrivée d’eau du
domicile).
4. Pièces consomptibles (ex : ampoules, piles, ltres à air ou à eau, solutions
de conservation, etc.).
5. Défauts ou dommage résultant de l’utilisation de pièces ou accessoires
Whirlpool non authentiques.
6. Dommages causés par : accident, mésusage, abus, incendie, inondations,
catastrophe naturelle ou l’utilisation de produits non approuvés par
Whirlpool.
7. Réparations aux pièces ou systèmes dans le but de rectier un dommage
ou des défauts résultant d’une réparation, altération ou modication non
autorisée faite à l’appareil.
8. Défauts d’apparence, notamment les éraures, traces de choc, ssures ou
tout autre dommage subi par le ni de l’appareil ménager, à moins que ces
dommages ne résultent de vices de matériaux ou de fabrication et ne soient
signalés à Whirlpool dans les 30 jours suivant la date d’achat.
9. Décoloration, rouille ou oxydation des surfaces résultant d’environnements
caustiques ou corrosifs incluant des concentrations élevées de sel, un haut
degré d’humidité ou une exposition à des produits chimiques (exemples non
exhaustifs).
10. Perte d’aliments ou de médicaments due à la défaillance du produit.
11. Enlèvement ou livraison. Ce produit est conçu pour être réparé à l’intérieur
du domicile.
12. Frais de déplacement et de transport pour le dépannage/la réparation dans
une région éloignée où une compagnie de service Whirlpool autorisée n’est
pas disponible.
13. Retrait ou réinstallation d’appareils inaccessibles ou de dispositifs
préinstallés (ex : garnitures, panneaux décoratifs, plancher, meubles, îlots
de cuisine, plans de travail, panneaux de gypse, etc.) qui entravent le
dépannage, le retrait ou le remplacement du produit.
14. Service et pièces pour des appareils dont les numéros de série et de modèle
originaux ont été enlevés, modiés ou ne peuvent pas être facilement
identiés.
Le coût d’une réparation ou d’un remplacement dans le cadre de ces
circonstances exclues est à la charge du client.

02/17
CLAUSE D’EXONÉRATION DE RESPONSABILITÉ AU TITRE DES GARANTIES IMPLICITES
LES GARANTIES IMPLICITES, Y COMPRIS LES GARANTIES APPLICABLES DE QUALITÉ MARCHANDE OU D’APTITUDE À UN USAGE
PARTICULIER, SONT LIMITÉES À CINQ ANS OU À LA PLUS COURTE PÉRIODE AUTORISÉE PAR LA LOI. Certains États et certaines provinces
ne permettent pas de limitation sur la durée des garanties implicites de qualité marchande ou d’aptitude à un usage particulier, de sorte que la
limitation ci-dessus peut ne pas être applicable dans votre cas. Cette garantie vous confère des droits juridiques spéciques et vous pouvez
également jouir d’autres droits qui peuvent varier d’une juridiction à l’autre.
EXONÉRATION DE RESPONSABILITÉ DANS LES DOMAINES NON COUVERTS PAR LA GARANTIE
Whirlpool décline toute responsabilité au titre de la qualité, de la durabilité ou en cas de dépannage ou de réparation nécessaire sur ce gros
appareil ménager autre que les responsabilités énoncées dans la présente garantie. Si vous souhaitez une garantie plus étendue ou plus
complète que la garantie limitée fournie avec ce gros appareil ménager, adressez-vous à Whirlpool ou à votre détaillant pour obtenir les
modalités d’achat d’une garantie étendue.
LIMITATION DES RECOURS; EXCLUSION DES DOMMAGES FORTUITS OU INDIRECTS
LE SEUL ET EXCLUSIF RECOURS DU CLIENT DANS LE CADRE DE LA PRÉSENTE GARANTIE LIMITÉE CONSISTE EN LA RÉPARATION
PRÉVUE PAR LA PRÉSENTE. WHIRLPOOL N’ASSUME AUCUNE RESPONSABILITÉ POUR LES DOMMAGES FORTUITS OU INDIRECTS.
Certains États et certaines provinces ne permettent pas l’exclusion ou la limitation des dommages fortuits ou indirects de sorte que ces
limitations et exclusions peuvent ne pas être applicables dans votre cas. Cette garantie vous confère des droits juridiques spéciques et vous
pouvez également jouir d’autres droits qui peuvent varier d’une juridiction à l’autre.
50
LE AGRADECEMOS la compra de este producto de alta calidad. Registre su nuevo refrigerador en www.whirlpool.com. En Canadá,
registre su refrigerador en www.whirlpool.ca.
Para referencia futura, tome nota de los números de modelo y de serie de su producto. Estos se pueden encontrar en la pared interior
del compartimiento del refrigerador.
Número de modelo ___________________________ Número de serie_____________________________
INSTRUCCIONES PARA EL USUARIO DEL REFRIGERADOR
Para obtener acceso a “Instrucciones para el usuario del refrigerador” en español, o para obtener información adicional acerca de su
producto, visite: www.whirlpool.com.
Necesitará su número de modelo y de serie, ubicado en el interior del compartimiento del refrigerador.
INSTRUCCIONES PARA EL USUARIO
DELREFRIGERADOR
SEGURIDAD DEL REFRIGERADOR
Si no sigue las instrucciones de inmediato, usted puede
morir o sufrir una lesión grave.
Si no sigue las instrucciones, usted puede morir o sufrir
una lesión grave.
Todos los mensajes de seguridad le dirán el peligro potencial, le dirán cómo reducir las posibilidades de sufrir una lesión y lo que
puede suceder si no se siguen las instrucciones.
Su seguridad y la seguridad de los demás es muy importante.
Hemos incluido muchos mensajes importantes de seguridad en este manual y en su electrodoméstico. Lea y obedezca siempre
todos los mensajes de seguridad.
ADVERTENCIA
PELIGRO
Este es el símbolo de alerta de seguridad.
Este símbolo le llama la atención sobre peligros potenciales que pueden ocasionar la muerte o una lesión a
usted y a los demás.
Todos los mensajes de seguridad irán a continuación del símbolo de advertencia de seguridad y de la palabra
“PELIGRO” o “ADVERTENCIA”. Estas palabras significan:
51
Advertencias de la Proposición 65 del estado de California:
ADVERTENCIA: Este producto contiene una o más sustancias químicas identificadas por el estado de California como
causantes de cáncer.
ADVERTENCIA: Este producto contiene una o más sustancias químicas identificadas por el estado de California como
causantes de defectos congénitos o algún otro tipo de daños en la función reproductora.
Para reducir el riesgo de incendio, choque eléctrico, o lesiones personales al usar su refrigerador siga
estas precauciones básicas:
ADVERTENCIA:
INSTRUCCIONES IMPORTANTES DE SEGURIDAD
CONSERVAR ESTAS INSTRUCCIONES
■ Conecte a un contacto de pared de conexión a tierra de
3 terminales.
■ No quite la terminal de conexión a tierra.
■ No use un adaptador.
■ No use un cable eléctrico de extensión.
■ Desconecte el suministro de energía antes de darle servicio.
■ Vuelva a colocar todos los componentes y paneles antes de
hacerlo funcionar.
■ Remueva las puertas de su refrigerador viejo.
■ Use un limpiador no inflamable.
■ No almacene ni use gasolina, líquidos inflamables ni gas
cerca de éste o cualquier otro electrodoméstico. Los vapores
pueden ocasionar incendios o explosiones.
■ No guarde en este refrigerador sustancias explosivas, como
latas en aerosol con propelente inflamable.
■ No use ni coloque dispositivos eléctricos dentro de los
compartimientos del refrigerador si no son del tipo
expresamente autorizados por el fabricante.
■ Use dos o más personas para mover e instalar el refrigerador.
■ Desconecte el suministro de energía antes de instalar la
fábrica de hielo (en aquellos modelos que incluyen el juego
de instalación de la fábrica de hielo).
■ La línea de agua y la máquina de hacer hielo deben ser
instaladas por un técnico de servicio calificado. Consulte
las instrucciones de instalación del kit de la máquina de
hacer hielo IC13B para obtener más información.
■ Conecte solamente al suministro de agua potable.
■ Use un vaso resistente para recibir hielo del despachador
(en algunos modelos).
■ Este aparato no ha sido diseñado para ser usado por
personas (incluidos niños) con capacidad física, sensorial o
mental reducida, o con falta de experiencia y conocimiento,
a menos que lo hagan bajo supervisión o siguiendo las
instrucciones relativas al uso del aparato, a cargo de una
persona responsable por su seguridad.
■ Los niños deberán estar bajo supervisión para asegurarse
de que no jueguen con el electrodoméstico.
■ Para evitar el riesgo de que los niños queden atrapados y
se sofoquen, no les permita jugar ni esconderse dentro del
refrigerador.
■
Si se ha dañado el cable de suministro eléctrico, deberá ser
reemplazado por el fabricante o por el agente de servicio
del fabricante o por una persona con calificación similar.
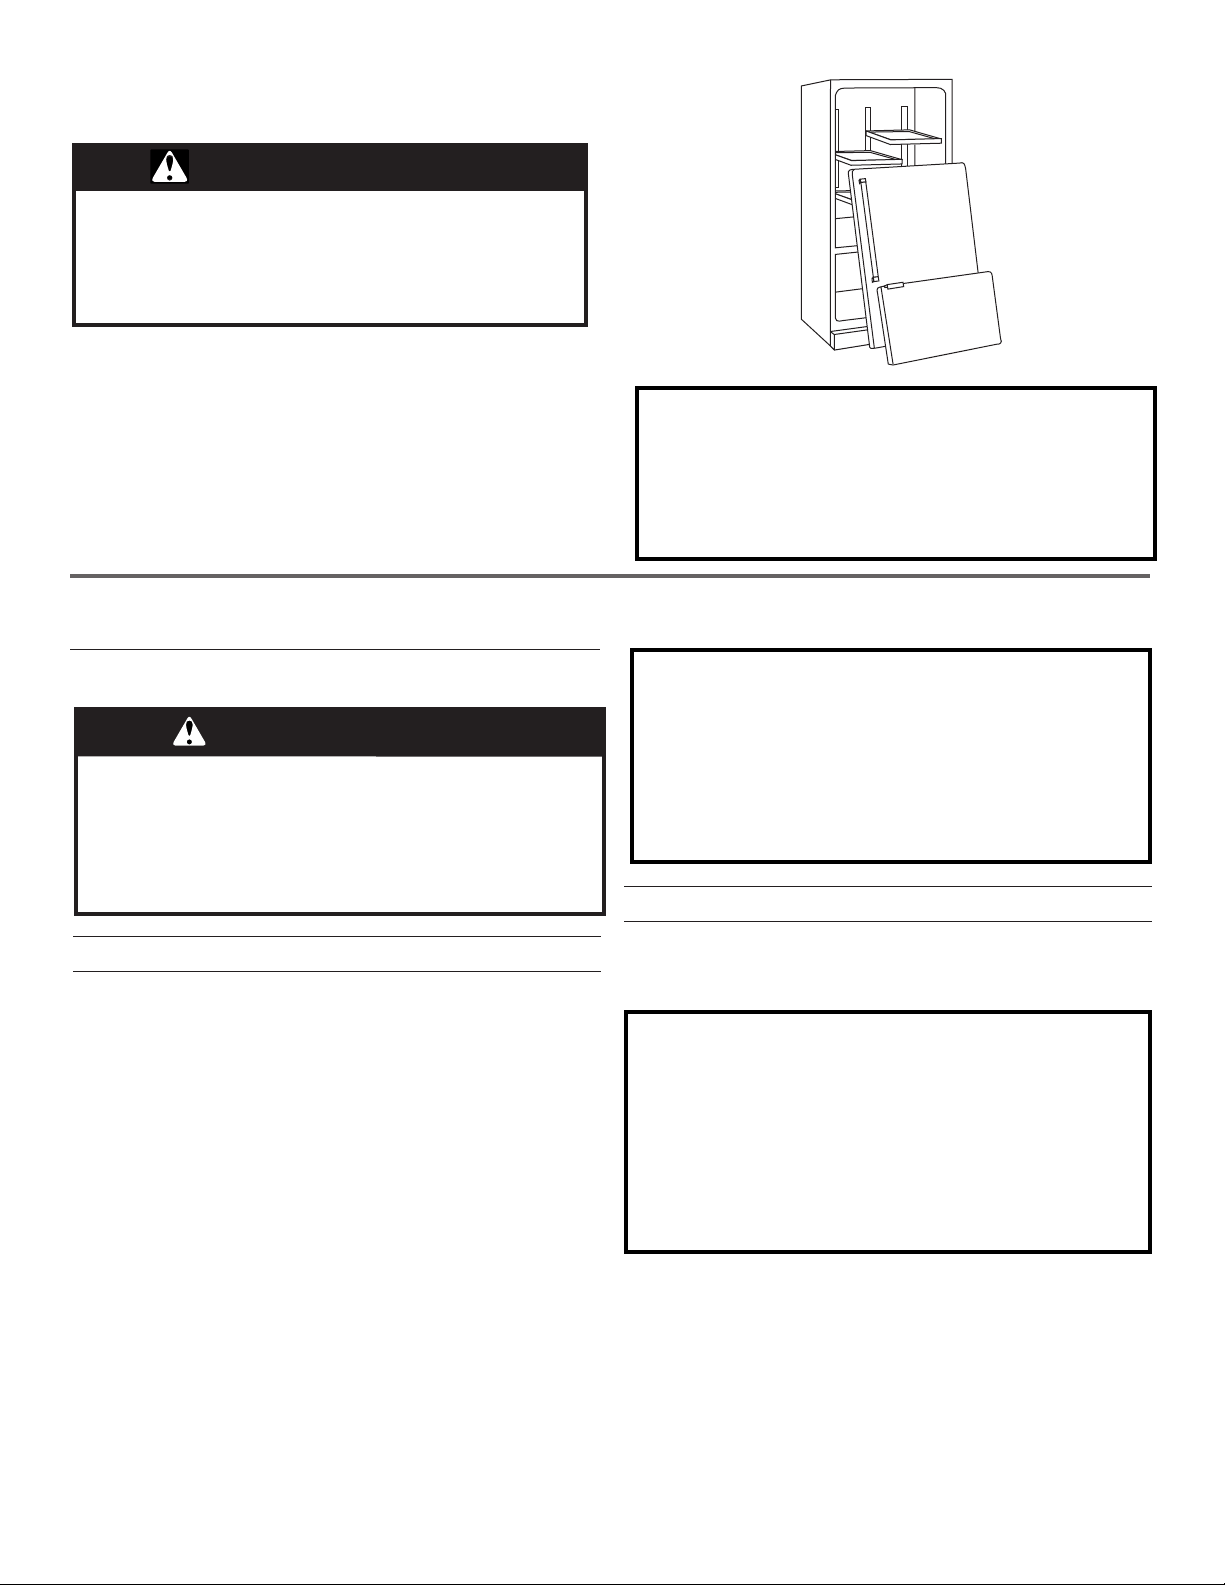
52
Cómo deshacerse adecuadamente
desu refrigerador viejo
ADVERTENCIA
Peligro de Asfixia
Remueva las puertas de su refrigerador viejo.
No seguir esta instrucción puede ocasionar
la muerte o daño al cerebro.
IMPORTANTE: El atrapamiento y la asxia de los niños no son
problemas del pasado. Los refrigeradores tirados y abandonados
son un peligro, aún si van a quedar ahí “por unos pocos días”.
Siestá por deshacerse de su refrigerador viejo, siga las
instrucciones que ofrecemos a continuación para prevenir
accidentes.
Antes de tirar su viejo refrigerador o congelador:
■ Saque las puertas.
■ Deje los estantes en su lugar así los niños no pueden
introducirse con facilidad.
INSTRUCCIONES DE INSTALACIÓN
Desembale el refrigerador
Cómo retirar el material de embalaje
■ Quite los restos de cinta y pegamento de las supercies
de su refrigerador antes de encenderlo. Frote un poco de
detergente líquido para vajilla sobre el adhesivo con los
dedos. Limpie con agua tibia y seque.
■ No use instrumentos losos, alcohol para fricciones, líquidos
inamables o limpiadores abrasivos para eliminar los restos
de cinta o de adhesivo. Estos productos pueden dañar la
supercie de su refrigerador. Para más información, vea
“Seguridad del refrigerador”.
■ Deseche o recicle todo el material de embalaje.
Limpieza antes del uso
Una vez que usted haya quitado todos los materiales de empaque,
limpie el interior de su refrigerador antes de usarlo.
Vea las instrucciones de limpieza en “Cuidado de su refrigerador”.
Información importante para saber acerca del desecho
de refrigerantes:
Deshágase del refrigerador siguiendo los reglamentos
federales y locales. Los refrigerantes deberán ser evacuados
por un técnico certificado en refrigeración por EPA (Agencia
de protección del medioambiente) según los procedimientos
establecidos.
ADVERTENCIA
Peligro de Peso Excesivo
Use dos o más personas para mover e instalar
el refrigerador.
No seguir esta instrucción puede ocasionar una
lesión en la espalda u otro tipo de lesiones.
Cómo mover su refrigerador:
Su refrigerador es pesado. Cuando mueva el refrigerador
para limpiarlo o para darle servicio, cerciórese de cubrir
el piso con cartón o madera para evitar daños en el mismo.
Al mover el refrigerador, siempre tire directamente hacia
afuera. No menee el refrigerador de lado a lado ni lo haga
“caminar” cuando lo trate de mover ya que podría dañar
el piso.
Información importante para saber acerca de los estantes
y tapas de vidrio:
No limpie los estantes y tapas de vidrio con agua caliente
mientras están fríos. Los estantes y tapas pueden romperse
si se exponen a cambios bruscos de temperatura o impacto,
como sería un golpe brusco. El vidrio templado se ha
diseñado para hacerse añicos. Esto es normal. Los estantes
y tapas de vidrio son muy pesados. Use ambas manos al
sacarlos para evitar que se caigan.
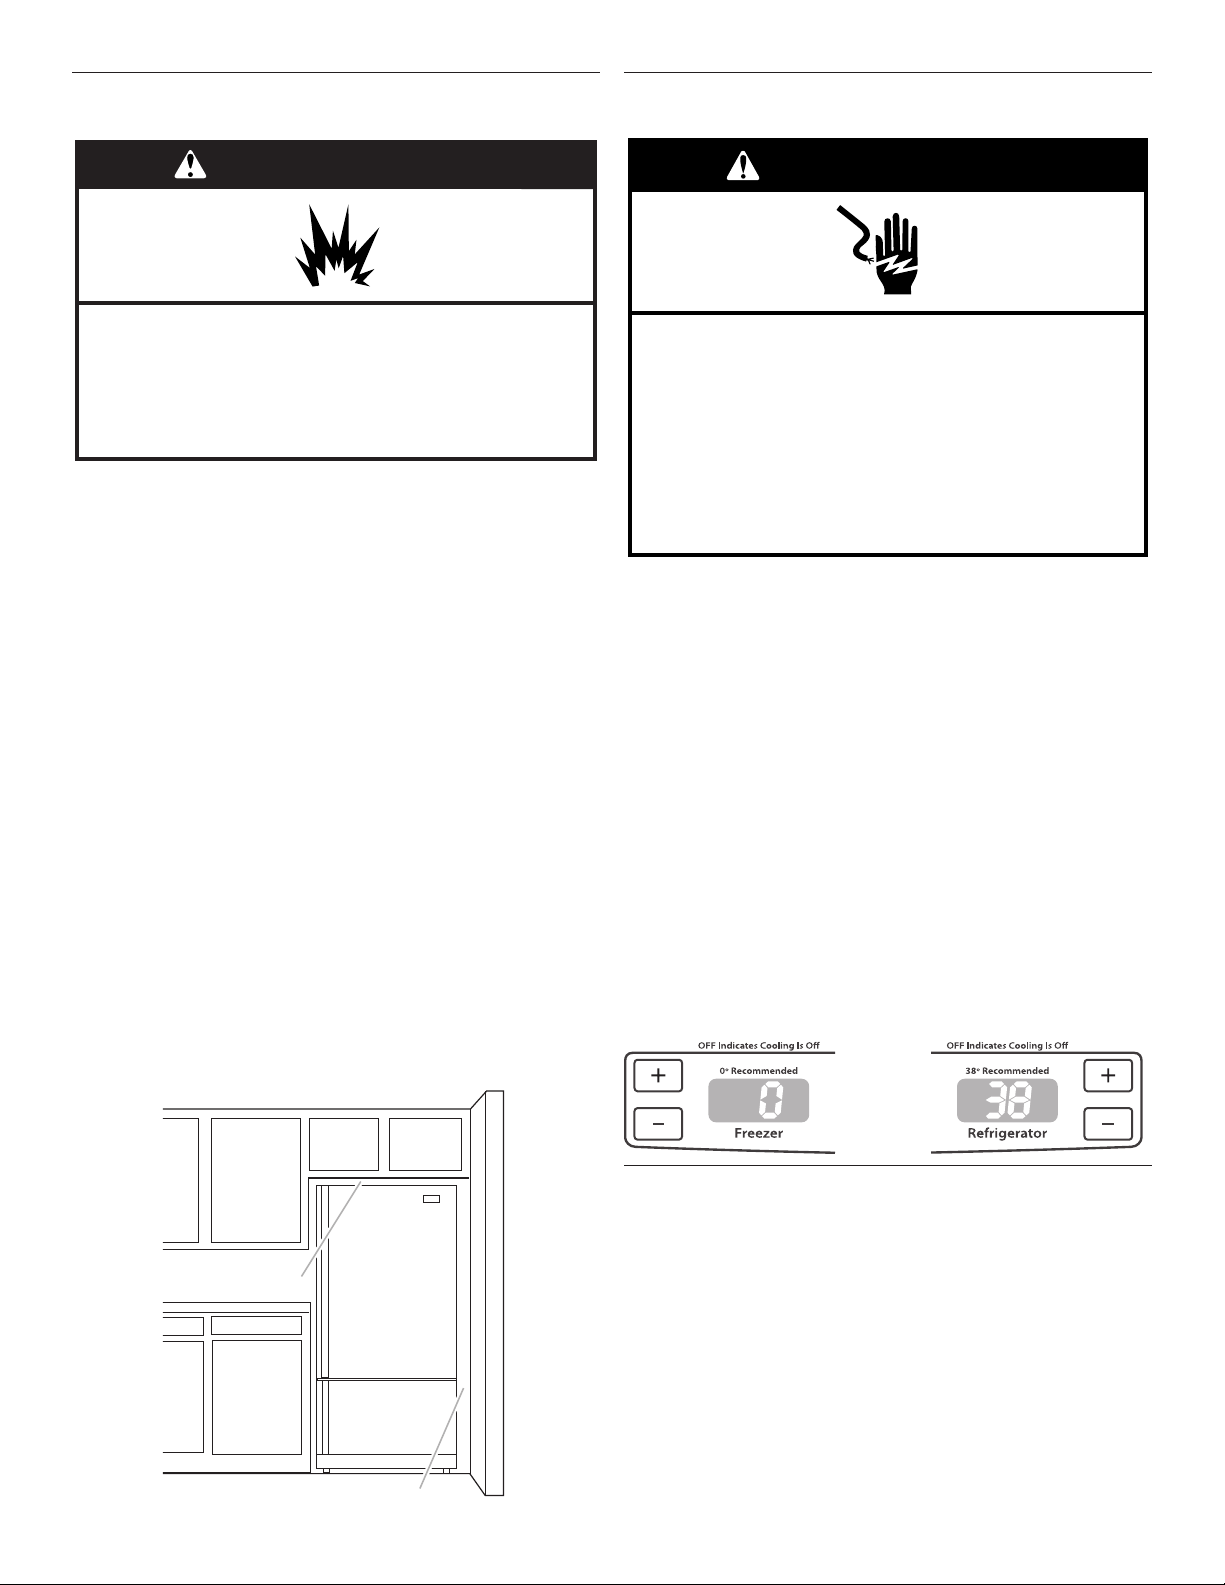
53
Requisitos de ubicación
IMPORTANTE: Este refrigerador fue diseñado únicamente para
uso familiar en interiores.
Este aparato ha sido diseñado para usarse en un entorno doméstico
y aplicaciones similares, tales como:
■ Áreas de cocina para el personal en tiendas, ocinas y otros
ambientes de trabajo.
■ En granjas y por los clientes de hoteles, moteles y otros
ambientes de tipo residencial.
■ Ambientes de alojamientos.
■ Aplicaciones en banquetería y otros negocios minoristas.
Para garantizar la ventilación adecuada del refrigerador, deje un
espacio de ¹⁄2" (1,25 cm) a cada lado y por encima. Deje un espacio
de 1" (2,54 cm) detrás del refrigerador. Si el refrigerador tiene fábrica
de hielo, asegúrese de que haya espacio adicional atrás para las
conexiones de la línea de agua. Si instala el refrigerador al lado
de una pared ja, deje como mínimo 2 ¹⁄2" (6,3 cm) del lado de la
bisagra (algunos modelos necesitan más espacio) para permitir
quela puerta abra bien.
NOTA: Este refrigerador ha sido diseñado para usarse en un
lugar en donde los rangos de temperatura varíen entre un mínimo
de 55 °F (13 °C) y un máximo de 110 °F (43 °C). Para un óptimo
rendimiento, el rango preferido de temperatura ambiente (que
reduce el uso de electricidad y provee un enfriamiento superior)
es entre 60 °F (15 °C) y 90 °F (32 °C). No se recomienda instalar
el refrigerador cerca de una fuente de calor, como un horno o un
radiador.
2¹⁄₂" (6,3 cm)
¹⁄₂" (1,25 cm)
Requisitos eléctricos
Antes de mover el refrigerador a su ubicación nal, es importante
que se asegure de tener la conexión eléctrica adecuada.
Si el cable de alimentación está dañado, solo debe ser reemplazado
por el fabricante, su agente de servicio o una persona igualmente
calicada. No use el cable si observa grietas o daños por abrasión
en su extensión, en el enchufe o en el extremo del conector.
Método de conexión a tierra recomendado
Se requiere un suministro eléctrico de 115 voltios, 60 Hz, CA
solamente, con fusibles de 15 o 20 amperios, debidamente
conectado a tierra. Se recomienda utilizar un circuito separado
solo para su refrigerador. Use un tomacorriente que no se pueda
apagar con un interruptor. No use un cable eléctrico de extensión.
NOTA: Antes de realizar cualquier tipo de instalación, limpieza o
de quitar un foco de luz, ponga el refrigerador en OFF (Apagado).
Dependiendo del modelo, gire el control del congelador hacia
la palabra OFF (Apagado) o presione echa hacia abajo del
congelador hasta que aparezca un guión (-) en la pantalla del
congelador y en la del refrigerador. Desconecte el refrigerador
de la fuente de suministro eléctrico. Cuando haya terminado,
reconecte el refrigerador a la fuente de energía eléctrica y vuelva
a poner los controles de temperatura en la posición deseada.
Vea“Uso de los controles”.
Requisitos de suministro de agua
Reúna las herramientas y las piezas necesarias antes de
comenzar la instalación. Lea y siga las instrucciones provistas
con cualquiera de las herramientas detalladas aquí.
HERRAMIENTAS NECESARIAS:
■ Destornillador de hoja plana ■ Llave para
tuercas de ¹⁄4"
■ Llaves de extremo abierto o dos
llaves ajustables de
7
⁄16" y ¹⁄"
■ Broca de ¹⁄4"
■ Taladro
inalámbrico
IMPORTANTE:
■ Conecte solamente al suministro de agua potable.
ADVERTENCIA
Peligro de Explosión
Mantenga los materiales y vapores inflamables,
tales como gasolina, alejados del refrigerador.
No seguir esta instrucción puede ocasionar la muerte,
explosión, o incendio.
ADVERTENCIA
Peligro de Choque Eléctrico
Conecte a un contacto de pared de conexión a tierra de
3 terminales.
No quite la terminal de conexión a tierra.
No use un adaptador.
No use un cable eléctrico de extensión.
No seguir estas instrucciones puede ocasionar
la muerte, incendio o choque eléctrico.
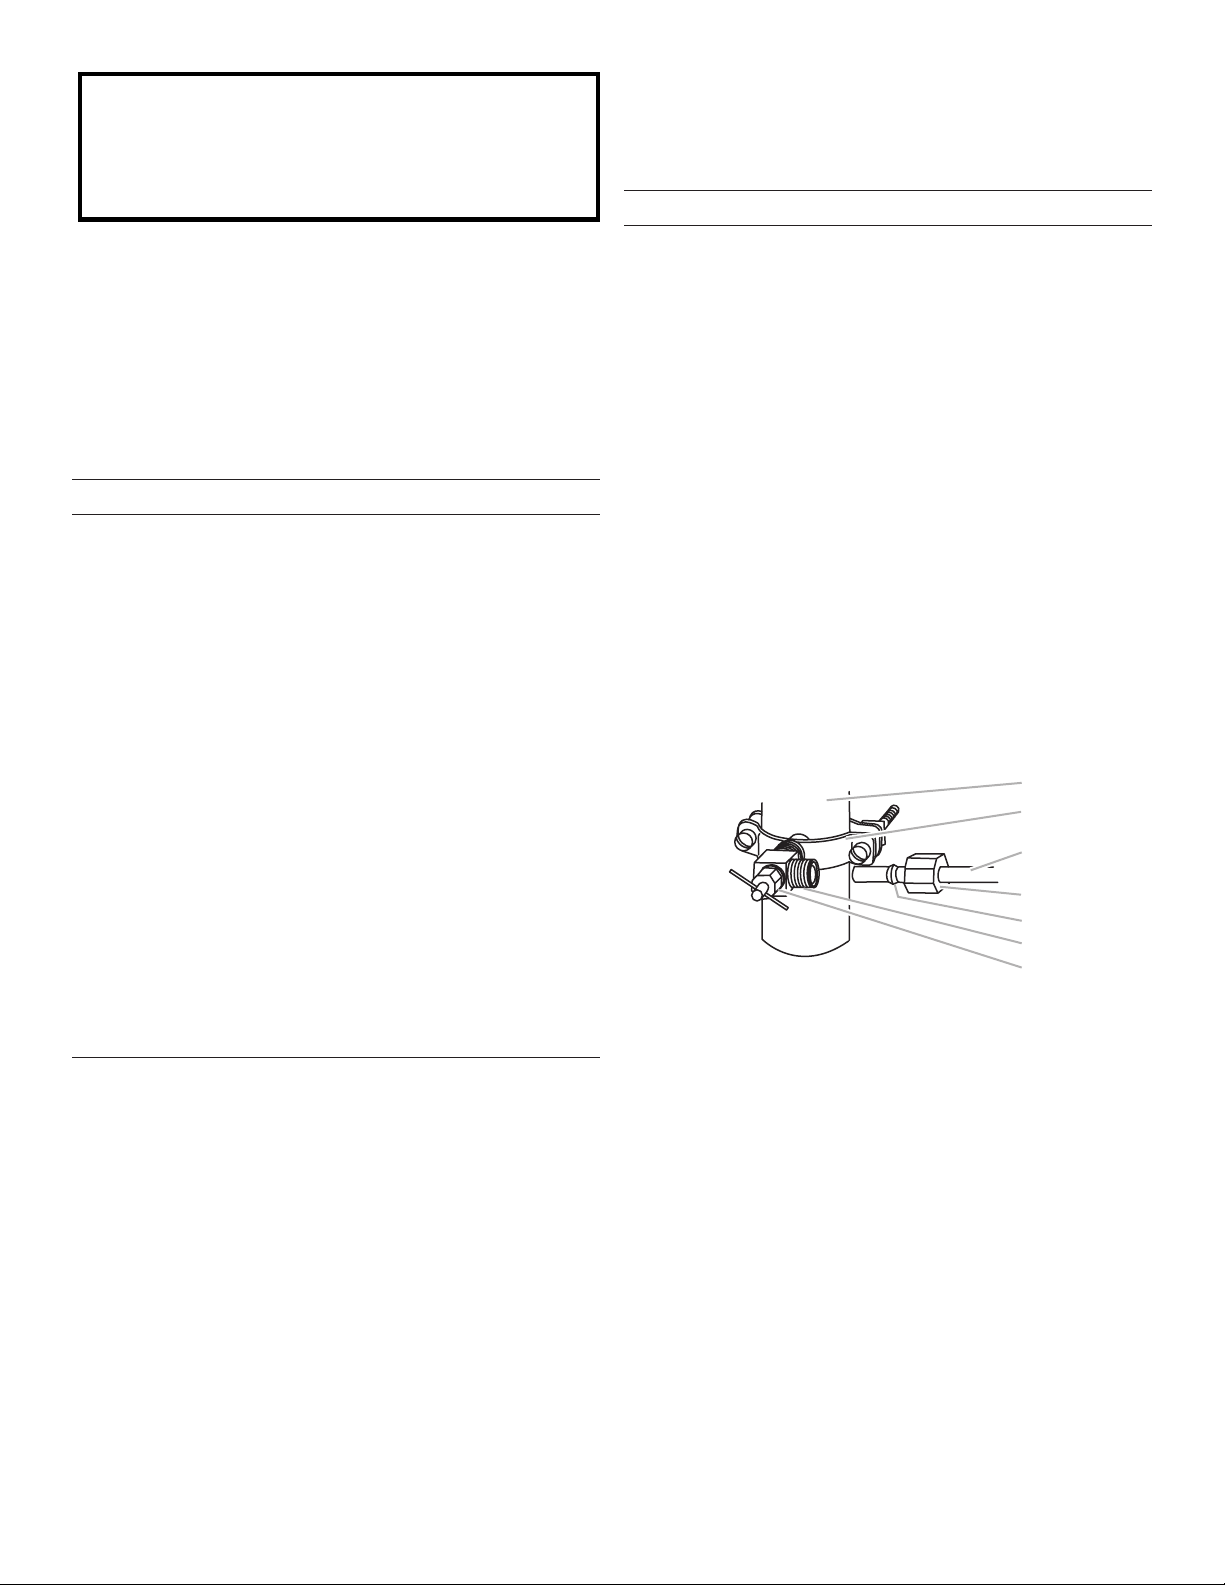
54
■ Todas las instalaciones deben hacerse de acuerdo a los
requisitos locales de plomería.
■ No use una válvula perforadora ni una válvula de montura de
³⁄16" (4,76 mm) que reduce el ujo de agua y se obstruye con
más facilidad.
■ Use tubería de cobre y revise si hay fugas. Instale la tubería
de cobre solo en áreas donde la temperatura vaya a
permanecer por encima del punto de congelación.
■ Para modelos con ltros de agua, el ltro de agua desechable
deberá reemplazarse por lo menos cada 6 meses.
Presión del agua
Se necesita un suministro de agua fría con presión de agua entre 35
y 120 lbs/pulg² (241 y 827 kPa) para hacer funcionar el despachador
de agua y la fábrica de hielo. Si tiene preguntas sobre la presión del
agua, llame a un plomero competente certicado.
Suministro de agua por ósmosis inversa
IMPORTANTE: La presión del suministro de agua que sale de un
sistema de ósmosis inversa y va a la válvula de entrada de agua
del refrigerador debe ser entre 35 y 120 psi (241 y 827 kPa).
Si el sistema de ltrado de agua por ósmosis inversa está conectado
al suministro de agua fría, la presión de agua para el sistema de
ósmosis inversa debe ser entre 40 y 60 psi (276 y 414 kPa).
Si la presión de agua hacia el sistema de ósmosis inversa es menor
de 40 a 60 lbs/pulg² (276 a 414 kPa):
■ Fíjese si el ltro de sedimentos en el sistema de ósmosis
inversa está bloqueado. Reemplácelo si fuera necesario.
■ Deje que se vuelva a llenar el tanque de almacenaje del
sistema de ósmosis inversa después del uso intenso.
■ Si el refrigerador tiene un ltro de agua, puede reducir la presión
aún más si se usa junto con un sistema de ósmosis inversa.
Quite el ltro de agua. Consulte el “Sistema de ltración de
agua”.
Si tiene preguntas sobre la presión del agua, llame a un plomero
competente certicado.
Conexión del suministro de agua
Lea todas las instrucciones antes de comenzar.
IMPORTANTE:
■ La tubería se debe instalar de acuerdo con el Código
internacional de plomería y cualquier norma y ordenanza local.
■ El tubo de agua gris ubicado en la parte de atrás del
refrigerador (que se usa para conectar a la línea de agua
doméstica) es un tubo PEX (de polietileno reticulado).
Lasconexiones de tubos de cobre y PEX desde la línea de
agua doméstica al refrigerador son aceptables y ayudarán a
evitar el mal sabor o el olor del agua o el hielo. Revise si hay
fugas.
Si se usa tubería de PEX en lugar de cobre, recomendamos
los siguientes números de pieza:
W10505928RP (7 pies [2,14 m] de PEX revestido),
8212547RP (5 pies [1,52 m] de PEX) o
W10267701RP (25 pies [7,62 m] de PEX).
■ Instale la tubería sólo en áreas donde la temperatura va a
permanecer por encima del punto de congelación.
■ Si enciende el refrigerador antes de conectar la línea de agua,
apague la fábrica de hielo para evitar el ruido excesivo o
daños en la válvula de agua.
Conexión a la línea de agua
1. Desenchufe el refrigerador o desconecte el suministro de
energía.
2. CIERRE el suministro principal de agua. ABRA la llave de agua
más cercana el tiempo suciente para que la tubería de agua
se vacíe.
3. Busque una tubería vertical de agua fría de ¹⁄2" a 1¹⁄4" (12,7 mm
a 31,8 mm) cercana al refrigerador.
IMPORTANTE:
■ Asegúrese de que sea una tubería de agua fría.
■ Una tubería horizontal funcionará, pero debe seguirse
el procedimiento indicado a continuación: Taladre por el
lado de arriba de la tubería, no por debajo. Esto ayudará
a mantener el agua alejada del taladro. Esto también evita
que se acumule el sedimento normal en la válvula.
4. Determine la longitud de la tubería de cobre que necesite.
Mida desde la conexión de la parte baja trasera derecha del
refrigerador hasta la tubería de agua. Agregue 7 pies (2,1 m)
para permitir la limpieza. Use tubos de cobre de ¹⁄4" (6,35
mm) de diámetro externo. Asegúrese de que ambos extremos
de la tubería de cobre estén cortados rectos.
5. Con un taladro inalámbrico, perfore un oricio de ¹⁄4" en la
tubería de agua fría que eligió.
F
G
A
B
C
D
E
6. Aance la válvula de cierre a la tubería de agua fría con una
abrazadera para tubería. Asegúrese de que el extremo de salida
esté rmemente insertado en el oricio de ¹⁄4" (6,35 mm) en la
tubería de agua y que la arandela esté debajo de la abrazadera
para tubería. Apriete la tuerca de presión. Apriete los tornillos
de la abrazadera para tubería lentamente y en forma pareja de
manera que la arandela provea un cierre hermético. No apriete
demasiado.
7. Deslice la manga de compresión y la tuerca de compresión
sobre la tubería de cobre como se muestra. Inserte el extremo
de la tubería en el extremo de salida en ángulo recto hasta
donde sea posible. Atornille la tuerca de compresión al extremo
de salida con una llave de tuercas ajustable. Noapriete
demasiado porque se puede aplastar la tubería decobre.
8. Coloque el extremo libre de la tubería en un recipiente
o fregadero y ABRA el suministro principal de agua.
Enjuaguelatubería hasta que el agua salga limpia.
CIERRElaválvula decierre del tubo de agua.
A. Tubería de agua fría
B. Abrazadera para tubería
C. Tubería de cobre
D. Tuerca de compresión
E. Manga de compresión
F. Válvula de cierre
G. Tuerca de presión
No use con agua que no sea microbiológicamente segura
o que sea de calidad desconocida sin desinfectarla
adecuadamente antes o después del sistema. Pueden
usarse sistemas certificados para la reducción de quistes
en aguas desinfectadas que puedan contener quistes
filtrables.
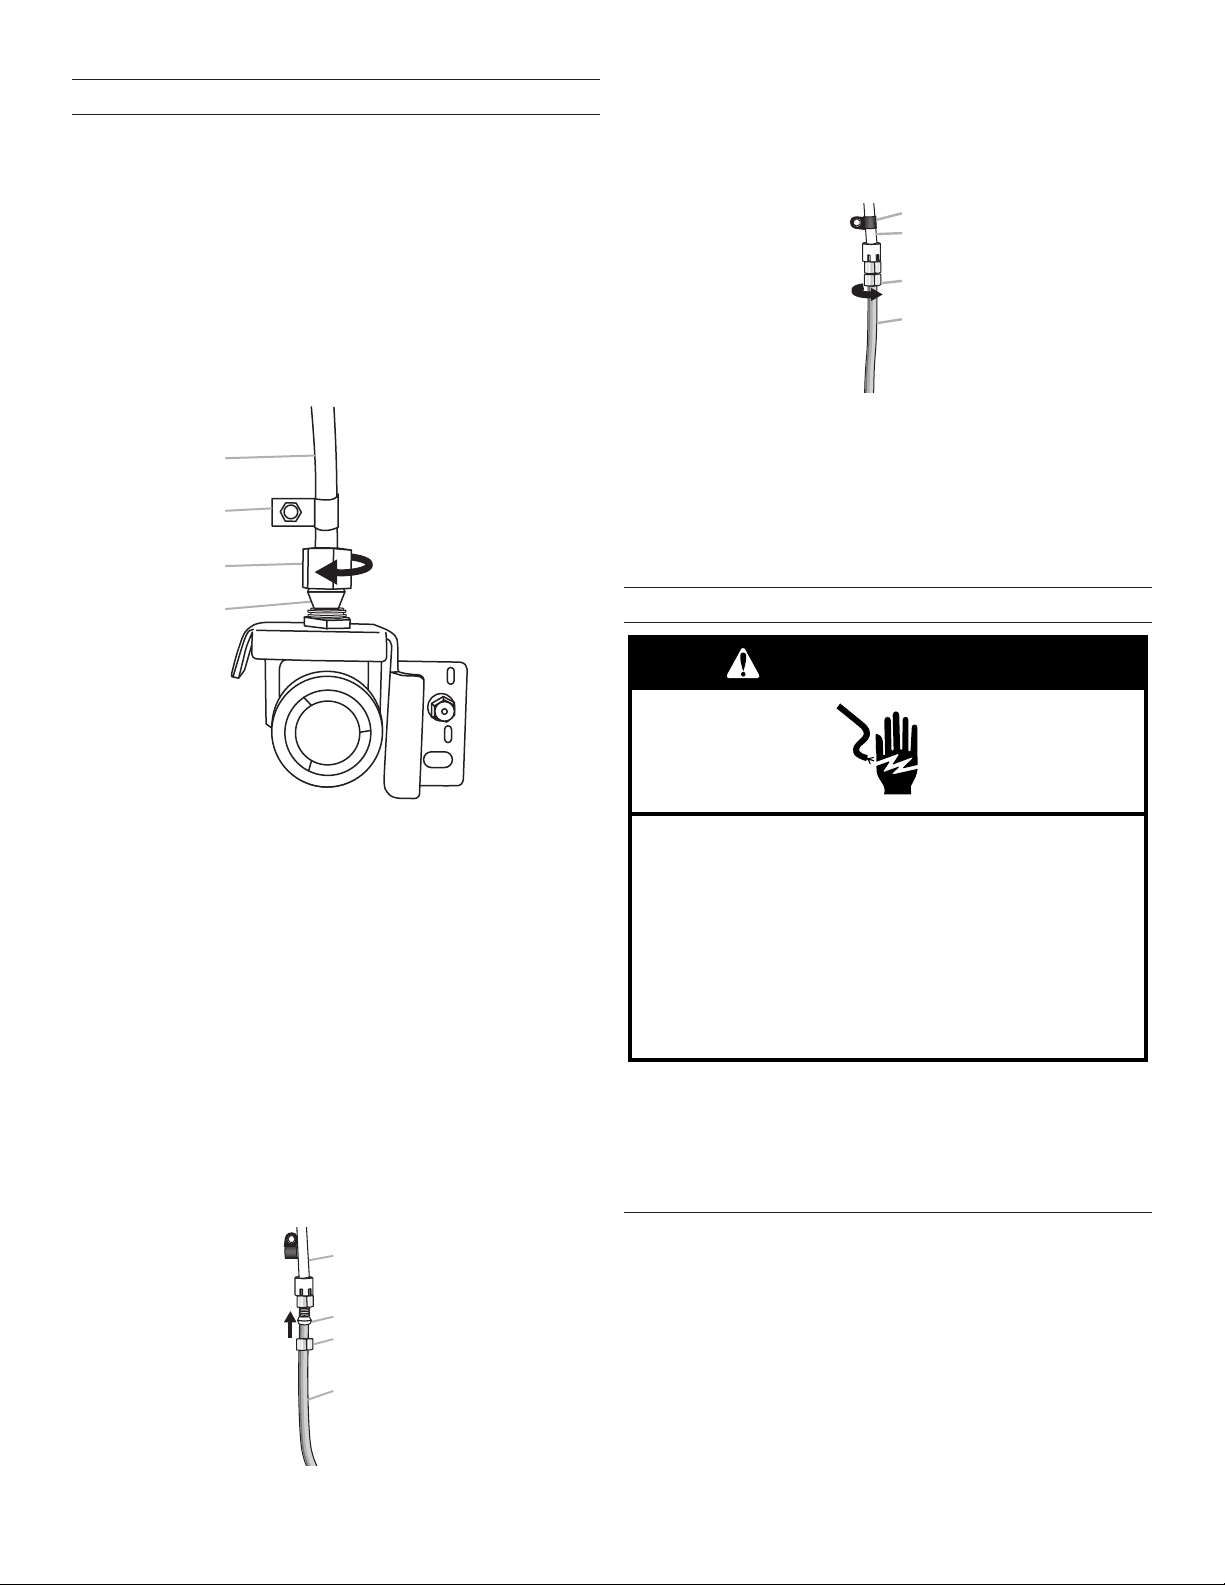
55
Conexión al refrigerador
Dependiendo de su modelo, la línea de agua puede descender
desde la parte de arriba o ascender desde la parte de abajo.
Sigalas instrucciones de conexión especícas para su modelo.
Estilo 1
1. Saque la tapa de plástico del puerto de entrada de la válvula
de agua. Fije el tubo de cobre a la entrada de la válvula usando
una tuerca y manguito de compresión, como se muestra.
Apriete la tuerca de compresión. No apriete demasiado.
Jalelatubería de cobre para comprobar que esté rme.
2. Haga un lazo de servicio con la tubería de cobre. Evite las
torceduras cuando enrolle la tubería de cobre. Asegure la tubería
de cobre al gabinete del refrigerador con una abrazadera en “P”.
B
A
C
D
3. Abra el suministro de agua al refrigerador y revise si hay
fugas deagua. Corrija cualquier fuga que encuentre.
Estilo 2
1. Cree un lazo de servicio (con un diámetro mínimo de 2 pies
[61 cm]) con la tubería de cobre. Evite las torceduras cuando
enrolle la tubería de cobre.
2. Saque la tapa de plástico del puerto de entrada de la válvula
de agua. Coloque una tuerca y una manga de compresión
sobre la tubería de cobre.
3. Inserte el extremo de la tubería de cobre en el puerto de entrada
de la válvula de agua. Para evitar que la tubería se retuerza,
dóblela ligeramente para introducirla directo en el puerto.
4. Deslice la tuerca de compresión sobre la manga y atorníllela
dentro del puerto de entrada de la válvula de agua.
B
A
C
D
5. Usando una llave de tuercas ajustable, sostenga la tuerca
sobre la línea de agua de plástico para evitar que se mueva.
Luego,con una segunda llave, gire la tuerca de compresión
sobre la tubería de cobre en el sentido contrario a las manecillas
del reloj para apretarla completamente. Noaprietedemasiado.
B
C
D
A
6. Verique la conexión jalando la tubería de cobre. Sujete la
tubería de plástico de agua al gabinete del refrigerador con
una abrazadera en “P”.
7. Abra el suministro de agua al refrigerador y revise si hay fugas
de agua. Corrija cualquier fuga que encuentre.
Complete la instalación
ADVERTENCIA
Peligro de Choque Eléctrico
Conecte a un contacto de pared de conexión a tierra de
3 terminales.
No quite la terminal de conexión a tierra.
No use un adaptador.
No use un cable eléctrico de extensión.
No seguir estas instrucciones puede ocasionar
la muerte, incendio o choque eléctrico.
1. Conecte el producto a un contacto de pared de 3 terminales
con conexión a tierra.
NOTA: Espere 24 horas para la producción del primer lote de
hielo. Deseche los tres primeros lotes de hielo producidos.
Espere 3 días para llenar por completo el depósito de
almacenamiento de hielo.
Puerta(s) y cajón del refrigerador
HERRAMIENTAS NECESARIAS: Llaves de tubo hexagonales
de
5
⁄16",
3
⁄8", ¹⁄4", un destornillador Phillips #2 y un destornillador
de cabeza plana.
IMPORTANTE:
■ Su refrigerador tiene una puerta de refrigerador reversible
estándar con una puerta para el congelador o un cajón
para el congelador, o bien dos puertas verticales.
Sigalasinstrucciones especícas para el estilo de puerta
desu modelo.
A. Tubería de cobre
B. Abrazadera en “P”
C. Tuerca de compresión
D. Manguito de compresión
A. Tubería de agua de plástico
B. Manga
C. Tuerca de compresión
D. Tubería de cobre
A. Abrazadera en “P”
B. Línea de agua de plástico
C. Tuerca de compresión
D. Tubería de cobre
56
■ Todas las ilustraciones a las que se hace referencia en las
siguientes instrucciones se incluyen más adelante en esta
sección después de “Pasos nales”. Las ilustraciones que se
muestran para una puerta estándar son para un refrigerador
que se abre hacia la derecha (bisagras instaladas en la fábrica
a la derecha).
■ Si usted sólo quiere quitar las puertas y volverlas a colocar,
vea las secciones “Cómo quitar las puertas y las bisagras” y
“Cómo volver a poner las puertas y las bisagras en su lugar”.
■ Antes de comenzar, gire el control del refrigerador a Apagado
(OFF), saque los alimentos y la puerta regulable o recipientes
de uso general de las puertas. Vuelva a colocar y quite las
manijas.
Vuelva a colocar y quite las manijas.
Puerta estándar
■ Para volver a colocar la manija, alinee la manija en la puerta
o el cajón, como se muestra. Con un destornillador Phillips,
sujete la manija con los tornillos para manija.
■ Para volver a colocar las piezas de adorno de la manija,
presione rmemente con su mano el frente del adorno y
deslice la pieza del adorno hacia el centro de la manija.
■ Para quitar la manija, invierta las instrucciones.
Dos puertas
■ Para quitar la manija, use una llave Allen de ³⁄32" para aojar
los dos tornillos jos ubicados al costado de cada manija.
Jale la manija directamente hacia fuera de la puerta o el
cajón. Asegúrese de guardar los tornillos para reinstalar
lasmanijas. Consulte las ilustraciones de Manija 1 y 2.
■ Para volver a colocar las manijas, siga las instrucciones en
orden inverso.
Cómo quitar las puertas y las bisagras
Puerta estándar
Modelos de congelador de cajón
1. Desenchufe el refrigerador o desconecte el suministro de
energía.
2. Mantenga la puerta del refrigerador cerrada hasta que esté
listo para levantarla y quitarla del gabinete.
NOTA: Mientras quita las bisagras, siempre disponga de un
soporte adicional para la puerta. No dependa de los imanes
de la junta de las puertas para sostener la puerta en su lugar
mientras trabaja.
3. Quite los componentes de la bisagra superior como se muestra
en la ilustración Bisagra superior. Levante y quite la puerta del
refrigerador del gabinete.
4. Quite los componentes de la bisagra inferior, como se muestra
en la ilustración Bisagra inferior.
Modelos de congelador con puerta
1. Desenchufe el refrigerador o desconecte el suministro de
energía.
2. Mantenga la puerta del congelador cerrada hasta que esté
listo para levantarla y quitarla del gabinete.
NOTA: Mientras quita las bisagras, siempre disponga de un
soporte adicional para la puerta. No dependa de los imanes
de la junta de las puertas para sostener la puerta en su lugar
mientras trabaja.
3. Quite los componentes de la bisagra superior como se muestra
en la ilustración Bisagra superior. Levante y quite la puerta del
refrigerador del gabinete.
4. Retire el pasador central de la bisagra y los tornillos de la
bisagra, como se muestra en la ilustración Bisagra central.
Levante y quite la puerta del congelador del gabinete.
5. Retire la rejilla de la base sujetándola rmemente con ambas
manos y jalándola hacia usted.
6. Quite los componentes de la bisagra inferior, como se muestra
en la ilustración Bisagra inferior.
Dos puertas
ADVERTENCIA
Peligro de Choque Eléctrico
Desconecte el suministro de energía antes de sacar
las puertas.
No seguir esta instrucción puede ocasionar la muerte
o choque eléctrico.
1. Desenchufe el refrigerador o desconecte el suministro de
energía.
2. Mantenga las puertas del refrigerador cerradas hasta que
esté listo para levantarlas y quitarlas del gabinete.
NOTA: Mientras retira las bisagras, siempre disponga de un
soporte adicional para la puerta del refrigerador. No dependa
de los imanes de la junta de las puertas para sostener la puerta
en su lugar mientras trabaja.
3. Comenzando por la puerta derecha, saque las piezas de la
bisagra superior, como se muestra en la ilustración Bisagra
superior. Levante la puerta del refrigerador para retirarla del
pasador de la bisagra inferior.
4. Saque la cubierta del pasador de la bisagra inferior y guárdela
para usarla más tarde. Vea la ilustración Bisagra inferior.
5. Antes de retirar la puerta del lado izquierdo, desconecte
el enchufe de cableado que está ubicado sobre la bisagra
superior introduciendo un destornillador de hoja plana o la
uña entre las dos secciones. Vea la ilustración Enchufe de
cableado.
NOTA: El alambre verde a tierra permanece sujeto a la bisagra.
6. Retire los componentes de la bisagra superior de la puerta
del lado izquierdo, como se muestra en la ilustración Bisagra
superior. Levante y saque la puerta del pasador inferior de la
bisagra.
NOTA: Saque la cubierta del pasador de la bisagra inferior
y guárdela para usarla más tarde. Vea la ilustración Bisagra
inferior.
Tornillo superior de cabeza hexagonal para bisagra

57
Cómo invertir el cierre de la puerta - Puerta estándar
(opcional)
IMPORTANTE: Siga estas instrucciones si desea que la puerta
seabra en el sentido opuesto. Si no desea cambiar el sentido de
apertura de la puerta, consulte “Cómo volver a colocar las puertas
y las bisagras en su lugar”.
Gabinete
1. Quite los tornillos de la bisagra del lado de la manija y
colóquelos en el lado opuesto. Consulte la ilustración 1.
Puerta del refrigerador
1. Vuelva a colocar el ensamblaje de la manija del refrigerador,
como se muestra en la Ilustración 2. Conserve juntos todos
los componentes.
2. Quite el tapón de enfrente del tornillo sellador de la manija
de la puerta. Colóquelo en el lado opuesto de la puerta del
refrigerador, como se indica en la ilustración 5.
3. Quite el retén de la puerta. Colóquelo en el lado opuesto de
la puerta del refrigerador, como se indica en la ilustración 3.
4. Ajuste la manija del refrigerador en el lado opuesto de la
puerta del refrigerador con dos tornillos, como se muestra en
la ilustración 2. Vuelva a colocar el adorno de la manija, como
se muestra.
5. Apriete todos los tornillos. Ponga la puerta a un lado hasta
que las bisagras y el cajón del compartimiento del congelador
estén en su sitio.
Puerta del congelador
1. Retire el ensamblaje de la manija del congelador, como
se muestra en la Ilustración 4. Conserve juntos todos los
componentes.
2. Quite el retén de la puerta. Colóquelo en el lado opuesto de
lapuerta del congelador como se indica en la ilustración 3.
3. Sujete la manija en el lado opuesto de la puerta del congelador.
4. Apriete todos los tornillos. Ponga la puerta a un lado.
5. Retire la rejilla de la base sujetándola rmemente con ambas
manos y jalándola hacia usted.
NOTA: Coloque una cuña debajo del borde frontal inferior
dela carcasa del refrigerador para disminuir el peso sobre
lossoportes de los rodillos.
6. Saque los tornillos de ambos soportes de los rodillos.
Consulte la ilustración 6.
7. Quite la placa de la bisagra que está ubicada detrás del soporte
del rodillo y colóquela al lado opuesto del refrigerador. Mueva el
pasador de la bisagra y la cuña al oricio exterior en la placa de
la bisagra. Consulte la ilustración 6.
Cómo volver a poner las puertas y las bisagras
ensulugar
Puerta estándar
NOTA: Si el sentido de apertura de la puerta se cambia,
laimagen de la puerta pudiera quedar invertida.
Modelos de congelador de cajón
1. Vuelva a poner los componentes de la bisagra inferior en su
sitio como se indica. Apriete los tornillos.
NOTA: Mientras quita las bisagras, siempre disponga de un
soporte adicional para la puerta. No dependa de los imanes
de la junta de las puertas para sostener la puerta en su lugar
mientras trabaja.
2. Ensamble los componentes de la bisagra superior, como
se muestra en la ilustración Bisagra superior. No apriete los
tornillos completamente.
3. Ajuste la puerta de modo que la base de la puerta del
refrigerador esté alineada en forma pareja con la parte
superior del cajón del congelador. Apriete todos los tornillos.
Modelos de congelador con puerta
1. Asegúrese de que la placa de la bisagra esté bien asegurada
detrás del soporte del rodillo y que el pasador de la bisagra esté
insertado en el oricio exterior. Apriete por completo todos los
tornillos del soporte del rodillo. Consulte la ilustración 6.
2. Saque la cuña que colocó debajo del borde frontal del
gabinete del refrigerador. Vuelva a poner en su lugar la
puertadel congelador.
NOTA: Mientras quita las bisagras, siempre disponga de un
soporte adicional para la puerta. No dependa de los imanes
de la junta de las puertas para sostener la puerta en su lugar
mientras trabaja.
3. Ensamble los componentes de la bisagra central, como se
indica en la ilustración Bisagra central, y apriete todos los
tornillos. Vuelva a poner en su lugar la puerta del refrigerador.
4. Ensamble los componentes de la bisagra superior como
se muestra en la ilustración Bisagra superior. No apriete
completamente los tornillos.
5. Ajuste las puertas de modo que la base de la puerta del
refrigerador esté alineada con la parte superior de la puerta
del congelador. Apriete todos los tornillos.
Tornillo del retén de la puerta Tornillo sellador frontal de la manija
de la puerta
Tornillo de cabeza plana para
la manija
Tapón del oricio de la bisagra
del gabinete
58
Dos puertas
1. Ensamble los componentes de las bisagras superiores,
comose muestra en la ilustración Bisagra superior.
Noapriete completamente los tornillos.
2. Vuelva a colocar los componentes de las bisagras inferiores,
como se muestra en la ilustración Bisagra inferior. Aprietelos
tornillos. Vuelva a poner en su lugar las puertas del refrigerador.
NOTA: Mientras quita las bisagras siempre disponga de un
soporte adicional para las puertas del refrigerador. No se confíe
en que los imanes de la junta de las puertas van a sostener las
puertas en su lugar mientras trabaja.
3. Alinee cada puerta de modo que la base de la puerta del
refrigerador esté alineada en forma pareja con la parte
superior del cajón del congelador. Apriete todos los tornillos.
4. Vuelva a conectar el enchufe de cableado sobre el lado
izquierdo de la puerta del refrigerador.
5. Vuelva a colocar las cubiertas de la bisagra superior.
Cómo quitar y volver a colocar el cajón del congelador
IMPORTANTE:
■ Tal vez se necesiten dos personas para quitar y volver
acolocar el cajón del congelador.
■ Todas las ilustraciones se incluyen en esta sección, más
adelante, después de "Pasos nales".
Para retirar el frente del cajón
1. Abra el cajón del congelador en toda su extensión.
2. Aoje los cuatro tornillos que sujetan las guías del cajón al frente
del cajón. Vea la ilustración Remoción del frente del cajón.
NOTA: Aoje los tornillos girándolos tres o cuatro veces.
Mantenga los tornillos en el frente del cajón.
3. Levante el frente del cajón hacia arriba y fuera de los tornillos.
Vea la ilustración Remoción del frente del cajón.
Para volver a colocar el frente del cajón
1. Deslice las guías fuera del compartimiento del congelador.
Inserte los tornillos en la parte superior del frente del cajón,
dentro de las ranuras que están en los soportes del cajón.
Vea la ilustración Cómo volver a colocar el frente del cajón.
2. Jale los soportes del cajón hacia usted para colocar los dos
tornillos en la base del frente del cajón, dentro de los soportes.
Vea la ilustración Cómo volver a colocar el frente del cajón.
3. Apriete por completo los cuatro tornillos.
Pasos nales
1. Revise todos los oricios para cerciorarse de que los tapones
de los oricios y los tornillos estén en su lugar. Vuelva a colocar
la tapa de la bisagra superior, como se muestra en la ilustración
Bisagra superior.
2. Vuelva a colocar la rejilla de la base.
3. Conecte el producto a un contacto de pared de 3 terminales
con conexión a tierra.
4. Vuelva a colocar todas las partes extraíbles en la puerta y la
comida en el refrigerador
ADVERTENCIA
Peligro de Choque Eléctrico
Conecte a un contacto de pared de conexión a tierra de
3 terminales.
No quite la terminal de conexión a tierra.
No use un adaptador.
No use un cable eléctrico de extensión.
No seguir estas instrucciones puede ocasionar
la muerte, incendio o choque eléctrico.
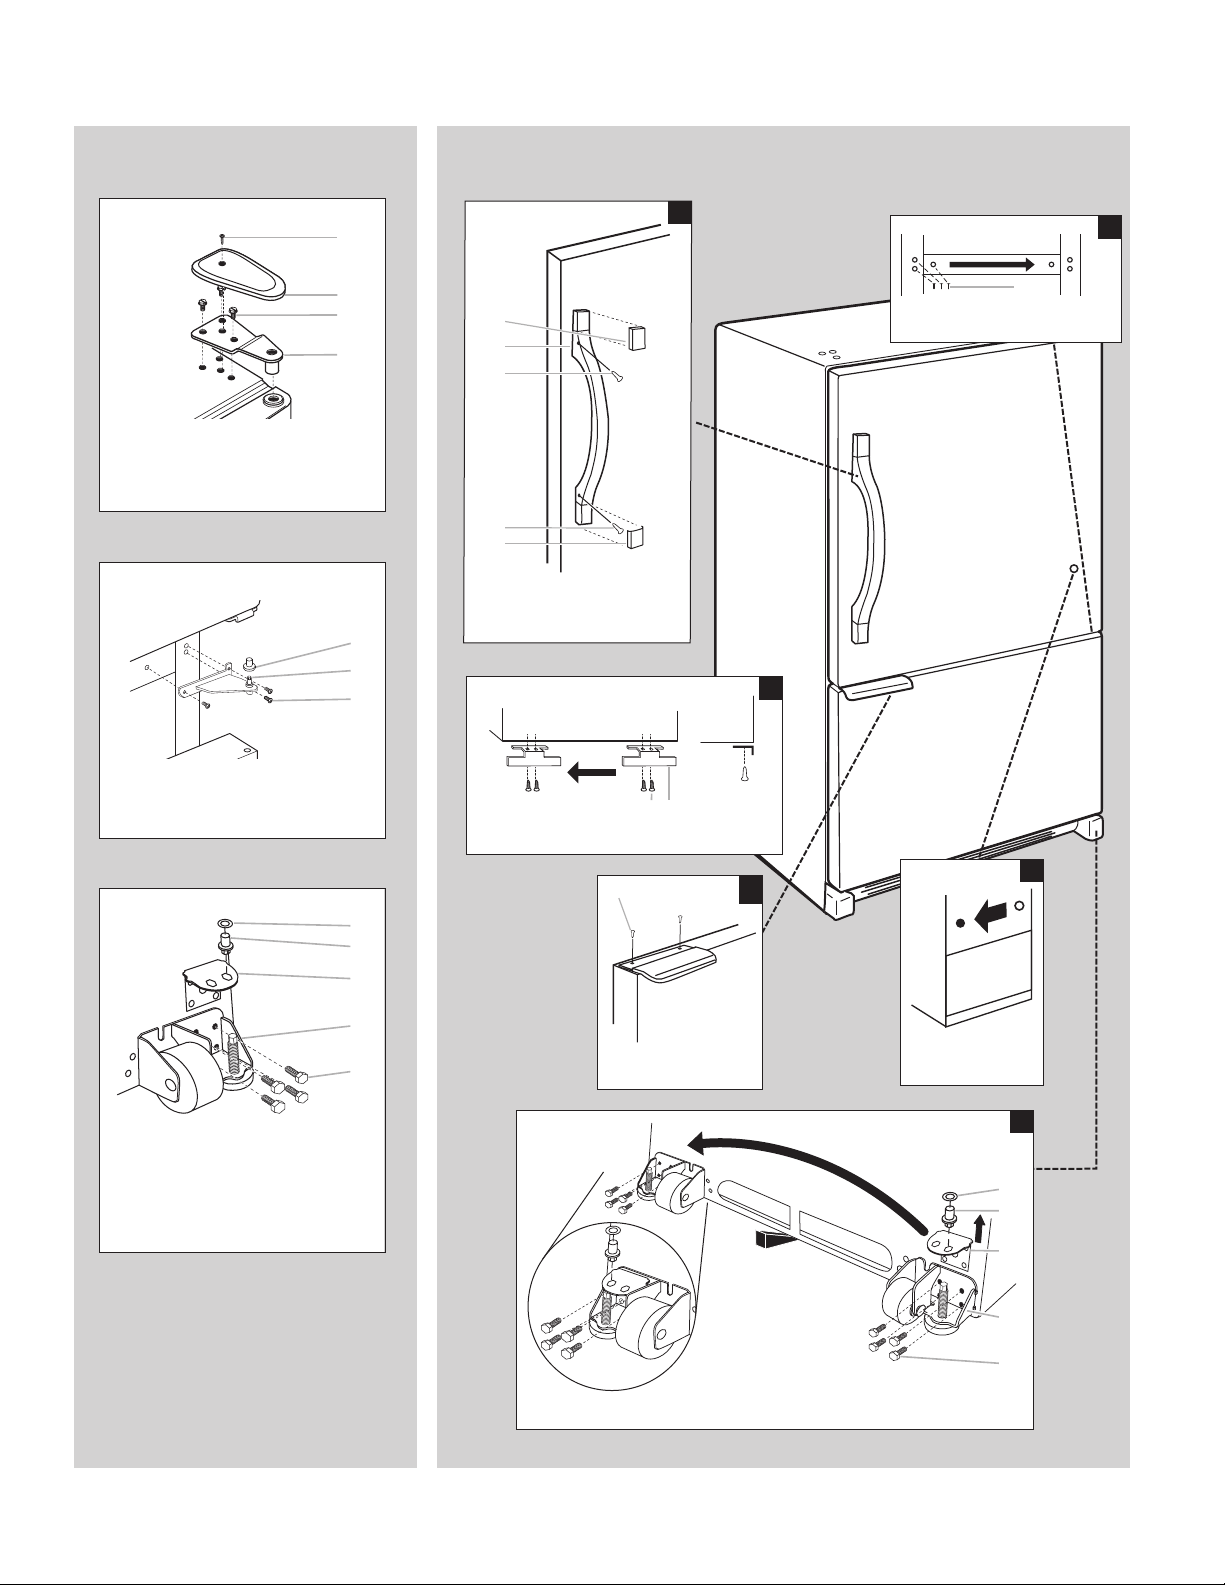
59
A
B
C
D
E
B
A
C
D
A
B
C
3
A
B
1
1
A
5
4
2
A
B
C
A
A
C
6
A
B
C
D
E
A. Tornillo para la cubierta de la bisagra
B. Cubierta de la bisagra superior
C. Tornillos de cabeza hexagonal de
5
/16"
para bisagra
D. Bisagra superior
A. Cubierta del pasador de la bisagra
B. Bisagra central
C. Tornillos para bisagra
A. Cuña del pasador de la bisagra
B. Bisagra inferior
C. Placa de la bisagra
D. Soporte del rodillo
B. Tornillos de cabeza hexagonal
de³⁄8"para bisagra
A. Adorno de la manija
B. Manija de la puerta del
refrigerador
C. Tornillos de cabeza plana
para la manija
A. Tornillos del retén de la puerta
B. Retén de la puerta
A. Tornillos de cabeza
plana para la manija
Manija de la puerta
Tornillo sellador
Frente
A. Cuña del pasador
de la bisagra
B. Bisagra inferior
C. Placa de la bisagra
D. Soporte del rodillo
B. Tornillos de cabeza hexagonal de ³⁄8" para
bisagra
Vista frontal Vista lateral
Bisagra superior
Bisagra central
Bisagra inferior
Cambio del sentido de abertura de las puertas (opcional)Cómo quitar y volver a poner
la puerta en su lugar
A. Tornillo de cabeza hexagonal
de
5
/16" para bisagra
Puerta estándar – Puerta del congelador
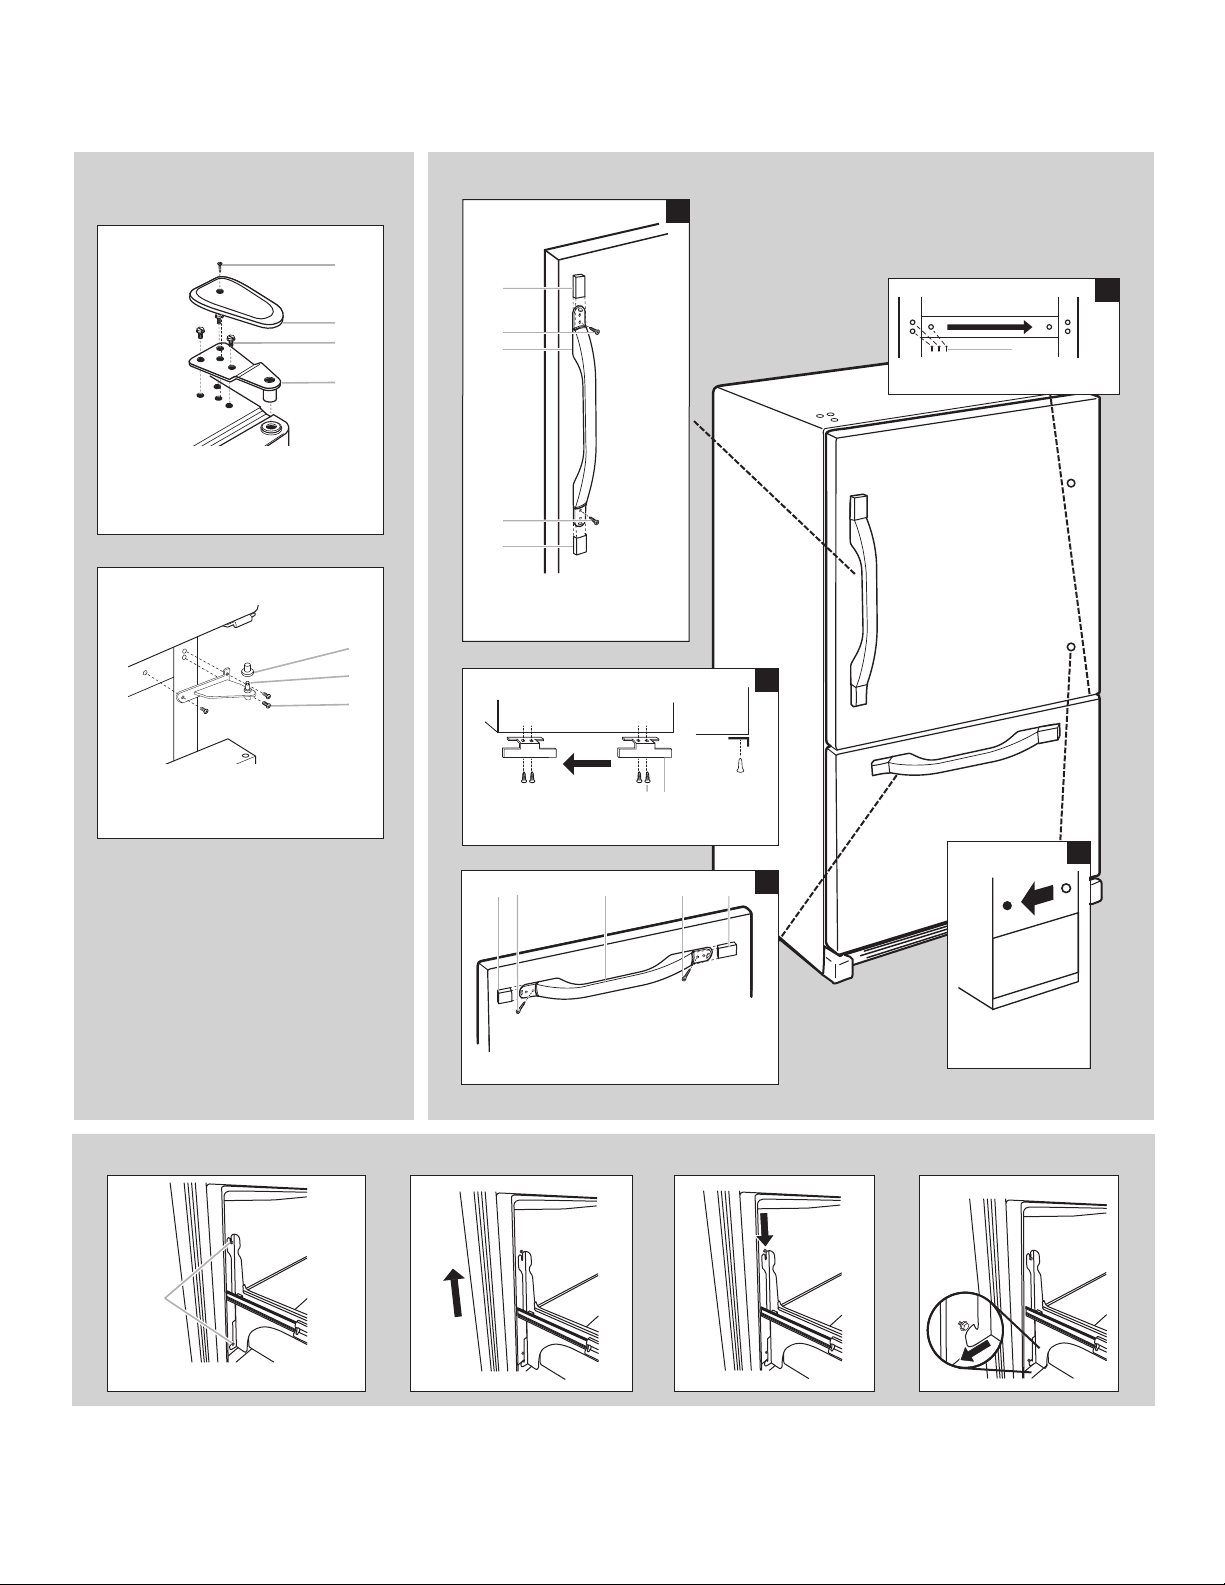
60
Puerta estándar – Cajón del congelador
3
A
B
A
1
A
5
2
C
B
A
A
B
B
A
C
D
A
B
C
4
C B AAB
A
A. Tornillo para la cubierta de la bisagra
B. Cubierta de la bisagra superior
C. Tornillos de cabeza hexagonal de
5
/16"
para bisagra
D. Bisagra superior
Bisagra superior
Cómo quitar y volver a
poner la puerta en su lugar
A. Cubierta del pasador de la bisagra
B. Bisagra inferior
C. Tornillos para bisagra
Bisagra inferior
Cambio del sentido de abertura de las puertas (opcional)
A. Adorno de la manija
B. Tornillos de cabeza plana para la
manija
C. Manija de la puerta del refrigerador
A. Tornillos del retén de la puerta
B. Retén de la puerta
Vista frontal Vista lateral
A. Adorno de la manija
B. Tornillos de cabeza plana para la manija
C. Manija del cajón del congelador
Manija de la puerta
Tornillo sellador
Frente
Cómo quitar el frente del cajón
Cómo volver a colocar el frente del cajón
A. Aoje los 4 tornillos de soporte de
la puerta
A. Tornillos para bisagras

61
Dos puertas
A
1
B
A
C
D
A
B
C
A
A
2
Cómo quitar y volver a colocar la puerta
Bisagra superior
Enchufe de cableado
Bisagra inferior
A. Tornillos de jación
de
3
⁄32" o
1
⁄8"
A. Tornillos de jación de
3
⁄32" o
1
⁄8"
Cómo quitar el frente del cajón
Cómo volver a colocar el frente del cajón
A. Tornillo para la cubierta de la bisagra
B. Cubierta de la bisagra superior
C. Tornillos de cabeza hexagonal de
5/16" para bisagra
D. Bisagra superior
A. Cubierta del pasador de la bisagra
B. Bisagra inferior
C. Tornillos para bisagra
A. Aoje los 4 tornillos de soporte
de la puerta
ADVERTENCIA
Peligro de Choque Eléctrico
Desconecte el suministro de energía antes de sacar las puertas.
No seguir esta instrucción puede ocasionar la muerte o choque eléctrico.
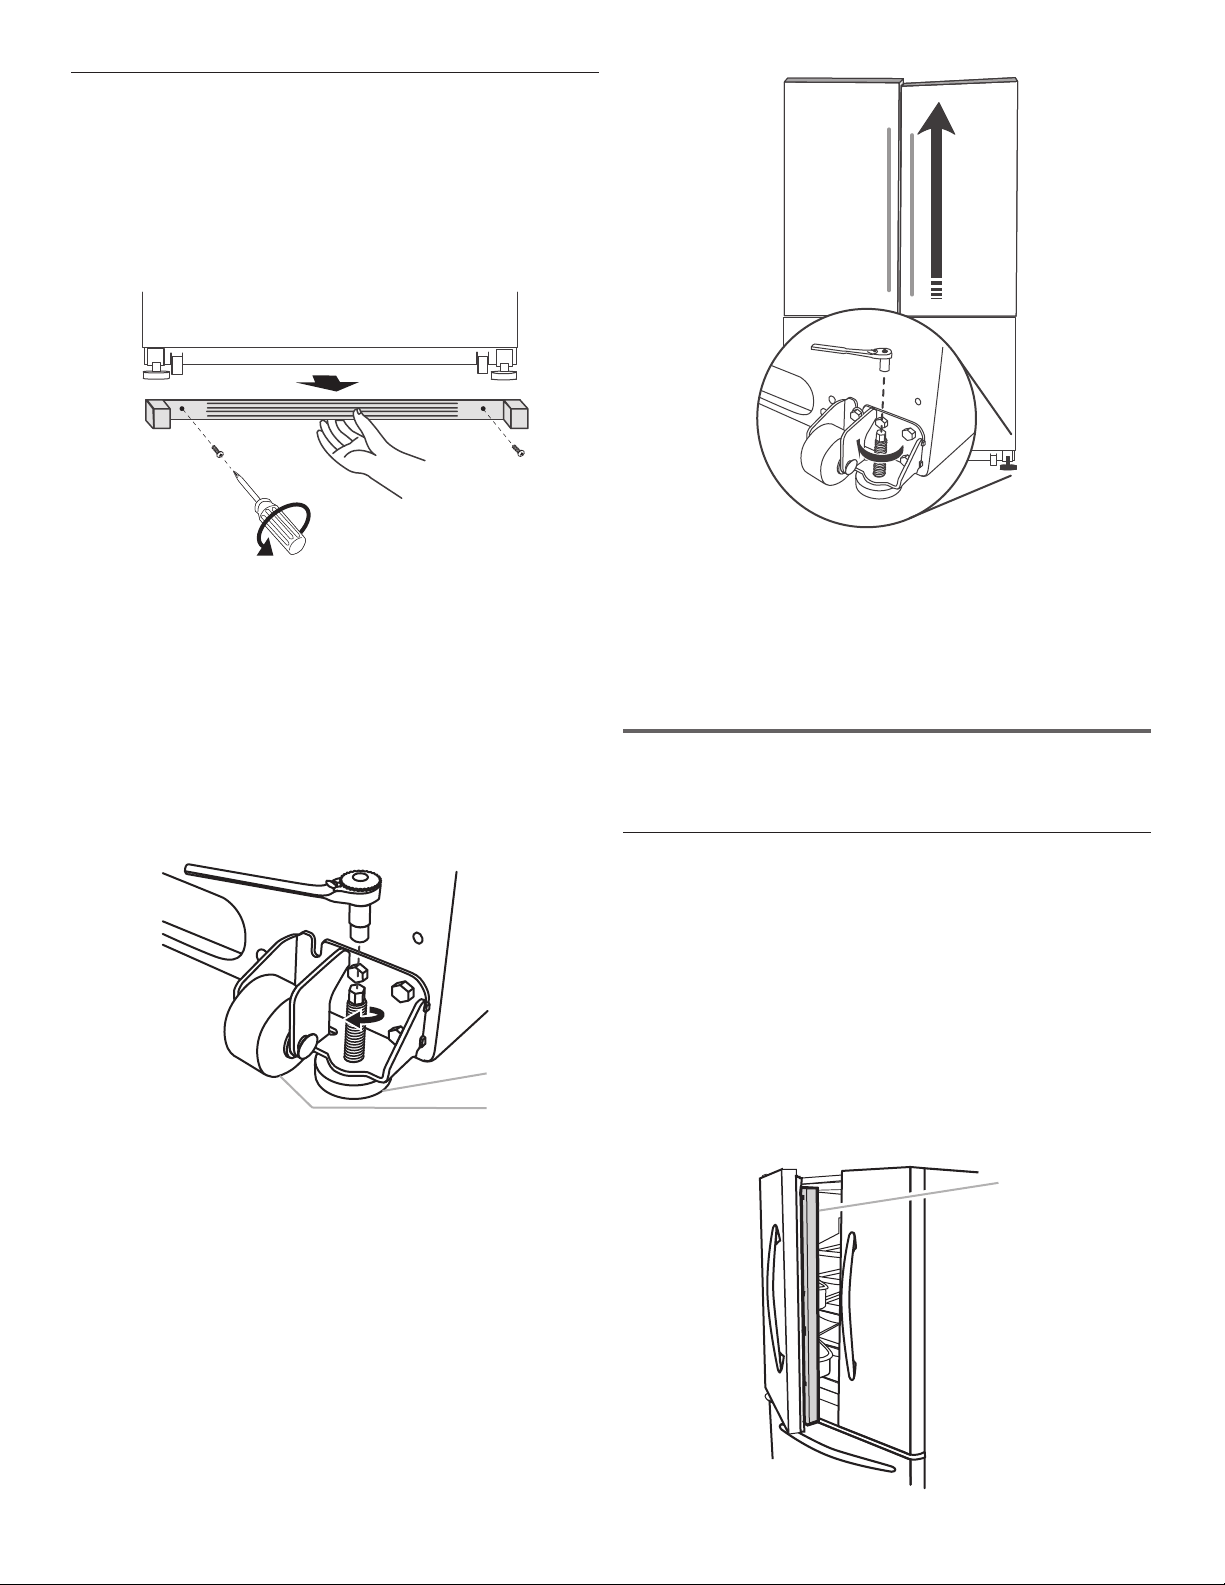
62
Cierre y alineamiento de las puertas
La rejilla de la base cubre los ensamblajes de tornillos niveladores
y rodillos, ubicados en la base del gabinete del refrigerador, debajo
de la puerta o el cajón del congelador. Antes de hacer ajustes, quite
la rejilla de la base y traslade el refrigerador hacia su ubicación nal.
1. Extraiga los dos tornillos que ajustan la rejilla de la base al
gabinete y deje los tornillos a un lado. Tome la rejilla con
rmeza y jálela hacia usted.
2. Mueva el refrigerador a su ubicación nal.
NOTA: Para permitir que el refrigerador se deslice con más
facilidad, levante las patas niveladoras del piso girando los
tornillos niveladores hacia la izquierda. los rodillos delanteros
tocarán el piso.
3. Para que las puertas se cierren con más facilidad, use una
llave hexagonal de ¹⁄4" para girar ambos tornillos niveladores
hacia la derecha. Esto hará que se levante la parte frontal del
refrigerador, inclinándose ligeramente hacia abajo en la parte
posterior. Gire ambos tornillos niveladores la misma cantidad
de vueltas.
NOTA: Para quitar un poco de peso de los tornillos niveladores,
haga que alguien empuje la parte superior del refrigerador.
Estofacilita el giro de los tornillos.
A
¹⁄₄"
B
4. Abra y cierre las puertas para vericar que se cierren con la
facilidad que usted desea. Si no es así, aumente la inclinación
girando ambos tornillos niveladores hacia la derecha.
Puedeprecisar darle varias vueltas al tornillo nivelador para
permitir que las puertas se cierren con más facilidad.
5. Revise el alineamiento de la puerta. Si una puerta está más
baja que la otra, ajuste el tornillo nivelador que se encuentra
en el lado inferior el refrigerador. Con una llave hexagonal de
¹⁄4", gire el tornillo hacia la derecha para levantar ese lado del
refrigerador, hasta que se alineen las puertas. Puedeprecisar
darle varias vueltas al tornillo nivelador para levantar el
refrigerador.
NOTA: Para quitar un poco de peso de los tornillos niveladores,
haga que alguien empuje la parte superior del refrigerador.
Estofacilita el giro de los tornillos.
¹⁄₄"
6. Asegúrese de que el refrigerador esté estable. Si el refrigerador
parece inestable o se desliza hacia delante cuando abre la
puerta o el cajón, ajuste los tornillos niveladores. Gire el tornillo
nivelador hacia la derecha con una llave hexagonal de ¹⁄4" hasta
que los rodillos queden hacia arriba y las patas niveladoras
estén rmes contra el piso.
7. Vuelva a colocar la rejilla de la base alineando los oricios
de la rejilla con los oricios en el gabinete y ajuste con los
tornillos que extrajo en el Paso 1.
USO DE SU
REFRIGERADOR
Cómo abrir y cerrar las puertas
(Modelos de dos puertas)
El compartimiento del refrigerador tiene dos puertas. Las puertas
pueden abrirse y cerrarse por separado o juntas.
Hay una junta con bisagras verticales en la puerta izquierda del
refrigerador.
■ Cuando se abre la puerta izquierda, la junta con bisagras se
pliega automáticamente hacia adentro para quedar fuera del
paso.
■ Cuando ambas puertas están cerradas, la junta con bisagras
forma automáticamente un sello entre las dos puertas.
A
A. Tornillo nivelador
B. Rodillo delantero
A. Junta con bisagras
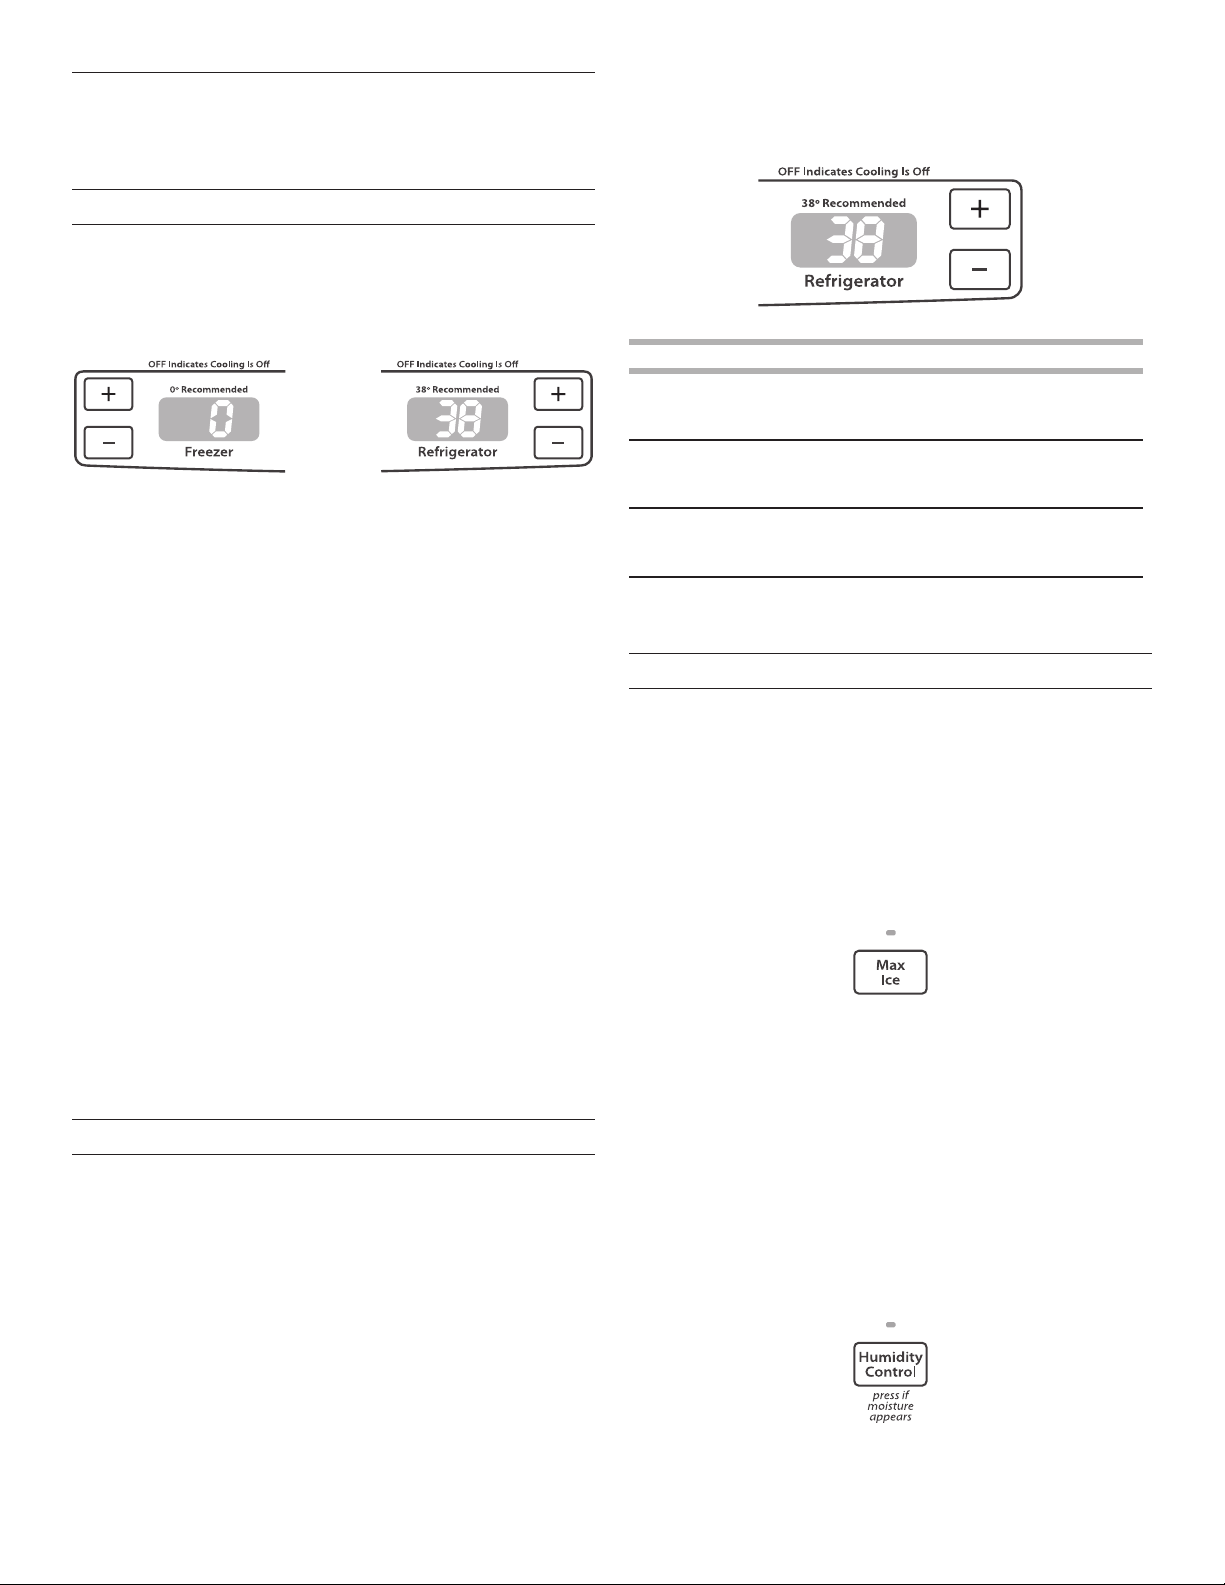
63
Uso de los controles
El centro de control está ubicado en la parte superior del
compartimiento del refrigerador.
Controles de temperatura
Para su conveniencia, los controles de temperatura vienen
prejados de fábrica. Cuando instale el refrigerador por primera
vez, asegúrese de que los controles estén todavía jados en los
puntos de ajuste recomendados, como se muestra.
Ajustes recomendados
IMPORTANTE:
■ Los ajustes recomendados deben ser los correctos para
un uso doméstico normal del refrigerador. Los controles
están ajustados correctamente cuando la leche o los jugos
están tan fríos como lo desea y cuando el helado tiene
consistencia rme.
■ Cuando esté encendido, la pantalla de temperatura muestra
la temperatura ja del compartimiento.
■ Espere 24 horas para que el refrigerador se enfríe
completamente antes de agregar alimentos. Si agrega
alimentos antes de que el refrigerador se haya enfriado
porcompleto, pueden echarse a perder.
NOTA: Poner los controles de temperatura del refrigerador y
del congelador en un ajuste más frío que el recomendado no
enfriará más rápido los compartimientos.
■ Si la temperatura está demasiado elevada o demasiado
baja en el refrigerador o en el congelador, antes de regular
los controles, revise primero los oricios de ventilación para
cerciorarse de que no estén obstruidos.
Para encender/apagar su refrigerador:
■ Presione el botón táctil (+) del congelador hasta que aparezca
OFF (Apagado) en la pantalla del congelador. Espere unos
cuantos segundos para que el refrigerador se apague.
Noseenfriará ningún compartimiento.
■ Presione el botón táctil (-) del refrigerador o del congelador
para encender el refrigerador.
Cómo ajustar los controles
El control del REFRIGERADOR regula la temperatura del
compartimiento del refrigerador. El control del CONGELADOR
regula la temperatura del compartimiento del congelador.
Si necesita regular la temperatura en el compartimiento del
refrigerador o del congelador, utilice como guía los ajustes
quese enumeran en la tabla.
Para regular las temperaturas de punto de ajuste:
Al primer toque del botón táctil de (+) o de (-), se mostrará en
lapantalla el punto de ajuste actual de temperatura.
■ Presione los botones táctiles (+) o (-) hasta que aparezca
enla pantalla el punto jo deseado de temperatura.
NOTA: No ajuste ningún control de temperatura en más de un
ajuste por vez, excepto cuando encienda el refrigerador por
primera vez. Espere 24 horas entre los ajustes para que se
estabilice la temperatura.
CONDICIÓN/MOTIVO: AJUSTE:
REFRIGERADOR demasiado
caliente
Control del
REFRIGERADOR 1º
másbajo
CONGELADOR demasiado
caliente/muy poco hielo
Ajuste el control del
CONGELADOR 1º
másbajo
REFRIGERADOR demasiado frío Ajuste el control del
REFRIGERADOR 1º
másalto
CONGELADOR demasiado frío Ajuste el control del
CONGELADOR 1º
másalto
Funciones adicionales del centro de control
Max Ice (Hielo máximo)
La característica Max Ice (Hielo máximo) ayuda en los períodos
de uso abundante de hielo aumentando la producción del
mismo.
■ Presione el botón táctil de la característica Max Ice para jar
el congelador en el ajuste de temperatura más bajo. Presione
nuevamente el botón táctil Max Ice para volver al punto de
ajuste normal del congelador.
NOTA: La característica Max Ice se apagará
automáticamente en aproximadamente 24 horas.
Humidity Control (Control de humedad)
La función de Humidity Control (Control de humedad) enciende
un calentador para ayudar a reducir la humedad en el sello
de la bisagra de la puerta. Úselo en ambientes húmedos o
cuando note humedad en el sello de la bisagra de la puerta.
El refrigerador utiliza más energía cuando el Humidity Control
(Control de Humedad) está encendido.
■ Presione Humidity Control (Control de humedad) cuando
el ambiente esté cálido y más húmedo, o si nota humedad
en el sello de la bisagra de la puerta. Se encenderá la luz
indicadora cuando el control de humedad esté ENCENDIDO.
■ Presione Humidity Control (Control de humedad) para
ahorrar energía cuando el ambiente esté menos húmedo.
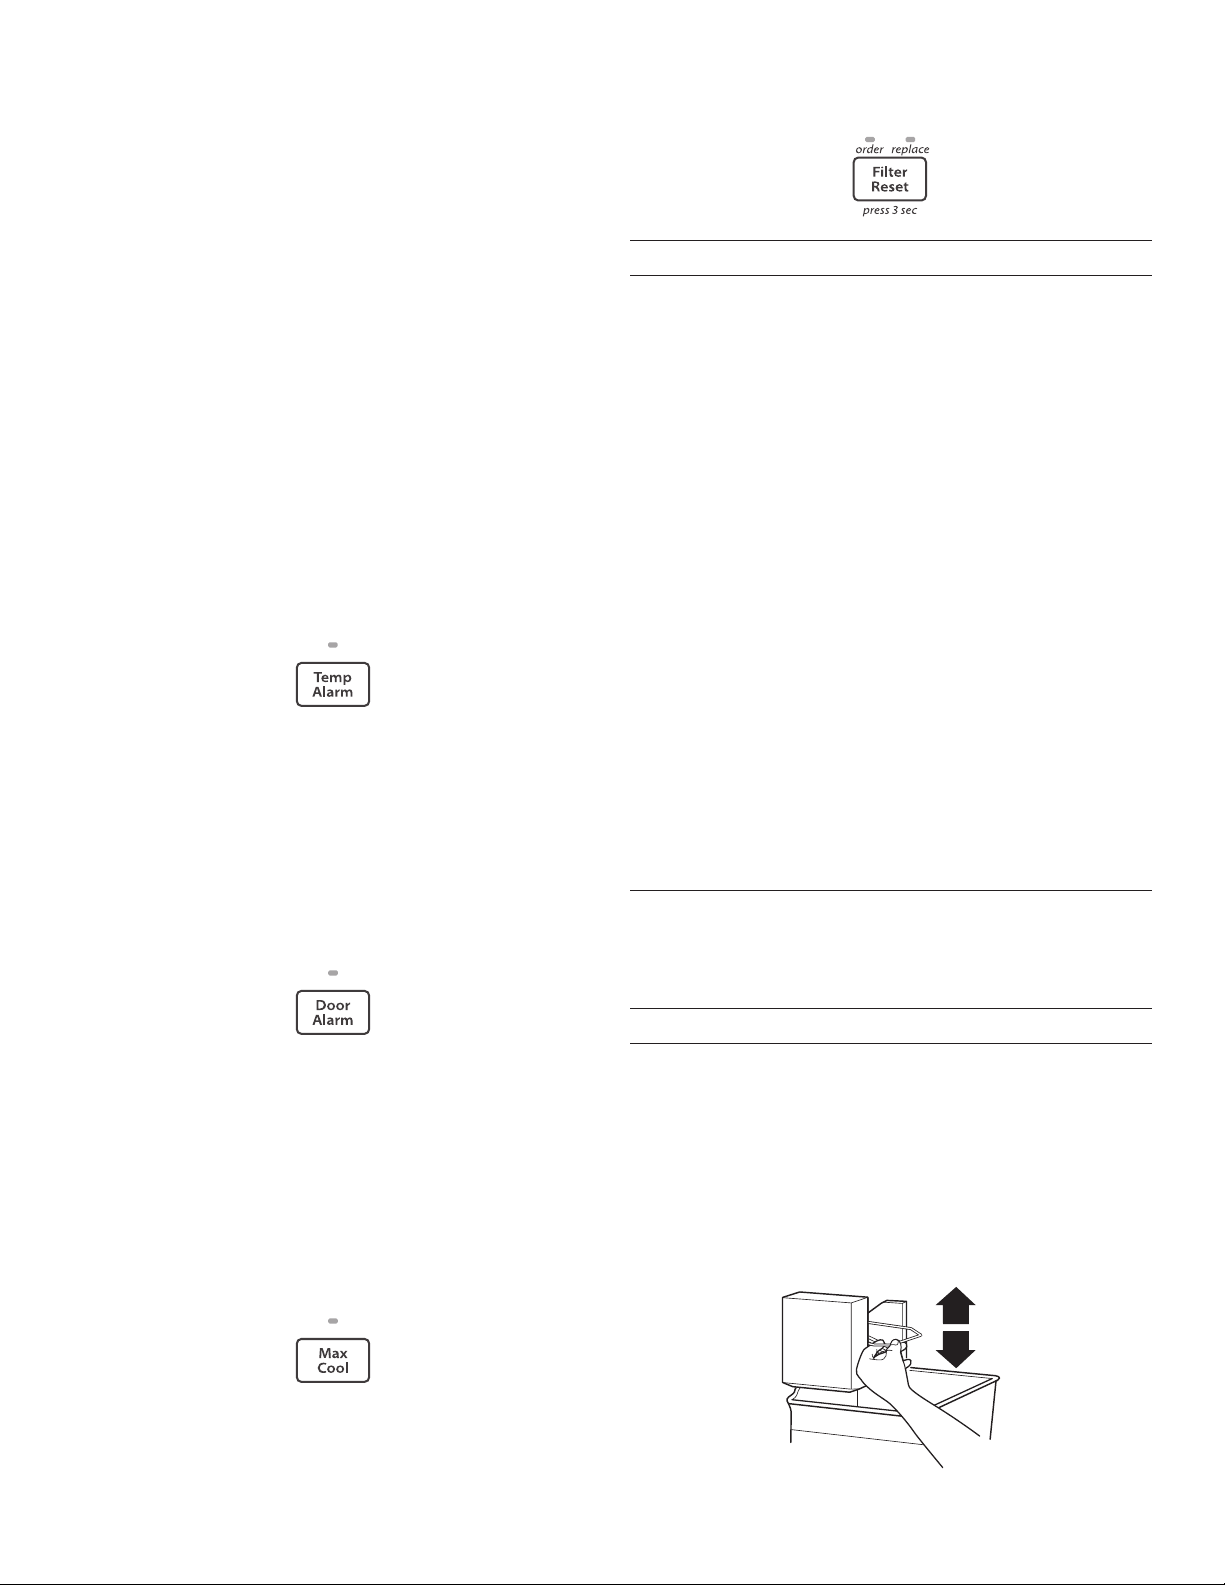
64
Temp Alarm (Alarma de temperatura)
La característica Temp Alarm (Alarma de temperatura) provee
información importante acerca de la temperatura en el caso de
que haya un corte de corriente.
Cortes de corriente: Durante un corte de corriente, si las
temperaturas de los compartimientos del refrigerador y
del congelador exceden las temperaturas normales para el
funcionamiento, aparecerá en la pantalla la temperatura más
altaa que se haya llegado.
■ Para que se encienda esta característica, presione el botón
táctil Temp Alam (Alarma de temperatura) hasta que se
encienda la luz indicadora. Para apagar esta característica,
presione y sostenga Temp Alarm durante 3 segundos, hasta
que se apague la luz indicadora.
Alarma de temperatura: Sonará repetidamente una alarma
si las temperaturas del compartimiento del congelador o del
refrigerador exceden las temperaturas de funcionamiento
normales durante una hora o más.
Las pantallas de temperatura mostrarán en forma alternada las
temperaturas corrientes y las temperaturas más altas que hayan
alcanzado los compartimientos.
■ Presione el botón táctil Temp Alarm (Alarma de temperatura)
una vez para detener laalarma audible y las pantallas
alternadas de temperatura. La luz de Temp Alarm continuará
destellando hasta que el refrigerador vuelva a la temperatura
jada.
Door Alarm (Alarma de la puerta)
La característica de Door Alarm (Alarma de la puerta) hace
sonar una señal cada pocos segundos cuando la puerta del
refrigerador ha quedado abierta durante 5 minutos seguidos.
La señal sonará hasta que se cierre la puerta o se apague la
alarma de la puerta.
■ Presione el botón táctil de Door Alarm (Alarma de la puerta)
para encender o apagar esta característica. La luz indicadora
se encenderá cuando esté encendida la característica Door
Alarm.
Max Cool (Frío máximo)
La característica Max Cool (Enfriamiento máximo) ayuda en
los períodos de alto uso del refrigerador, cargas completas
de comestibles o temperaturas ambientales temporalmente
elevadas.
■ Presione Max Cool (Frío máximo) para jar el congelador
y el refrigerador en los ajustes de temperatura más bajos.
Presione nuevamente Max Cool para volver al punto jo
normal del refrigerador.
NOTA: La característica Max Cool (Frio maàximo) se apagará
automáticamente en aproximadamente 12 horas.
Restablecimiento de ltros
El control de reposición del ltro le permite volver a iniciar la
característica de control de estado del ltro de agua cada vez
que usted reemplace el ltro de agua. Vea “Sistema de ltración
de agua”.
■ Mantenga presionado el botón táctil de Filter Reset
(Reposición del ltro) durante 3 segundos, hasta que se
apague la luz de Order (Pedir) o Replace (Reemplazar).
Preferencias del usuario
El centro de control le permite jar sus preferencias, si usted
lodesea.
Pantalla de temperatura (F_C)
Con esta preferencia, usted puede cambiar la pantalla de la
temperatura.
F - Temperatura en grados Fahrenheit
C - Temperatura en grados centígrados
Alarma (AL)
Con esta preferencia, usted puede apagar el sonido de todas
las larmas.
ON (Encendido) - Usted escuchará el sonido de la alarma.
OFF (Apagado) - Usted no escuchará el sonido de la alarma.
Para obtener acceso al menú de preferencias del usuario:
1. Presione y sostenga el botón táctil de Door Alarm (Alarma
dela puerta) durante tres segundos. El número de preferencia
aparecerá en la pantalla del congelador y el estado de
preferencia (F o C) u (ON - Encendido u OFF - Apagado)
aparecerán en la pantalla del refrigerador.
2. Use los botones táctiles (+) o (-) del congelador para hacer
avanzar los nombres de las preferencias. Cuando aparezca
en la pantalla el nombre de la preferencia deseada, presione
los botones (+) o (-) del refrigerador, para cambiar el estado
de esa preferencia.
3. Fije sus preferencias presionando y sosteniendo el botón
de Door Alarm (Alarma de la puerta) durante 3 segundos,
ocerrando la puerta del refrigerador o del congelador.
Fábrica de hielo
IMPORTANTE: Enjuague el sistema de agua antes de encender
la fábrica de hielo. Vea “Despachador de agua”.
Para encender y apagar la fábrica de hielo
Para poner a funcionar la fábrica de hielo, sencillamente baje el
brazo de control de alambre.
Para apagar la fábrica de hielo manualmente, levante el brazo de
control de alambre a la posición OFF (Apagado - brazo elevado)
y escuche el chasquido.
NOTA: La fábrica de hielo tiene apagado automático. A medida
que se produce el hielo, los cubitos de hielo llenarán el depósito
para hielo y éstos levantarán el brazo de control de alambre a la
posición OFF (Apagado - brazo elevado). No fuerce el brazo de
control de alambre hacia arriba o hacia abajo.

65
NOTA: Apague la fábrica de hielo antes de quitar el depósito
de hielo para limpiarlo o para servir hielo. Esto evitará que
los cubos de hielo caigan fuera de la fábrica de hielo hacia el
compartimiento del congelador. Encienda la fábrica de hielo
después de volver a colocar el depósito de hielo.
Velocidad de producción de hielo
■ La fábrica de hielo debe producir un lote completo de hielo
aproximadamente cada 3 horas.
■ Para aumentar la producción de hielo, baje la temperatura
del congelador y del refrigerador. Vea “Uso de los controles”.
Deje pasar 24 horas entre cada ajuste.
Recuerde
■ Espere 24 horas para la producción del primer lote de
hielo. Espere 3 días para llenar por completo el depósito
dealmacenamiento de hielo. Deseche los tres primeros lotes
de hielo producidos.
■ La calidad del hielo dependerá de la calidad del agua que
suministre a su fábrica de hielo. Evite la conexión de la fábrica
de hielo a un suministro de agua ablandada. Las sustancias
químicas utilizadas para ablandar el agua (como la sal) pueden
dañar componentes de la fábrica de hielo y producir hielo
de calidad deciente. Si no se puede evitar el uso de un
suministro de agua blanda, asegúrese de que el ablandador
deagua esté funcionando correctamente y que goce de un
buen mantenimiento.
■ No guarde nada encima de la fábrica de hielo o en el depósito
de hielo.
Despachador de agua
IMPORTANTE:
■ Después de haber conectado el refrigerador a un suministro
de agua o de haber reemplazado el ltro de agua, enjuague
el sistema de agua. Use un recipiente resistente para oprimir
y sostener la barra del despachador por 5 segundos, luego
suéltela por 5 segundos. Repita hasta que el agua comience a
correr. Una vez que el agua haya comenzado a correr, continúe
presionando y soltando la barra del despachador (5 segundos
activado, 5 segundos desactivado) hasta despachar un total de
4 galones (15 L). Esto eliminará el aire en el ltro y en el sistema
de despachado de agua, y preparará el ltro de agua para
ser usado. En algunas casas, se puede requerir un enjuague
adicional. A medida que sale aire del sistema, es posible que
salgan chorros de agua repentinos del despachador.
NOTA: Después de cinco minutos de despacho continuo,
el despachador se detendrá para evitar derrames.
Paraseguir despachando, presione nuevamente el botón
deldespachador.
■ Espere 24 horas para que el refrigerador se enfríe y pueda
enfriar el agua. Haga salir suciente agua cada semana para
mantener un suministro fresco.
Despacho de agua
1. Sostenga un recipiente por debajo del dispensador mientras
presiona el botón.
2. Suelte el botón para dejar de despachar.
Sistema de ltración de agua
El ltro de agua está ubicado en la esquina superior derecha del
compartimiento del refrigerador.
IMPORTANTE: El ltro de agua desechable deberá
reemplazarse por lo menos cada 6 meses. Si el ujo de agua
hacia el despachador de agua o a la fábrica de hielo disminuye
sensiblemente antes de que pasen 6 meses, cambie el ltro más
seguido.
Reemplazo del ltro de agua
Para comprar ltros de agua de reemplazo, modelo
UKF8001AXX-750 o UKF8001AXX-200, póngase en contacto
consu distribuidor o llame al 1-800-253-1301 en EE.UU. o al
1-800-807-6777 en Canadá.
IMPORTANTE: El aire que quede atrapado en el sistema de agua
puede hacer que se salga agua y el ltro. Siempre despache agua
por lo menos durante 2 minutos antes de quitar el ltro o la tapa
azul de paso.
1. Gire el ltro en el sentido contrario a las manecillas del reloj
para sacarlo.
2. Saque la etiqueta de sellado del ltro de reemplazo e inserte
el extremo del ltro dentro del cabezal del ltro.
3. Gire el ltro hacia la derecha hasta que se detenga. Encaje la
cubierta del ltro en su lugar para cerrarla.
4. Enjuague el sistema de agua. Vea “Despachador(es) de agua
y hielo”.
NOTA: La característica del despachador se puede usar sin tener
un ltro de agua instalado. El agua no estará ltrada. Si elige esta
opción, reemplace el ltro con la tapa azul de paso.
No use con agua que no sea microbiológicamente segura
o que sea de calidad desconocida sin desinfectarla
adecuadamente antes o después del sistema. Pueden
usarse sistemas certificados para la reducción de quistes
en aguas desinfectadas que puedan contener quistes
filtrables.
66
CUIDADO DEL
REFRIGERADOR
Limpieza
Tanto la sección del refrigerador como la del congelador
se descongelan automáticamente. No obstante, limpie
ambas secciones más o menos una vez al mes para evitar
laacumulación de olores. Limpie los derrames de inmediato.
IMPORTANTE:
■ Debido a que el aire circula entre ambas secciones,
cualquierolor que se forma en una sección pasará a la
otra. Debelimpiarmeticulosamente ambas secciones para
eliminar olores. Paraevitar la transferencia de olores y la
deshidratación de los alimentos, envuelva o tape bien los
alimentos.
■ Para los modelos de acero inoxidable, el acero inoxidable
es resistente a la corrosión y no a prueba de corrosión.
Paraayudar a evitar la corrosión del acero inoxidable,
mantenga las supercies limpias, siguiendo las instrucciones
de limpieza a continuación.
Para limpiar su refrigerador:
NOTA: No use productos de limpieza abrasivos o ásperos,
como aerosoles para ventanas, productos de limpieza para
pulir, líquidos inamables, ácido muriático, ceras para limpieza,
detergentes concentrados, blanqueadores o productos de
limpieza que contengan productos derivados de petróleo en las
supercies exteriores (puertas y carcasa), partes de plástico,
revestimientos interiores o de la puerta, o juntas. No use toallas
de papel, estropajos para fregar ni otros utensilios de limpieza
ásperos.
1. Desenchufe el refrigerador o desconecte el suministro de
energía.
2. Lave a mano, enjuague y seque todas las partes
desmontables y las supercies interiores meticulosamente.
Use una esponja limpia o un paño liso y un detergente suave
en agua tibia.
3. Limpie las supercies exteriores.
Metal pintado: Limpie el exterior de metal pintado con un
paño limpio y liso, o una esponja y detergente suave en
agua tibia. Enjuague las supercies con agua tibia limpia y
séquelas inmediatamente para evitar las manchas de agua.
Acero inoxidable: Lave las supercies de acero inoxidable
con un paño limpio y liso o una esponja y un detergente suave
en agua tibia. Enjuague las supercies con agua tibia limpia y
séquelas inmediatamente para evitar las manchas de agua.
NOTA: Cuando limpie el acero inoxidable, siempre talle en
ladirección de la veta para evitar rayar a través del mismo.
4. No se necesita una limpieza rutinaria del condensador
enambientes de funcionamiento de casas normales. Si el
ambiente es particularmente grasoso o polvoriento, o si hay
bastante tránsito de mascotas en el hogar, el condensador
deberá limpiarse cada dos o tres meses para asegurar la
máxima ecacia.
Si necesita limpiar el condensador:
■ Quite la rejilla de la base.
■ Use una aspiradora con un cepillo suave para limpiar la
rejilla, las áreas abiertas detrás de la rejilla y la supercie
frontal del condensador.
■ Vuelva a colocar la rejilla de la base cuando termine.
5. Enchufe el refrigerador o reconecte el suministro de energía.
Cómo cambiar el foco
IMPORTANTE: Los focos de luz en los compartimientos del
refrigerador y el congelador de su nuevo refrigerador usan
bombillas LED, bombillas incandescentes o una combinación
de ambas. Si las luces no se encienden cuando abre la puerta
del refrigerador y/o el congelador, llame para solicitar ayuda o
servicio técnico. Consulte “Garantía” para conocer los números
de teléfono.
1. Desenchufe el refrigerador o desconecte el suministro de
energía.
2. Quite la pantalla de la luz (en algunos modelos).
■ Parte superior del compartimiento del refrigerador:
deslicela pantalla de la luz hacia la parte posterior del
compartimiento para liberarla del ensamblaje de luz.
3. Cambie los focos quemados por focos del mismo tamaño,
forma y vataje.
■ Para reemplazar un foco quemado por un foco LED, pida
el número de pieza W10565137 (3,6 vatios).
NOTA: Algunos focos LED de reemplazo no se recomiendan
para ambientes húmedos. Los compartimientos del refrigerador
y congelador se consideran ambientes húmedos. Si utiliza un
foco LED de una marca diferente a la recomendada, antes de
lainstalación, lea y siga todas las instrucciones del empaque
delLED.
■ Cuando reemplace un foco incandescente, use solo
focos incandescentes para electrodomésticos con un
máximo de40 vatios. Vuelva a colocar la pantalla del
foco después de reemplazar el foco incandescente.
4. Vuelva a colocar la pantalla de luz.
5. Enchufe el refrigerador o reconecte el suministro de energía.
ADVERTENCIA
Peligro de Explosión
Use un limpiador no inflamable.
No seguir esta instrucción puede ocasionar la muerte,
explosión o incendio.

67
Cuidado durante las vacaciones
ylasmudanzas
Vacaciones
Si decide dejar el refrigerador encendido mientras está
ausente:
1. Use todos los artículos perecederos y congele el resto.
2. Si su refrigerador tiene una fábrica de hielo automática y está
conectada al suministro de agua de la casa, cierre el suministro
de agua al refrigerador. Si no se cierra el suministro de agua,
pueden producirse daños a la propiedad.
3. Si tiene una fábrica de hielo automática, apáguela.
NOTA: Según el modelo, levante el brazo de control de alambre
a la posición OFF (Apagado) (hacia arriba), o presione el
interruptor hacia OFF (Apagado).
4. Vacíe el depósito de hielo.
Modelos con Función Vacation Mode (Modo de
vacaciones)
■ Encienda Vacation mode (Modo de vacaciones).
Vea “Uso de los controles”.
NOTA: La activación de Vacation Mode (Modo de vacaciones)
no apaga la fábrica de hielos.
Si decide apagar el refrigerador antes de irse:
1. Saque toda la comida del refrigerador.
2. Si el refrigerador tiene fábrica de hielo automática:
■ Cierre el suministro de agua a la fábrica de hielo por lo
menos un día antes.
■ Cuando el último lote de hielo caiga, levante el brazo
de control de alambre a la posición OFF (Apagado -
hacia arriba) o presione el interruptor a la posición OFF
(Apagado), según su modelo.
3. Vacíe el depósito de hielo.
4. Apague el control(es) de Temperatura. Consulte “Uso del
(delos) control(es)”.
5. Limpie el refrigerador, pásele un trapo y séquelo bien.
6. Fije con cinta adhesiva bloques de goma o de madera en la
parte superior de ambas puertas para que queden abiertas
lo suciente como para que ingrese aire. Esto evita que se
acumulen olores y moho.
Mudanza
Si va a mudar el refrigerador a una casa nueva, siga estos pasos
para prepararlo para la mudanza.
1. Si el refrigerador tiene fábrica de hielo automática:
■ Cierre el suministro de agua a la fábrica de hielo por lo
menos un día antes.
■ Desconecte la tubería de agua de atrás del refrigerador.
■ Cuando el último lote de hielo caiga, levante el brazo
de control de alambre a la posición OFF (Apagado -
hacia arriba) o presione el interruptor a la posición OFF
(Apagado), según su modelo.
2. Saque toda la comida del refrigerador y empaque todos los
alimentos congelados en hielo seco.
3. Vacíe el depósito de hielo.
4. Apague el control(es) de Temperatura. Vea “Uso del (de los)
control(es)”.
5. Desenchufe el refrigerador.
6. Limpie, repase y seque meticulosamente.
7. Retire todas las piezas desmontables, envuélvalas bien
y asegúrelas con cinta adhesiva para que no se sacudan
durante la mudanza.
8. Según el modelo, levante la parte delantera del refrigerador
para que ruede con facilidad O levante los tornillos niveladores
para no rayar el suelo. Vea “Ajustar la Puerta(s)” o “Cierre y
Alineamiento de las Puertas.”
9. Sostenga las puertas cerradas y el cable pegado a la parte
posterior del refrigerador con cinta adhesiva.
Cuando llegue a la casa nueva, ponga todo de nuevo en su
sitio y consulte la sección “Instrucciones de instalación” para
obtener instrucciones de preparación. Además, si el refrigerador
tiene fábrica de hielo automática, recuerde volver a conectar el
suministro de agua al refrigerador.

68
SOLUCIÓN DE PROBLEMAS
Pruebe primero las soluciones sugeridas aquí. Si necesita asistencia adicional o más recomendaciones que pueden ayudarle a evitar
una llamada de servicio técnico, consulte la página de la garantía de este manual y escanee el código con su dispositivo móvil o visite
www.whirlpool.com/product_help.
En Canadá, visite www.whirlpool.ca.
Si tiene preguntas o dudas, contáctenos por correo a la dirección que aparece a continuación:
En Estados Unidos:
Whirlpool Brand Home Appliances
Customer eXperience Center
553 Benson Road
Benton Harbor, MI 49022-2692
Incluya en su correspondencia un número de teléfono en el que
se le pueda localizar durante el día.
Funcionamiento del refrigerador
El refrigerador no funciona
■ ¿Está desenchufado el cable de suministro de energía?
Conecte el producto a un contacto de pared de 3 terminales
con conexión a tierra.
■ ¿Funciona el contacto? Enchufe una lámpara para ver si
funciona el tomacorriente.
■ ¿Hay un fusible de la casa fundido o se disparó
el cortacircuitos? Reemplace el fusible o reinicie el
cortacircuitos. Si el problema continúa, llame a un electricista.
■ ¿Están encendidos los controles? Asegúrese de que los
controles del refrigerador estén encendidos. Consulte “Uso
del (de los) control(es)”.
■ ¿Es nueva la instalación? Espere 24 horas después de la
instalación para que el refrigerador se enfríe por completo.
NOTA: El ajustar los controles de temperatura en la posición
más fría no enfría ningún compartimiento más rápido.
En Canadá:
Whirlpool Brand Home Appliances
Customer eXperience Centre
200 – 6750 Century Ave.
Mississauga, Ontario L5N 0B7
El motor parece funcionar demasiado
Es posible que su nuevo refrigerador funcione por períodos
más largos que su refrigerador anterior debido al compresor y
los ventiladores de alto rendimiento. Es posible que la unidad
funcione por más tiempo si la habitación está caliente, si se ha
agregado una gran cantidad de alimentos, si se abren las puertas
con frecuencia o si se han dejado las mismas abiertas.
El refrigerador parece ser ruidoso
El ruido del refrigerador se ha ido reduciendo a lo largo de los
años. Debido a esta reducción, es posible que escuche ruidos
intermitentes en su nuevo refrigerador que no había notado en
el modelo viejo. A continuación se enumeran algunos sonidos
normales con explicaciones.
■ Zumbido - se escucha cuando la válvula de agua se abre
para llenar la fábrica de hielo
■ Sonido pulsante - los ventiladores/el compresor se están
ajustando para obtener el máximo desempeño
■ Sonido sibilante/vibraciones - ujo de líquido
refrigerante, movimiento de la tubería de agua o artículos
guardados arriba del refrigerador.
■ Chisporroteos/Gorgoteos - agua goteando en el
calentador durante el ciclo de descongelación
■ Estallido - contracción/expansión de las paredes
interiores, especialmente durante el enfriamiento inicial
■ Agua corriendo - puede escucharse cuando el hielo se
derrite durante el ciclo de descongelación y el agua corre
hacia la bandeja recolectora
■ Chirridos/Crujidos - esto ocurre cuando el hielo es
expulsado del molde de la fábrica de hielo.
Las puertas no cierran completamente
■ ¿Están bloqueadas las puertas? Aleje los paquetes de
alimentos de la puerta.
■ ¿Hay un recipiente o un estante bloqueando el paso?
Empuje el recipiente o el estante nuevamente a la posición
correcta.
ADVERTENCIA
Peligro de Choque Eléctrico
Conecte a un contacto de pared de conexión a tierra de
3 terminales.
No quite la terminal de conexión a tierra.
No use un adaptador.
No use un cable eléctrico de extensión.
No seguir estas instrucciones puede ocasionar
la muerte, incendio o choque eléctrico.
69
Es difícil abrir las puertas
■ ¿Están las empaquetaduras sucias o pegajosas? Limpie
las juntas y las supercies de contacto con jabón suave y
agua tibia. Enjuague y seque con un paño suave.
Temperatura y humedad
La temperatura está demasiado elevada
■ ¿Es nueva la instalación? Espere 24 horas después de la
instalación para que el refrigerador se enfríe por completo.
■ ¿Las puertas se abren a menudo o quedan abiertas? Esto
permite el ingreso de aire caliente al refrigerador. Reduzca al
mínimo el número de veces que abre la puerta y mantenga
las puertas completamente cerradas.
■ ¿Se ha agregado una gran cantidad de alimentos? Espere
varias horas para que el refrigerador vuelva a la temperatura
normal.
■ ¿Se han ajustado los controles correctamente de acuerdo
con las condiciones circundantes? Regule los controles
un ajuste más frío. Fíjese en la temperatura en 24 horas.
Consulte “Uso del (de los) control(es)”.
Hay acumulación de humedad en el interior
NOTA: cierta acumulación de humedad es normal.
■ ¿Está húmeda la habitación? Esto contribuye a la acumulación
de humedad.
■ ¿Las puertas se abren a menudo o quedan abiertas?
Esto hace que entre aire húmedo al refrigerador. Reduzca al
mínimo el número de veces que abre la puerta y mantenga
las puertas completamente cerradas.
Hielo y agua
La fábrica de hielo no produce hielo o no produce
suciente hielo
■ ¿Se ha conectado el refrigerador a un suministro de agua
y se ha abierto la válvula de cierre? Conecte el refrigerador
al suministro de agua y abra completamente la válvula de
cierre.
■ ¿Hay un estrechamiento en la tubería de suministro
deagua? Una torcedura en la línea puede reducir el ujo
deagua. Enderece la línea de origen de agua.
■ ¿Está encendida la fábrica de hielo? Asegúrese de que el
brazo o interruptor de cierre de alambre (dependiendo del
modelo) esté en la posición de ON (Encendido).
■ ¿Es nueva la instalación? Espere 24 horas después de la
instalación de la fábrica de hielo para que empiece a producir
hielo. Deje transcurrir 72 horas para la producción total de
hielo.
■ ¿Está completamente cerrada la puerta del congelador?
Cierre con rmeza la puerta del compartimiento del
congelador. Si la puerta del compartimiento del congelador
no se cierra completamente, consulte “Las puertas no cierran
completamente” antes en esta sección.
■ ¿Se acaba de sacar una gran cantidad de hielo? Deje
transcurrir 24 horas para que la fábrica de hielo produzca
más hielo.
■ ¿Se trabó un cubo de hielo en el brazo eyector de la
fábrica de hielo?
Saque el hielo del brazo eyector con un utensilio plástico.
■ ¿Tiene un ltro de agua instalado en el refrigerador? Quite
el ltro y ponga a funcionar la fábrica de hielo. Si el volumen
de agua aumenta, el ltro puede estar obstruido o haberse
instalado incorrectamente. Reemplace el ltro o vuelva a
instalarlo correctamente.
■ ¿Se ha conectado un sistema de ltración de agua de
ósmosis inversa al suministro de agua fría? Esto puede
hacer que disminuya la presión de agua.
Vea “Requisitos del suministro de agua”.
Los cubos de hielo son huecos o pequeños
NOTA: esto es una indicación de baja presión de agua.
■ ¿No está abierta por completo la válvula de cierre de
agua? Abra completamente la válvula de cierre de agua.
■ ¿Hay un estrechamiento en la tubería de suministro
deagua? Una torcedura en la línea puede reducir el ujo
deagua. Enderece la línea de origen de agua.
■ ¿Tiene un ltro de agua instalado en el refrigerador? Quite
el ltro y ponga a funcionar la fábrica de hielo. Si mejora la
calidad del hielo, el ltro puede estar obstruido o haberse
instalado incorrectamente. Reemplace el ltro o vuelva a
instalarlo correctamente.
■ ¿Se ha conectado un sistema de ltración de agua de
ósmosis inversa al suministro de agua fría? Esto puede
hacer que disminuya la presión de agua.
Vea “Requisitos del suministro de agua”.
■ ¿Aún tiene preguntas acerca de la presión de agua?
Llame a un plomero competente matriculado.
El hielo tiene mal sabor, mal olor o un color grisáceo
■ ¿Son nuevas las conexiones de plomería? Las conexiones
nuevas de plomería pueden producir un hielo descolorido o
de mal sabor.
■ ¿Se han guardado los cubos de hielo por mucho tiempo?
Deseche ese hielo. Lave el recipiente de hielo. Espere 24
horas para que la fábrica de hielo haga hielo nuevo.
■ ¿Ha habido una transferencia de olor de los alimentos?
Use recipientes herméticos contra humedad para almacenar
comida.
■ ¿Contiene el agua minerales (como el azufre)? Puede
ser necesario instalar un ltro de agua para eliminar los
minerales.
ADVERTENCIA
Peligro de Explosión
Use un limpiador no inflamable.
No seguir esta instrucción puede ocasionar la muerte,
explosión o incendio.

70
■ ¿Tiene un ltro de agua instalado en el refrigerador?
Undescoloramiento oscuro o un color gris del hielo indican
que el sistema de ltrado de agua necesita enjuagarse más.
Enjuague el sistema de agua antes de usar un nuevo ltro.
Reemplace el ltro de agua cuando se indique. Consulte el
“Sistema de ltración de agua”.
El despachador de agua no funciona debidamente
■ ¿Se ha conectado el refrigerador a un suministro de agua
y se ha abierto la válvula de cierre? Conecte el refrigerador
al suministro de agua y abra completamente la válvula de
cierre.
■ ¿Hay un estrechamiento en la tubería de suministro
deagua? Enderece la línea de origen de agua.
■ ¿Es nueva la instalación? Enjuague y llene el sistema
deagua. Consulte “Despachador de agua”.
■ ¿Está la presión de agua a por lo menos 35 lb/pulg²
(241kPa)? La presión de agua a la casa determina el ujo del
despachador. Consulte “Requisitos del suministro de agua”.
■ ¿Tiene un ltro de agua instalado en el refrigerador?
Saque el ltro y ponga a funcionar el dispensador. Si mejora
el ujo de agua, el ltro puede estar obstruido o haberse
instalado incorrectamente. Reemplace el ltro o vuelva a
instalarlo correctamente.
■ ¿Está completamente cerrada la puerta del refrigerador?
Cierre la puerta con rmeza. Si no se cierra completamente,
vea “Las puertas no cierran completamente” anteriormente
en esta sección.
■ ¿Se han quitado las puertas recientemente? Asegúrese
que el montaje del alambre/tubo del dispensador se ha vuelto
a conectar como es debido. Consulte “Puerta(s) y cajón del
refrigerador”.
■ ¿Se ha conectado un sistema de ltración de agua de ósmosis
inversa al suministro de agua fría? Esto puede hacer que
disminuya la presión de agua. Vea “Requisitos del suministro
de agua”.
Hay fugas de agua en el sistema del dispensador
NOTA: Es normal que caigan una o dos gotas de agua después
de servir agua.
■ ¿No se ha puesto el vaso debajo del despachador el
tiempo suciente?
Sostenga el vaso debajo del despachador durante 2 a 3
segundos después de soltar la palanca del despachador.
■ ¿Es nueva la instalación? Enjuague el sistema de agua.
Vea“Despachador de agua”.
■ ¿Ha cambiado recientemente el ltro de agua? Enjuague
el sistema de agua.
■ Vea “Despachador de agua”.
■ ¿Hay agua en el piso cerca de la rejilla de la base?
Asegúrese de que las conexiones de la tubería del dispensador
de agua estén bien ajustadas.
Vea “Puerta(s) y cajón del refrigerador”.
El agua del despachador está tibia
NOTA: El agua del despachador se enfría solamente a 50° F (10° C).
■ ¿Es nueva la instalación? Espere 24 horas después de
la instalación para que el suministro de agua se enfríe
completamente.
■ ¿Se ha despachado recientemente una gran cantidad
deagua? Deje transcurrir 24 horas para que el suministro
deagua se enfríe completamente.
■ ¿No se ha usado el despachador de agua recientemente?
Puede ser que el primer vaso de agua no esté frío.
Descarteel agua del primer vaso.
■ ¿Se ha conectado el refrigerador a una tubería de agua
fría? Asegúrese de que el refrigerador esté conectado a una
tubería de agua fría.
Vea “Requisitos del suministro de agua”.
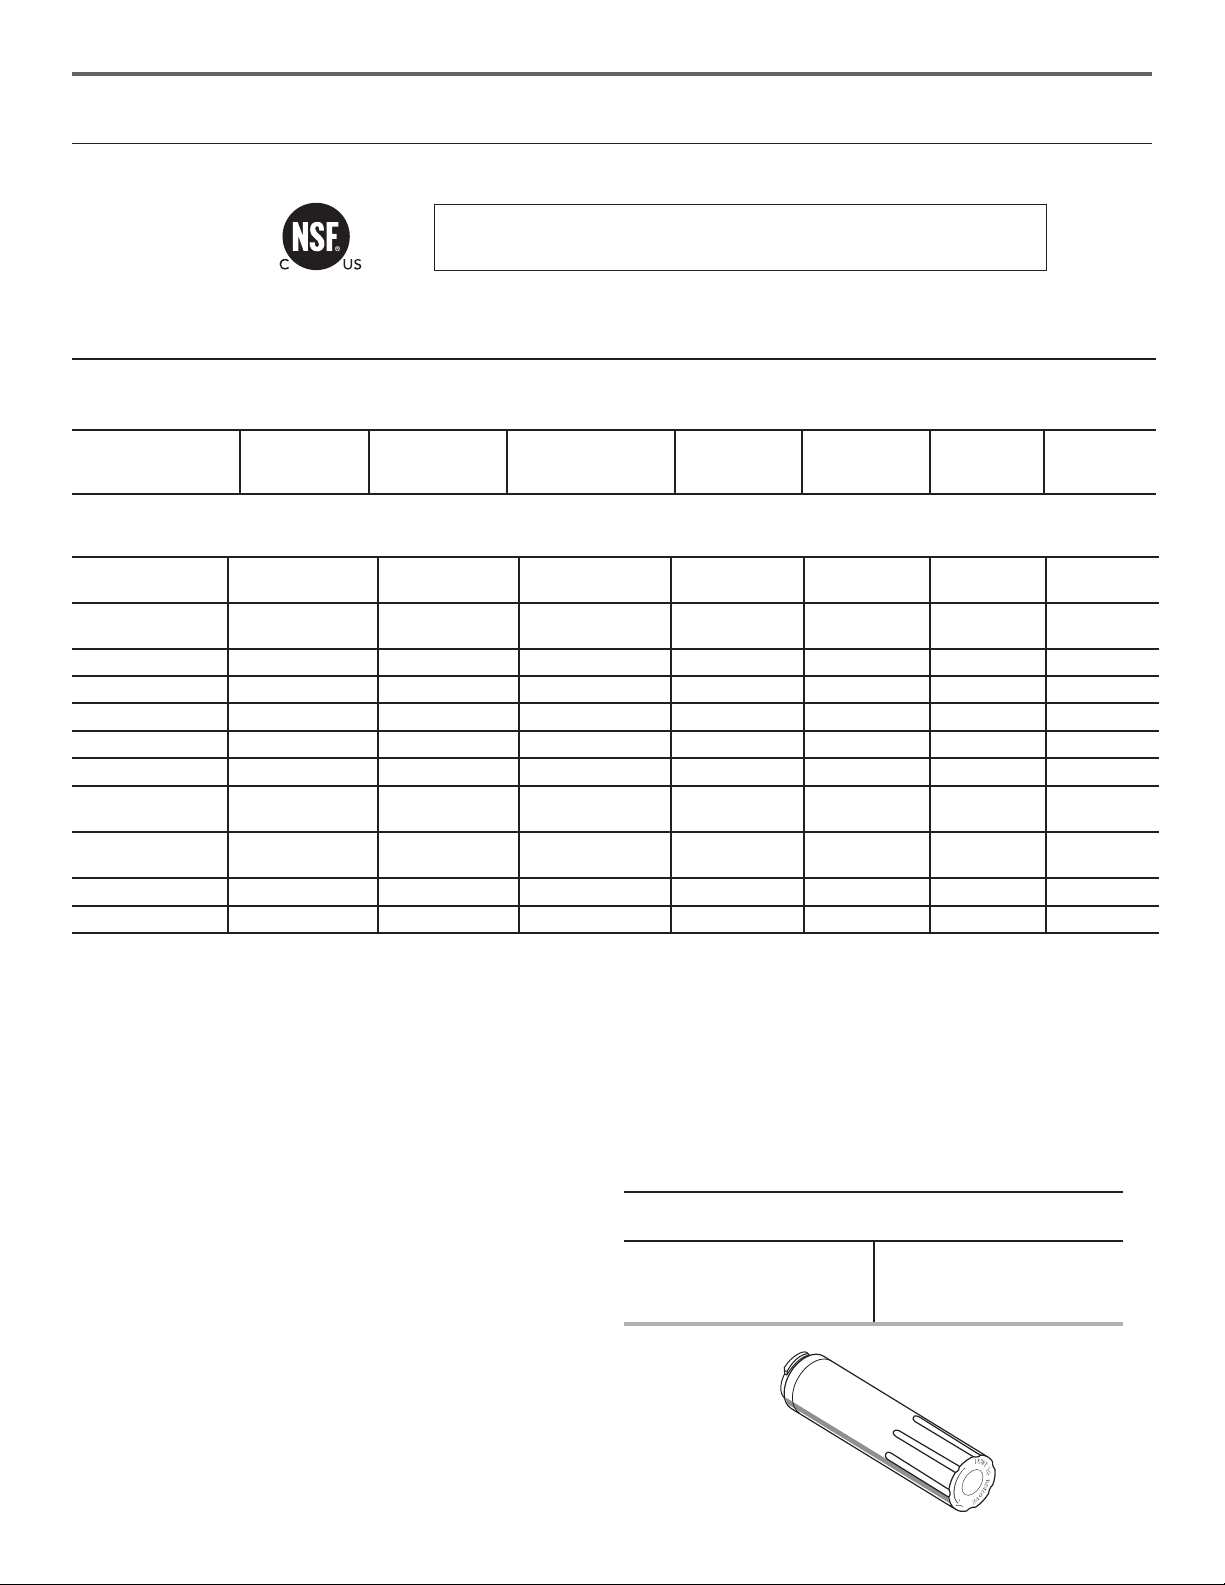
71
HOJAS DE DATOS DEL PRODUCTO
Sistema de ltración de agua interior
Modelo UKF8001AXX-750 Capacidad de 750 galones (2839 litros)
Este sistema ha sido probado según las normas NSF/ANSI 42, 53, 401 y CSA B483.1 para la reducción de las sustancias citadas a
continuación. La concentración de las sustancias indicadas en agua entrando al sistema fue reducida a una concentración menor o
igual al límite permitido para agua saliendo del sistema, tal como se especica en las normas NSF/ANSI 42, 53 y 401 y CSA B483.1.
Reducción de
sustancias Efectos
estéticos
Requisitos
dereducción
de NSF
Promedio
inuente
Concentración en
el agua a tratar
Máximo
euente
Promedio
euente
% mínimo de
reducción
% promedio
de reducción
Sabor/olor a cloro
Clase de partículas I*
50% de
reducción 85%
de reducción
2,00 mg/L
14.000.000 #/mL
2,0 mg/L ± 10%
Por lo menos 10.000
partículas/mL
0,06 mg/L
370.000 #/mL**
0,050625 mg/L
196.666 #/mL
97,00%
97,40%
97,52%
99,00%
Reducción de
contaminantes
Requisitos de
reducción de NSF
Promedio
inuente
Concentración en
el agua a tratar
Máximo
euente
Promedio
euente
% mínimo
de reducción
% promedio
de reducción
Plomo: @ pH 6,5
Plomo: @ pH 8,5
0,010 mg/L
0,010 mg/L
0,150 mg/L
†
0,150 mg/L
†
0,15 mg/L ± 10%
0,15 mg/L ± 10%
< 0,001 mg/L
< 0,001 mg/L
< 0,001 mg/L
< 0,001 mg/L
>99,30%
>99,30%
>99,30%
>99,30%
Mercurio: @ pH 6,5
Mercurio: @ pH 8,5
0,002 mg/L
0,002 mg/L
0,006 mg/L
0,0059 mg/L
0,006 mg/L ± 10%
0,006 mg/L ± 10%
0,0005 mg/L
0,0018 mg/L
0,0003 mg/L
0,00073 mg/L
91,70%
69,20%
95,00%
88,10%
Benceno 0,005 mg/L 0,0133 mg/L 0,015 mg/L ± 10% 0,0005 mg/L 0,0005 mg/L 96.10% 96.30%
p-Diclorobenceno 0,075 mg/L 0,210 mg/L 0,225 mg/L ± 10% < 0,0005 mg/L < 0,0005 mg/L >99,80% >99,80%
Carbofurano 0,040 mg/L 0,0753 mg/L 0,08 mg/L ± 10% 0,027 mg/L 0,008 mg/L 64.60% 73.45%
Toxafeno 0,003 mg/L 0,015 mg/L 0,015 ± 10% < 0,001 mg/L < 0,001 mg/L >93,3% >93,3%
Atrazina 0,003 mg/L 0,0102 mg/L 0,009 mg/L ± 10% 0,0027 mg/L 0,00105 mg/L 76.30% 89.40%
Asbestos >99% 126.5 MF/L De 107 a 108
bras/L
††
0.17 MF/L 0.17 MF/L >99,99% >99,99%
Quistes vivos
‡
Turbidez
>99,95%
0,5 NTU
122.500 #/L
10,5 NTU
50.000/L min.
11 ± 1 NTU
< 1 #/L
‡
0,30 NTU
< 1 #/L
‡
0,125 NTU
>99,99%
97,30%
>99,99%
98,80%
Lindano 0,0002 mg/L 0,0019 mg/L 0.002 ± 10% < 0,00016 mg/L 0,000035 mg/L 91.80% 97.90%
Tetracloroetileno 0,005 mg/L 0,015 mg/L 0,015 mg/L ± 10% < 0,0005 mg/L < 0,0005 mg/L >96,6% >96,6%
Parámetros de la prueba: pH = 7,5 ± 0,5 a menos que se indique otra cosa. Flujo = 0,78 gpm (2,9 Lpm). Presión = 60 psig (413.7 kPa). Temp. = 68°F ± 5°F
(20°C ± 3°C).
■ Es esencial que los requerimientos de operación, mantenimiento
y reemplazo del ltro se lleven a cabo para que el producto se
desempeñe tal como se ofrece en la publicidad.
■ El ltro de agua desechable deberá reemplazarse por lo menos
cada6 meses.
■ El sistema monitor del ltro mide la cantidad de agua que pasa a
través del ltro y lo pone en alerta para reemplazar el ltro. Cuando se
ha usado el 90% de la duración nominal del ltro, se enciende la luz
amarilla (Order - Pedir). Cuando se ha usado el 100% de la duración
nominal del ltro, se encenderá la luz roja (Replace - Reemplazar) y
se le recomienda reemplazar el ltro. Para los modelos sin luces de
estado del ltro, reemplace el ltro cada 6 meses. Use el modelo de
ltro de repuesto UKF8001. El precio sugerido de venta al por menor
durante el año 2015 es de $49,99 en EE.UU./ $ 49,95 en Canadá.
Losprecios están sujetos a cambio sin previo aviso.
■ El producto es para uso con agua fría únicamente.
■ No use con agua que no sea microbiológicamente segura o que
sea de calidad desconocida sin desinfectarla adecuadamente antes
o después del sistema. Pueden usarse sistemas certicados para
la reducción de partículas en aguas desinfectadas que puedan
contener partículas ltrables.
■ Consulte la sección “Sistema de ltración de agua” para obtener
elnombre y número telefónico del fabricante.
■ Reérase a la sección “Garantía” para vericar la garantía limitada
delfabricante.
Pautas de aplicación / Parámetros para el suministro
deagua
Suministro de agua
Presión del agua
Temperatura del agua
Flujo nominal de servicio
Municipal o de pozo
35 - 120 psi (241 - 827 kPa)
33° - 100°F (1° - 38°C)
0,78 gpm (2,9 L/min.) a 60 psi
Sistema probado y certicado por NSF International, según las normas
NSF/ANSI 42, 53 y 401 y CSA B483.1** para la reducción de los
contaminantes especicados en la Hoja de datos de rendimiento.
*Tamaño de las partículas clase I: >0,5 a <1 um
**El requisito de prueba es de cuando menos 100.000 partículas/ml de
polvo no de prueba AC.
†
Estos contaminantes no se encuentran necesariamente en su suministro
deagua El rendimiento puede variar según las condiciones locales del agua.
†
Fibras de más de 10 um de longitud
‡
Se basa en el uso de Ooquistes Cryptosporidium parvum
®
NSF es una marca registrada de NSF International.
72
Sistema probado y certicado por NSF International, según las normas
NSF/ANSI 42, 53 y 401 y CSA B483.1** para la reducción de los
contaminantes especicados en la Hoja de datos de rendimiento.
Sistema de filtración de agua
Modelo UKF8001AXX-200/UKF8001 Capacidad de 200 galones (757 litros)
Este sistema ha sido probado según las normas NSF/ANSI 42, 53, 401 y CSA B483.1 para la reducción de las sustancias citadas a
continuación. Laconcentración de las sustancias indicadas en agua entrando al sistema fue reducida a una concentración menor o
igual al límite permitido para agua saliendo del sistema, tal como se especica en las normas NSF/ANSI 42, 53 y 401 y CSA B483.1.
Reducción de sustancias
Efectos estéticos
Concentración en el agua a tratar Concentración de nivel máximo permisible
de agua en el producto
% promedio de
reducción
Cloro, sabor/olor 2,0 mg/L ± 10% 50% reducción 97.6%
Clase de partículas I* Por lo menos 10.000 partículas/mL 85% reducción 98.8%
Reducción de contaminantes Concentración en el agua a tratar Concentración de nivel máximo permisible
de agua en el producto
% promedio de
reducción
Plomo***: a pH 6,5/a pH 8,5 0,150 mg/L ± 10% 0,010 mg/L 99,3%/99,3%
Mercurio: a pH 6,5/a pH 8,5 0,006 mg/L ± 10% 0,002 mg/L 95,1%/95,0%
Asbestos De 107 a 108 bras/L†† >99% >99%
Quistes† 50.000/L min. >99,95% 99.99%
Turbidez 11 NTU ± 10% 0,5 NTU 98.1%
Atrazina 0,009 mg/L ± 10% 0,003 mg/L 94.4%
Benceno 0,015 mg/L ± 10% 0,005 mg/L 96.6%
Carbofurano 0,080 mg/L ± 10% 0,040 mg/L 86.8%
Lindano 0,002 mg/L ± 10% 0,0002 mg/L 98.8%
P-Diclorobenceno 0,225 mg/L ± 10% 0,075 mg/L 99.7%
Tetracloroetileno 0,015 mg/L ± 10% 0,005 mg/L 96.0%
Toxafeno 0,015 mg/L ± 10% 0,003 mg/L 93.8%
Atenolol 200 ± 20% 30 ng/L >95,9%
Endrin 0,006 mg/L ± 10% 0,002 mg/L 96.7%
Etilbenceno 2,1 mg/L ± 10% 0,7 mg/L 99.9%
O-Diclorobenceno 1,8 mg/L ± 10% 0,6 mg/L 99.9%
2,4-D 0,210 mg/L ± 10% 0,07 mg/L 97%
Carbamazepina 1400 ± 20% 200 ng/L >98,6%
DEET 1400 ± 20% 200 ng/L >98,5%
Linurón 140 ± 20% 20 ng/L >96,8%
Meprobamato 400 ± 20% 60 ng/L 94.6%
Metolaclor 1400 ± 20% 200 ng/L 98.3%
Trimetoprima 140 ± 20% 20 ng/L >96,4%
Bisfenol 2000 ± 20% 300 ng/L 99.4%
Estrona 140 ± 20% 20 ng/L >96,7%
Nonilfenol 1400 ± 20% 200 ng/L >98,9%
Ibuprofeno 400 ± 20% 60 ng/L 92.9%
Naproxeno 140 ± 20% 20 ng/L >96,3%
Fenitoína 200 ± 20% 30 ng/L >94,8%
Parámetros de la prueba: pH = 7,5 ± 0,5 a menos que se indique otra cosa. Flujo = 0,78 gpm (2,95 Lpm). Presión = 60 psig (413,7 kPa).
Temp. = 68°F a 71,6°F (20°C a 22°C). Capacidad de servicio nominal = 200 galones (757 litros).
Los compuestos certicados según NSF 401 se han considerado “compuestos emergentes/contaminantes incidentales”. Los compuestos
emergentes/contaminantes incidentales son aquellos compuestos que se detectaron en suministros de agua potable en niveles detectables. Aunque
solo se presentan en niveles de traza, estos compuestos pueden afectar la aceptación/percepción pública de la calidad del agua para beber.
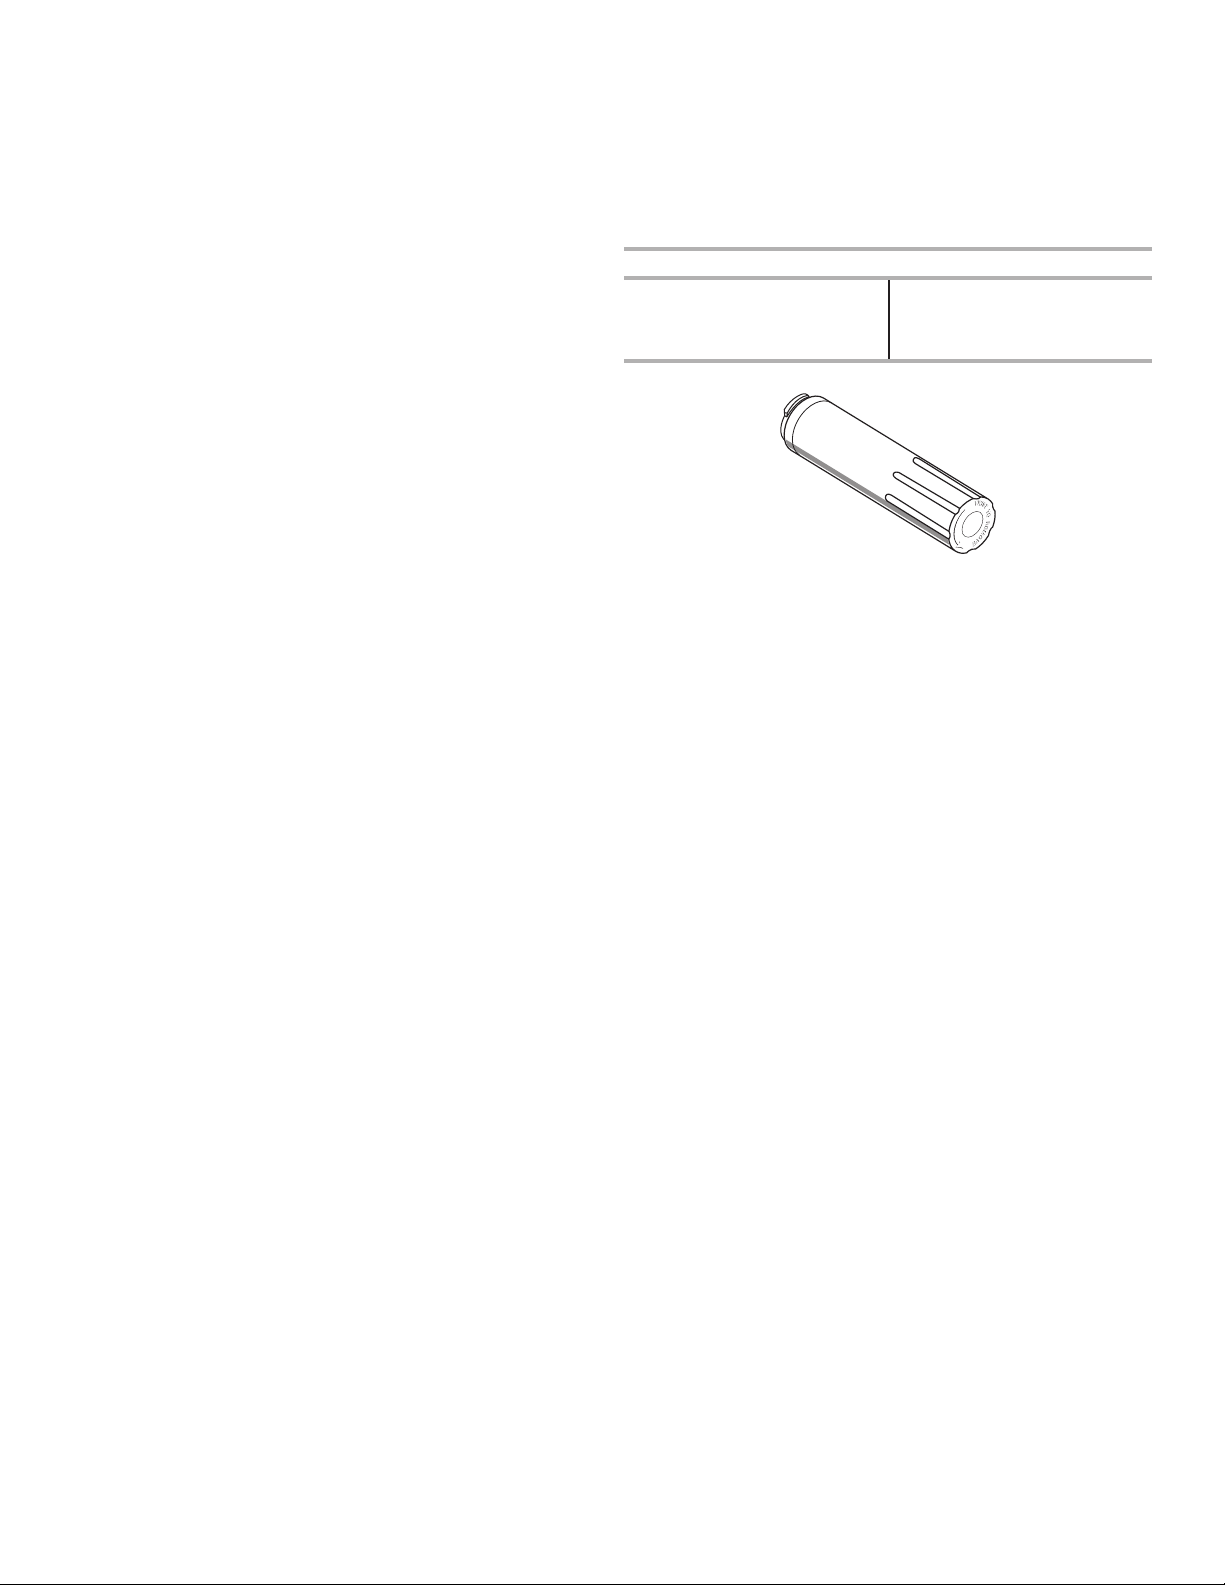
73
■ Es importante que los requerimientos de operación, mantenimiento
y reemplazo del ltro se lleven a cabo para que el producto se
desempeñe tal como se ofrece en la publicidad. Pueden ocurrir daños
a la propiedad si no se siguen todas las instrucciones.
■ El cartucho desechable deberá cambiarse al menos cada 6 meses.
■ Use el ltro de repuesto UKF8001, No. de pieza EDR4RXD1/
EDR4RXD1B. Elprecio sugerido de venta al por menor durante el
año 2015 es de $49,99 en EE.UU./$ 49,95 en Canadá. Los precios
están sujetos a cambio sin previo aviso.
■ El sistema de monitoreo del ltro mide la cantidad de agua que
atraviesa el ltro y le alerta cuando llega el momento de cambiar el
ltro. Para saber cómo revisar el estado del ltro de agua, consulte
“Uso de los controles” o “Sistema de ltración de agua” en las
Instrucciones del usuario o la Guía del usuario.
■ Después de cambiar el ltro de agua, enjuague el sistema de agua.
Vea“Dispensadores de agua y hielo” o “Dispensador de agua” en las
Instrucciones del usuario o la Guía del usuario.
■ Estos contaminantes no se encuentran necesariamente en
su suministro de agua. Si bien se realizaron las pruebas bajo
condiciones de laboratorio estándares, el desempeño actual puede
variar.
■ El producto es para uso con agua fría únicamente.
■ El sistema de agua deberá instalarse conforme a las leyes y normas
estatales y locales.
■ No use con agua que no sea microbiológicamente segura o que
sea de calidad desconocida sin desinfectarla adecuadamente antes
o después del sistema. Pueden usarse sistemas certicados para
la reducción de partículas en aguas desinfectadas que puedan
contener partículas ltrables. EPA Est. N° 10350-MN-005
■ Consulte la sección de la “Garantía” (en las Instrucciones del usuario
o la Guía del usuario) para ver la garantía limitada, el nombre y el
número de teléfono del fabricante.
Pautas de aplicación / Parámetros para el suministro de agua
Suministro de agua
Presión del agua
Temperatura del agua
Flujo nominal de servicio
Municipal o de pozo
35 - 120 psi (241 - 827 kPa)
33° - 100°F (1° - 38°C)
0,78 gpm (2,9 L/min.) a 60 psi
* Tamaño de partículas clase I: >0,5 a <1 um
*** Cumple con los requisitos de reducción de plomo según la norma 53 NSF/ANSI de acuerdo con las pruebas
realizadas por Pace Analytical Services, Inc.
† Con base en el uso de oocistos Cryptosporidium parvum.
††Fibras mayores de 10 um de longitud.
®
NSF es una marca registrada de NSF International.
74
SI NECESITA SERVICIO:
1. Antes de contactarnos para organizar la visita del servicio técnico, determine si su producto requiere reparación. Algunas cuestiones pueden
resolverse sin servicio técnico. Dedique unos minutos a revisar la sección de Solución de problemas del Manual de uso y cuidado o visite
producthelp.whirlpool.com.
2. Todo servicio técnico dentro de la garantía es provisto exclusivamente por nuestros Proveedores de Servicio Técnico autorizados de Whirlpool.
En EE.UU. y Canadá, dirija todas las solicitudes de servicio técnico dentro de la garantía a:
Whirlpool Customer eXperience Center
En los EE.UU., llame al 1-800-253-1301. En Canadá, llame al 1-800-807-6777.
Si se encuentra fuera de los 50 estados de Estados Unidos o de Canadá, póngase en contacto con su distribuidor autorizado de Whirlpool para
determinar si corresponde otra garantía.
GARANTÍA LIMITADA
DE LOS PRODUCTOS
DE REFRIGERACIÓN
WHIRLPOOL
®
ADJUNTE SU RECIBO AQUÍ. SE REQUIERE UN COMPROBANTE DE
COMPRA PARA OBTENER SERVICIO BAJO LA GARANTÍA.
Tenga disponible la siguiente información cuando llame al Centro para la
eXperiencia del cliente:
■ Nombre, dirección y número de teléfono
■ Número de modelo y de serie
■ Una descripción clara y detallada de problema
■ Comprobante de compra que incluya nombre y dirección del
distribuidor o minorista
GARANTÍA LIMITADA DE CINCO AÑOS
QUÉ ESTÁ CUBIERTO QUÉ NO ESTÁ CUBIERTO
GARANTÍA LIMITADA DE UN AÑO
Durante un año desde la fecha de compra, cuando este
aparato principal se instale, mantenga y opere de acuerdo con
las instrucciones que se adjuntan o se proporcionan con el
producto, Whirlpool Corporation o Whirlpool Canada LP (de
aquí en adelante “Whirlpool”) pagará las piezas de repuesto
especicadas por la fábrica y la mano de obra de reparación
para corregir defectos en los materiales o la fabricación que
existieran cuando este electrodoméstico principal se compró, o
bien, a su exclusivo criterio, reemplazará el producto. En caso
de reemplazo del producto, su electrodoméstico tendrá garantía
durante el plazo restante del período de garantía de la unidad
original.
GARANTÍA LIMITADA DEL SEGUNDO AL QUINTO AÑO EN
EL REVESTIMIENTO DE LA CAVIDAD Y EL SISTEMA DE
REFRIGERACIÓN SELLADO
Desde el segundo al quinto año desde la fecha de compra
original, siempre y cuando este electrodoméstico principal
se instale y se le dé un uso y mantenimiento de conformidad
con las instrucciones adjuntas o provistas con el producto,
la marca Whirlpool se hará cargo del costo de las piezas
especicadas de fábrica y del trabajo de reparación para los
siguientes componentes, para corregir defectos no estéticos en
los materiales y en la mano de obra que tenga esta pieza, los
cuales eviten el funcionamiento del refrigerador, y que hayan
existido en el momento de la compra de este electrodoméstico
principal:
■ Revestimiento de la cavidad del refrigerador/congelador si la
pieza se rompiera debido a defectos de material o de mano
de obra
■ Sistema de refrigeración sellado (incluye compresor,
evaporador, condensador, secador y tubos conectores)
SU ÚNICO Y EXCLUSIVO RECURSO SEGÚN LOS TÉRMINOS
DE ESTA GARANTÍA LIMITADA SERÁ EL DE REPARAR
EL PRODUCTO SEGÚN SE ESTIPULA EN LA PRESENTE.
El servicio deberá ser suministrado por una compañía de
servicio designada por Whirlpool. Esta garantía limitada es
válida solamente en Estados Unidos o en Canadá y se aplica
solamente cuando el electrodoméstico principal se use en el
país en el que se ha comprado. Esta garantía limitada está
en vigencia a partir de la fecha de la compra del consumidor
original. Se requiere una prueba de la fecha de compra original
para obtener servicio bajo esta garantía limitada.
1. Uso comercial, no residencial o familiar múltiple o uso diferente del indicado
en las instrucciones del usuario, del operador o de instalación publicadas.
2. Instrucciones provistas en la casa para usar el producto.
3. Servicio técnico para corregir mantenimiento o instalación incorrectos del
producto, instalación no acorde con los códigos eléctricos o de plomería o
corrección de electricidad o plomería de la casa (p. ej. cableado, fusibles o
mangueras de entrada de agua en la casa).
4. Piezas consumibles (por ejemplo, focos de luz, baterías, ltros de aire o de
agua, soluciones conservantes, etc.).
5. Defectos o daños causados por piezas o accesorios no genuinos de
Whirlpool.
6. Daños causados por accidente, uso indebido, abuso, incendio, inundación,
actos fortuitos o uso con productos no aprobados por Whirlpool.
7. Reparaciones de piezas o sistemas para corregir daños o defectos
causados por servicio técnico, alteración o modicación no autorizados del
electrodoméstico.
8. Daños estéticos, incluso rayaduras, abolladuras, desportilladuras u otro daño
al acabado del electrodoméstico, a menos que se deba a defectos en los
materiales o la mano de obra y se informe a Whirlpool en un lapso de 30 días.
9. Decoloración, herrumbre u óxido de supercies causados por ambientes
cáusticos o corrosivos, incluso, entre otras cosas, altas concentraciones de
sal, alta humedad o condensación o exposición a sustancias químicas.
10. Pérdidas de comida o de medicamentos debido a fallas del producto.
11. Recogida o entrega. Este producto ha sido diseñado únicamente para ser
reparado en la casa.
12. Gastos de viajes o transporte para el servicio técnico en lugares remotos
donde no haya un proveedor de servicio técnico autorizado de Whirlpool
disponible.
13. Retiro o reinstalación de electrodomésticos inaccesibles o componentes
integrados (por ejemplo, adornos, paneles decorativos, pisos, gabinetes, islas,
encimeras, mampostería, etc.) que intereran con el servicio técnico, el retiro o
el reemplazo del producto.
14. Servicio técnico o piezas para electrodomésticos con números de modelo/
serie originales que se hayan removido, alterado o que no se puedan
determinar con facilidad.
El costo de la reparación o el reemplazo bajo estas circunstancias excluidas
correrá por cuenta del cliente.

02/17
02/18
®
/™ ©2018 Whirlpool. All rights reserved. Used under license in Canada.
Tous droits réservés. Utilisé sous licence au Canada.
Todos los derechos reservados. Usado en Canadá bajo licencia.
EXCLUSIÓN DE GARANTÍAS IMPLÍCITAS
LAS GARANTÍAS IMPLÍCITAS, INCLUSO CUALQUIER GARANTÍA IMPLÍCITA DE COMERCIABILIDAD O GARANTÍA IMPLÍCITA DE ADECUACIÓN
PARA UN PROPÓSITO PARTICULAR, ESTARÁN LIMITADAS A CINCO AÑOS O AL PERÍODO MÁS CORTO PERMITIDO POR LEY. Algunos estados
y provincias no permiten la limitación de la duración de las garantías implícitas de comerciabilidad o capacidad, de modo que la limitación antes
indicada quizá no le corresponda. Esta garantía le otorga derechos legales especícos y es posible que usted tenga también otros derechos que
varían de un estado a otro o de una provincia a otra.
EXCLUSIÓN DE DECLARACIONES FUERA DE LA GARANTÍA
Whirlpool no hace declaraciones acerca de la calidad, durabilidad o necesidad de servicio técnico o reparación de este electrodoméstico principal
aparte de las declaraciones incluidas en esta garantía. Si desea una garantía más prolongada o más completa que la garantía limitada que se
incluye con este electrodoméstico principal, debe dirigirse a Whirlpool o a su minorista para la compra de una garantía extendida.
LÍMITE DE REPARACIONES: EXCLUSIÓN DE DAÑOS INCIDENTALES Y CONSECUENTES
SU ÚNICO Y EXCLUSIVO RECURSO SEGÚN LOS TÉRMINOS DE ESTA GARANTÍA LIMITADA SERÁ EL DE REPARAR EL PRODUCTO SEGÚN SE
ESTIPULA EN LA PRESENTE. WHIRLPOOL NO SE RESPONSABILIZARÁ POR DAÑOS INCIDENTALES O CONSECUENTES. Algunos estados y
provincias no permiten la exclusión o limitación de daños incidentales o consecuentes, de modo que estas limitaciones y exclusiones quizás no le
correspondan. Esta garantía le otorga derechos legales especícos y es posible que usted tenga también otros derechos que varían de un estado a
otro o de una provincia a otra.
W10597601D
W10597594E-EN/FR