Loading ...
Loading ...
Loading ...
12
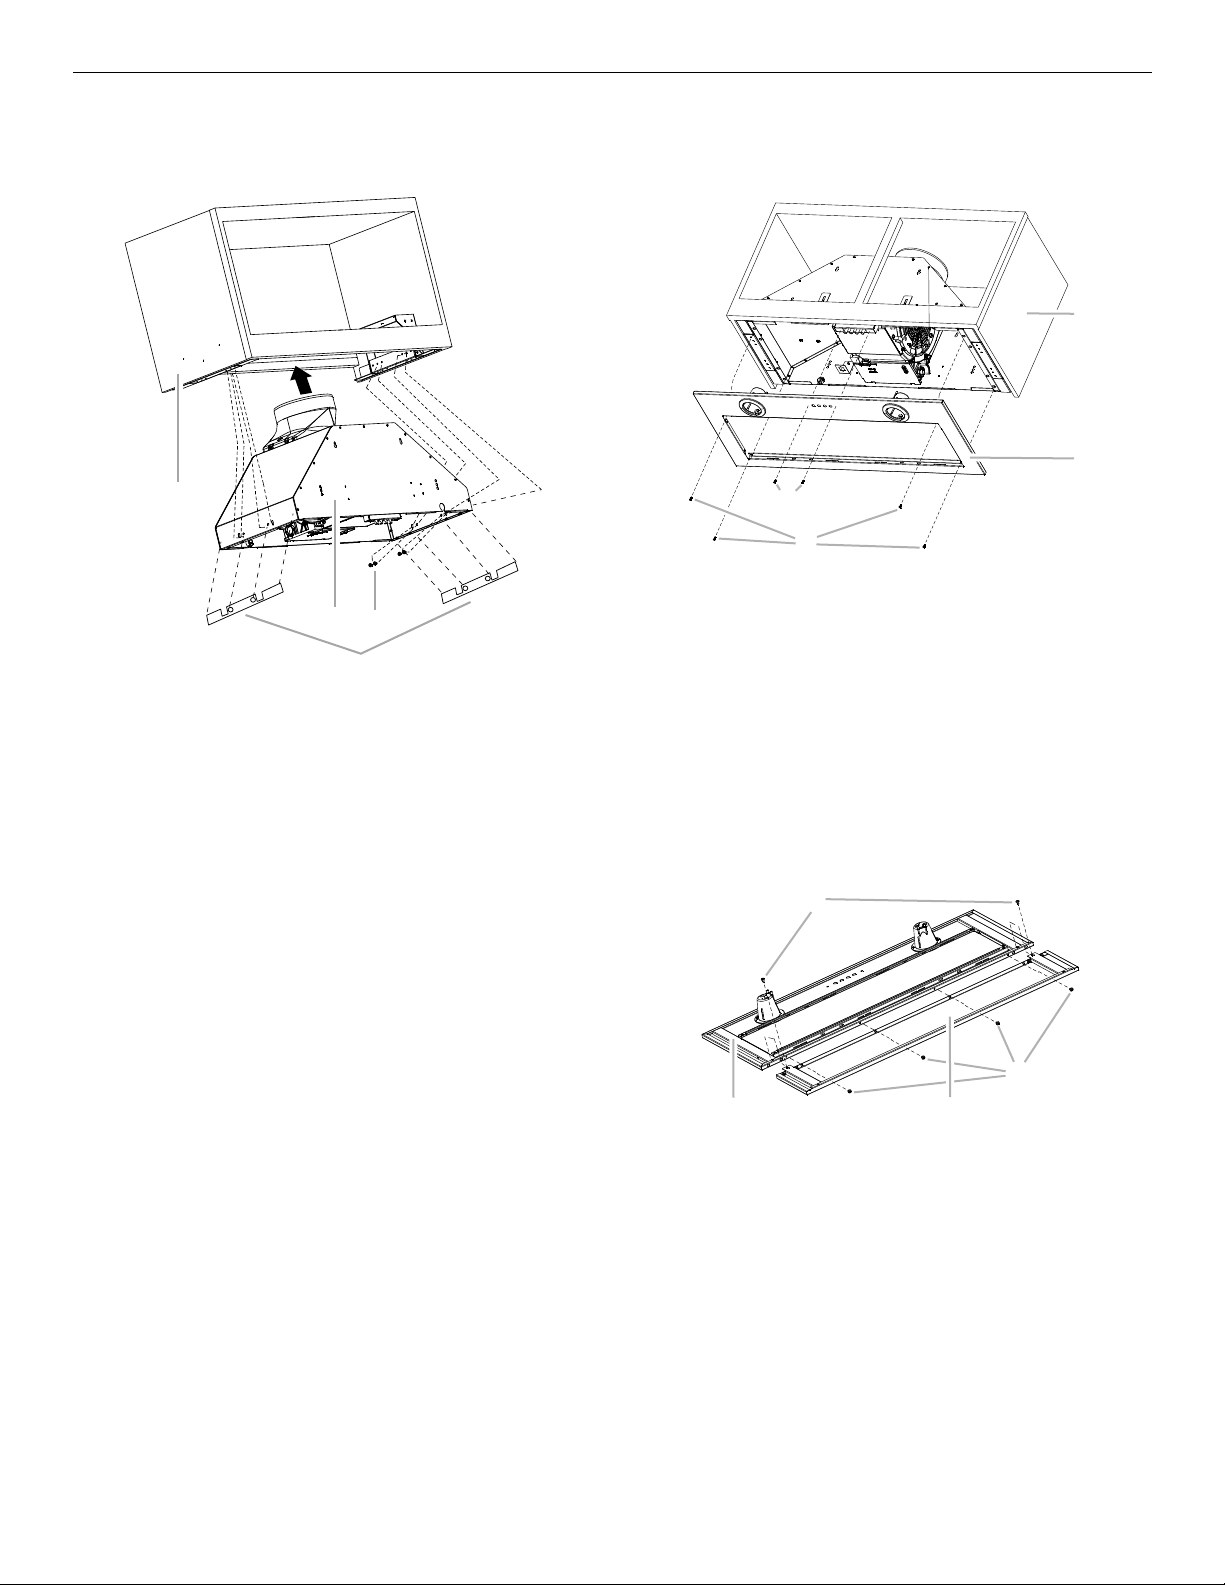
Install Range Hood
1. Using 2 or more people, lift the hood liner into its mounted
location. Attach with four 4.2 x 19 mm #2 Phillips screws into
the slotted openings. Do not tighten screws.
2. If needed, insert up to three (3) spacers between each side of
the canopy and the mounting plate to space and center the
canopy in the cabinet. Align the bottom of the canopy with
the bottom of the cabinet. Install four 4.2 x 19 mm #2 Phillips
screws into the round mounting plate openings and tighten all
(8) mounting screws.
3. Remove the metal grease filters from the face panel. See the
“Range Hood Care” section.
4. Attach the face panel to the hood liner. (The 30" x 12"
[76.2 cm x 30.5 cm] cabinet size is shown.)
See instructions below for your specific cabinet size.
For cabinet size - 30" x 12" (76.2 cm x 30.5 cm)
Attach the 30" x 12" (76.2 cm x 30.5 cm) face panel (supplied
with range hood) to the hood liner using four 3.5 x 9.5 mm
flat-head screws and two 4.2 x 15 mm truss head screws.
Tighten to secure.
For cabinet size - 30" x 15" (76.2 cm x 38.1 cm)
Assemble the face panel rear extension to the 30" x 12"
(76.2 cm x 30.5 cm) face panel using eight 4.2 x 8 mm
screws.
Attach the 30" x 15" (76.2 cm x 38.1 cm) face panel
assembly to the hood liner using four 3.5 x 9.5 mm flat-head
screws and two 4.2 x 15 mm truss head screws. Tighten to
secure.
5. Connect the lamp electrical connectors.
A. Cabinet
B. Hood liner canopy assembly
C. Screws - 4.2 x 19 mm #2 Phillips (8)
D. Spacer - optional
A
B
C
D
A. Screws - 3.5 x 9.5 mm flat-head (4)
B. Face plate (30" x 12" [76.2 cm x 30.5 cm] shown)
C. Cabinet (30" x 12" [76.2 cm x 30.5 cm] shown)
D. Screws - 4.2 x 15 mm truss-head (2)
A. Screws - 4.2 x 8 mm (8)
B. Face panel
C. Face panel rear extension
A
B
C
D
A
B
C
A
Loading ...
Loading ...
Loading ...