Loading ...
Loading ...
Loading ...
5
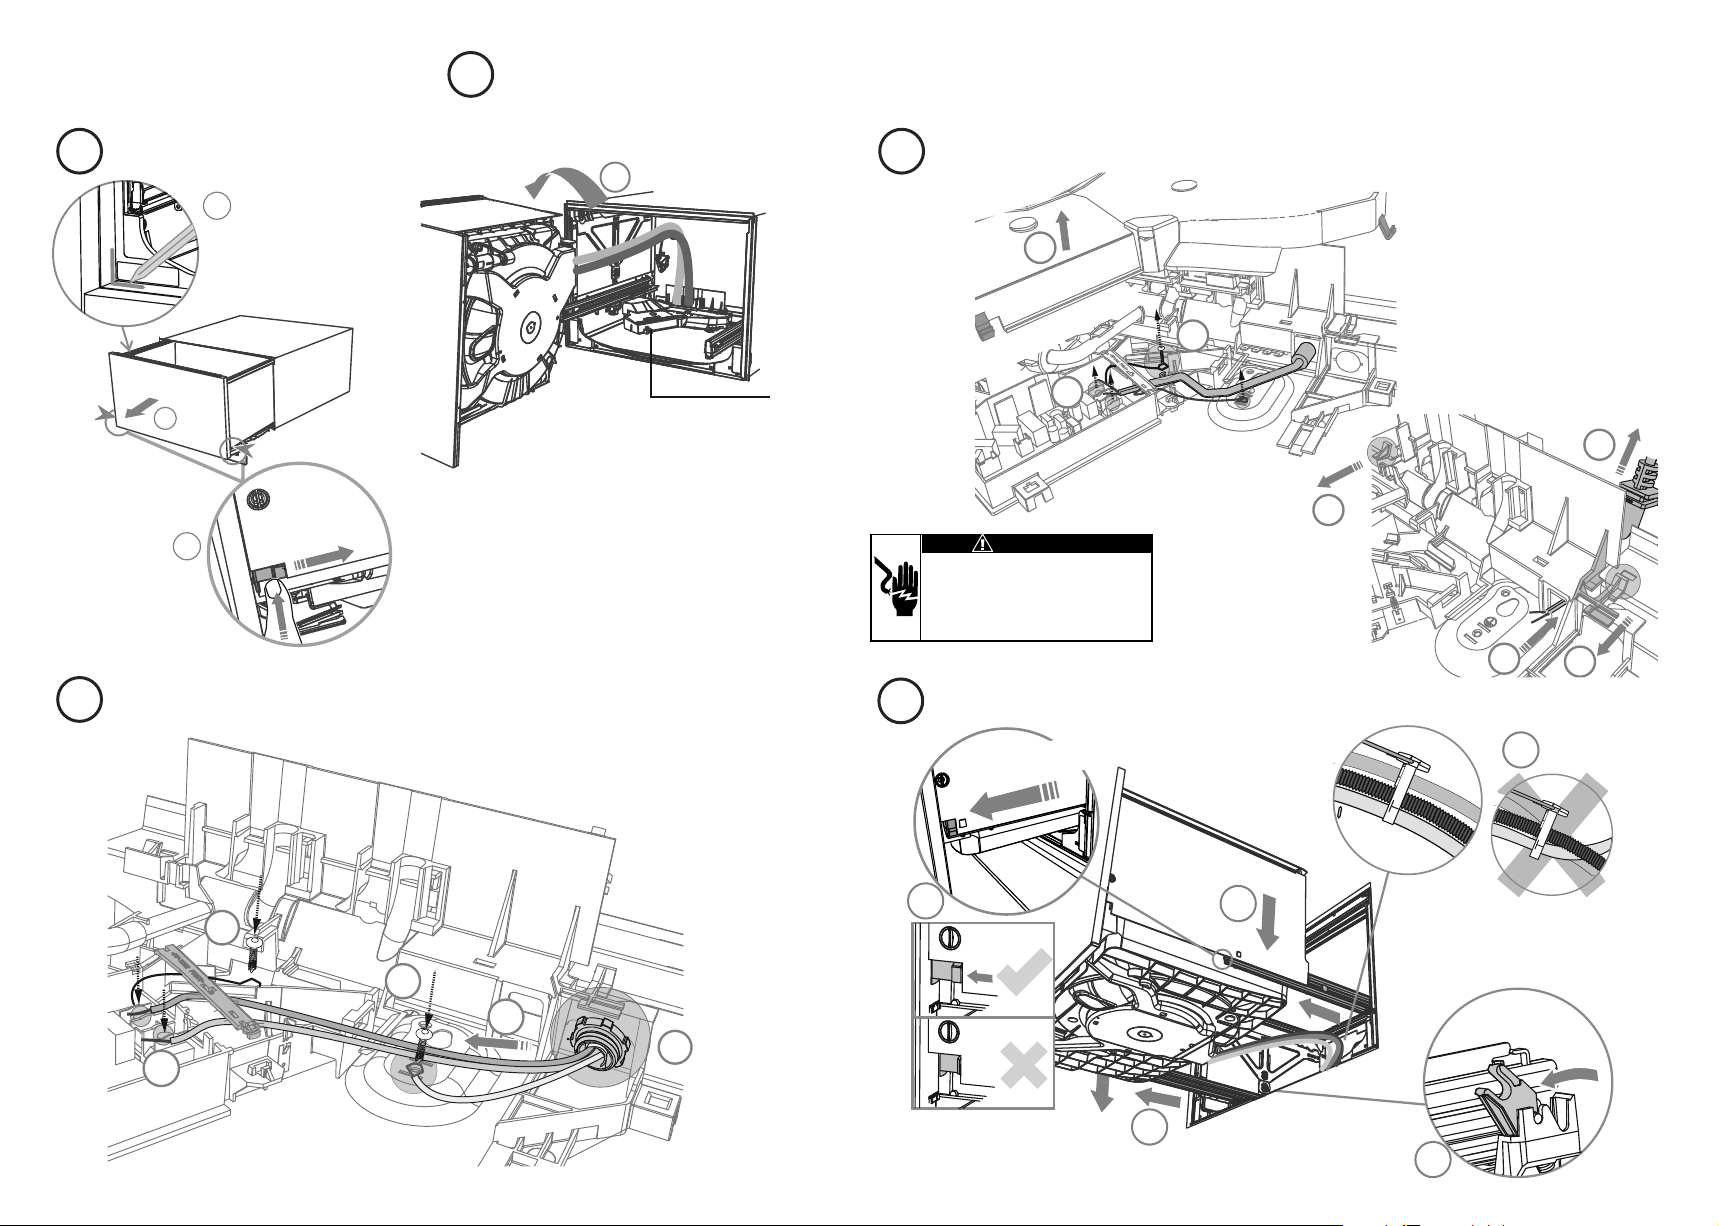
OPTIONALLY HARD WIRING PRIOR TO INSTALLATION
9
12
11
11
10
4
5
6
7
7
8
8
3a
3c
3
3b
REMOVE THE DRAWER
TERMINATE THE WIRING AS SHOWN
REMOVE THE ACCESS COVER & POWER CORD
Remove knock-out for cable clamp and
fit a suitable cable clamp for the conduit.
Use copper conductors only.
2
100 mm
1
3
4
5
To prevent kinked hoses, we recommend
rotating the drawer counter-clockwise
and resting it on its side after removal.
Product may move.
Mark chassis position
on cavity
Access
cover
Press the release tabs in on
either side and push back
to release drawer from
runners.
3
4” (100mm)
18
19
15
16
17
Before refitting the drawer,
ensure the hoses are not
twisted and the latches at
the rear of each drawer
runner are facing forward.
Ensure the release tabs on
both sides are reset fully.
Ensure the drawer
is now rotated
clockwise back.
13
14
15
16
17
Pull forward the release tabs
on both sides 4”(100
mm)
3d
REFIT THE DRAWER ONTO THE RUNNERS & CLOSE
Electrical Shock Hazard
Before continuing, ensure that the product is
disconnected from the power supply.
Failure to follow this warning may result in
electrical shock, injury or re.
WARNING!
Loading ...
Loading ...
Loading ...