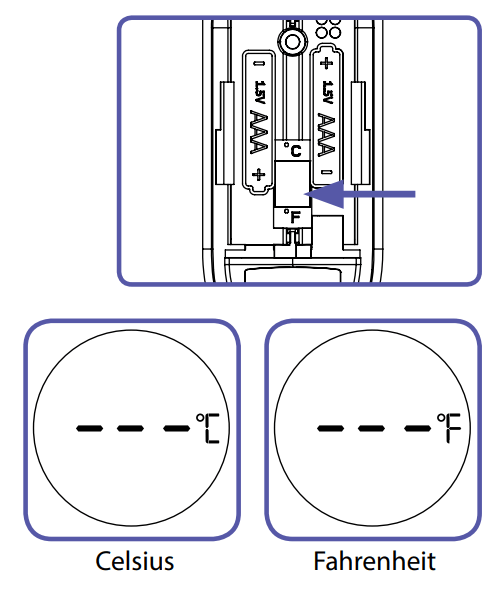
Fahrenheit to Celsius switch (inside battery compartment)
Why Braun No touch & touch forehead?
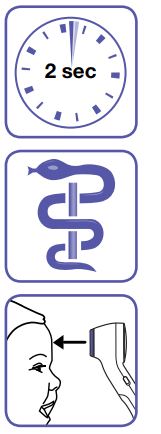
Measurement in under 2 seconds: The innovative infrared technology allows measurement of forehead temperature in under 2 seconds whether you use the touch or no-touch option.
Accurate and reliable: Due to the unique technology, the No touch & touch forehead thermometer captures the heat naturally given off by the forehead to calculate body temperature value. Get the same professional accuracy whether touching your child’s forehead or holding up to 1 inch (2.5cm) away.
Easy to use: The No touch & touch forehead thermometer is non-invasive. A measurement can be taken even while a child is sleeping. The No touch & touch forehead thermometer is safer to use on a child than a rectal thermometer and is easier to use than other methods.
Safe and hygienic: No-touch option helps minimize spreading of germs. Completely safe for use on children and adults
How does Braun No touch & touch forehead work?
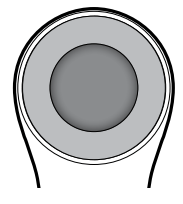
The No touch & touch forehead thermometer measures infrared energy radiated from the skin at the center. This captured energy is collected through the lens and converted to an oral equivalent value.
The No touch & touch forehead thermometer has been clinically tested and proven to be safe and accurate when used in accordance with its operating instruction manual.
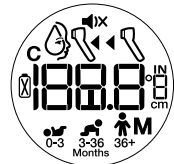
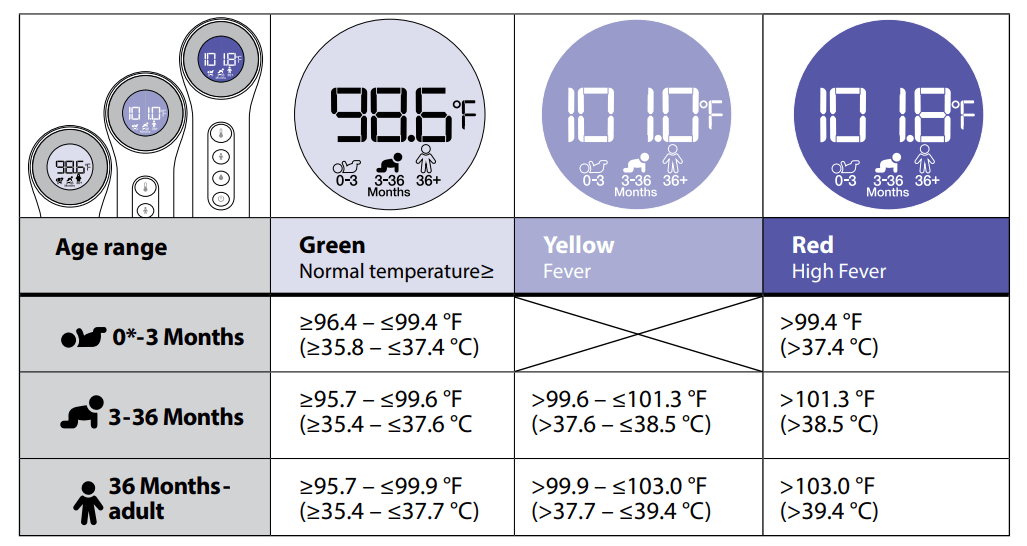
Age Precision™ color-coded display
Clinical research shows the definition of fever changes as newborns grow into children and children grow into adults.1
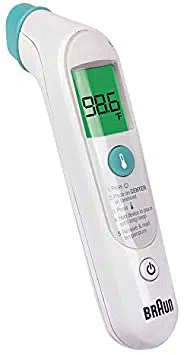
Select the appropriate age setting, take a temperature, and the display will glow green, yellow, or red to indicate whether the temperature is in a normal, fever, or high fever range, respectively.
The device is only intended for the measurement of human body temperature. It is not intended to diagnose or monitor a serious medical condition or disease.
1 Herzog L.., Phillips S. Addressing Concerns About Fever. Clinical Pediatrics. 2011; 50 (#5): 383-390.
Temperature taking hints
It is important to know each individual’s normal temperature when they are well. This is the only way to accurately diagnose a fever. Take multiple readings when healthy to determine normal temperature.
A child’s normal temperature can be as high as 99.9 °F (37.7 °C) or as low as 97.0 °F (36.1 °C). Be sure to note this unit reads 0.9 °F (0.5 °C) lower than a rectal digital measurement.
An individual must be inside for 30 minutes before taking a measurement.
Note: The thermometer and Individual should be in the same ambient temperature for at least 10 minutes.
ALWAYS hold the thermometer and the forehead steady when taking a reading. DO NOT move the thermometer until you hear the final beep. DO NOT take a measurement while or immediately after nursing a baby.
Individuals should not drink, eat, or be physically active before/while taking the measurement. Remove hats and wait 10 minutes before taking a measurement.
Before taking a measurement, remove dirt or hair from the forehead area. Wait 10 minutes after cleaning before taking measurement.
ALWAYS take the temperature exactly as directed. Temperature results may vary if positioned in the wrong location.
For individuals measuring their own temperature, it is recommended to use the “touch” option instead of “no touch.”
In the following situations it is recommended that three temperatures in the same location be taken and the highest one taken as the reading:
Newborn infants in the first 100 days.
Children under three years of age with a compromised immune system and for whom the presence or absence of fever is critical.
When the user is learning how to use the thermometer for the first time until he/she has familiarized himself/herself with the instrument and obtains consistent readings.
General precautions:
Remove any sweat prior to measuring with a dry cloth.
Avoid any cooling or warming cloths on the forehead for at least 30 minutes prior to measurement.
DO NOT take temperature measurements over scar tissue, open sores, or abrasions.
Keep the measurement sensor and lens clean. Avoid directly touching the sensor or lens.
ALWAYS store the thermometer with the protective cap in place to prevent dirt and scratches from damaging the device.
Make sure to remove the protective cap before taking a measurement and to put the cap back on after using the thermometer.
How to use your Braun No touch & touch forehead
Note: The thermometer and individual should be in the same ambient temperature for at least 10 minutes.
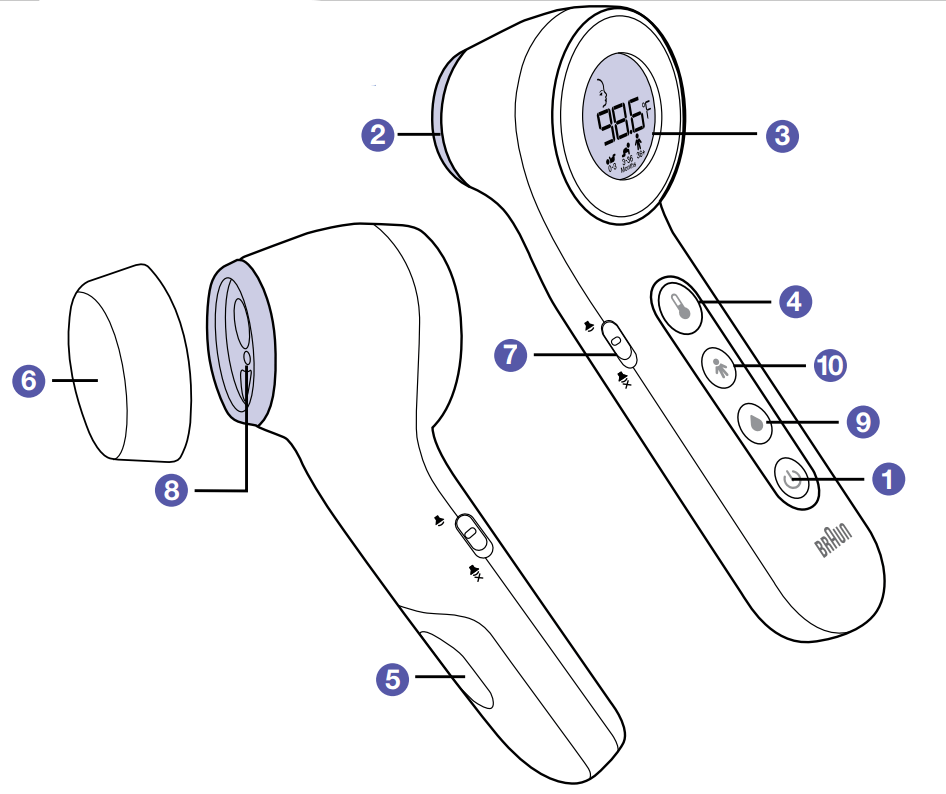
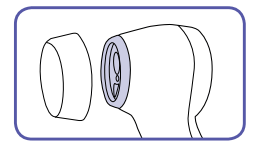
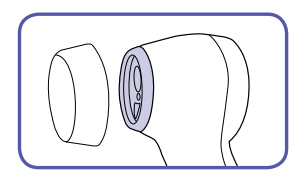
1. Remove protective cap
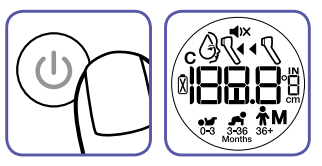
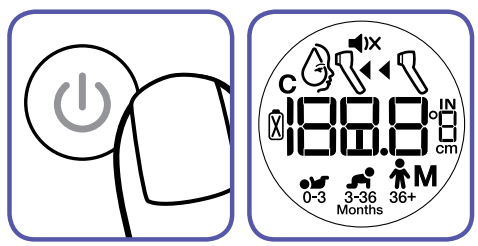
2. Power on
Press and release the power button once. Backlight will come on and the start-up sequence will begin.
NOTE: Make sure to remove the protective scanner cap before taking a measurement.
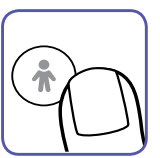
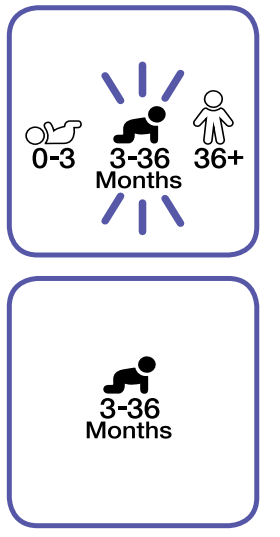
3. Select age range
Select age with Age Precision button.
Device will start cycling through the age ranges, highlighting the 3 ranges you may select; 0-3 months ( ), 3-36 months ( ), or 36+ months ( ).
Press the Age Precision button to toggle through the age ranges until you select the age appropriate for the individual.
3.1 To set a preferred age range: (Locking an age setting)
To save a preferred age range, so that the preferred age range will be automatically selected when the thermometer is turned ON, follow these steps:
A. Make sure the thermometer is OFF.
B. Press and hold the power button ( ) and Age Precision button ( ) for 4 seconds. The unit will turn on, displaying a yellow backlight and the 3 age range icons will flash.
C. Press the Age Precision ( ) button. The age range selected will flash. Press the Age Precision button until your desired age range is flashing on the display.
D. Once the desired age range is selected, stop pressing the button and wait 3 seconds. The green backlight will illuminate, and the selected age range will turn solid. After 4 seconds, the thermometer will turn off.
E. The preferred age range will be automatically selected when the thermometer is turned ON.
Note: With a preferred age range, an alternate age range can be selected during each use, by pressing the Age Precision button when the age range icon appears, after the thermometer is turned ON.
F. To remove the preferred age range, open the battery door, remove the batteries, wait 30 seconds and re-insert the batteries.
IMPORTANT: To ensure accurate readings, you must always take a temperature reading in the age range that corresponds to the individual’s age.
4. Position
Position thermometer on or up to 1” (2.5 cm) away from the center of the forehead, just between the eyebrows.
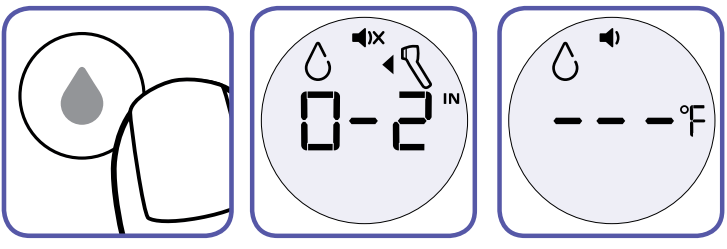
When the thermometer is ready and on or 1” away from the forehead. A horizontal line of dashes (“---”) will appear on the screen.
For No touch readings, the yellow guidance light will show you where you are aiming.
If the eyebrow area is covered with hair, sweat or dirt, please clean the area beforehand to improve the reading accuracy. It is important to hold the thermometer and the forehead steady during measurement. Movement will impact the temperature reading.
5. Take temperature
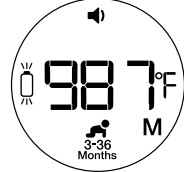
Three dashed lines mean the thermometer is ready to take temperature. Press the temperature button. The display will show a dashed line animation while it takes a reading. Once the reading is complete a confirmation beep will be heard and the appropriate fever light color will be displayed on screen.
If the device is positioned too far away from the forehead, it will prompt you to move closer by displaying the letters “FWD.” Slowly move the device toward the forehead until the dashed line animation starts and a reading is displayed.
6. Read temperature
If temperature is in the normal range, a long beep will sound when the measurement is complete. If the temperature is in the fever range, ten short beeps will sound to indicate the measurement is complete.
* 0 months is defined as having a gestational age of greater than or equal to 37 calendar weeks at birth.
7. To turn off
Press the power button to turn off. Device will also shut off automatically after 30 seconds of no use
How to use the No touch setting to take a food/bath temperature
1.Remove protective cap
2. Power on
Press and release the power button once. Backlight will come on and the start-up sequence begins.
NOTE: Make sure to remove the protective scanner cap before taking a measurement.
3. Select food & bath temperature mode
Press and release the food & bath temperature mode button. A beep will sound, the food & bath icon ( ) will be displayed, the screen backlight will turn blue and three dashes will show on the screen indicating the thermometer is read to take a temperature.
4. Position:
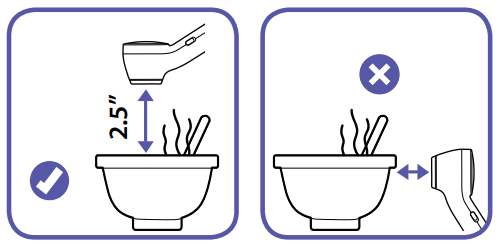
Position device up to 2.5” away from the bath water or food. Note: When measuring food or bath temperature the thermometer must be aimed directly at the food or bath water. DO NOT aim at sides of container holding the liquid or food. DO NOT touch liquid or food with the thermometer.
5. Take temperature:
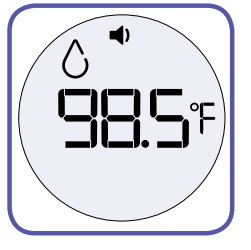
Press the temperature button (you can press and hold the button or press and release it.) The display will show a dashed line animation while it takes a reading. Once the reading is complete, the display will show the temperature reading.
6. Read temperature:
Remove the device and read the temperature.
Changing the temperature scale
Open battery compartment and remove the batteries.
°C / °F switch is accessible in the battery compartment.
Slide switch to °C or °F to set preferred temperature scale.
Replace the batteries and close the battery door.
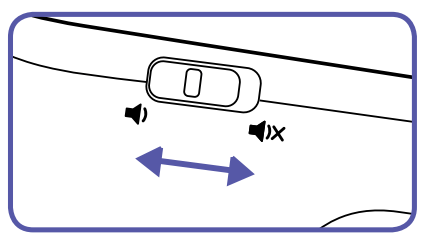
Changing the sound mode
The Braun No touch & touch forehead thermometer allows you to silence the beeps on the thermometer to avoid waking a sleeping child. To activate the silence feature, slide the switch to the silent mode position and take a temperature reading. An icon will appear on the screen to indicate that the thermometer is in silent mode.
Calibration
The thermometer is initially calibrated at the time of manufacture. If this thermometer is used according to the use instructions, periodic re-adjustment is not required. If at any time you question the accuracy, please contact Consumer Relations.
Errors and troubleshooting
Error message
Situation
Solution
When 20% of battery life is left, the display flashes the low battery warning symbol; however, the device can still work until the battery life has 0% left.
Replace batteries.
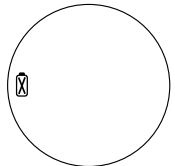
If the steady battery icon is the only symbol shown on the display, the device cannot work. The battery should be replaced immediately.
Replace batteries.
This message displays when the measured temperature is lower than 93.2 °F (34 °C) or higher than 109.4 °F (43 °C) or when the room temperature is outside the operating range of 59 °F – 104 °F (15 °C – 40 °C).
Re-measure the temperature, carefully following the instructions in “How to use” section.
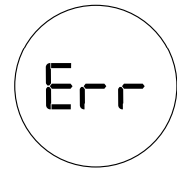
System error – self-check display flashes continuously and will not be followed by the ready beep and the ready symbol. If error persists,
If error still persists,
Wait 1 minute until the thermometer turns off automatically, then turn on again.
... reset the thermometer by removing the batteries and putting them back in.
… please contact consumer relations.
Blank display. Thermometer does not have power.
Please check if the batteries have been loaded correctly. Also check polarity (<+> and <–>) of batteries.
Contact consumer relations if thermometer still does not function.
Care and cleaning
To avoid scratching the surface of the scanner, replace the protective cap after each use. The thermometer should be cleaned between uses.
Use an alcohol swab or a cotton swab moistened with alcohol (70% Isopropyl) to wipe the thermometer casing and measuring probe for 90 seconds. Wait 10 minutes, allowing the thermometer to air-dry, before taking a measurement. Ensure that no liquid enters the interior of the thermometer. NEVER use abrasive cleaning agents, thinners, or benzene for cleaning, and NEVER immerse the thermometer in water or other cleaning liquids.
 ), 3-36 months (
  ), or 36+ months (
 ).
).
 ) and Age Precision button (
 ) for 4 seconds. The unit will turn on, displaying a yellow backlight and the 3 age range icons will flash.
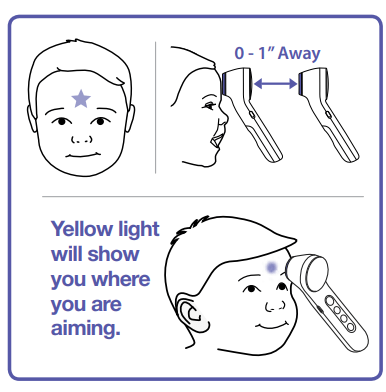


 ) will be displayed, the screen backlight will turn blue and three dashes will show on the screen indicating the thermometer is read to take a temperature.