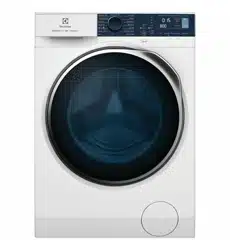
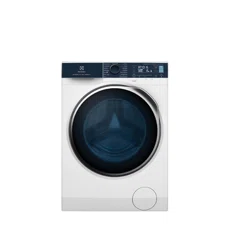
3. Press the On/Off button to turn on the washer-dryer. Touch one of the Program Icons to choose the wash program you require.
4. Check and remove objects (if there are any) that could be trapped in the fold.
5. Place the laundry in the drum, one item at a time, shaking them out as much as possible. (Refer to page 23 “WASHING & DRYING HINTS”)
6. Close the door
Make sure that no laundry remains between the seal and the door.
Using Detergent And Additives
1. Detergent Dispenser Drawer
The detergent dispenser is divided into three compartments.
2. Measure out the detergent and the fabric softener;
- Pull out the dispenser drawer until it stops.
- Measure out the amount of detergent required, pour it into the main wash compartment.
- If you wish to carry out the “Prewash” phase, pour it into the compartment marked “ ”.
- If required, pour fabric softener into the compartment marked “ ”.
Options Setting
1.If you want your laundry to be spun or use temperature different from the one proposed by the washer-dryer, pess the Spin “ ” and the temperature “ ” touchpads repeatedly to change the spin speed and temperature.
Press the option touchpads, if you want your laundry to be washed with special functions
2. If you want to adjust washing time, press the “Time Manager ” touchpad repeatedly to increase or decrease washing time. See Time Manager guide on page 15.
If you want to delay the start of the washing program, press the “Delay Start ” touchpad repeatedly to choose your washer-dryer delay time.
Interruption Of A Program
To pause, press Start/ Pause . The indicator will start flashing.
Press the Start/Pause again. The program will continue.
Changing A Program
Changing a running program is possible only by switching off the appliance.
Press the “On/Off” button to cancel the program and to turn off the appliance.
Press the “On/Off” button again to start the appliance.
Now you can set a new wash program and change any available options. Press Start/Pause to start the new program.
Changing The Options
It may be possible to change some of the options after a wash program has started.
Press the touchpad Start/Pause . The indicator will start flashing.
If available, change the options that you wish.
Press Start/Pause again. The program will continue.
DAILY USE - DRYING (Only)
Press the On/Off button to turn on the machine.
Load the laundry.
Select the drying program, “Drying Cottons” for cotton items or “Drying Mixed” for synthetic or mixed fabric items in the More>> ( ) program touchpad of the program touchpads group.
Select a spin cycle at the maximum spin speed allowed for the type of laundry in order to obtain the best drying performance.
If you wish to select an automatic drying, press the “Dryness ” option until the icon corresponding to the required dryness level appears on the display. (see page 14)
If you wish to select a timed drying, press the “Dry Time ” option repeatedly until desired drying time reached. (see page 13)
Press “Start/Pause ” to start the program. The time remaining is updated every minute.
8. At the end of the program :
The acoustic signal will operate
The display will show time remaining “ ”.
The display will show “Cycle end” and “Anti-crease” alternately
The door lock indicator ( ) is still on
The appliance will perform the anticrease phase for approximately 10 minutes.
After anti-crease phase finish, the door lock indicator ( ) goes off. The display will show “Cycle end” and “Remove laundry” alternately.
9. Press “On/Off” button to switch the machine off.
10. At the end of each drying cycle, the temperature of your clothing will be high. For your safety, please leave the door open to let your clothes cool before removing your laundry
CARE AND CLEANING
External Cleaning
Clean the appliance only with soap and warm water. Fully dry all the surfaces.
Descaling
The water we use normally contains lime. It is a good idea to periodically use a water softening powder in the machine.
Do this separately from any laundry washing, and according to the softening powder manufacturer's instructions.
This will help to prevent the formation of lime deposits.
After Each Wash
Leave the door open for a while. This helps to prevent mould and stagnant smells forming inside the appliance. Keeping the door open after a wash will also help to preserve the door seal.
Maintenance Wash
With the use of low temperature washes it is possible to get a build up of residues inside the drum.
We recommend that a maintenance wash be performed on a regular basis.
To run a maintenance wash:
The drum should be empty of laundry.
Select the hottest cotton wash program.
Use a normal measure of detergent, must be a powder with biological properties.
Press “Start/Pause ” to start the program.
Cleaning The Dispenser Drawer
The washing powder and additive dispenser drawer should be cleaned regularly. Remove the drawer by pressing (PUSH) the catch downwards and by pulling it out. Flush it out under a tap, to remove any traces of accumulated powder.
To aid cleaning, the top part of the additive compartment should be removed.
Cleaning The Drawer Recess
Having removed the drawer, use a small brush to clean the recess, ensuring that all washing powder residue is removed from the upper and lower part of the recess. Replace the drawer and run the rinse program without any clothes in the drum.
Cleaning The Pump
Clean the pump if:
The appliance does not drain the water.
The drum cannot turn.
The appliance makes an unusual noise because of the blockage of the drain pump.
The display shows an alarm code because of the problem with water drain.
WARNING!
Disconnect the mains plug from the mains socket.
Do not remove the filter while the appliance is operating. Do not clean the drain pump if the water in the appliance is hot. The water must be cold before you clean the drain pump.
To clean the drain pump:
1. Open the drain pump door.
2. Pull the flap down, then squeeze the legs on both sides of the cover together and pull out (as picture).
3. Place a suitable water container below the recess of the drain pump to collect the water that flows out.
Press the two levers and pull forward the drainage duct to let the water flow out.
4. When the container is full of water, put the drainage duct back again and empty the container. Do step 3 again and again until no more water flows out from the drain pump.
5. Pull back the drainage duct and turn the filter counter-clockwise to remove it.
6. Remove fluff and objects from the pump filter (if there are any).
7. Make sure that the impeller of the pump can turn. If this does not occur, contact the service centre.
8. Clean the filter under the water tap.
9. Put the filter back in the pump. Make sure that you correctly tighten the filter to prevent leakages.
10. Put the flap back and close the drain pump door.
Cleaning The Water Inlet Filter
If your water is very hard or contains traces of lime deposit, the water inlet filter may become clogged. It is therefore a good idea to clean it from time to time.
To clean the water inlet filters:
1. Close the water tap
2. Remove the water inlet hose from the water tap.
3. Clean the filter in the inlet hose with a stiff brush.
4. Remove the inlet hose behind the appliance.
5. Clean the filter in the valve with a stiff brush or a towel.
6. Install the inlet hose again. Make sure that the couplings are tight to prevent leakages
7. Open the water tap.
Frost Precautions
If the appliance is installed in an area where the temperature can be less than 0 °C, remove the remaining water from the inlet hose and the drain pump.
Emergency Drain
1.Disconnect the main plug from the main socket. Turn off the water tap.
2. Remove the water inlet hose.
3. Remove the drain hose from the rear support and unhook it from sink or spigot.
4. Put the end of the drain and inlet hose in a container. Let the water flow out of the hoses.
5. When no more water flows, install the inlet hose and the drain hose again.
TROUBLESHOOTING
Possible Failures
Certain problems are due to lack of simple maintenance or oversights, which can be solved easily without calling out an engineer. Before contacting your local Service Centre, please check possible cause of malfunction and solution listed below.
Once the problem has been eliminated, press the Start/Pause button to restart the program. If after all checks, the problem persists, contact your local Service Centre.
Alarm Code:
The appliance does not fill with water properly.
The appliance does not drain the water.
The appliance door is open or not closed correctly. Please check the door!
The main supply is unstable. Wait until the main supply is stable.
No communication between electronic elements of the appliance. Switch off and switch on again.
Malfunction
Possible cause => Solution
The washerdryer does not start:
The door has not been closed. (Error code: ) => Close the door firmly.
The plug is not properly inserted in the power socket. => Insert the plug into the power socket.
There is no power at the socket. => Please check your domestic electrical installation.
The Start/Pause touchpad has not been pressed. => Press the Start/Pause touchpad.
The “Delay Start” has been selected. => If the laundry are to be washed immediately, cancel the “Delay Start”.
The Main supply is unstable. (If appears in the display.) => Wait until the main supply is stable. Appliance will start automatically.
The machine does not fill the water:
The water tap is closed. (Error code: ) => Open the water tap.
The inlet hose is squashed or kinked. (Error code: ) => Check the inlet hose connection.
The filter in the inlet hose is blocked. (Error code: ) => Clean the water inlet hose filter.
The door is not properly closed. (Error code: ) => Close the door firmly.
The machine fills then empties immediately:
The end of the drain hose is too low. (Error code: ) => Refer to relevant paragraph in “water drainage” section.
The machine does not empty and/or does not spin:
The drain hose is squashed or kinked. (Error code: ) => Check the drain hose connection.
The drain pump is clogged. (Error code: ) => Clean the drain filter.
The option “Extra Silent” or “Rinse Hold” has been selected. => Press Start/Pause touchpad to drain the water or select spin program.
The laundry is not evenly distributed in the drum. => Pause the machine and redistribute laundry manually.
There is water on the floor:
Too much detergent or unsuitable detergent (creates too much foam) has been used. => Reduce detergent quantity and use correct type of detergent (refer page 24).
Check whether there are any leaks from one of the inlet hose fittings. It is not always easy to see this as the water runs down the hose; check to see if it is damp. => Check the water inlet hose connection.
The drain hose is damaged. => Call Service.
Unsatisfactory washing results:
Too little detergent or unsuitable detergent has been used. => Increase detergent quantity or use different detergent (refer page 24).
Stubborn stains have not been treated prior to washing. => Use commercial products to treat the stubborn stains.
The correct temperature was not selected. => Check if you have selected the correct temperature.
Excessive laundry load. => Reduce load.
The door will not open:
The program is still running. => Wait until the end of cycle.
There is water in the drum. => You must drain the water to open the door (refer “Opening The Door” on page 19).
This problem may be caused by a failure of the appliance. => Contact Service. If you need to open the door, please read carefully “Emergency door opening” on next page.
The machine vibrates or is noisy:
The transit bolts and packing have not been removed. => Check the correct installation of the appliance.
The support feet have not been adjusted. => Check the correct levelling of the appliance.
The laundry is not evenly distributed in the drum. => Pause the machine and redistribute laundry manually.
There is very little laundry in the drum. => Load more laundry.
Unstable floors eg. wooden floors. => Refer to relevant paragraph in “Positioning” section.
Cycle time longer than displayed:
Detergent over dose. => Reduce the detergent quantity or use another one. (Refer page 24 “Detergents Type And Quantity Of Detergent”).
Machine unbalance. => Redistribute laundry manually in the drum and start the spin phase again.
The cycle is shorter than the time displayed.
The appliance calculated a new time according to the laundry load.
Spinning starts late or the machine does not spin:
The electronic unbalance detection device has cut in because the laundry is not evenly distributed in the drum. The laundry is redistributed by reverse rotation of the drum.
This may happen several times before the unbalance disappears and normal spinning can resume. If, after 10 minutes, the laundry is still not evenly distributed in the drum, the machine will not spin. In this case, redistribute the load manually and select the spin program.
=> Pause the machine and redistribute laundry manually.
The machine makes an unusual noise:
Machine not installed properly. => Make sure the levelling of the appliance is correct. Refer to “Installation”.
Transit bolts or packaging not removed. => Make sure that the packaging and/or the transit bolts are removed. Refer to “Unpacking”.
The load may be too small. => Add more laundry in the drum.
No water is visible in the drum:
Machines based on modern technology operate very economically using very little water without affecting performance.
The machine does not dry or does not dry properly:
The “Dry Time” or the “Dryness” degree has not been selected. => Select the drying time or the dryness degree.
The water tap is not turned on. (Error code: ) => Open the water tap.
The drain filter is clogged. (Error code: ) => Clean the drain filter.
The machine is overloaded. => Reduce the laundry load in the drum.
The selected drying program, time or dryness degree was not suitable for the laundry. => Select the suitable drying program, time or dryness degree for the laundry.
Display time is frozen at the end of drying cycle for more than 30 minutes:
Machine is optimizing the drying cycle according to the laundry type and load size. It will vary for each kind of fabric as the water absorption is different. => This is a normal behavior of the machine and not a cause for concern as it does not compromise its performance.
Emergency Door Opening
In case of power failure or appliance failure, the appliance door remains locked. The wash program continues when power is restored. If the door remains locked in case of failure, it is possible to open it using the emergency unlock feature.
Before Opening The Door:
WARNING!
Make sure that the water temperature and the laundry are not hot. Wait until they cool down if necessary.
Make sure that the drum is not rotating. Wait until the drum stops rotating if necessary.
Make sure that the water level inside the drum is not too high. If necessary, perform an Emergency Drain (see page 30).
To open the door proceed as follows:
1. Press the On/Off button to switch the appliance off.
2. Disconnect the main plug from the main socket.
3. Open the filter flap.
4. While pulling the emergency unlock strap (red strap) downward, pull the door handle to open the door.
5. Take out the laundry.
6. Close the filter flap.
If you are unable to identify or solve the problem, contact our service centre.
Before calling service centre, make a note of the model, serial number and purchase date of your machine: the Service Centre will require this information.


 Make sure that no laundry remains between the seal and the door.


 ”.
”. ”.
”.
 ” and the temperature “
 ” touchpads repeatedly to change the spin speed and temperature.
 ” touchpad repeatedly to increase or decrease washing time. See Time Manager guide on page 15.
 ” touchpad repeatedly to choose your washer-dryer delay time.
 . The indicator will start flashing.
 ) program touchpad of the program touchpads group.
 ” option until the icon corresponding to the required dryness level appears on the display. (see page 14)
 ” option repeatedly until desired drying time reached. (see page 13)
 ”.
”. ) is still on
 At the end of each drying cycle, the temperature of your clothing will be high. For your safety, please leave the door open to let your clothes cool before removing your laundry
 ” to start the program.


 ) => Close the door firmly.
 appears in the display.) => Wait until the main supply is stable. Appliance will start automatically.
 ) => Open the water tap.
 ) => Check the drain hose connection.