Loading ...
Loading ...
Loading ...
Safety Instructions Operating Instructions Care and Cleaning Troubleshooting Tips Customer Service
Using the lower oven probe.
For many foods, especially roasts and poultry, internal food temperature is the best test for doneness.
The temperature probe takes the guesswork out of roasting by cooking foods to the exact doneness you want.
NOTE: The probe is for use in the lower oven only.
Use of probes other than the one
provided with this product may result in
damage to the probe.
Use the handles of the probe and plug
when inserting and removing them from
the meat and outlet.
■
To avoid damaging your probe, do not use
tongs to pull on the cable when removing it.
■
To avoid breaking the probe, make sure food is
completely defrosted before inserting.
■
To prevent possible burns, do not unplug the
probe from the outlet until the oven has
cooled.
■
Never leave your probe inside the oven during
a self-cleaning cycle.
■
Do not store the probe in the cooking center.
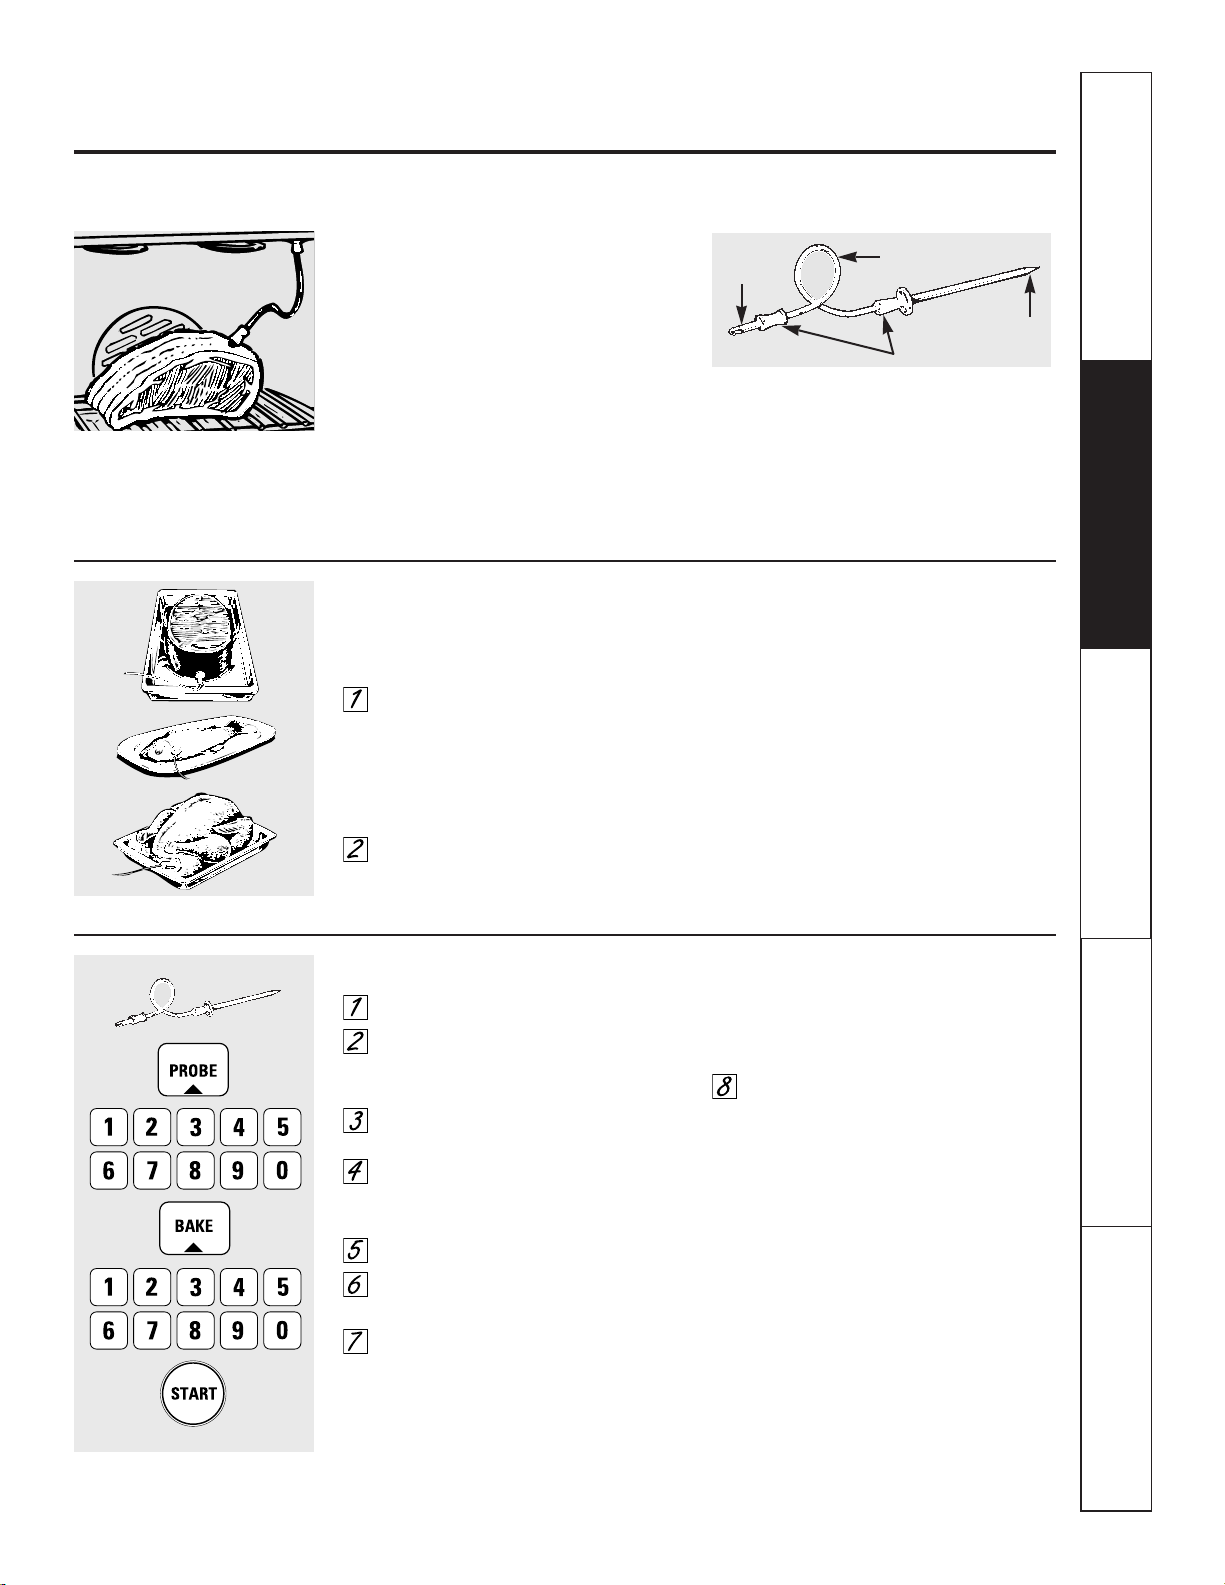
The temperature probe has a
skewer-like probe at one end and a
plug at the other end that goes into
the outlet in the oven.
After preparing the meat and placing it
on a trivet or on the broiler pan grid,
follow these directions for proper probe
placement.
Lay the probe on the outside of the
meat along the top or side and mark
with your finger where the edge of
the meat comes to on the probe. The
point should rest in the center of the
thickest meaty part of the roast.
Insert the probe completely into the
meat. It should not touch the bone,
fat or gristle.
For roasts with no bone, insert the probe
into the meatiest part of the roast. For
bone-in ham or lamb, insert the probe
into the center of the lowest large muscle
or joint.
Insert the probe into the center of dishes
such as meat loaf or casseroles. When
cooking fish, insert the probe from just
above the gill into the meatiest area,
parallel to the backbone.
Insert the probe into the meatiest part of
the inner thigh from below and parallel
to the leg of a whole turkey.
How to Set the Oven For Roasting When Using the Probe
Insert the probe into the meat.
Plug the probe into the outlet in the
oven. Make sure it’s pushed all the
way in. Close the oven door.
Press the
PROBE
pad.
Press the number pads to set the
desired internal food or meat
temperature.
Press the
BAKE
pad.
Press the number pads to set the
desired oven temperature.
Press the
START
pad.
The display will flash if the probe is inserted into
the outlet and you have not set a probe
temperature and pressed the START pad.
When the oven starts to heat, the word
LO
will be in the display.
After the internal temperature of the meat
reaches 100°F., the changing internal
temperature will be shown in the display.
When the internal temperature of the
meat reaches the temperature you
have set, the probe and the oven
turn off and the oven control signals.
To stop the signal, press the
CLEAR/OFF
pad. Use hot pads to
remove the probe from the food. Do
not use tongs to pull on it—they
might damage it.
To change the oven temperature during
the Roast cycle, press the
BAKE
pad and
then the number pads to set the new
temperature.
■
If the probe is removed from the food before
the final temperature is reached, a tone will
sound and the display will flash until the probe
is removed from the oven.
■
You can use the timer even though
you cannot use timed oven operations.
Probe
Cable
Handles
Plug
31
Loading ...
Loading ...
Loading ...