Loading ...
Loading ...
Loading ...
12
English
Connections
Step 4: Connecting TV
3
2
1
O
OFER
3
2
1
OOFER
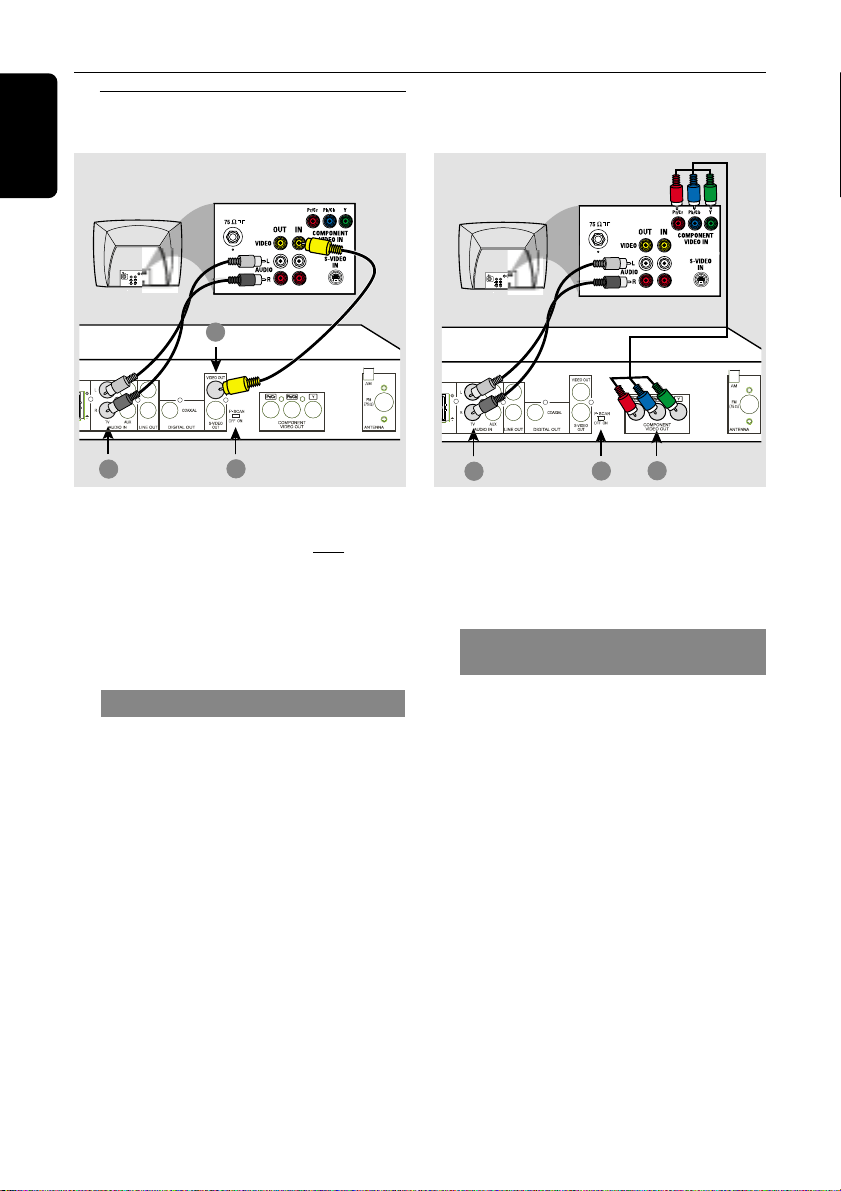
IMPORTANT!
– You only need to make one video
connection from the following
options, depending on the
capabilities of your TV.
– Connect the DVD system directly
to the TV.
Using Composite Video jack
1 Use the supplied composite video cable
(yellow) to connect the DVD system’s
VIDEO OUT jack to the video input
jack (or labeled as A/V In, CVBS,
Composite or Baseband) on the TV.
2 To hear the TV channels through this
DVD system, use the supplied audio
cables (white/red) to connect AUDIO
IN-TV jacks to the corresponding
AUDIO OUT jacks on the TV.
3 Set the P-SCAN switch to ‘OFF.’
IMPORTANT!
The progressive scan video quality is
only possible when using Pr/Cr Pb/Cb Y,
and a progressive scan TV is required.
Using Component Video jacks
(Pr/Cr Pb /Cb Y)
1 Use a component video cables (red/blue/
green - not supplied) to connect the
DVD system’s Pr/Cr Pb/Cb Y jacks to
the corresponding Component video
input jacks (or labeled as Pr Pb Y or
YUV) on the TV.
2 To hear the TV channels through this
DVD system, use the supplied audio
cables (white/red) to connect AUDIO
IN-TV jacks to the corresponding
AUDIO OUT jacks on the TV.
3 If you are using a Progressive Scan TV
(TV must indicate Progressive Scan or
ProScan capability), set the P-SCAN
switch to ‘ON’. Otherwise, set it to ‘OFF.’
Helpful Hint:
– You have to power off the DVD system or
switch to standby mode before changing the
P-SCAN switch setting.
Option 1
Option 2
Loading ...
Loading ...
Loading ...