Loading ...
Loading ...
Loading ...
Repositioning the backrests
Move the seat belts to the side, making
sure that they are correctly extended
and not twisted.
Raise the backrests and push them
back until the locking click of both
retainers is heard. Visually check that
the red marks have disappeared from
the release devices A fig. 19. The red
marks indicate that the backrest is not
secured.
WARNING
11) All adjustments must be made with the
car stationary.
12) Once you have released the
adjustment lever, always check that the
seat is locked on the guides by trying to
move it back and forth. If the seat is not
locked into place, it may unexpectedly slide
and cause the driver to lose control of the
car.
13) Make sure the backrests are properly
secured at both sides (not visible "red
notches) to prevent them from moving
forward, in the event of sharp braking, with
possible impact with of the passengers.
IMPORTANT
4) The fabric upholstery of the seats has
been designed to withstand long-term wear
deriving from normal use of the car. Some
precautions are however required. Avoid
prolonged and/or excessive rubbing
against clothing accessories such as metal
buckles and Velcro strips which, by
applying a high pressure on the fabric in a
small area, could cause it to break, thereby
damaging the upholstery.
5) Do not arrange objects beneath the
electrically adjustable seat and do not
impede its movement, since the controls
may be damaged. The fabric upholstery of
the seats has been designed to withstand
long-term wear deriving from normal use of
the car. Some precautions are however
required. Avoid prolonged and/or excessive
rubbing against clothing accessories such
as metal buckles and Velcro strips which,
by applying a high pressure on the fabric in
a small area, could cause it to break,
thereby damaging the upholstery. They
may also restrict the seat travel.
6) Before tilting the backrest, remove any
objects on the seat cushion.
HEAD RESTRAINTS
FRONT
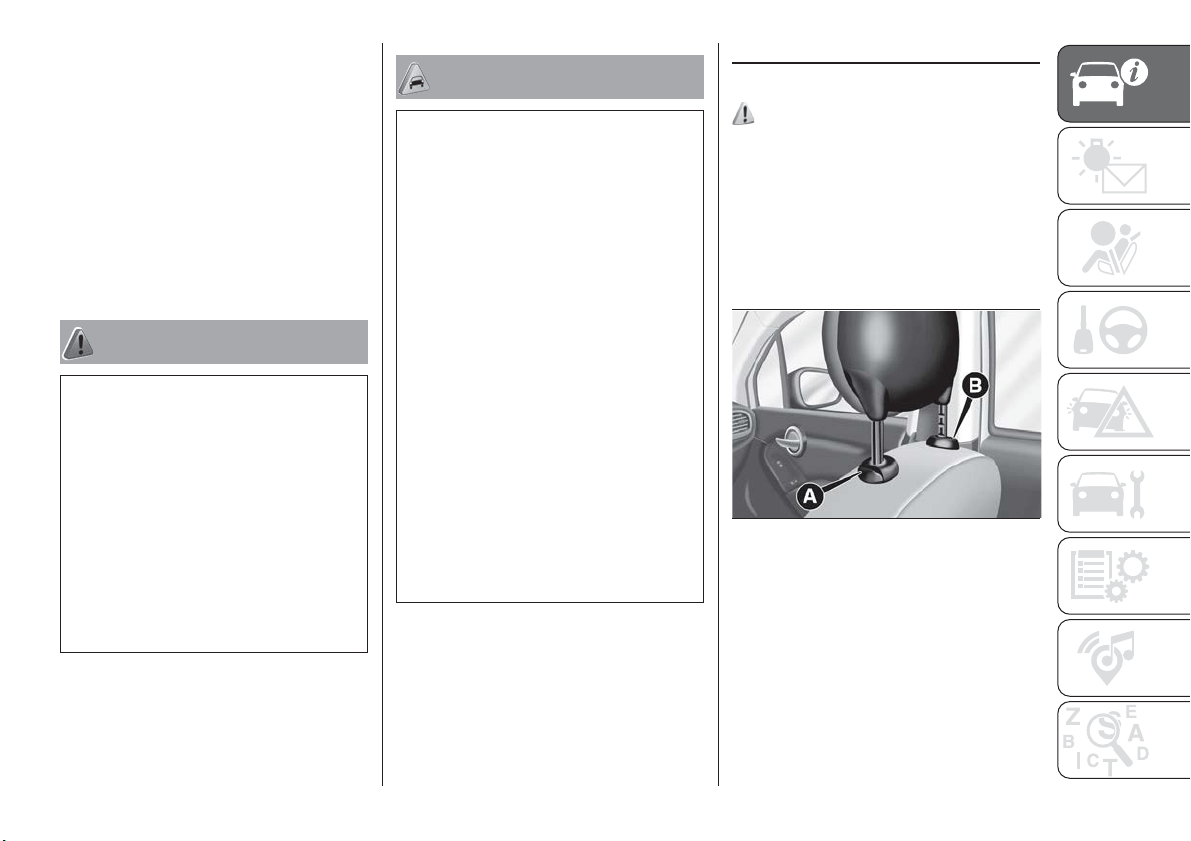
14)
Adjustment
They can be adjusted to 4 height
positions (completely raised /
2 intermediate positions / completely
lowered).
Upward adjustment: raise the head
restraint until it clicks into place.
Downward adjustment: press button A
fig. 20 and lower the head restraint.
20
F1B0029C
21
Loading ...
Loading ...
Loading ...