Loading ...
Loading ...
Loading ...
10
11
OPERATING INSTRUCTIONS CARE AND MAINTENANCE
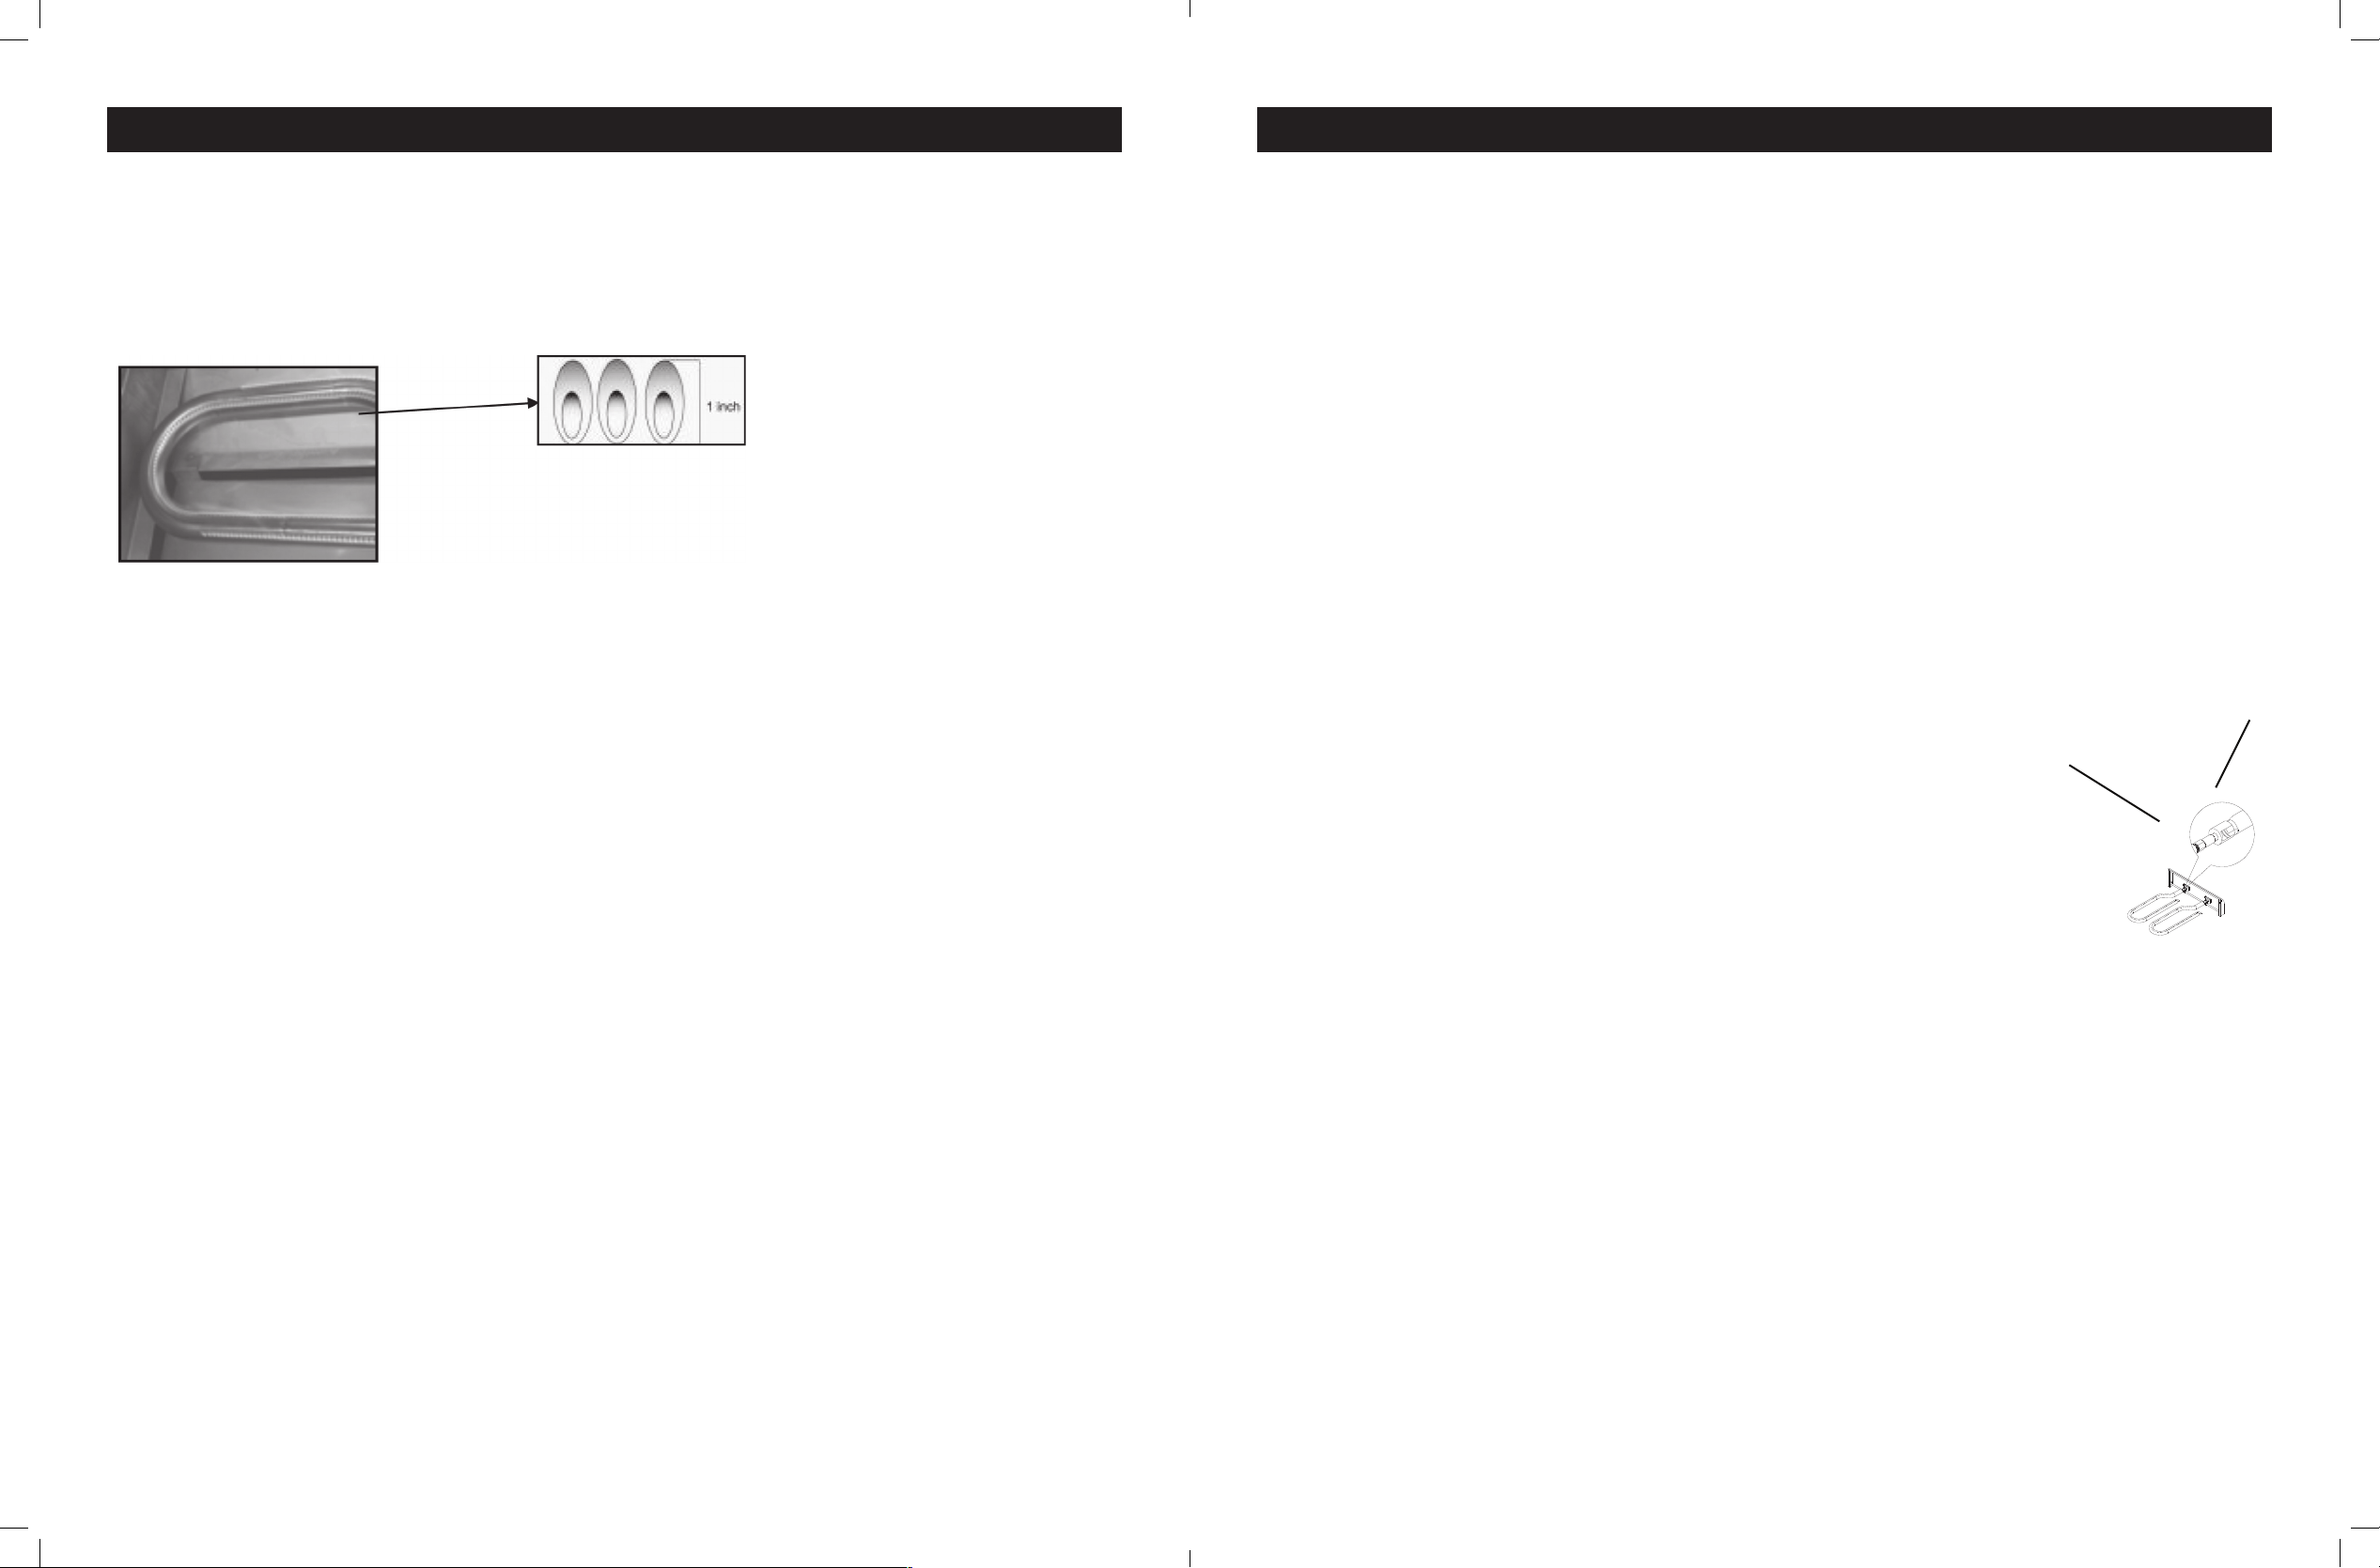
FLAME CHARACTERISTICS
• Check for proper burner ame characteristics. Burner ames should be blue and stable with no yellow tips,
excessive noise, or lifting as shown in Fig. 6.
• Turn the control knobs and Liquid Propane cylinder valves “OFF.”
• Allow the grill and burners to cool.
There is very little care and maintenance needed. The Portable Gas Grill is designed and made of materials
that will last many years with normal use. Following these instructions will improve the longevity and quality of
cooking. To ensure safe operation of your grill, the area of cooking should always be kept free of combustible
materials of any type, such as gasoline or other ammable vapors or liquids.
Outside Grill Parts - This is stainless steel. It can be cleaned easily with warm soapy water or any stainless
steel cleaner.
Cooking Grid and Grease Tray – The cooking grid is made of stainless steel. The cooking grid should be
brushed with a steel brush immediately after cooking, while the grill is still warm. The grease tray is also stain-
less steel and can be cleaned with a at scraper such as a putty knife.
Caution: The grease tray must be kept clean and free of heavy buildup for the grill to perform properly and to
eliminate are-ups.
Grill Main Burners - Extreme care should be taken when removing a burner. It must be correctly centered on
the orice before any attempt is made to relight the grill. Frequency of cleaning will depend on how often you
use the grill.
Failure to properly place the burner over the orice could cause a re to occur behind and beneath the valve
panel, thereby damaging the grill and making it unsafe to operate. Before cleaning, make sure the gas supply
and control knobs are in the “OFF” position and the burners have cooled.
To remove the main burners for cleaning:
1. Locate the burner screw at the rear of the rebox.
2. Remove the screw and lift the burner out of the rebox.
To clean the grill burners:
1. Clean the exterior of the burner with a wire brush. Use a metal scraper for stub-
born stains or debris.
2. Clear clogged ports with a straightened paper clip. Never use a wooden toothpick
as it may break off and clog the port.
3. Check and clean burners / venturi tubes for insects and insect nests. A clogged
tube can lead to a re beneath, and behind the main control panel.
To reinstall the main burners:
1. Insert the burner over the main burner gas valve (part# 11 on page 14).
2. Make sure the orice spud (A) is inside the burner venturi (B) as shown in Fig. 7.
3. Align the burner screw hole with the rebox hole, insert screw and tighten.
Firebox - Use warm soapy water to clean this area. Do not allow grease to build up.
Drain Hole – The drain hole must be kept clear of grease and food particles to allow drippings to drain
properly into the grease tray. This must be done to maintain proper operation of your grill.
General - This grill, like all equipment, will look better and last longer if kept out of the weather when not in use.
Caution: Do not store propane cylinders in enclosed areas. When using a cover or moving the grill, always
wait until the grill has cooled for at least 30 minutes.
• Not obstruct the ow of combustion and ventilation air.
• A clogged tube can lead to a re beneath the appliance.
USING THE GRILL
1. Find a level surface to grill on.
2. Allow the grill to warm up with the lid closed for 5 minutes prior to cooking.
3. You may cook on the grill in any weather. If the temperature is extremely cold or hot, the cooking times will
be slightly increased or decreased. Keep the grill out of excessive winds when operating.
Figure 6
Visually check the burner ames
prior to each use, the ames should
look like this picture, if they do not,
refer to the burner main tenancy
part of this manual.
B
A
Figure 7
Loading ...
Loading ...
Loading ...