Loading ...
Loading ...
Loading ...
6
7. Slip compression sleeve and compression nut on copper
tubing as shown. Insert end of tubing into outlet end squarely
as far as it will go. Screw compression nut onto outlet end
with adjustable wrench. Do not overtighten.
8. Place the free end of the tubing into a container or sink, and
turn ON main water supply and flush out tubing until water is
clear. Turn OFF shut-off valve on the water pipe. Coil copper
tubing.
Connecting to refrigerator:
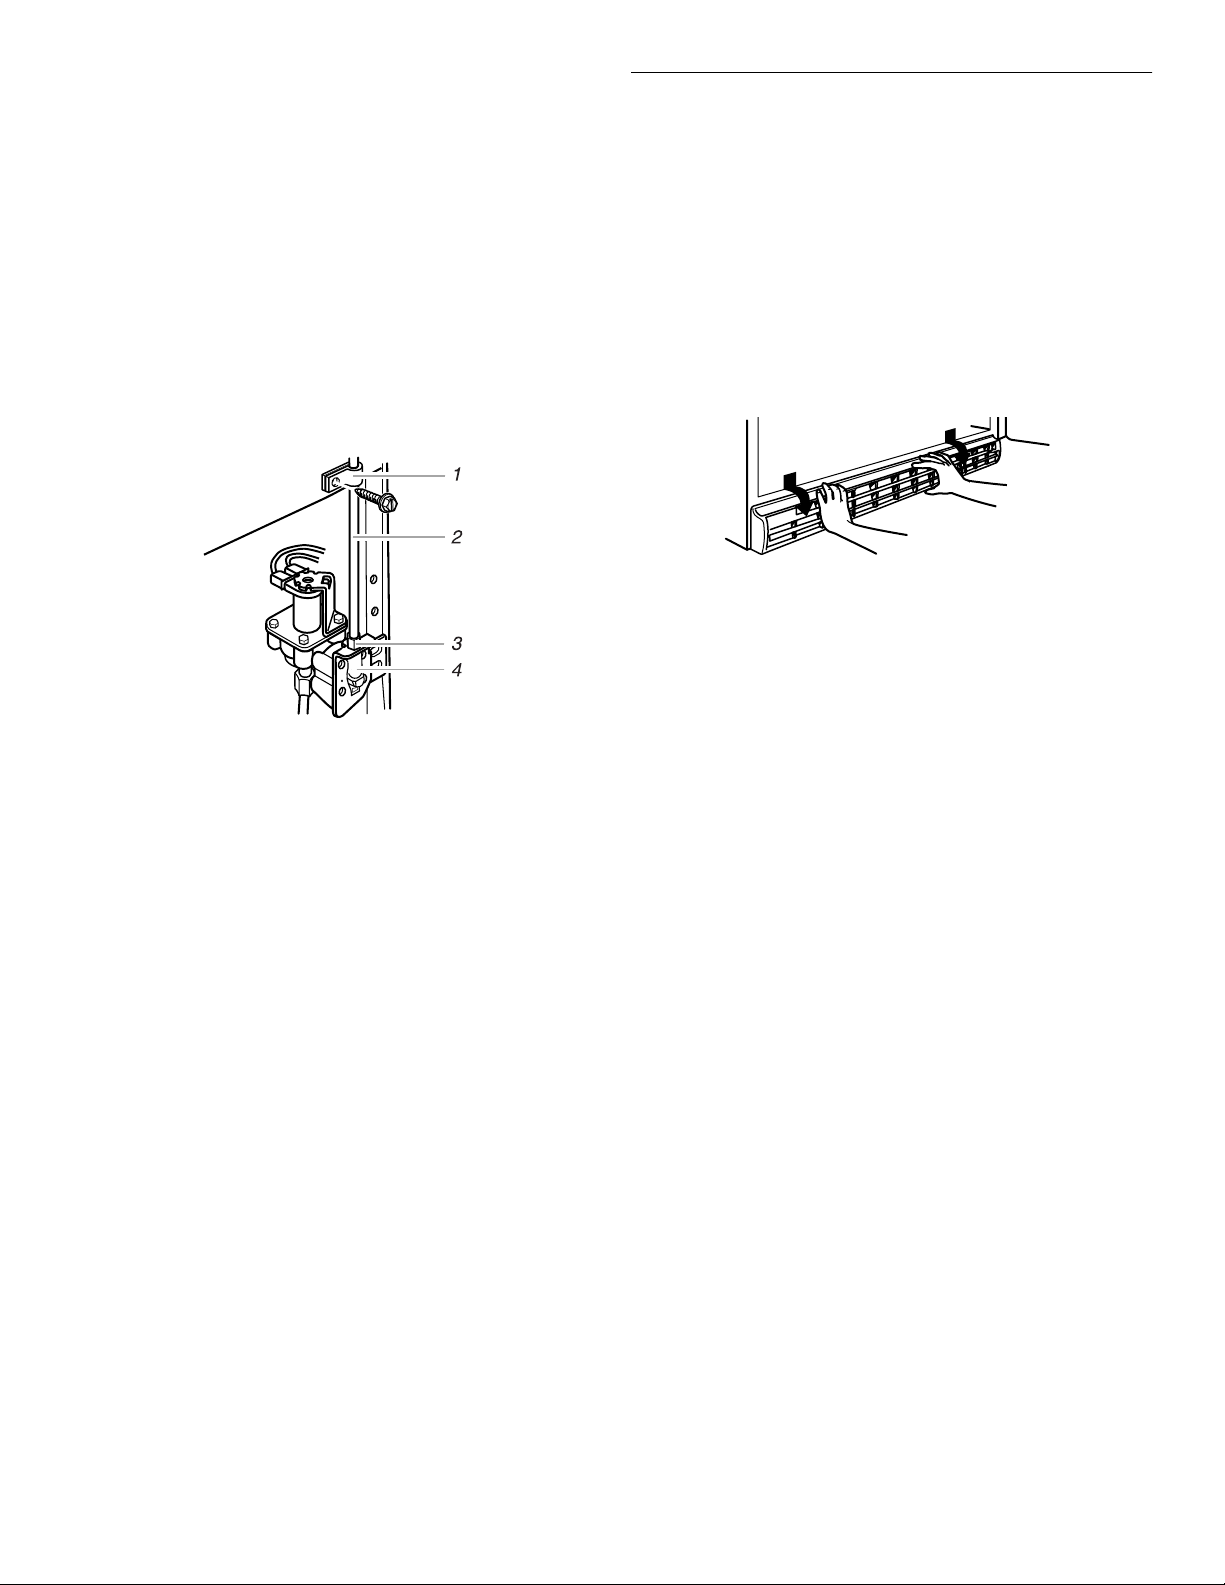
1. Attach the copper tube to the valve inlet using a compression
nut and sleeve as shown. Tighten the compression nut. Do
not overtighten. Use the tube clamp on the back of the
refrigerator to secure the tubing to the refrigerator as shown.
This will help prevent damage to the tubing when the
refrigerator is pushed back against the wall. Move to step 2.
2. Turn shut-off valve ON. Check for leaks. Tighten any
connections (including connections at the valve) or nuts that
leak.
1. Tube Clamp
2. Copper Tubing
3. Compression Nut
4. Valve Inlet
3. The ice maker is equipped with a built-in water strainer. If
local water conditions require periodic cleaning or a well is
your source of water supply, a second water strainer should
be installed in the ¹⁄₄ in. (6.35 mm) water line. Obtain a water
strainer from your nearest appliance dealer. Install at either
tube connection.
4. Plug in refrigerator or reconnect power.
Base Grille
To remove the base grille:
1. Open the refrigerator door.
2. Grasp the grille with both hands.
3. Lift up and tilt the bottom of the grille toward you.
NOTE: Do not remove the Tech Sheet that is fastened behind the
grille.
To replace the base grille:
1. Open the refrigerator door.
2. Place upper clips in openings in the metal panel.
3. Roll the grille down toward the refrigerator until it snaps into
place.
Loading ...
Loading ...
Loading ...