Loading ...
Loading ...
Loading ...
12
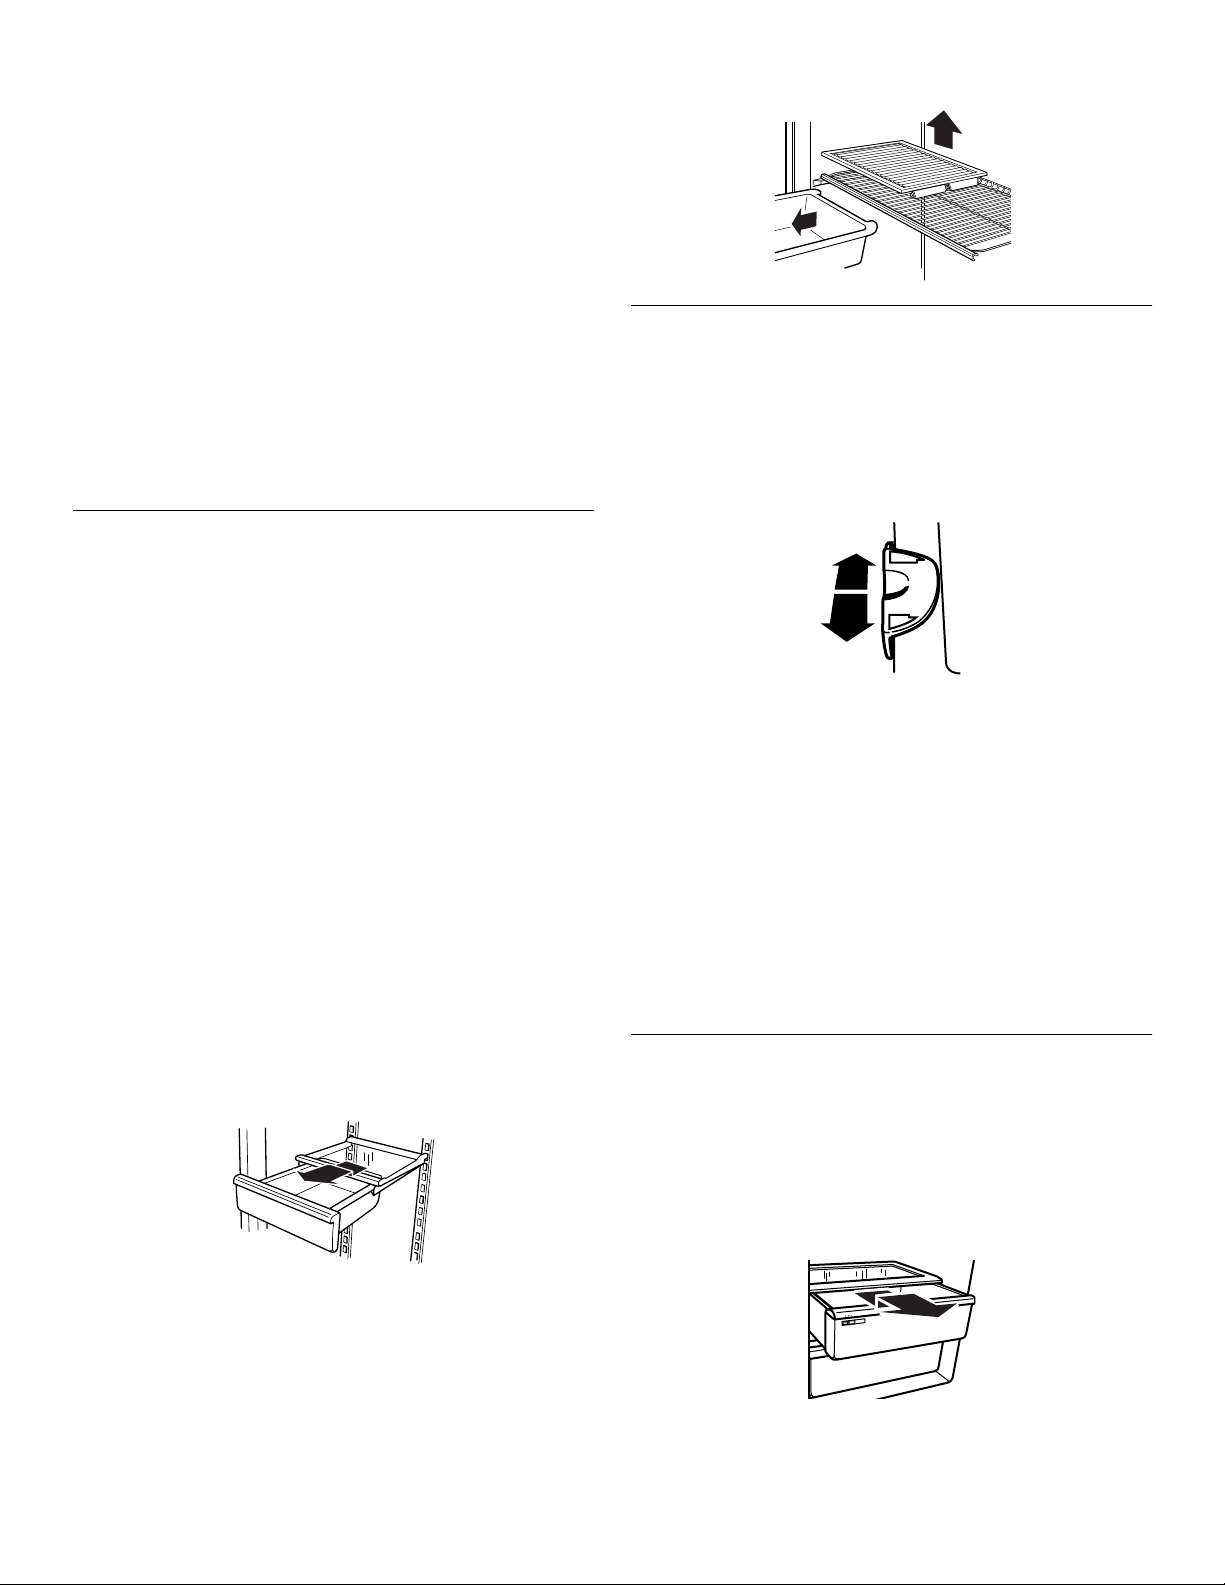
To remove and replace the shelf track:
1. Remove the shelf track by lifting both sides of the track
slightly and pulling the track straight out.
2. Replace the track by guiding the track hooks into the shelf
support slots on the back wall.
NOTE: Make sure that both sets of track hooks are in the
slots and that the slots are parallel with each other.
3. Push the track back and down securely into the shelf
supports.
To replace the shelf:
NOTE: Make sure that both of the rear shelf slides are securely in
the track before letting go of the shelf. The lateral shelf may be
difficult to install if the track is placed too close to the refrigerator
ceiling. Reposition the track on a lower rung until the shelf can be
tilted enough to easily slide into the track.
1. Hold the shelf at the front and tip the front at a 45° angle to
the track.
2. Insert both of the rear shelf slides into the upper channel of
the track, and lower the front of the shelf into place.
Meat Drawer and Cover
(on some models)
To remove and replace the meat drawer (all styles):
1. Remove the meat drawer by sliding it out to the stop. Lift the
front of meat drawer with one hand while supporting the
bottom of drawer with other hand. Slide drawer out the rest of
the way.
2. Replace the meat drawer by guiding it into the meat cover
supports and pushing it in until it stops.
To remove and replace the meat drawer cover (Style 1 glass):
1. Remove the meat drawer. Remove the cover by tilting up the
front of the cover and lifting at the back. Pull the cover
straight out.
2. Replace the cover by guiding the rear hooks into the shelf
supports. Tilt the cover up at the front until the rear hooks
drop into the slots.
3. Lower the front of the cover to a level position and replace the
meat drawer.
IMPORTANT: Do not clean glass meat drawer covers with warm
water when they are cold. Glass meat drawer covers may break if
exposed to sudden temperature changes or impact, such as
bumping. For your protection, tempered glass is designed to
shatter into many small pebble-size pieces. This is normal.
NOTE: Glass meat drawer covers are heavy. Use special care
when removing them to avoid impact from dropping.
To remove and replace the meat drawer cover (Style 2
plastic):
1. Remove the meat drawer. Tilt the cover up at the front and
pull it forward and out.
2. Replace the meat drawer cover by fitting the notches and rear
edge of the cover over rear and center crossbars on the shelf.
3. Lower cover into place and replace the meat drawer.
Chilled Meat Drawer
(on some models)
To adjust the meat drawer temperature:
■ Slide the meat drawer temperature control forward to make
the meat drawer less cold.
■ Slide the meat drawer temperature control backward to make
the meat drawer colder.
Meat storage guide
Store most meat in original wrapping as long as it is airtight and
moisture-proof. Rewrap if necessary. See the following chart for
storage times. When storing meat longer than the times given,
freeze the meat.
Fresh fish or shellfish..................use same day as purchased
Chicken.....................................................................1-2 days
Ground beef ..............................................................1-2 days
Variety meats (liver, heart, etc.)..................................1-2 days
Cold cuts...................................................................3-5 days
Steaks/roasts ............................................................3-5 days
Cured meats............................................................7-10 days
Leftovers - Cover leftovers with plastic wrap, aluminum foil, or
plastic containers with tight lids.
Crisper and Crisper Cover
(on some models - Accessory)
To remove and replace the crisper(s):
1. Slide crisper(s) straight out to the stop. Lift the front of the
crisper(s) and slide out the rest of the way.
2. Replace the crisper(s) by sliding back in fully past the drawer
stop.
IMPORTANT: Do not clean glass crisper covers with warm water
when they are cold. Glass crisper covers may break if exposed to
sudden temperature changes or impact, such as bumping. For
your protection tempered glass is designed to shatter into many
small pebble-size pieces. This is normal.
COLDER
COLD
LO
W
LOW
HIG
H
HIGH
Loading ...
Loading ...
Loading ...