Loading ...
Loading ...
HEAT LIVE RELAX
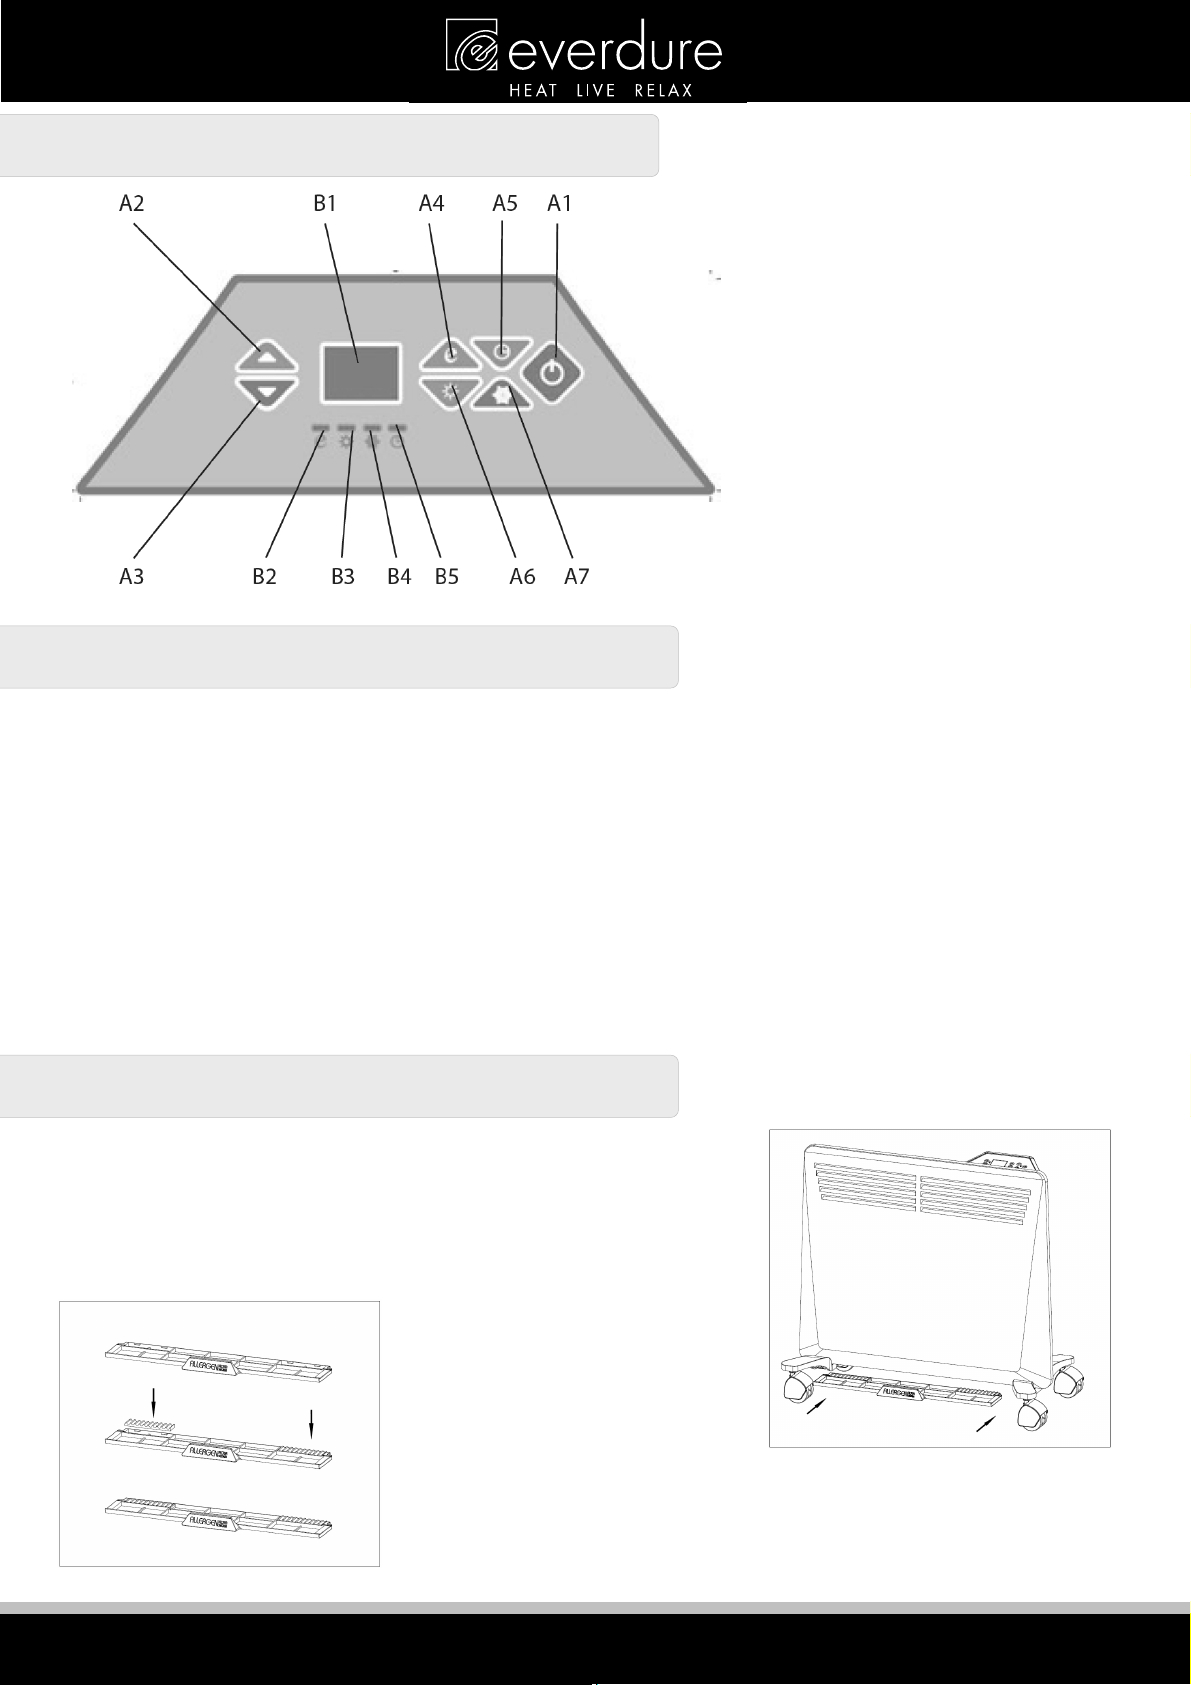
CONTROL FUNCTIONS
GETTING STARTED
1. Carefully remove the heater from packaging and the carton, and unwind the cord to its full length.
2. Either fit the castors & place the heater onto a stable, flat and dry surface, or fit the mounting brackets to a stable
wall & hang from the wall in a dry position away from open or running water. See installation sections for
details.
3. Turn the heater off at the power switch (on the top right hand side of the unit). Plug the cord set into a
220-240V~A.C. 50Hz electrical outlet. Turn the power on at the electrical outlet.
4. Turn the heater on at the power switch (on the right hand side of the unit). Depending on the last setting, either
the numeric display will light up showing the previous temperature setting (the appliance will start to operate), or
the numeric display decimal point will light up (the appliance in stand-by mode). If in stand-by mode, press the
power button to start the appliance, and press again to put back to stand-by mode.
NOTE: Heater must have castors fitted or be attached to a wall before use.
FILTERS
The main filter can be fitted by pushing it into the slots mounted at the
bottom of the appliance. It is designed to stop hair and dust from entering
the appliance and collecting where it is hard to clean as well as removing
them from air circulation. Remover the filter and clean with a vacuum
cleaner periodically to keep the appliance working efficiently. NOTE:
Allowing dust & hair to build up can create a potential fire hazard. The
small filter inserts can be used to
disperse fragrance oils. Place one or
2 drops of the fragrance oil in each
filter insert, and place in the rear
corners of the main filter. Place the
main filter under the appliance as
described above. The heating effect and natural air convection will draw the
scent through the heater and help distribute it throughout the room. NOTE:
Do not overload the filter inserts with oils as they could be potentially
flammable.
A1. POWER BUTTON
A2. INCREASE SETTING BUTTON
A3. DECREASE SETTING BUTTON
A4. LOW POWER (ECONOMY) BUTTON
A5. TIMER BUTTON
A6. FULL POWER BUTTON
A7. ANTI-FROST BUTTON
B1. NUMERIC DISPLAY
B2. LOW POWER INDICATOR
B3. HIGH POWER INDICATOR
B4. ANTI-FROST INDICATOR
B5. TIMER SET INDICATOR
Loading ...
Loading ...
Loading ...