The following information will help you to use your appliance in an ecological way, and to save energy:
Use dark coloured or enamel coated cookware in the oven since the heat transmission will be better.
While cooking your dishes, perform a preheating operation if it is advised in the user manual or cooking instructions.
Do not open the door of the oven frequently during cooking.
Try to cook more than one dish in the oven at the same time whenever possible. You can cook by placing two cooking vessels onto the wire shelf.
Cook more than one dish one after another. The oven will already be hot.
You can save energy by switching off your oven a few minutes before the end of the cooking time. Do not open the oven door.
Defrost frozen dishes before cooking them.
Use pots/pans with cover for cooking. If there is no cover, energy consumption may increase 4 times.
Select the burner which is suitable for the bottom size of the pot to be used. Always select the correct pot size for your dishes. Larger pots require more energy.
Pay attention to use flat bottom pots when cooking with electric hobs.
Pots with thick bottom will provide a better heat conduction. You can obtain energy savings up to 1/3.
Vessels and pots must be compatible with the cooking zones. Bottom of the vessels or pots must not be smaller than the hotplate.
Keep the cooking zones and bottom of the pots clean. Dirt will decrease the heat conduction between the cooking zone and bottom of the pot.
For long cookings, turn off the cooking zone 5 or 10 minutes before the end of cooking time. You can obtain energy savings up to 20% by using the residual heat.
Initial use
Time setting
While making any adjustment, related symbols flash on the display.
Press +/- keys to set the time of the day after the oven is energized for the first time.
For touch control models, touch first and I Jthen use + /- to set the time of the day.
Confirm the setting by pressing symbol and wait for 4 seconds without touching any keys to confirm.
1
Adjustment key
2
Keylock symbol
3
Clock symbol
4
Alarm volume symbol
5
Eco mode symbol
6
Plus key
7
Minus key
8
Time slice symbol
9
Alarm symbol
10
End of Cooking Time symbol
11
Cooking Time symbol
12
Program key
If the initial time is not set, clock will run starting from 12:00 and symbol will be displayed. The symbol will disappear once the time is set.
Current time settings are canceled in case of power failure. It needs to be readjusted.
First cleaning of the appliance
The surface might get damaged by some detergents or cleaning materials. Do not use aggressive detergents, cleaning powders/creams or any sharp objects during cleaning. Do not use harsh abrasive cleaners or sharp metal scrapers to clean the oven door glass since they can scratch the surface, which may result in shattering of the glass.
Remove all packaging materials.
Wipe the surfaces of the appliance with a damp cloth or sponge and dry with a cloth.
Initial heating
Heat up the product for about 30 minutes and then switch it off. Thus, any production residues or layers will be burnt off and removed.
WARNING: Hot surfaces cause burns! Product may be hot when it is in use. Never touch the hot burners, inner sections of the oven, heaters and etc. Keep children away. Always use heat resistant oven gloves when putting in or removing dishes into/from the hot oven.
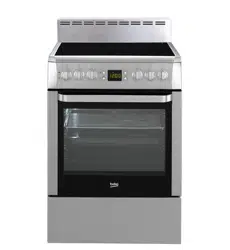
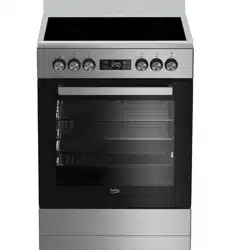
Electric oven
Take all baking trays and the wire grill out of the oven.
Close the oven door.
Select Static position.
Select the highest grill power; See How to operate the electric oven, page 22.
Operate the oven for about 30 minutes.
Turn off your oven; See How to operate the electric oven, page 22
Grill oven
Take all baking trays and the wire grill out of the oven.
Close the oven door.
Select the highest grill power; see How to operate the grill, page 27.
Operate the grill about 30 minutes.
Turn off your grill; see How to operate the grill, page 27
Smoke and smell may emit for a couple of I Jhours during room is well ventilated to remove the smoke anthe initial operation. This is quite normal. Ensure that the d smell. Avoid directly inhaling the smoke and the smell that emits.
How to use the hob
General information about cooking
Never fill the pan with oil more than one third of it. Do not leave the hob unattended when heating oil. Overheated oils bring risk of fire. Never attempt to extinguish a possible fire with water! When oil catches fire, cover it with a fire blanket or damp cloth. Turn off the hob if it is safe to do so and call the fire department.
Before frying foods, always dry them well and gently place into the hot oil. Ensure complete thawing of frozen foods before frying.
Do not cover the vessel you use when heating oil.
Place the pans and saucepans in a manner so that their handles are not over the hob to prevent heating of the handles. Do not place unbalanced and easily tilting vessels on the hob.
Do not place empty vessels and saucepans on cooking zones that are switched on. They might get damaged.
Operating a cooking zone without a vessel or saucepan on it will cause damage to the product. Turn off the cooking zones after the cooking is complete.
As the surface of the product can be hot, do not put plastic and aluminum vessels on it.
Clean any melted such materials on the surface immediately.
Such vessels should not be used to keep foods either.
Use flat bottomed saucepans or vessels only.
Put appropriate amount of food in saucepans and pans. Thus, you will not have to make any unnecessary cleaning by preventing the dishes from overflowing.
Do not put covers of saucepans or pans on cooking zones.
Place the saucepans in a manner so that they are centered on the cooking zone. When you want to move the saucepan onto another cooking zone, lift and place it onto the cooking zone you want instead of sliding it.
Tips about glass ceramic hobs
Glass ceramic surface is heatproof and is not affected by big temperature differences.
Do not use the glass ceramic surface as a place of storage or as a cutting board
Use only the saucepans and pans with machined bottoms. Sharp edges create scratches on the surface
Do not use aluminum vessels and saucepans. Aluminum damages the glass ceramic surface
Spills may damage the glass ceramic surface and cause fire
Do not use vessels with concave or convex bottoms.
Use only the saucepans and pans with flat bottoms. They ensure easier heat transfer.
If the diameter of the saucepan is too small, energy will be wasted.
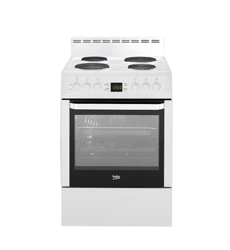
Using the hobs
Single-circuit cooking plate 14-16 cm
Dual-circuit cooking plate 18-20/12-14 cm
Single-circuit cooking plate 14-16 cm
Single-circuit cooking plate 18-20 cm is list of advised diameter of pots to be used on related burners
Glass ceramic hob is equipped with an operation light and a hot zone warning indicator.
Hot zone warning indicator indicates the status of the active zone and it remains lit after the plate is turned off. When the temperature of the plate cools down to a level that it can be touched by hand, warning indicator turns off. Flickering of the hot zone warning indicator is not a failure.
Turning on the ceramic plates
The hob control knobs are used for operating the plates. To obtain the desired cooking power, turn the hob control knobs to the corresponding level.
Turning off the ceramic plates
Turn the plate knob to OFF (upper) position.
Using multi-segmented cooking zones
Multi-segmented cooking zones allows to cook with different size of saucepans on the same cooking zone. When these cooking zones are activated, first the inward cooking zone turns on.
To change the active cooking zone diameter, turn the control knob clockwise.
A "click" will be heard as soon as the hotplate radius changes.
Turning off multi-segment cooking zones
1. Turn the knob counter clockwise to OFF (upper) position to turn off the oven. All segments of the cooking zone are turned off.
Position 1
Position 2
Position 3
How to operate the oven
General information on baking, roasting and grilling * •
Tips for baking
Use non-sticky coated appropriate metal plates or aluminum vessels or heat-resistant silicone moulds.
Make best use of the space on the rack.
Place the baking mould in the middle of the shelf.
Select the correct rack position before turning the oven or grill on. Do not change the rack position when the oven is hot.
Tips for roasting
Treating whole chicken, turkey and large piece of meat with dressings such as lemon juice and black pepper before cooking will increase the cooking performance.
It takes about 15 to 30 minutes longer to roast meat with bones when compared to roasting the same size of meat without bones.
Each centimeter of meat thickness requires approximately 4 to 5 minutes of cooking time.
Let meat rest in the oven for about 10 minutes after the cooking time is over. The juice is better distributed all over the roast and does not run out when the meat is cut.
Fish should be placed on the middle or lower rack in a heat-resistant plate
Tips for grilling
When meat, fish and poultry are grilled, they quickly get brown, have a nice crust and do not get dry. Flat pieces, meat skewers and sausages are particularly suited for grilling as are vegetables with high water content such as tomatoes and onions.
Distribute the pieces to be grilled on the wire shelf or in the baking tray with wire shelf in such a way that the space covered does not exceed the size of the heater.
Slide the wire shelf or baking tray with grill into the desired level in the oven. If you are grilling on the wire shelf, slide the baking tray to the lower rack to collect fats. Add some water in the tray for easy cleaning.
Foods that are not suitable for grilling carry the risk of fire. Only grill food which is suitable for intensive grilling heat.
Do not place the food too far in the back of the grill. This is the hottest area and fatty food may catch fire
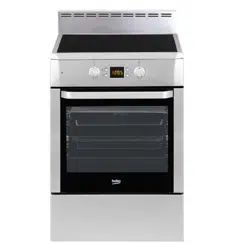
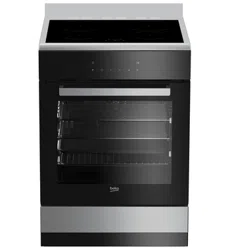
How to operate the electric oven
Select temperature and operating mode
1. Function knob
2. Thermostat knob
Set the Function knob to the desired operating mode.
Set the Temperature knob to the desired temperature.
Oven heats up to the adjusted temperature and maintains it. During heating, temperature lamp stays on.
Switching off the electric oven
Turn the function knob and temperature knob to off (upper) position.
Rack positions (For models with wire shelf)
It is important to place the wire shelf onto the side rack correctly. Wire shelf must be inserted between the side racks as illustrated in the figure.
Do not let the wire shelf stand against the rear wall of the oven. Slide your wire shelf to the front section of the rack and settle it with the help of the door in order to obtain a good grill performance
Maintenance and care
General information
Service life of the product will extend and the possibility of problems will decrease if the product is cleaned at regular intervals.
DANGER: Disconnect the product from mains supply before starting maintenance and cleaning works. There is the risk of electric shock!
DANGER: Allow the product to cool down before you clean it. Hot surfaces may cause burns!
Clean the product thoroughly after each use. In this way it will be possible to remove cooking residues more easily, thus avoiding these from burning the next time the appliance is used.
No special cleaning agents are required for cleaning the product. Use warm water with washing liquid, a soft cloth or sponge to clean the product and wipe it with a dry cloth.
Always ensure any excess liquid is thoroughly wiped off after cleaning and any spillage is immediately wiped dry.
Do not use cleaning agents that contain acid or chloride to clean the stainless or inox surfaces and the handle. Use a soft cloth with a liquid detergent (not abrasive) to wipe those parts clean, paying attention to sweep in one direction
The surface might get damaged by some detergents or cleaning materials.
Do not use aggressive detergents, cleaning powders/creams or any sharp objects during cleaning.
Do not use harsh abrasive cleaners or sharp metal scrapers to clean the oven door glass since they can scratch the surface, which may result in shattering of the glass.
Do not use steam cleaners to clean the appliance as this may cause an electric shock.
Cleaning the hob
Glass ceramic surfaces
Wipe the glass ceramic surface using a piece of cloth dampened with cold water in a manner as not to leave any cleaning agent on it. Dry with a soft and dry cloth
Residues may cause damage on the glass ceramic surface when using the hob for the next time.
Dried residues on the glass ceramic surface should under no circumstances be scraped with hook blades, steel wool or similar tools.
Remove calcium stains (yellow stains) by a small amount of lime remover such as vinegar or lemon juice. You can also use suitable commercially available products.
If the surface is heavily soiled, apply the cleaning agent on a sponge and wait until it is absorbed well. Then, clean the surface of the hob with a damp cloth.
Sugar-based foods such as thick cream and syrup must be cleaned promptly without waiting the surface to cool down. Otherwise, glass ceramic surface may be damaged permanently.
Slight color fading may occur on coatings or other surfaces in time. This will not affect operation of the product.
Color fading and stains on the glass ceramic surface is a normal condition, and not a defect.
Cleaning the control panel
Clean the control panel and knobs with a damp cloth and wipe them dry.
Do not remove the control buttons/knobs to clean the control panel. Control panel may get damaged!
Cleaning the oven
To clean the side wall
(This feature is optional. It may not exist on your product.)
1. Remove the front section of the side rack by pulling it in the opposite direction of the side wall.
2. Remove the side rack completely by pulling it towards you.
Catalytic walls
(This feature is optional. It may not exist on your product.)
The inner side walls (A) and/or the rear wall (B) of your product may be coated with catalytic enamel. Catalytic walls have a light matte colour and a porous surface. Catalytic walls of the oven should not be cleaned. Porous surfaces of the catalytic walls are automatically cleaned by absorbing and converting the spilled oil (steam and carbon dioxide).
Easy Steam Cleaning
Use this process to dean the lop one! bottom enamel surfaces inside your oven. It ensures easy cleaning because the dirt (having waited not for too long) is softened with the steam that forms inside the oven and the water drops condensing on the inner surfaces of the oven.
1. Remove all accessories inside the oven.
2. Pour 500 ml of water into the oven tray and place the tray at the 2nd rack of the oven.
3. Set the oven to easy steam cleaning mode and run at 100°C for 25 minutes.
4. Open the door and wipe the inner surfaces of the oven with a damp sponge or cloth.
5. Use warm water with washing liquid, a soft cloth or sponge to clean the persistent dirt and wipe it with a dry cloth.
Clean oven door
To clean the oven door, use warm water with washing liquid, a soft cloth or sponge to clean the product and wipe it with a dry cloth
Don't use any harsh abrasive cleaners or sharp letal scrapers for cleaning the oven door, hey could scratch the surface and destroy the lass.
Removing the oven door
1. Open the front door (1).
2. Open the clips at the hinge housing (2) on the right and left hand sides of the front door by pressing them down as illustrated in the figure
3. Move the front door to half-way.
4. Remove the front door by pulling it upwards to release it from the right and left hinges.
Steps carried out during removing process should be performed in reverse order to install he door. Do not forget to close the clips at the linge housing when reinstalling the door.
Removing the door inner glass
The inner glass panel of the oven door can be removed for cleaning.
Install the inner glass panel so that the printed side will face upwards.
1. Open the oven door.
2. Pull towards yourself and remove the plastic part installed to upper section of the front door (1).
As illustrated in figure, raise the innermost glass panel slightly in direction A and pull it out in direction B.
4. Repeat the same procedure to remove the second and third glass panels
The first step to regroup the door is reinstalling second and third inner glass panels (2, 3).
As illustrated in figure, place the chamfered corner of the glass panel so that it will rest in the chamfered corner of the plastic slot.
Since the second and third inner glass panels are interchangeable, their order of installation is not important.
When installing the innermost glass panel (1), make sure that the printed side of the panel faces towards the second glass panel.
It is important to seat lower corners of all inner glass panels into the lower plastic slots (5).
Push the plastic part towards the frame until you hear a "click".
AII glass panels must be reinstalled after cleaning
Replacing the oven lamp
DANGER: Before replacing the oven lamp, make sure that the product is disconnected from mains and cooled down in order to avoid the risk of an electrical shock. Hot surfaces may cause burns!
The oven lamp is a special electric light bulb Jthat can resist up to 300 °C. See Technical specifications, page 13 for details. Oven lamps can be obtained from Authorised Service Agents or technician with licence.
Position of lamp might vary from the figure
The lamp used in this appliance is not suitable jfor household room illumination. The intended purpose of this lamp is to assist the user to see foodstuffs.
The lamps used in this appliance have to Iwithstand extreme physical conditions such as temperatures above 50 °C.
If your oven is equipped with a round lamp
1. Disconnect the product from mains.
2. Turn the glass cover counter clockwise to remove it
3. If your oven lamp is of type (A) shown in the figure below, remove it by rotating as shown and replace it. If it is of type (B), pull and remove it as shown in the figure and replace it.
4. Install the glass cover.
Troubleshooting
Oven emits steam when it is in use.
It is normal that steam escapes during operation. »> This is not a fault.
Product emits metal noises while heating and cooling.
When the metal parts are heated, they may expand and cause noise »> This is not a fault.
Product does not operate.
The mains fuse is defective or has tripped. »> Check fuses in the fuse box. If necessary, replace or reset them.
Product is not plugged into the (grounded) socket. »> Check the plug connection.
Oven light does not work.)
Oven lamp is defective. »> Replace oven lamp.
Power is cut. »> Check if there is power. Check the fuses in the fuse box. If necessary, replace or reset the fuses.
Oven does not heat.
Function and/or Temperature are not set. »> Set the function and the temperature with the Function and/or Temperature knob/key.
In models equipped with a timer, the timer is not adjusted. »> Adjust the time.
(In products with microwave oven, timer controls only microwave oven.)
Power is cut. »> Check if there is power. Check the fuses in the fuse box. If necessary, replace or reset the fuses.
(In models with timer) Clock display is blinking or clock symbol is on
A previous power outage has occurred. »> Adjust the time /Switch of the product and switch it on again
Consult the Authorised Service Agent or technician with licence or the dealer where you (have purchased the product if you can not remedy the trouble although you have implemented the instructions in this section. Never attempt to repair a defective product yourself.


 first and I Jthen use + /- to set the time of the day.
 symbol and wait for 4 seconds without touching any keys to confirm.