Loading ...
Loading ...
Loading ...
10
1. Unplug the toaster and let it cool before
cleaning.
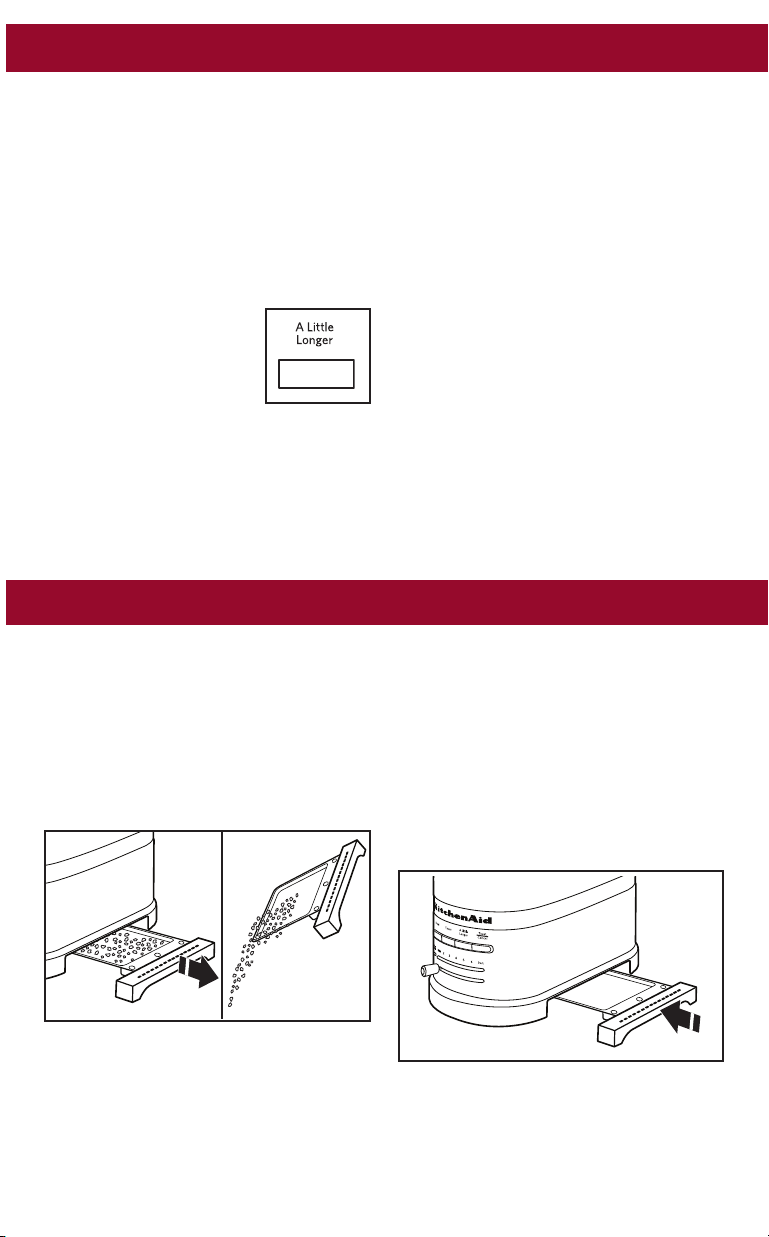
2. Grasp the center of the crumb tray then
slide it out. Shake the crumbs into a
waste container. It is recommended that
the crumb tray be emptied after each
use. Crumb tray is hand-wash only.
IMPORTANT: The tray will be hot
immediately following a toasting cycle.
3. Wipe toaster with a soft, damp cotton
cloth. Do not use paper towels, abrasive
cleansers or liquid cleaning products.
Do not immerse toaster in water.
NOTE: If grease or oil splatters on the
toaster, wipe splatters away immediately
using a clean, damp cotton cloth.
4. Return crumb tray to toaster. Press it in
rmly until it clicks into position. Do not
use the toaster without the crumb tray in
proper position.
NOTE: KitchenAid does not recommend
the use of a toaster cover.
Special Toasting Functions
A Little Longer
If you have a preferred brownness setting
but would like to toast something “a little
longer”, you can do so at the touch of a
button, without changing your favorite
setting.
To use this feature after a toasting cycle is
complete:
1. Wait for the food to raise automatically.
A signal will sound.
2. If you desire more
browning, just press A
LITTLE LONGER and the
food will resume toasting.
3. When the toaster is
nished, it will automatically raise the
food and a signal will sound. If food is not
removed within 45 seconds, the toaster
will enter Keep Warm mode.
Caring for Your Toaster
NOTE: This feature may also be used to
extend the toasting time from the beginning
of the cycle.
1. Insert bread or other food to be toasted
in slot(s).
2. Wait for the bread to lower automatically,
or press TOAST/CANCEL to start the
cycle.
3. Press the A LITTLE LONGER button.
4. The toaster will extend toasting time.
5. When the toaster is nished, it will
automatically raise the food and a signal
will sound. If food is not removed within
45 seconds, the toaster will enter Keep
Warm mode.
W10510972A.indd 10 1/8/13 11:01 AM
Loading ...
Loading ...
Loading ...