Loading ...
Loading ...
Loading ...
23INSTALLING THE GAS ELEVATED COOKER
• In order to avoid overheating of the cooker,
the cooker must not be installed behind a
decorative door.
• The appliance MUST be installed using the
flexible hose supplied.
• The vents, openings and air spaces MUST NOT
be blocked.
• You MUST NOT pull the cooker by the door
handles or the splashback.
• The cooker MUST be checked every five years.
• The cooker MUST NOT be used as a space heater.
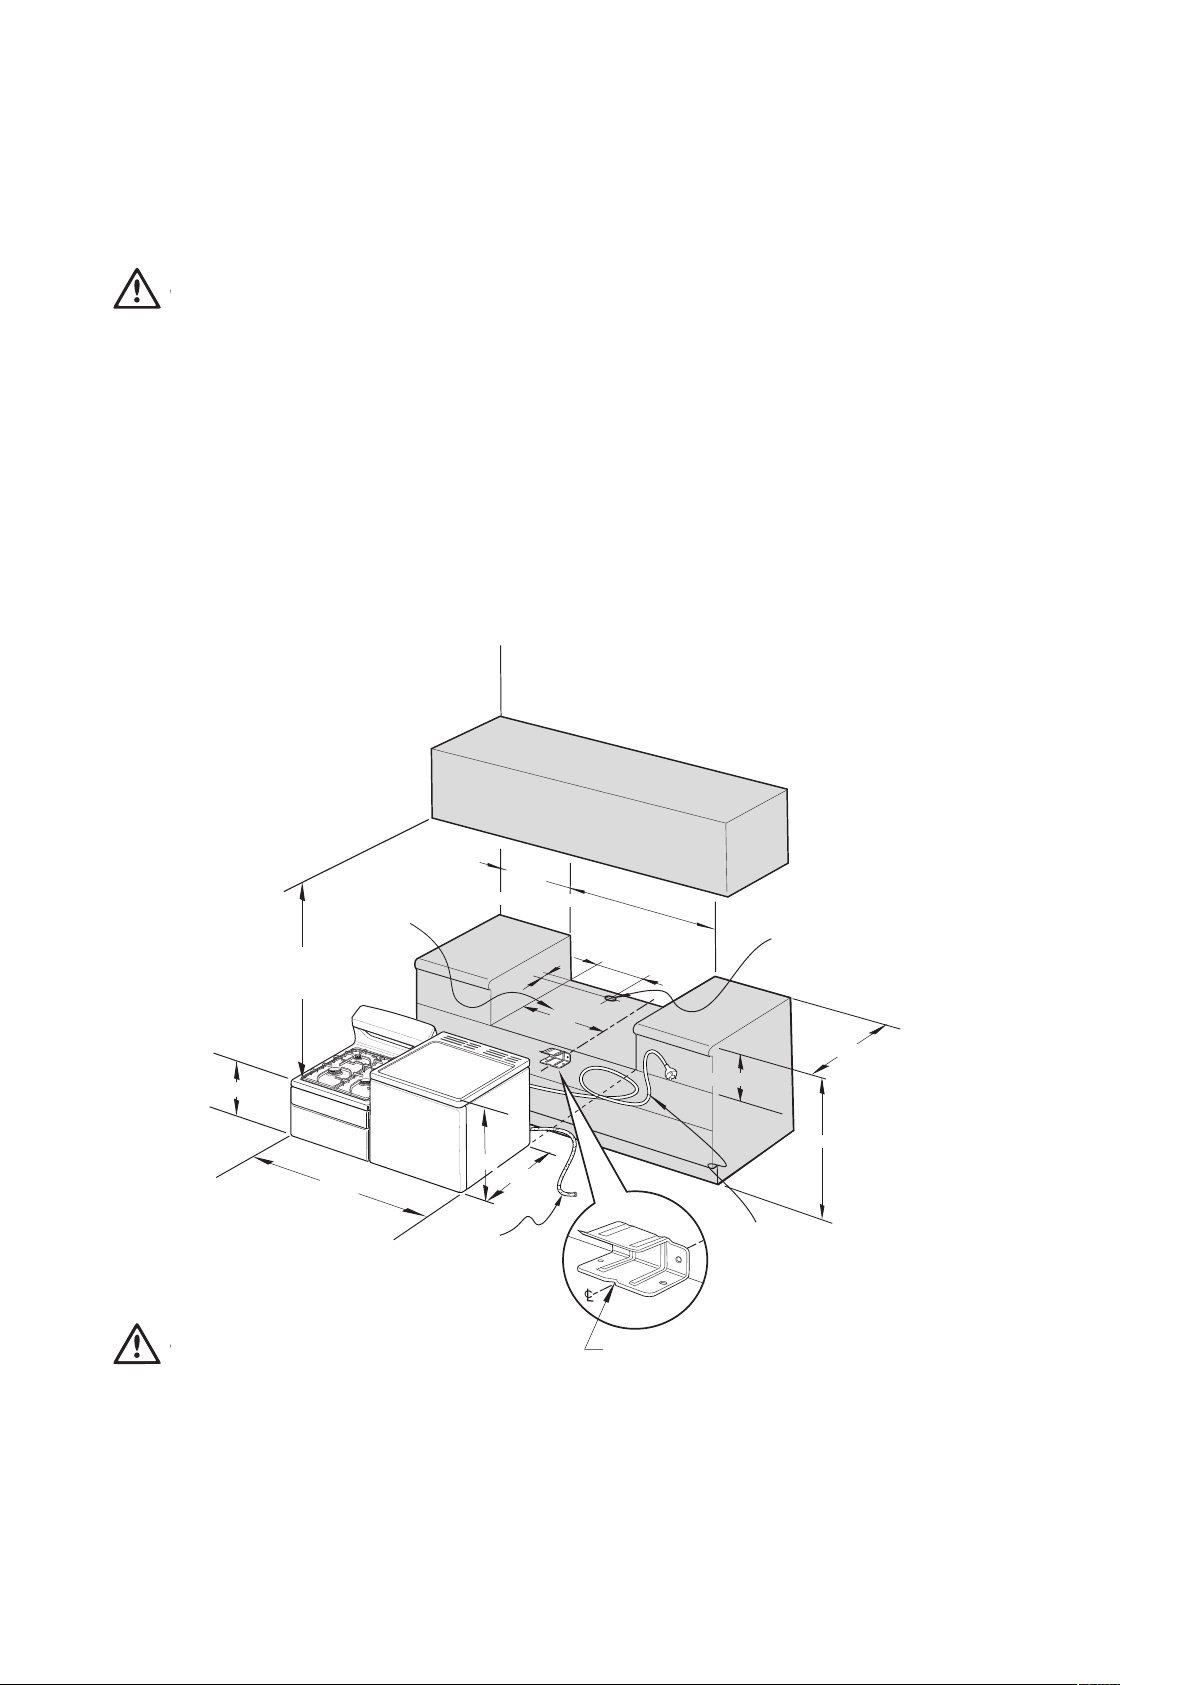
Locating the cooker
Study the diagrams below to be sure of the dimensions
required to locate the cooker safely.
INSTALLING THE GAS ELEVATED COOKER
Safety Warnings about installation
WARNING
WARNING
• The cooker MUST be installed and serviced by a
qualified technician.
• A Certificate of Compliance MUST be supplied to
be kept by the customer.
• The packing materials MUST be removed before
you install the cooker.
• You MUST follow the installation instructions in
this booklet.
• The surrounding kitchen cabinets MUST be able
to withstand 85°C. Electrolux Products WILL
NOT accept responsibility for damage caused
by installation into kitchen cabinets which cannot
withstand 85°C.
300 Maximum
600
Locating V
900
1095 Minimum
280 R.H. Oven
720 L.H. Oven
1.7m
Gas supply hose
2.0m
Electrical service
cord (if fitted)
50mm diameter access
hole to gas supply and
power point (if required)
1085
320
500 minimum
to combustible
material
40
762
520
620
120
minimum
to
combustible
material
Dimension to centre
line of anti-tilt plate
WARNING
WARNING
In order to avoid accidental tipping of the appliance (for
example, by a child climbing onto the open oven door),
the anti-tilt plate MUST be installed.
Position the anti-tilt plate to the rear wall and 762mm
from the left side of the wall. Dimension to the “v” at
the front of the anti-tilt plate and then securely fix
with fasteners.
Loading ...
Loading ...
Loading ...