Loading ...
Loading ...
Loading ...
11
Consumer SupportTroubleshooting TipsOperating InstructionsSafety Instructions
GEAppliances.com
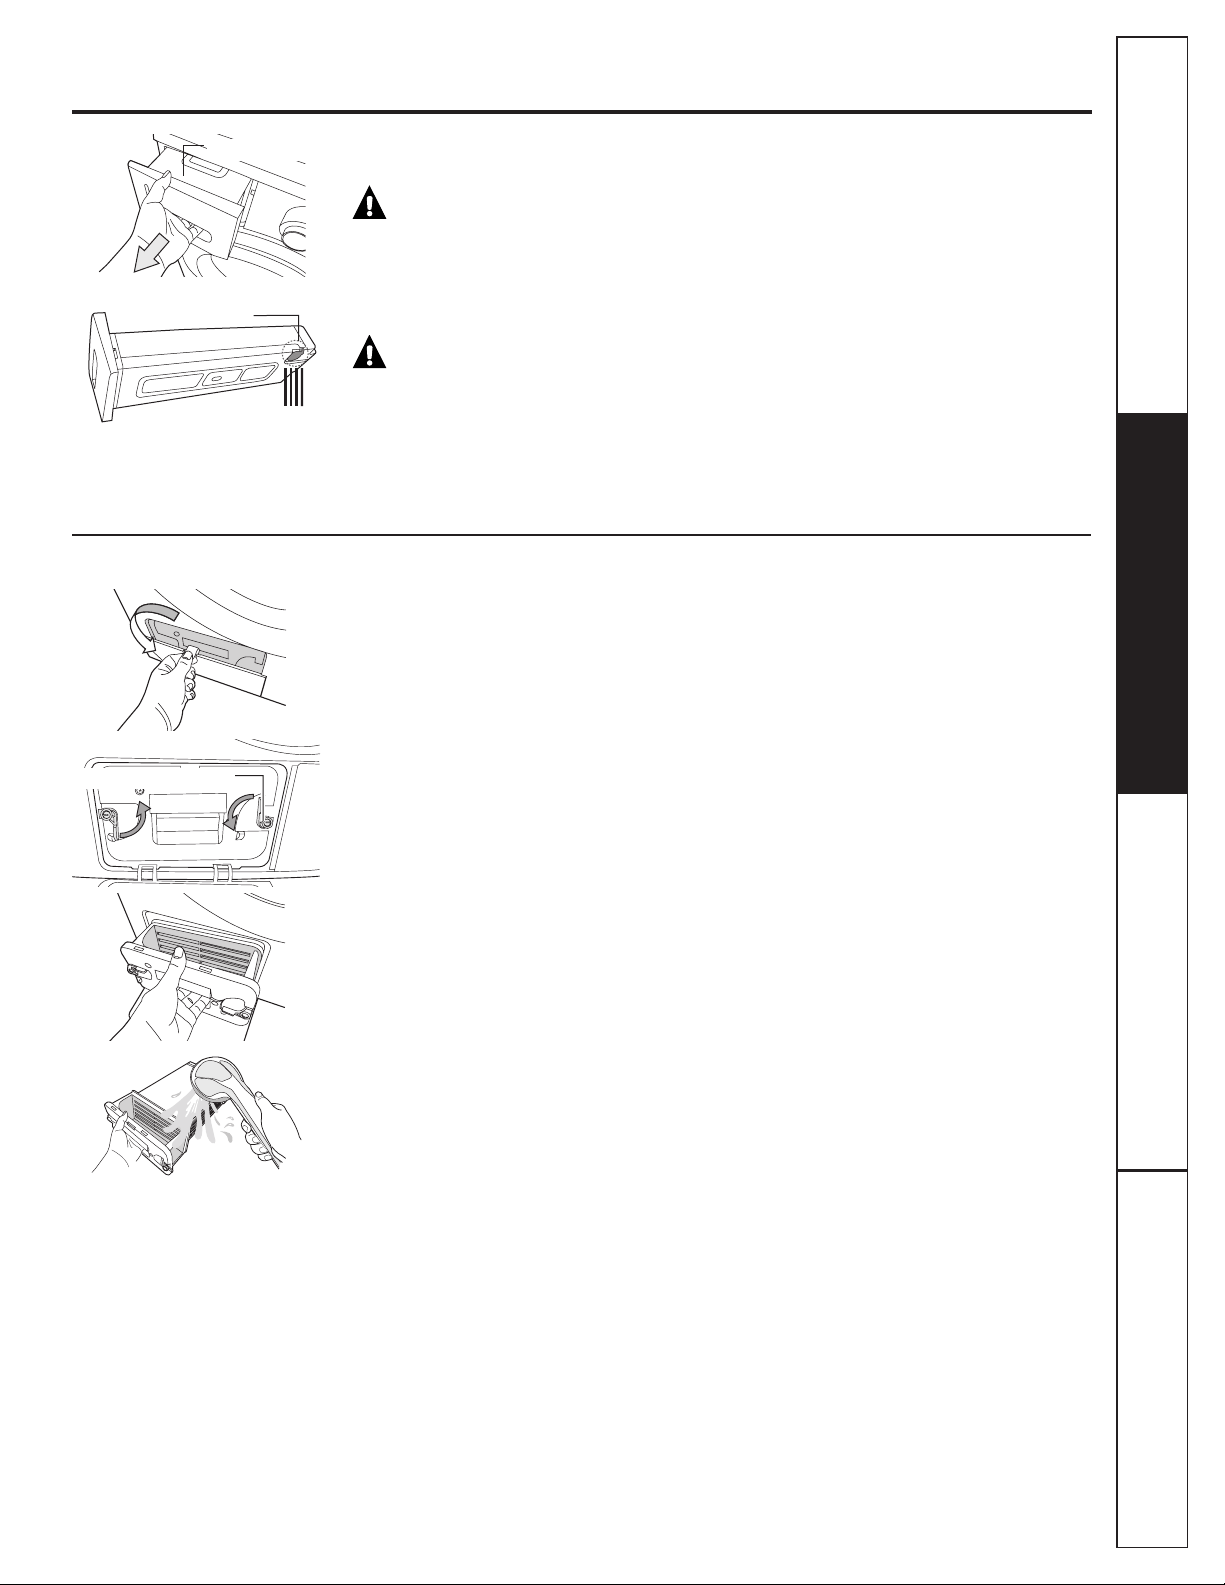
Emptying the Water Tank
1. Pull out the water tank.
CAUTION:
!*'04'/18+0)6*'!#6'46#0-(41/6*'241&7%6*1.&+675+0)
$16**#0&5#5+6+5*'#8;#0&6#-'%#4'0166152+..#0;9#6'4+05+&'6*'6#0-
'/18'6*'%10&'05'&9#6'4+05+&'6*'9#6'46#0-
='/18'6*'%10&'05'&9#6'4+06*'6#0-#(6'4'8'4;&4;+0)%;%.'
WARNING:
+0%'6*'4'+5#%*#0%'1(9#6'4.'#-+0)+(;17&1016&4#+06*'
9#6'4#(6'475+0)6*'241&7%6/#-'574'61&4#+06*'9#6'4
NOTE: !*'06*'#0-7..+0&+%#614.+)*6+5?10@the dryer will not operate until the tank is
emptied and the warning has been cleared. Press the START button and the indicator light
will turn off and the dryer will resume the cycle.
Water-Tank
Drain hole
Cleaning the condenser
1. Open the condenser compartment cover.
2. Unlock the fixer condenser.
3. Remove the condenser.
4. Clean the condenser completely by allowing tap water to flow through it.
NOTES:
• Make sure to clean your condenser once per month to prevent degradation of the dryer’s
performance.
• When assembling the condenser after cleaning it, make sure the fixer condenser is set to
the lock position.
Fixer Condenser
Loading ...
Loading ...
Loading ...