Contact LG Customer Service at 1-800-243-0000 (1-888-542-2623 in Canada) if any accessories are missing.
For your safety and for extended product life, use only authorized components. The manufacturer is not responsible for product malfunction or accidents caused by the use of separately purchased unauthorized components or parts.
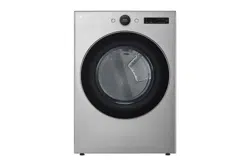
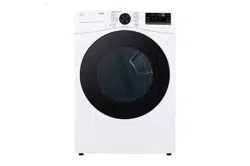
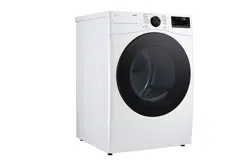
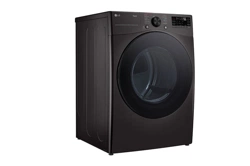
The images in this guide may be different from the actual components and accessories, and are subject to change by the manufacturer without prior notice for product improvement purposes.
Control Panel Features
Operation
Button
Description
• Turns the washing machine on and off.
• (During the wash cycle) stops operation, and cancels the settings.
• Allergiene™
- For cotton, underwear
• Sanitary
- For underwear, diapers, etc.
• Heavy Duty
- For heavily soiled cotton fabric
• Bulky/Large
- For blankets or large bulky items
• Cotton/Normal
- For general laundry, such as cotton T-shirts or towels
• Bright Whites™
- For white fabrics
• Perm. Press
- For wrinkle-free fabrics
• Delicates
- For sheer and delicate fabrics
• Towels
- For towels
• Speed Wash
- For small quantities of lightly soiled items
• Downloaded
- This position is for downloadable cycles. The default cycle in this position is Small Load, (see page 38)
• Tub Clean
- For tub clean (see page 30)
• Starts or pauses the washing machine cycle.
- If you do not press the button within 60 minutes of selecting a cycle, the washing machine will turn off automatically.
• (Press repeatedly) Selects the water temperature for the wash cycle (see page 25).
- Select water temperature from 5 settings.
• (Press repeatedly) Selects the spin speed in the desired level (see page 25).
- Selects spin speed from 5 settings.
• (Press repeatedly) Selects a wash cycle by soil level (see page 25).
- Selects soil level from 5 settings.
• (Press repeatedly) Adjust the volume of the melody and button tones (see page 26).
Button
Description
Pre-wash heavily soiled laundry (See page. 26).
(Press and hold during wash cycle) Lock/unlock the button (See page. 27).
Use this option to add extra water to the wash and rinse cycles for better wash and rinse performance (Stain Treatment) with large or bulky items (See page.27).
(Press before wash cycle) Add an extra rinse to the selected cycle (See page. 26).
(Press before wash cycle) Use this option to rinse detergent from load (See page. 26).
Set delay time of starting cycle (See page. 26).
(Press before starting wash cycle) Use this option for extra cleaning power (See page. 26).
(Press and hold 3 seconds) Tumbles clothes to prevent wrinkle (See page. 28).
Use this option to consume less energy (See page. 27).
Use this function to add garments or remove foreign objects like coins or keys after the cycle has started (See page. 28).
Display
Display Icon
Description
• This portion of the display shows which stage of the wash cycle is currently underway (Load Sensing, Wash, Rinse or Spin).
• Indicates that the door is locked. The washer door will lock while the washer is operating. The door can be unlocked by pressing the Start/ Pause button to stop the washer.
• This indicator shows that the washer has been set for Delay Wash. The washer will start automatically after the set delay time has passed.
• When the Start/Pause button is pressed, the washer automatically detects the wash load (weight) and optimizes the washing time, based on the selected cycle and options. The display will then indicate the estimated time remaining for the selected wash cycle.
INSTALLATION
Installation Overview
Choosing the Proper Location
Install the washing machine on a solid floor that is strong and rigid enough to support the weight of the washing machine, even when fully loaded, without flexing or bouncing. If the floor has too much flex, you may need to reinforce it to make it more rigid. If the floor is not solid, it may cause severe vibration and noise.
1. Clean the floor before installation.
- Make sure to select solid and smooth ground.
2. Two or more people are needed for moving and unpacking the washing machine.
3. Allow for sufficient space between the walls and the washing machine for installation.
Space Requirements
You must allow sufficient space for water lines, the drain line, and airflow.
NOTE
Be sure to allow for wall, door, or floor moldings that may increase the required clearances.
Clearances
NOTE
The floor must be strong and rigid enough to support the weight of the washer, when fully loaded, without flexing or bouncing. If your floor has too much flex, you may need to reinforce it to make it more rigid. A floor that is adequate for a top-loading washer may not be rigid enough for a front loading washer, due to the difference in the spin speed and direction. If the floor is not solid, your washer may vibrate and you may hear and feel the vibration throughout your house.
Before installing the washer, make sure the floor is clean, dry and free of dust, dirt, water and oils so the washer feet can not slide easily. Leveling feet that can move or slide on the floor can contribute to excess vibration and noise due to poor contact with the floor.
If a drip pan must be used, take extra care to follow the instructions provided with the drip pan and make sure the leveling feet are adjusted for firm and even contact with the pan. Use of drip pans and failure to properly level the machine may result in increased vibration and noise during operation.
Installing on a Pedestal or Stacking Kit
Unpacking and Removing Shipping Bolts
When removing the washer from the carton base, be sure to remove the foam drum support in the middle of the carton base. If you must lay the washer down to remove the base packaging materials, always lay it carefully on its side.
Do NOT lay the washer on its front or back.
1. Starting with the bottom two shipping bolts, use the wrench (included) to fully loosen all four shipping bolts by turning them counterclockwise. Remove the bolt assemblies by wiggling them slightly while pulling them out.
2. Locate the four hole caps included in the accessory pack and install them in the shipping bolt holes
NOTE
Save the bolt assemblies for future use. To prevent damage to internal components, DO NOT transport the washer without reinstalling the shipping bolts.
Failure to remove shipping bolts and retainers may cause severe vibration and noise, which can lead to permanent damage to the washer. The cord is secured to the back of the washer with a shipping bolt to help prevent operation with shipping bolts in place.
Connecting the Water Lines
1. Check the rubber seals on both sides of the hose.
Insert a rubber seal into the threaded fittings on each hose to prevent leaking.
2. Connect the water supply hoses to the HOT and COLD water faucets tightly by hand and then tighten another 2/3 turn with pliers.
Connect the blue hose to a cold water faucet and the red hose to a hot water faucet.
4. Connect the hoses to the water inlets tightly by hand and then tighten another 2/3 turn with pliers.
Connect the blue hose to the cold water inlet and the red hose to the hot water inlet.
5 Check for leaks by turning on the faucets.
If water leaks, check steps 1 to 4 again.
NOTE
For your safety, and for extended product life, use only authorized components. The manufacturer is not responsible for product malfunction or accidents caused by the use of separately purchased, unauthorized parts.
Use new hoses when you install the washing machine. Do not reuse old hoses.
LG recommends the use of LG hoses. Any leaking, property damage, to the washing machine caused by an improper installation or by the use of non-LG hoses is not covered under the terms of the LG warranty and is the sole responsibilty of the customer and/or an installer.
Periodically check the hoses for cracks, leaks and wear, and replace the hoses every five years.
Do not stretch the water hoses intentionally, and make sure that they are not crushed by other objects.
Water supply pressure must be between 20 psi and 120 psi (138–827 kPa). If the water supply pressure is more than 120 psi, a pressure reducing valve must be installed.
To provide optimum washing performance the hot water temperature should be set at 120-135°F (48-57°C) and the cold at 60°F (15°C).
Connecting the Drain Line
Secure the drain hose in place to prevent moving and leaking.
NOTE
The drain hose should be properly secured. Failure to properly secure the drain hose can result in flooding and malfunction.
The end of the drain hose should not be less than 29 inches (73.7 cm) or more than 96 inches (243.8 cm) from the bottom of the washer.
The drain must be installed in accordance with any applicable local codes and regulations.
Make sure that the water lines are not stretched, pinched, crushed, or kinked.
Using a Standpipe
1. Clip the end of the hose into the elbow bracket.
Connect the elbow bracket within 4 inches (10 cm) from the end of the drain hose. If the drain hose is extended more than 4 inches (10 cm) beyond the end of the elbow bracket, mold or microorganisms could spread to the inside of the washer.
2. Insert the end of the drain hose into the standpipe.
3. Use a tie strap to secure the drain hose in place.
Using a Laundry Tub
1. Clip the end of the hose into the elbow bracket.
Connect the elbow bracket within 4 inches (10 cm) from the end of the drain hose. If the drain hose is extended more than 4 inches (10 cm) beyond the end of the elbow bracket, mold, or microorganisms could spread to the inside of the washer.
2. Hang the end of the drain hose over the side of the laundry tub.
3. Use a tie strap to secure the drain hose in place.
Leveling the Washer
The washer tub of your new washing machine spins at very high speeds. To minimize vibration, noise, and unwanted movement, the floor must be perfectly level and solid.
1. Check that the washer is level.
Rock the top edges of the washing machine or place a level on the washing machine. The slope beneath the washing machine must not exceed 1°, and all four leveling feet must rest firmly on the floor.
2. Turn the lower leveling feet clockwise to level the washing machine.
Turning the lower leveling feet clockwise raises the washing machine.
3. Turn the locknuts counterclockwise and tighten them when the washing machine is level.
4. Check again that the washer is level.
Push or rock the top edges of the washing machine gently to make sure that the washing machine does not rock.
If the washing machine rocks, repeat steps 1 to 3.
Using Non-Skid Pads (Optional)
If you install the washing machine on a slippery surface, it may move because of excessive vibration. Incorrect leveling may cause malfunction through noise and vibration. In the event of this, lay the nonskid pads under the leveling feet and adjust the level.
1. Clean the floor to attach the non-skid pads.
Use a dry rag to remove and clean foreign objects or moisture. If moisture remains, the non-skid pads may slip.
2. Level the washer after placing it in the installation area.
3. Place the adhesive side of the non-skid pad on the floor.
It is most effective to install the non-skid pads under the front legs. If it is hard to place the pads under the front legs, place them under the back legs.
4. Check again that the washer is level.
Push or rock the top edges of the washing machine gently to make sure that the washing machine does not rock. If the washing machine rocks, level the washing machine again.
Connecting to the Power Supply
Make sure to ground the washing machine to prevent a short circuit or an electric shock when plugging in.
Using a 3-Prong Outlet
Plug in the electrical outlet without additional grounding.
Testing the Washer
Check if the washing machine is properly installed and run a test cycle.
1. Load the washing machine with 6 pounds of laundry.
2. Press and turn to the right.
3. Press to Rinse + Spin.
4. Press .
The wash cycle starts.
5. Check if water is supplied, that the washing machine does not rock or vibrate excessively, and that it drains well during the spin cycle.
If water leaks during water supply, see page 14, Connecting the Water Lines to connect them properly.
If the washing machine rocks and vibrates excessively, see page 16, Leveling the Washer to level it again.
If the drain does not work, see page 15, Connecting the Drain Line to install it properly
OPERATION
Using the Washer
1. Load the laundry into the washing machine and close the door
2. Press .
The lights around the cycle selector knob will illuminate and a chime will sound.
3. Turn to the desired cycle.
The proper default option is automatically set according to the wash cycle. See page 23, Cycle Guide, for more detailed default options for each cycle.
See page 24, Wash Cycles, for details on the wash cycles.
To change the options, press the option button and select the desired option. See page 25, Setting Options before Cycle, for more details on options.
Skip to step 4 to use the default setting without changing the options
4. Add the proper amount of detergent and additions (bleach, softener) into the detergent dispenser drawer.
See page 20, Using Detergent/Fabric Softener, for more details on using detergent.
5. Press C.
The washing machine will start
6. When the melody plays, the wash cycle is finished.
When the washing cycle is finished, the door will unlock. Open the door and remove the laundry immediately.
Make sure to check around the door seal when taking out the finished load. Small items may be caught in the door seal.
Wash Cycles
You can wash laundry items more thoroughly by selecting the wash cycle that best suits the type of items to be washed. Turn the to the desired cycle. When you select a wash cycle, the light for the corresponding wash cycle will turn on. See page 22, Basic operation, for more details on operating methods.
Allergiene™ : Reducing Laundry Allergens
This cycle is a powerful, high temperature cycle designed specifically to reduce certain allergens.
NOTE
Selecting the Allergiene™ cycle automatically incorporates steam into the wash cycle.
The Allergiene™ cycle can significantly reduce allergens in bedding and clothing.
The Allergiene™ cycle helps reduce dust mite populations and helps reduce allergens.
Due to the higher energy and temperatures used, the Allergiene™ cycle is not recommended for wool, silk, leather, or any other delicate or temperature sensitive items
Sanitary : Reducing Laundry Bacteria
This wash cycle reduces 99% of bacteria on laundry through high temperature.
Bright Whites™ : White Fabrics
This cycle is for washing white items only.
Bulky/Large : Blankets or Bulky Items
This cycle is for washing blankets or bulky items.
Cotton/Normal: Normal Items
Use this cycle to wash all normal items, except delicate fabrics such as wool or silk.
NOTE
If you press and then without selecting another cycle, the washing machine proceeds to Cotton/Normal.
Heavy Duty : Heavily Soiled Items
This cycle is for washing heavily soiled laundry through more powerful tub rotation.
Perm. Press : Wrinkle-Free Items
This cycle is for washing items such as wrinkle-free clothes or tablecloths to minimize wrinkles.
Delicates : Sheer Items
This cycle is for washing lingerie or sheer and lacy clothes which can easily be damaged.
Towels
This cycle is for washing towels.
Speed Wash : Washing Quickly
Use the Speed Wash cycle to quickly wash lightly soiled clothing and small loads. For high wash and rinse efficiency, wash small loads of 2-3 lightly soiled garments.
Cycle Modifier Buttons
Each cycle has preset settings that are selected automatically. You may also customize the settings using the cycle modifier buttons. Press the button for that option to view and select other settings. The washer automatically adjusts the water level for the type and size of wash load for best results and maximum efficiency. It may seem there is no water inside the drum in some cycles, but this is normal.
Setting Options Before Cycle
You can select and add the desired optional functions before you start the washing machine.
Wash Temp.
Set the water temperature for the wash cycle. Set the appropriate temperature, as specified in the fabric care label.
1. Press and turn to the desired cycle.
2. Press repeatedly to select the desired water temperature:
When an optional item is selected, an indication light for the corresponding optional item turns on.
3. Modify other cycle settings and add desired options or proceed to step 4 to begin the cycle.
4. Press
NOTE
Cold rinses use less energy.
Your washer features a heating element to boost the hot water temperature for Extra Hot settings. This provides improved wash performance at normal water heater settings.
Select the water temperature suitable for the type of load you are washing. Follow the fabric care label for best results.
Spin Speed
The spin speed for each cycle has been set automatically. To change the spin speed for a cycle, follow the instructions below.
To protect clothing, follow manufacturers' instructions on fabric care labels.
1. Press and turn to the desired cycle.
2. Press repeatedly to select the desired spin speed.
When you select an option, an indicator light for the corresponding optional item turns on.
3. Modify other cycle settings and add desired options or proceed to step 4 to begin the cycle.
4. Press
Soil Level
You can wash your laundry more thoroughly by setting the proper soil level on the washing machine.
1. Press and turn to desired cycle.
2. Press repeatedly to select a soil level.
The indicator light for the corresponding selection turns on.
3. Modify other cycle settings and add desired options or proceed to step 4 to begin the cycle.
4. Press
Signal
The washing machine plays a melody when the wash cycle is finished. The buttons make a sound each time a button is pressed. Use this option to adjust the volume of the melody and button tones.
1. Press .
2. Turn to the desired cycle.
3. Press . Adjust the melody and button tones as desired.
4. Modify other cycle settings and add desired options or proceed to step 5 to begin the cycle.
5. Press .
Pre Wash
Prewash for 15 minutes when clothes are covered in dirt or dust. This feature is suitable for heavily soiled items.
1. Press and turn to the desired cycle.
2. Press .
light will turn on.
3. Modify other cycle settings and add desired options or proceed to step 4 to begin the cycle.
4. Press .
Rinse+Spin
Use this cycle to rinse detergent from load.
1. Press .
2. Modify other cycle settings and add desired options or proceed to step 3 to begin the cycle.
3. Press .
Extra Rinse
You can add an extra rinse cycle to the default rinse cycle.
1. Press and turn to the desired cycle.
2. Press .
light will turn on.
3. Modify other cycle settings and add desired options or proceed to step 4 to begin the cycle.
4. Press .
Delay Wash
Set the desired start time for a cycle.
1. Press and turn to the desired cycle.
2. Modify cycle settings and add desired options or proceed to step 3 to set the cycle start time.
3. Press repeatedly to select the desired start time.
light will turn on.
The set start time appears on the display panel.
Each press of the button increases the delay time by one hour, up to 19 hours.
4 Press .
Steam
Adding the Steam option to these cycles help to enhance washing performance. By using a hot steam fabrics get the cleaning benefits of a super hot wash.
1. Press and turn to the desired cycle.
2. Press . The washer will automatically adjust the cycle settings.
3. Set any other desired options.
4. Press
Water Plus
Use this option to add extra water to the wash and rinse cycles for better wash and rinse performance (Stain Treatment) with large or bulky items.
1. Press and turn to the desired cycle.
2. Press . The indicator light will turn on.
3. Modify cycle settings and add desired options or proceed to step 4 to begin the cycle.
4. Press .
Cold Wash™
Adding the Cold Wash™ option reduces energy usage and provides the same washing performance as a warm water wash. By using six different washing motions (tumbling, rolling, stepping, scrubbing, swing, and filtration) fabrics are cleaned while reducing energy usage.
1. Press and turn to the desired cycle.
2. Press The washer will automatically adjust the cycle settings.
3. Set any other desired options.
4. Press .
Setting Options During Cycle
You can add the desired options during the wash cycle.
Child Lock
This feature locks the controls to prevent children or others from changing the cycle settings by pressing the buttons during the cycle. The feature does not lock the door.
Enabling Child Lock
Press and hold for three seconds during the wash cycle.
When Child Lock is enabled, a N message and the remaining wash time are displayed, in turn, on the display panel of the washing machine.
Disabling Child Lock
Press and hold for three seconds during the wash cycle.
Add Garments
Use this function to add garments or remove foreign objects like coins or keys after the cycle has started.
Press The cycle pauses and the door unlocks.
Open the door, add garments or remove foreign objects, and close the door.
Press to restart the cycle. The cycle continues automatically.
Fresh Care
Use this function when you are not able to take out your clothes as soon as the wash cycle ends. This function provides periodic tumbling for up to about 19 hours to prevent wrinkles. Press the Start/ Pause or Power button to unload laundry at any time.
1. Press and turn to the desired cycle.
2. Press and hold for three seconds.
The light will turn on.
3. Select any desired options.
Skip to step 4 if you would like to use the default settings without changing or adding any options.
4. Press .
MAINTENANCE
Regular Cleaning
Care After Wash
After the cycle is finished, wipe the door and the inside of the door seal to remove any moisture. Leave the door open to dry the washer tub interior. Wipe the body of the washing machine with a dry cloth to remove any moisture.
Care in Cold Climates
Long-Term Storage
Follow these instructions when storing the washer for an extended period where it might be exposed to freezing temperatures.
1. Turn off the faucets connected with the water lines.
2. Unscrew the water lines from back of the washer.
3. Empty any water out of the water lines.
4. Press .
5. Open the door and add 1 gallon (3.8 L) of nontoxic recreational vehicle (RV) antifreeze to the empty washer tub. DO NOT use automotive anti-freeze. Close the door.
6. Press for draining and spinning.
7. Press .
Drain the water from the washing machine for 1 minute. Not all of the RV antifreeze will be expelled.
8 Press to turn off the washing machine and pull out the power plug.
9 Dry the tub interior of the washer tub with a soft cloth, and close the door.
10. Press down hard on the disengage button and pull out the detergent dispenser drawer.
11. Drain the water from the detergent dispenser drawer and dry out each compartment.
12. Store the washing machine in an upright position.
Thawing Frozen Water Lines
1. Turn off the faucets connected with the water lines.
2. Pour hot water on the frozen faucets to thaw the water lines and pull them out.
3. Immerse the water lines in hot water to thaw them.
4. Connect the water lines with the water inlets of the washing machine and faucets.
See page 14, Connecting the water lines for details.
5. Turn on the faucets.
6. Press
7. Press .
8. Press
Verify the water fills properly.
Thawing Frozen Drain Lines
1. Pour hot water in the washer tub and close the door.
Leave it for 10 minutes.
2. Press after 10 minutes.
3. Press [ | for draining and spinning.
4. Press
- Check if the water drains.
Cleaning
Periodically clean the washing machine to help maintain its performance and to minimize the chance of malfunction.
Tub Clean
"Improper installation or use of the washing machine in a humid space for a long period of time potentially could lead to a buildup of detergent residue in the washing machine that may produce mildew or musty smells. If you clean the washer tub regularly on a monthly basis using Tub Clean it will minimize the possibility that detergent residue will build up and mildew or musty smells may occur."
1. Add tub cleaner or lime scale remover into the detergent dispenser drawer.
Do not exceed the maximum detergent limit line when you add it. Detergent may remain in the washer tub after cleaning.
When you use liquid chlorine bleach, load it into the liquid chlorine bleach compartment.
When you use a powdered cleaner, pull out the liquid detergent cup and add it into the main wash detergent compartment.
When you use cleaning tablets, place them directly into the washer tub. (Do not add tablet cleaner to the drawer.)
2. Press .
3. Turn to Tub Clean.
message appears in the display.
The indication light for Tub Clean turns on.
4. Press
NOTE
Never load laundry while using Tub Clean. The laundry may be damaged. Make sure to clean the washer tub when it is empty.
It is recommended to leave the door open after finishing the laundry to keep the tub clean.
It is recommended that Tub Clean should be repeated monthly.If you notice mildew or musty smells, run Tub Clean for 3 consecutive weeks.
Safely and conveniently secure the door slightly ajar with a magnetic door plunger. This will promote air circulation and help the machine to dry.
Automatic Alert
When the power is on and the O O message blinks, it means the washer tub needs cleaning. Use Tub Clean to clean the washer tub. The automatic indication alert for cleaning the washer tub depends on the frequency of use, however, the message will generally blink every 1~2 months.
Removing Mineral Buildup
If you live in an area with hard water, mineral scale can form on the internal components of the washing machine. Take extra care to periodically clean the mineral buildup on the internal components to extend the lifespan of the washing machine.
Check if the descaler is suitable for cleaning the washer tub before using it and run the Tub Clean cycle. See page 30, Tub Clean, for details on tub clean.
Removing Lime Buildup on Stainless Steel
Wipe lime buildup or other spots on stainless steel with a soft cloth soaked in stainless steel cleaner.
Cleaning the Detergent Dispenser Drawer
Leaving detergent in the detergent dispenser drawer for an extended period of time or using the washing machine for a long period of time may cause the build-up of scales in the detergent dispenser drawer. Pull out and clean the detergent dispenser drawer once a week.
1. Pull out the detergent dispenser drawer.
2. Press down hard on the disengage button and pull out the detergent dispenser drawer.
3. Remove the inserts from the drawer.
4. Clean them with warm water.
Use a soft cloth or brush for cleaning and remove any residue.
5. Wipe any moisture with a dry towel or cloth after cleaning.
6. Replace the detergent dispenser drawer.
Cleaning the Water Inlet Filters
Clean the water inlet filters periodically to prevent clogging. Take extra care to clean the water inlet filters for areas using hard water. Water may not be supplied if there are foreign objects, such as rust, sand, or stones in the water inlet filters.
1. Press to turn off the washing machine and pull out the plug.
2. Turn off the faucets connected with the water inlets.
3. Remove the water inlets.
4. Pull out the water inlet filter.
5. Remove foreign objects from the water filter inlet.
Soak the water filter inlets in white vinegar or a lime scale remover or use a toothbrush to remove foreign objects and rinse thoroughly.
6. Press the water filter inlets back into place.
7. Reattach the water lines to the washing machine.
Cleaning the Drain Pump Filter
The washing machine fails to drain if the drain pump filter is clogged. Periodically clean the drain filter to prevent clogging with foreign objects.
1. Press to turn off the washing machine and pull out the plug.
2. Open the drain pump filter cover.
3. Unclip the drain hose and remove the plug from the drain hose to drain the remaining water.
4. Twist the pump filter counterclockwise to remove.
5. Clean the pump filter and opening.
6. Recap the plug onto the drain hose and reattach the drain hose.
7. Insert the drain pump filter.
8. Close the drain pump filter cover.
Cleaning the Door Seal
Clean the door seal once a month to prevent buildup of dirt in the door seal.
Wear rubber gloves and protective goggles.
Dilute 3/4 cup (177 ml) of liquid chlorine bleach in 1 gallon (3.8 L) of water.
Soak a sponge or a soft cloth in this diluted solution and wipe all around the door seal.
Wipe any moisture with a dry towel or cloth after cleaning.
Leave the door open to allow the door seal to dry completely.
TROUBLESHOOTING
Checking Error Messages
If the following message appears on the display, check the following and take the appropriate corrective action.
Message
Possible Causes
Solutions
Item of clothing has gathered on one side of the tub.
• There are not enough items in the machine.
• Have your items gathered in one area, or is the load too small?
• Did you wash a stuffed animal, a mat, or knitwear?
• Did you wash two different blankets together?
• Rearrange items to help balance the load.
• Stuffed animals or mats can become unbalanced during spinning and the washing machine may fail to drain. Rearrange the knitwear to help balance the load and drain it again.
• Put one blanket in at a time.
Water is not supplied or the water pressure is low
• Is the faucet turned off?
• Is the water supply stopped or the faucet frozen?
• Is the water pressure low or is an inlet filter clogged?
• Is the water line properly connected with the cold water inlet?
• Is the water line pinched or bent?
• Turn on the faucets.
• If a faucet is frozen, thaw it with warm water.
• If the inlet filter is clogged, clean it. (see page 32)
• Connect the water line properly with the cold water inlet. (see page 14)
• Check that the water lines are not pinched or bent. Take extra care that water lines are not twisted or pinched by other objects.
Water line leaks in connection
• Are the water lines connected with the faucets properly?
• Connect the water lines properly with the faucets. (see page 14)
The tub does not rotate
• Is the door secured?
• Close and secure the door. If the message keeps appearing, unplug the power and contact your nearest LG service center.
The washing machine drains slowly or not at all
• Is the drain hose installed over 3 1/4 feet (1 m) beyond the end of the elbow bracket?
• Is the drain hose pinched or clogged inside?
• Is the drain hose frozen?
• Is the drain hose clogged with foreign objects?
• Lower the drain hose within 3 feet below the end of the elbow bracket.
• Place the drain hose on a smooth surface to prevent bending.
• If the drain hoses are frozen, thaw them in warm water.
• Open the drain pump plug cap and remove the dirt.
A power failure has occurred.
• Press @ to turn off the washing machine and press it again to turn it on.
Control Error.
• Unplug the power cord and contact your nearest LG service center.
The water supply does not stop
• Do the water supply and the drain keep repeating in turn?
• Unplug the power cord and contact your nearest LG service center
The water level is not controlled • Is the water level too low or high compared with the size of the load?
• The water level sensor is not working correctly.
• Unplug the power cord and contact your nearest LG service center.
The tub does not rotate • Is the washing machine overloaded?
• Rearrange the load size and restart the washing machine.
• If the load size is big, the tub may not rotate due to an overheated motor. Allow the washing machine to stand for a while and restart the cycle. Unplug the power cord and contact your nearest LG service center if the same error message appears.
• To clean up the tub, please run the Tub Clean cycle.
• Please empty the tub and insert bleach into the detergent dispenser and select the Tub Clean cycle.
• If you want to skip the Tub Clean, turn the CYCLE SELECTOR KNOB or push option buttons to select desired cycle. In this case, you would see the message again until few washing times and it would be disappear until next point of time to clean the tub.
• If the washing machine detects too many suds, it displays this error code and adds a Suds Reducing cycle. This adds about two hours to the cycle time. If too many suds are detected during spinning, the washing machine stops to help prevent leaking.
• Do not add more than the manufacturer's recommended amount of detergent.
Before Calling for Service
Check the following before calling for service.
Problem
Possible Causes
Solutions
Clicking sound
• Do you hear a sound when you close or lock and unlock the door?
• This sound is normal and occurs when the door is closed, locked or unlocked.
Spraying or hissing sound
• Is water spraying in the tub?
• This sound is normal as water is spraying or circulating during the cycle.
Buzzing or gushing sound
• Is the washing machine draining water?
• This sound is normal as the drain pump drains water from the washing machine after the cycle.
Splashing sound
• Is the washing machine washing a load of laundry?
• This sound is normal as the load is moving up and down during the wash and rinse cycles.
Rattling and clanking noise
• Are there any foreign objects such as keys, coins, or safety pins in the tub or drain filter?
• Check if there are any foreign objects in the tub and drain the filter after stopping the cycle.
• Unplug the power cord and contact your nearest LG service center if the noise persists.
Thumping sound
• Is the washing machine overloaded?
• Is the load out of balance?
• This sound is normal and occurs when the load is out of balance. Stop the cycle and rearrange the load for balancing.
Vibrating noise
• Are the shipping bolts removed?
• Is the load evenly distributed in the tub?
• Is the washing machine level balanced?
• Is the washing machine installed on a solid and smooth surface?
• See page 13, Unpacking and removing shipping bolts to remove the shipping bolts.
• Stop the cycle and rearrange the load for balancing.
• See page 16, Leveling the washing machine to level the washing machine.
• Check if the floor is solid and level.
Water leaking around washer
• Does water leak from a faucet or a water line?
• Is a drain pipe or a drain hose clogged?
• Check the faucets or water lines.
- If the water lines are loosely
connected, see page 14, Connecting water lines to connect them properly.
• Unclog the drain pipe or drain hose. Contact a plumber if necessary.
Excessive suds or failure to rinse
• Did you use more than the recommended amount of detergent?
• Is the soil level higher than the size of the load?
• Use the recommended amount of detergent for load.
• If the contamination level is low, reduce the detergent quantity to less than the recommended level.
Only use detergent with the HE (High-Efficiency) logo.
Staining
• Did you add detergent directly to the tub?
• Did you remove the load immediately after it finished?
• Did you sort and wash the clothes by color or soil?
• Make sure to load detergent into the detergent dispenser drawer.
• Remove the load immediately after it finishes.
• Sort and separate dark colors from light or white ones, and heavily soiled items from lightly soiled ones. See page 19, Sorting laundry for details
Wrinkling
• Did you remove the load immediately after it finished?
• Did you overload the tub?
• Did you reverse the hot and cold water inlets?
• Remove the load immediately after it finishes.
• Do not overload the tub.
• Hot water rinse can cause garments to wrinkle. Check the inlet hose connections.
Power is not turned on
• Is the power cord plugged in properly?
• Has a house fuse blown, a circuit breaker tripped, or a power outage occurred?
• Make sure that the plug is secured in a grounded 3-prong, 120 V (60 Hz) outlet.
• Reset the circuit breaker or replace the fuse. Do not increase the fuse capacity. If the problem is a circuit overload, have it corrected by a qualified electrician.
The door does not open when the cycle pauses or finishes
• Is the temperature in the tub too high?
• Is the water level in washer high?
• The washing machine has a safety lock built into the door to prevent burning. Leave the door closed and wait until the door lock icon disappears from the display.
• Allow the washer to complete the programmed cycle, or Press the SPIN button.
The wash cycle time is longer than usual
• Is the washing machine overloaded? Are other options added to the wash cycle?
• This is normal. The washing machine automatically adjusts the cycle time for the amount of laundry, water pressure, water temperature, and other operating conditions.
It is musty or moldy in the tub
• Has the incorrect detergent been used?
• Did you clean the tub periodically?
• Use only HE (High-Efficiency) detergent recommended for a front-loading washing machine.
• See page 30, clean the inside and outside of the washing machine periodically.
Banging noise when washer is filling with water (Water Hammer)
• Plumbing in the home moves or flexes when the water valves in the washer shut off.
• Water hammer is not caused by a defect in the washer. Install water hammer arrestors (purchased separately at hardware or home improvement store) between the fill hose and the washer for best results.
• Household water supply pressure is very high.
• Adjust household water supply regulator to a lower pressure or contact a plumber to have a regulator installed.
Odor
• This odor is caused by the rubber attached to the washing machine.
* It is the normal odor of new rubber and will disappear after the machine has been run a few times.
• If the rubber door gasket and door seal area are not cleaned regularly, odors can occur from mold or foreign substances.
* Be sure to clean the gasket and door seal regularly and check under the door seal for small items when unloading the washer.
* Odors can occur if foreign substances are left in the drainage pump filter.
• Be sure to clean the drainage pump filter regularly.
* Odors can occur if the drainage hose is not properly installed, causing siphoning (water flowing back inside the washing machine)
• When installing the drainage hose, be sure that it doesn't become kinked or blocked.
* Using the dry function, odors can occur from lint and other laundry matter sticking to the heater. (Dryer model only)
• This is not a malfunction.
* A particular odor can occur from drying wet clothes with hot air. (Dryer model only)


 and turn
  to the right.
  to Rinse + Spin.
  .
. 

 .
. 
 to the desired cycle.


 to the desired cycle. When you select a wash cycle, the light for the corresponding wash cycle will turn on. See page 22, Basic operation, for more details on operating methods.
 and then
  without selecting another cycle, the washing machine proceeds to Cotton/Normal.
 and turn
  to the desired cycle.
 repeatedly to select the desired water temperature:
 repeatedly to select the desired spin speed.
 repeatedly to select a soil level.
 . Adjust the melody and button tones as desired.
  .
.  .
.  .
.  .
.  repeatedly to select the desired start time.
  . The washer will automatically adjust the cycle settings.
  The indicator light will turn on.
  The washer will automatically adjust the cycle settings.
  for three seconds during the wash cycle.
  The cycle pauses and the door unlocks.
  for three seconds.
 .
.  for draining and spinning.
 .
. 
 .
. .
. to Tub Clean.
 message appears in the display.


 to turn off the washing machine and pull out the plug.