User Guide for Blood Pressure Monitor
PARTS AND COMPONENTS

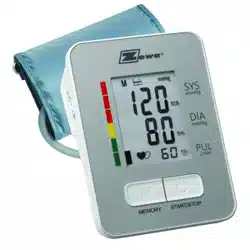
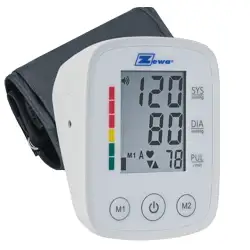
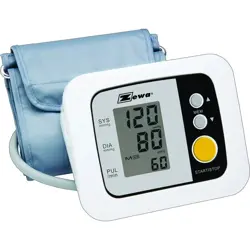
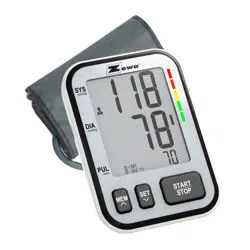
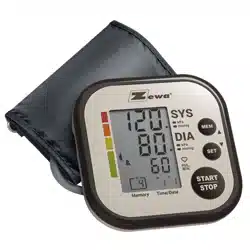
1.Main Body
2.LCD Display
3.Air Connector
4.Tube Plug
5.Air Hose
6.Cuff7.D-ring
8.Button 'M’
9.Button ' '
'
10.Batteries (Optional)
SYMBOL

GENERAL
This instruction manual is intended to assist the user for safe and efficient operation of the automatic digital blood pressure monitor (hereinafter: device) model UAM-720. The device must be used in accordance with the procedures described in the manual. It is important to read and understand the entire manual. especially the section <Tips for taking blood pressure measurement>.
This device is intended for the non-invasive measurement of systolic and diastolic arterial blood pressure and pulse rate in adults (age 15 and above). Consult the physician if measurement is taken in children or persons with arrhythmia as errors may occur.
PRINCIPLE OF OPERATION
This device adopts the oscillometric technology with Fuzzy Algorithm measuring the arterial blood pressure and pulse rate. The cuff is wrapped around the arm and automatically inflated by the air pump. The sensor of the device catches weak fluctuation of the pressure in the cuff produced by extension and contraction of the artery of the arm in response to each heartbeat. The amplitude of the pressure waves is measured. converted in millimeters of the mercury column. and is displayed by digital value.
Annotation: This device can not provide reasonable accuracy if used or stored in the temperature or humidity beyond the range stated in the section <SPECIFICATIONS> of this manual.
CAUTION: DO NOT USE THE DEVICE OUTDOORS
NEW TECHNOLOGIES USED
Fuzzy Algorithm is the processing algorithm taking into account of the speciality of individual heartbeats. which provides higher accuracy of measurement.
Software version: V1.1
TIPS FOR TAKING BLOOD PRESSURE MEASUREMENT
1. It is important to know that arterial blood pressure constantly changes. The level of the arterial blood pressure depends on many factors. Generally arterial blood pressure is lower in summer and higher in winter. Arterial blood pressure changes with atmosphere pressure and is affected considerably by many factors. e.g. exercise. emotional excitability. stress. meals. etc. Medicines. drinking. smoking affects greatly the level of individual blood pressure. When blood pressure is measured in hospital. the value is always higher than that at home. The reason is the tensity and such case is especially serious in given group patients. which is known as White coat effect’ medically. Blood pressure will raise in low tempera ture. so it is better to take blood pressure measurement in room temperature (approximately 20°C). If this device was stored in low temperature. it is necessary to leave it in room temperature for at least 1 hour. otherwise the measurement can be inaccurate. Blood pressure does vary with age and individual. and it is recommended to write down the readings in blood pressure record daily. then you can check with your doctor to find out what is “normal blood pressure” for you.

2. Take measurement under doctor's instruction for patients with cardio-vascular diseases.
Under no circumstances should you alter the dosages of any drugs prescribed by your doctor!
3. Accurate measurement of blood pressure may be difficult in arrhyth mia. premature beat. atrial fibrillation atreriosclerosis hypoperfusion diabetes pregnancy nephropathy. weak pulse. or in patients with obvious fluctuation of heart contraction rhythm. Please consult a qualified physician to interpret your blood pressure readings.
4. lt is necessary to keep quiet during measurement to get accurate readings. Measurement should be conducted in quiet environment at room temperature. Don't eat or smoke before a measurement.This device includes 1 upper arm cuff. Care should be taken to ensure that the cuff size is appropriate for the person whose blood pressure is being taken. Children and adults with cuff size fall outside the range of the cuff should select special size cuffs. Please contact the dealer to get these special size cuffs.
CLASSIFICATION
- ME EQUIPMENT not intended for use in an oxygen rich environment or in the presence of flammable mixers.
- Internally powered equipment (without adapter). Class Il equipment (with adapter).
- Type BF applied part. recognize the cuff as applied part.
BATTERY INSTALLATION
1.Open the battery cover and install four AA’ type batteries into the battery compartment as indicated. Make sure that the polarity is correct;
2.Close the battery compartment cover.
- Replace the batteries when the replacement indication “
 "appears in the display or nothing after “ ” button is pressed;
- Batteries in this kit are intended to check work capacity of the device and the life-span of the batteries can be shorter than the recommended;
- Use R6. R6 or AA alkaline batteries. do not use rechargeable batteries;
- Only same type batteries are allowed to use together. Replace all batteries simultaneously;
- If the device is to be unused for long time. please take out the batteries;
- Don't leave the worn batteries in the device.
USE THE DEVICE WITH AC POWER ADAPTER
Besides batteries you can use AC power adapter as the power supply. AC power supply is not included. but is available for purchase.
Insert the AC adapter cord into the jack on the right side of the monitor .
Insert the AC adapter plug into the outlet.
To remove the AC adapter. disconnect the adapter plug from the AC outlet first and then disconnect the cord from the monitor's jack.
CAUTION
- When using optional AC adapter. the AC adapter must comply with the requirements of standard IEC60601-1.
- To avoid possible damage to the monitor. use only the exclusive AC adapter that can be purchased from authorized dealers. Other adapter may damage the blood pressure monitor.
- The AC adapter is used as an isolating means. the AC adapter plug shall insert into the outlet nearby the operator. make it easy to disconnection the device from the outlet.
- If long time work. remove the plug after the adapter cools. and prevent bums.
Note: The monitor is designed not to draw power from the batteries when the AC adapter in use.
Optional AC adapter technical feature:
Output voltage: 6V+5%
Max. output current: At least 600 mA
Output plug polarity: <-> inner

CORRECT POSTURE FOR MEASUREMENT
1.Sit in a chair with your arm placed on a table in front of you. feet flat on the floor. The cuff should be on the same level as your heart.

USING THE CUFF
1. Put the cuff on the left upper arm with the tube pointing to the direction of palm. If measurement on your left arm is difficult. you can use right arm for measurement. In this case. it is necessary to know that the readings may differ about 5-10 mmHg between left arm and right arm.
2.Wrap cuff around your upper arm with the lower edge of the cuff approximately 2-3 centimeters above the elbow. The mark <ARTERY> must be over the artery of the arm.
3.Press the cuff to make sure that it is attached securely. The cuff should not be too tight or too loose.
Two fingers should be easily put in between cuff and upper arm.
4.The mark <INDEX> on the cuff must point to area <NORMAL> or <LARGE CUFF>. This means the cuff size is correct. If mark <INDEX> points to the area beyond area <NORMAL> or <LARGE CUFF>. please consult your dealer whether you need another size cuff.
5.lf your clothes restrict blood circulation of your upper arm. or you roll your sleeve up so as to result in such restriction. Please take off your clothes to get accurate measurement if necessary.

TAKE A MEASUREMENT
1. Insert the tube plug into the air connector. Before the measurement. take 3~5 times deep breath and relax yourself. Don’t talk or move your arm;
2. Press button . and all symbols will appear on display in 2 seconds as Fig.1. Then two short beep will sound and 0’ will appear on the screen. Pump begins to inflate with display showing the reading of pressure. Generally the pressure will reach 190mmHg as Fig.2;
3. The pump stop inflating and pressure begins to decrease gradually. during which the user's blood pressure and pulse will be calculated as Fig.3;
4.There will be a long beep following the accomplishment of measurement. The air in the cuff will deflate quickly and the blood pressure reading. pulse reading will show in the display as Fig.4;
5.Press the button to turn off the device. Please rest for at least 3 minutes for another measurement. If the power supply is not switched off and the device keeps unused for 3 minutes. the device will be switched off automatically.
AUTOMATIC INFLATION
The devices uses 4 different inflation pressures: 190mmHg. 230mmHg. 270mmHg and 300mmHg. When 190mmHg is not enough or movement of arm occurs. the device will automatically inflate to reasonable pressure level to ensure a successful measurement. It is not a fault.
RAPID DEFLATION DURING MEASUREMENT
If you do not feel well during measurement or want to stop the measure ment for some reason. you can press the “ ” button. The device will quickly release the air in cuff and the device will be switched off.

MEMORY FUNCTION
MEMORY RECALL
1. UAM-720 can store 90 sets of readings and automatically calculate the average value of the latest 3 readings. When the memory is full (90 sets of readings are stored), the oldest reading will be replaced by new one automatically. Memory will not clear away even if power supply is removed;
2. After a measurement or when the device stands by, the user can press button Memory to recall memory. Press button Memory, the display will show the average value of the latest 3 readings as Fig. 5;
3. Press again, the display will show ‘01’, which means the latest reading, then turns to another screen to show readings as Fig. 6;
4. Press again, the display will show ‘02’, which means the second to the latest reading...

MEMORY CLEARANCE
After a measurement is finished or when the device stands by, hold down button Memory for at least 5 seconds, the display will show ‘CLR’ which means all the stored reading are removed as Fig.7.
WHO BLOOD PRESSURE CLASSIFICATION INDICATION
Standards for assessment of high or low blood pressure, regardless of age, have been established by World Health Organization(WHO) as shown in the chart below:

The indicator displays a segment, based on the current data, corresponding to the WHO classification.
For example, if your blood pressure is 135mmHg (Systolic Pressure), 78mmHg (Diastolic Pressure),according to the world health organization standard, your blood pressure level is High Normal.
Note:
1 .If the systolic blood pressure and diastolic blood pressure fall into different categories, the higher value should be taken for classification.
2. The WHO blood pressure classification indication in the device is only a reminder, it can not be regarded as the final diagnosis.
|
INDICATION
|
POSSIBLE REASON
|
CORRECTION METHODS
|
 |
The cuff is put on wrongly or the tube plug is inserted too loosely. Movement of arm/hand or talking during measurement.
The cuff is not inflated to necessary pressure. Arrhythmia.
|
Make sure that cuff is put on correctly and the tube plug is inserted tightly and repeat the measurement.
Repeat the measurement with following completely recommendations of manual.
Repeat the measurement with pumping cuff to higher pressure Consult your personal physician.
|
 |
The batteries are weak
|
Replace all 4 batteries with new ones.
|
CARE, STORING, REPAIR AND RECYCLING
1. It’s necessary to protect this device against high moisture, direct sunlight, shock, solvent, alcohol and gasoline.
2. Remove the batteries if the device is to be stored for a long time and keep the batteries far from the children.
3. Keep the cuff from sharp subject and don’t extend or twist the cuff.
4. Use only soft and dry cloth to clean the device.
5. The BP Monitor must be handled with care. You can clean the cuff cover with damp cloth as daily maintenance.
To avoid across infection when share the cuff, you can sanitary treatment of inner side of fabrics cover of the cuff and contacting with help oT cottorr woof tampons, moistened by 3% solution of Tvydrogerv dioxide. After long using, it is allowed partial discoloration of fabrics covering of the cuff. It is not allowed the laundry of the cuff, as well as ironing by hot flatiron.
WARNING: Under no circumstances may you wash the inner bladder!
6. Since neither the device nor batteries are household waste, follow your local recycling rules and dispose them at appropriate collection sites.
7. Do not open the device. It is delicate electrical components and an intricate air unit that could be damaged. If you can not fix the problem using the troubleshooting instruction, request service from your dealer.
8. It is generally recommended to have the monitor inspected every 2 years, to ensure proper functioning and accuracy and safety. Please contact your dealer for maintenance.
WARNING: Do not modify the equipment without authorization of the manufacturer.
9. Do not serve or maintain the cuff when in use with patient.
TROUBLESHOOTING
|
SYMPTOM
|
CHECK POINT
|
REMEDY
|
|
No display when connect the power.
|
- The batteries have run down.
- The polarity of battery is wrong.
- The contact of battery compartment is polluted.
|
- Replace all the batteries with new ones.
- Install the batteries correctly.
- Clean the battery terminals with dry cloth.
|
|
Inflation stops and re-inflate later.
|
- The automatic inflation for ensuring correct measurement.
- Did you talk or move your arm (or hand) during measurement?
|
- See<AUTOMATIC INFLATION>
- Keep quiet and silent during the measurement.
|
|
The reading is extremely low or high.
|
- Is the cuff at the same level as the heart?
- Is the cuff wrapped right?
- Did you strain your arm during measurement?
- Did you talk or move your arm (or hand) during measurement?
|
- Make sure that your posture is right.
- Wrap the cuff correctly.
- Relax during measurement.
- Keep quiet and silent during the measurement.
|
|
Pulse rate is too low or too high.
|
- Did you talk or move your arm (or hand) during measurement?
- Did you make measurement right after exercise?
|
- Keep quiet and silent during the measurement.
- Take measurement again after resting for more than 5 minutes.
|
|
The batteries are run down soon.
|
- Faulty batteries are used.
|
- Use alkaline batteries of known manufacturers.
|