Owner's Guide Refrigerator
PARTS AND FEATURES
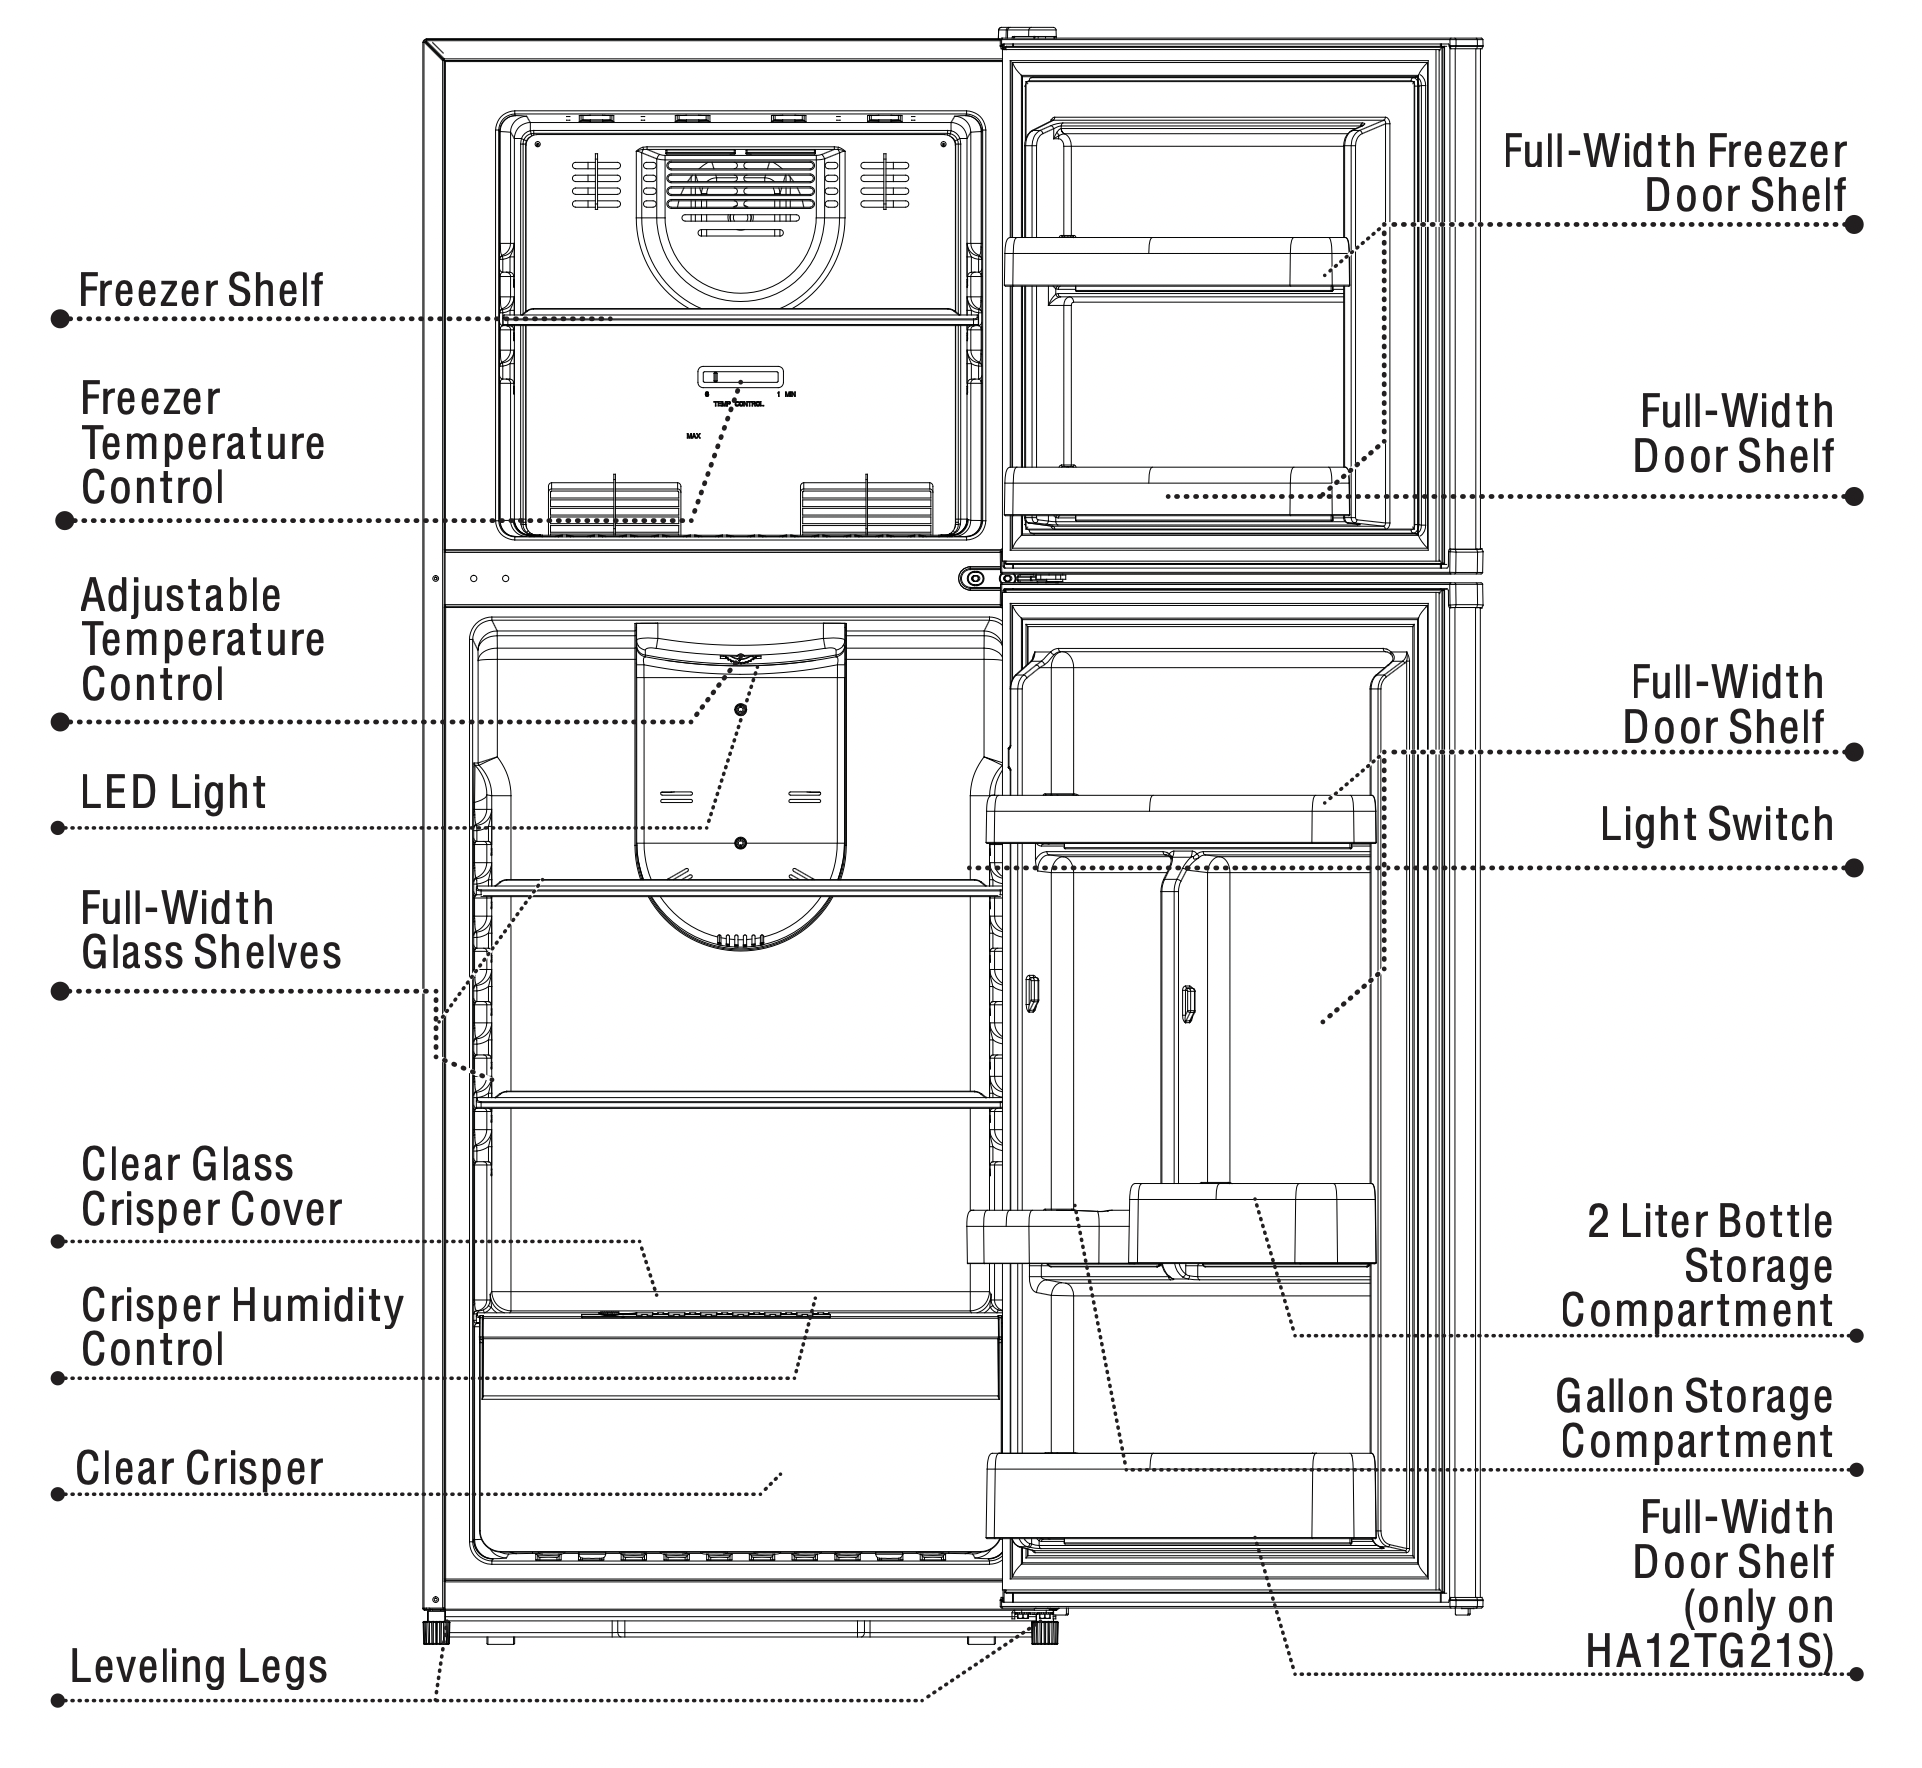
REFRIGERATOR USE
ADJUSTABLE TEMPERATURE DIAL
Your refrigerator will automatically maintain the temperature level you select. The temperature control dial has 7 settings. 1 is the warmest. 7 is the coldest. At first, set the dial to 4 and allow 24 hours to pass before adjusting the temperature to your needs.
To adjust the temperature range in the cold setting, turn the temperature dial in a clockwise direction. For normal operating conditions, keep the dial halfway between cold and coldest.
For your convenience, the factory presets the control at normal operating conditions.
NOTE: If the refrigerator has been placed in a horizontal or tilted position for any period of time wait 24 hours before plugging the unit in.
Freezer Section
Your freezer compartment is equipped with adjustable temperature control. For your convenience, temperature is preset by the factory to the colder setting. There is also an option to adjust the settings, either to cold or to coldest.
REFRIGERATOR SECTION INTERIOR LIGHT
Your refrigerator is equipped with an interior light in the fresh food section for you to easily locate your food.
FROST- FREE REFRIGERATOR-FREEZER
You should never need to defrost your freezer, as it automatically defrosts any ice build-up that may occur.
DANGER - RISK OF FIRE OR EXPLOSION: Flammable refrigerant used. Do not use mechanical devices to defrost refrigerator or freezer. Do not puncture refrigerant tubing.
REFRIGERATOR INTERIOR SHELVES
(Shelves may vary by model)
The shelves of your refrigerator were designed with you in mind. Their varied adjustability allows you to satisfy your personal storage needs.
To remove or adjust a full-width slideout shelf: (see Fig. 9)
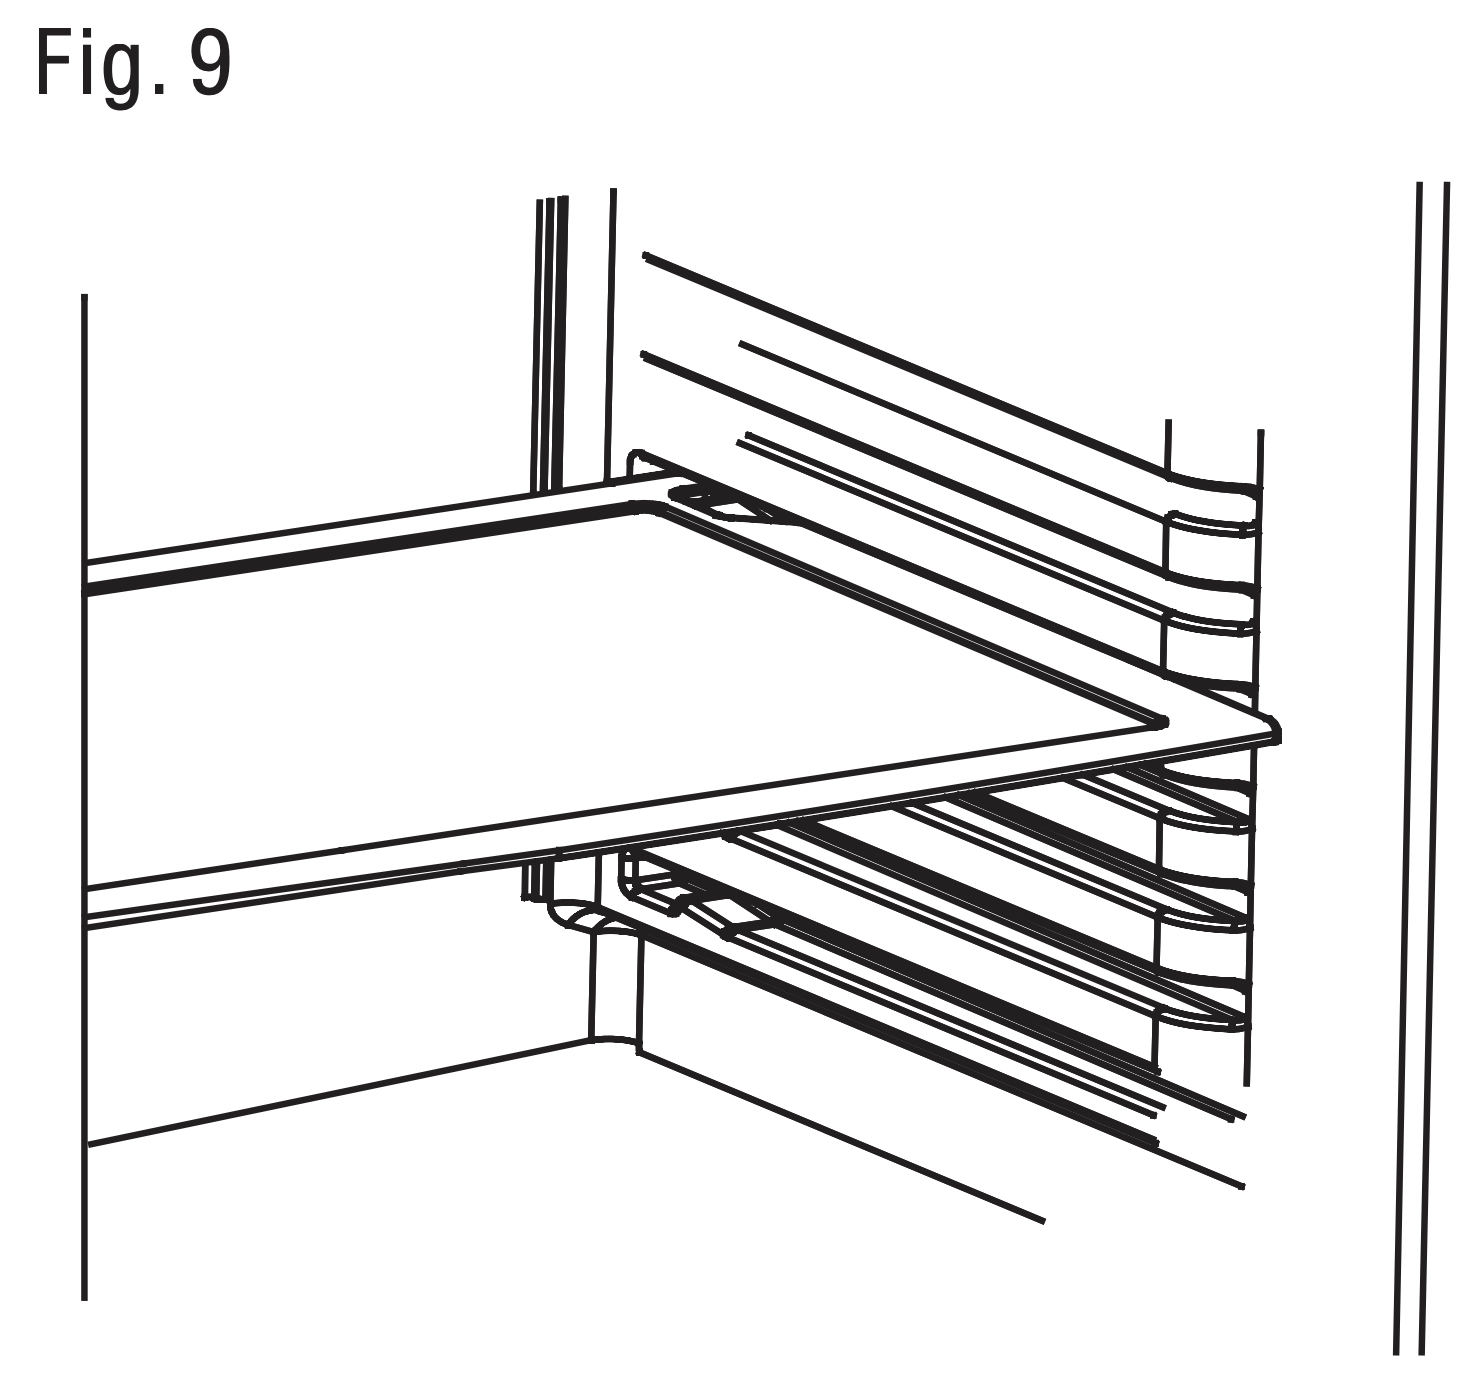
- Gently tilt the shelf up and slide forward until the shelf has been completely removed.
- To replace the shelf, select the desired setting and gently slide the shelf back until it rests in the locking position.
CRISPERS AND CRISPER COVER
To remove and install the crisper: (see Fig. 10)
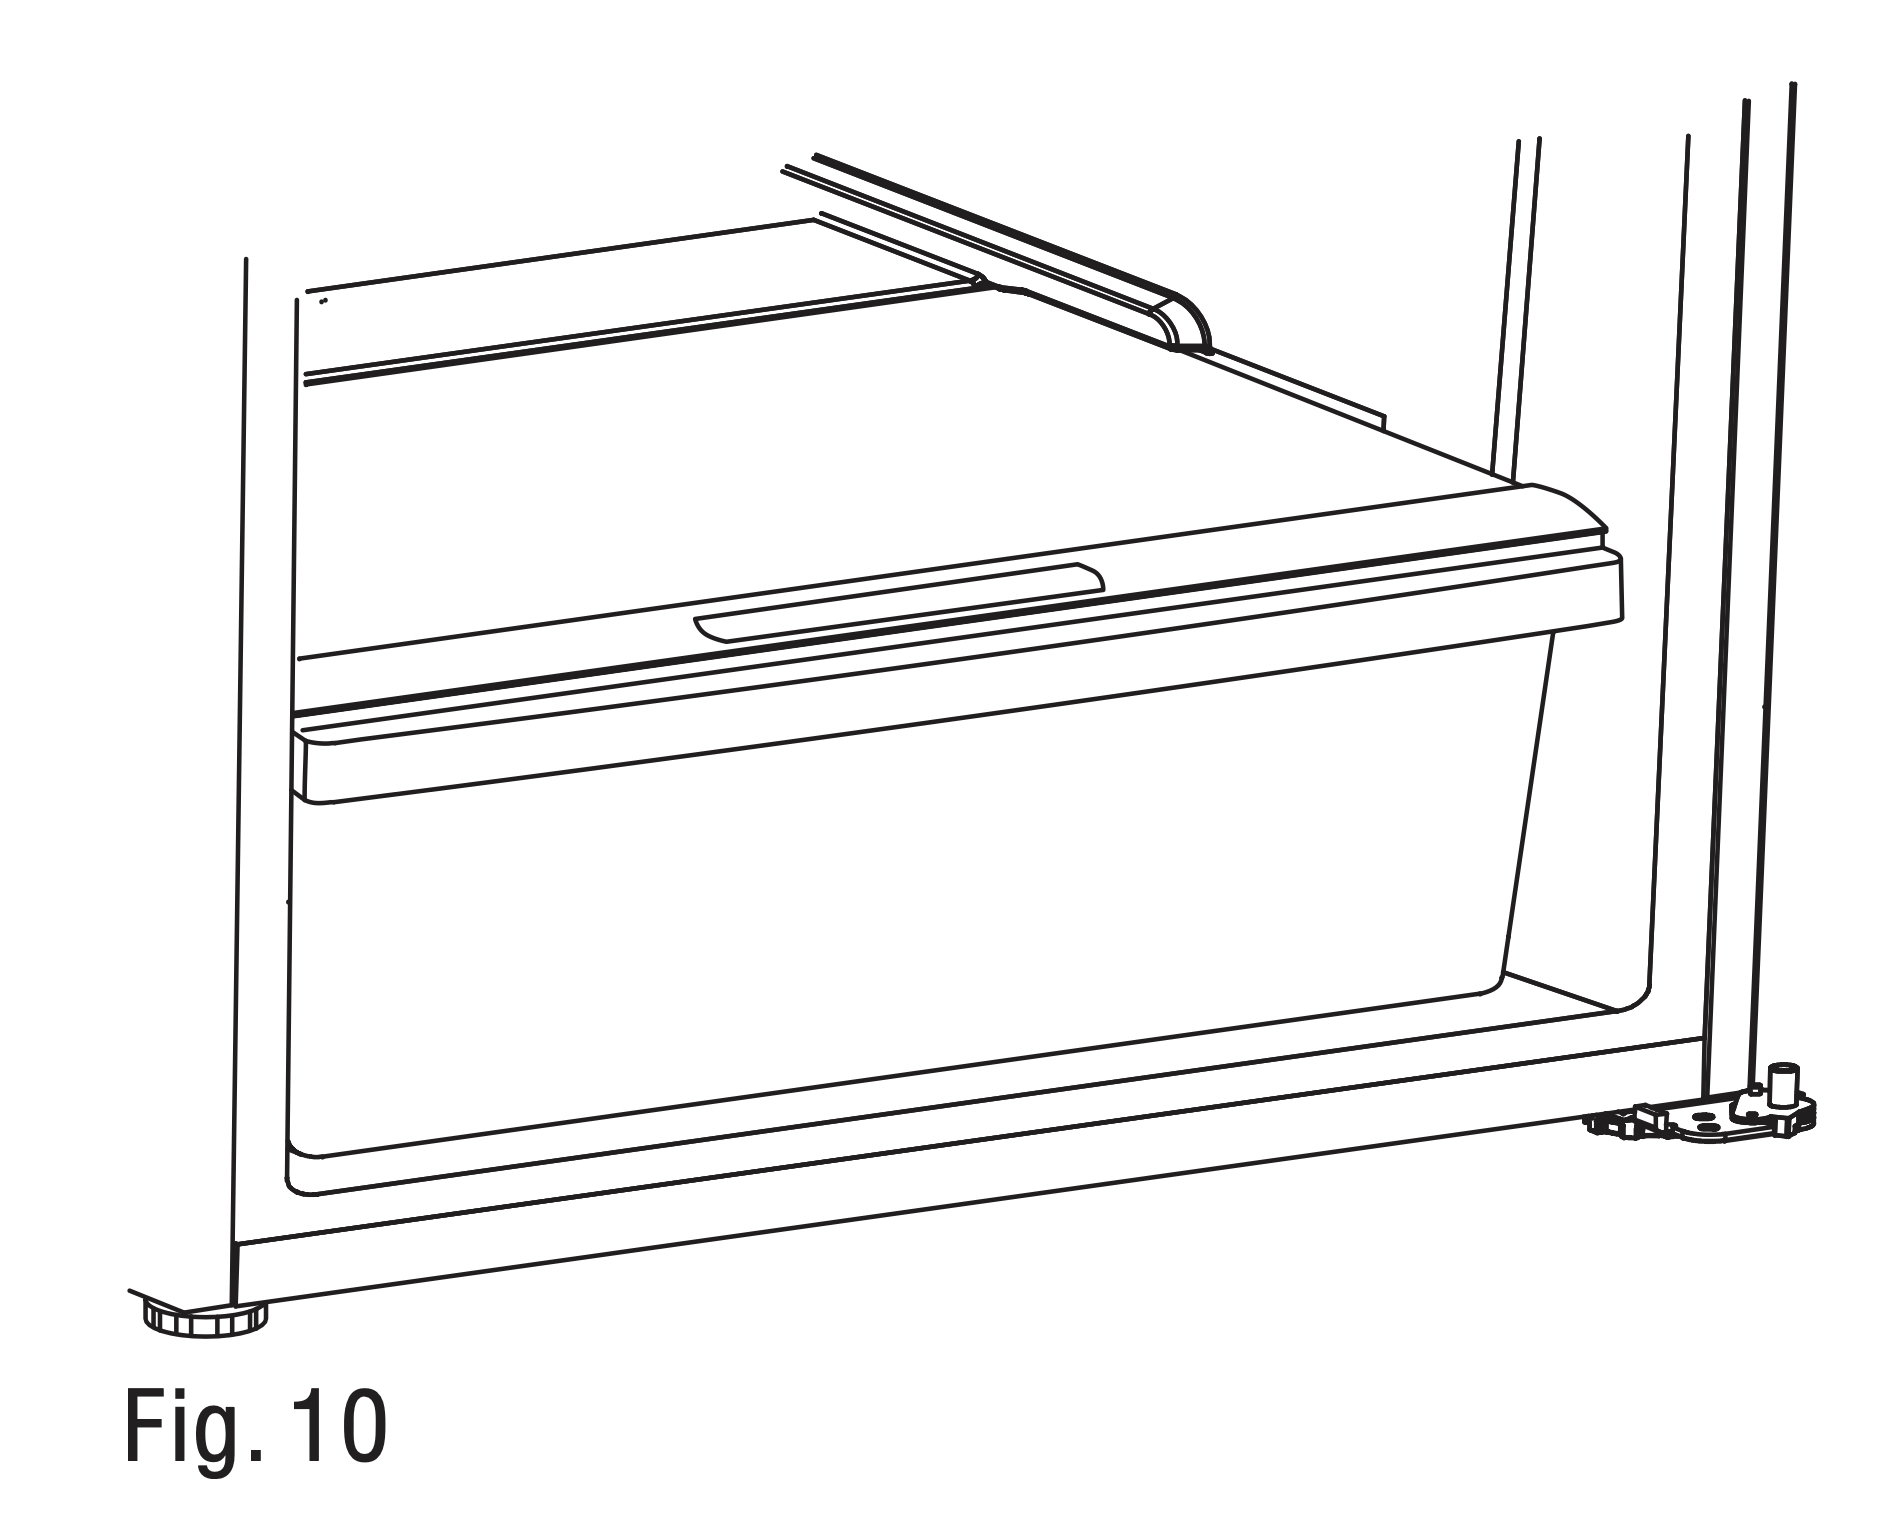
- Grip the crisper firmly and slide out completely.
- Replace the crisper by placing the crisper properly in position and gently sliding it back into place.
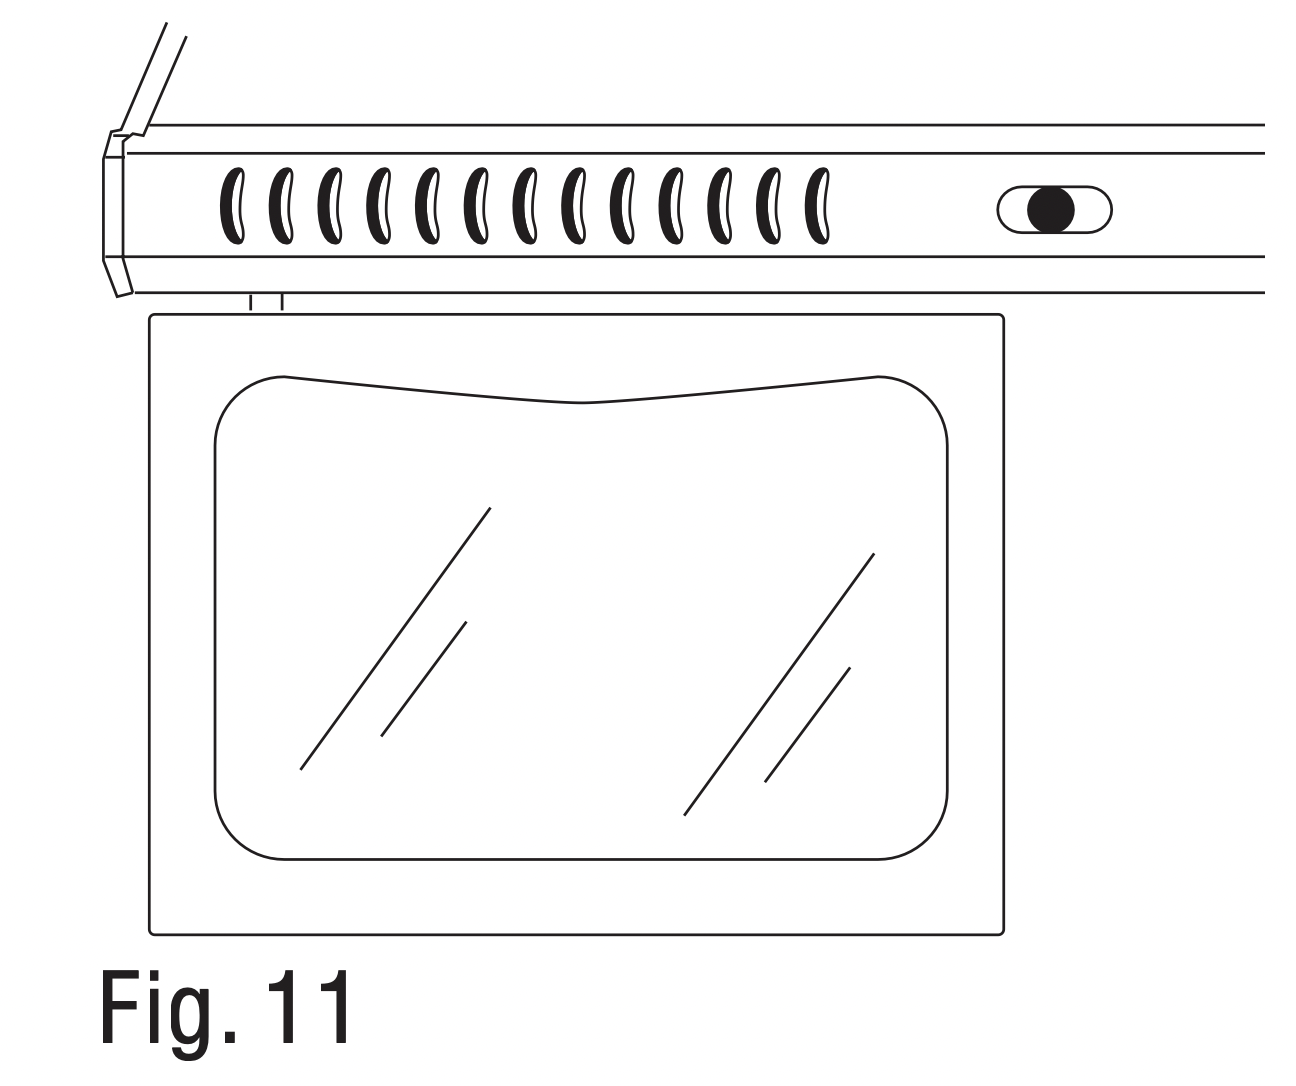
Your refrigerator may be equipped with a slide control to raise or lower the humidity levels or your crispers. This feature will increase the storage life of your fruits and vegetables. Simply adjust the controls to the appropriate setting for items you are storing in the crispers. Low settings allow moist air to exit the crisper, for optimum storage of fruit and/or vegetables that have skins. High settings retains moist air in the crisper, for optimum storage of leafy fresh vegetables.
REMOVING OR REPLACING THE CRISPER COVER
- Carefully grasp the crisper cover and slide out to remove. (Fig. 12)
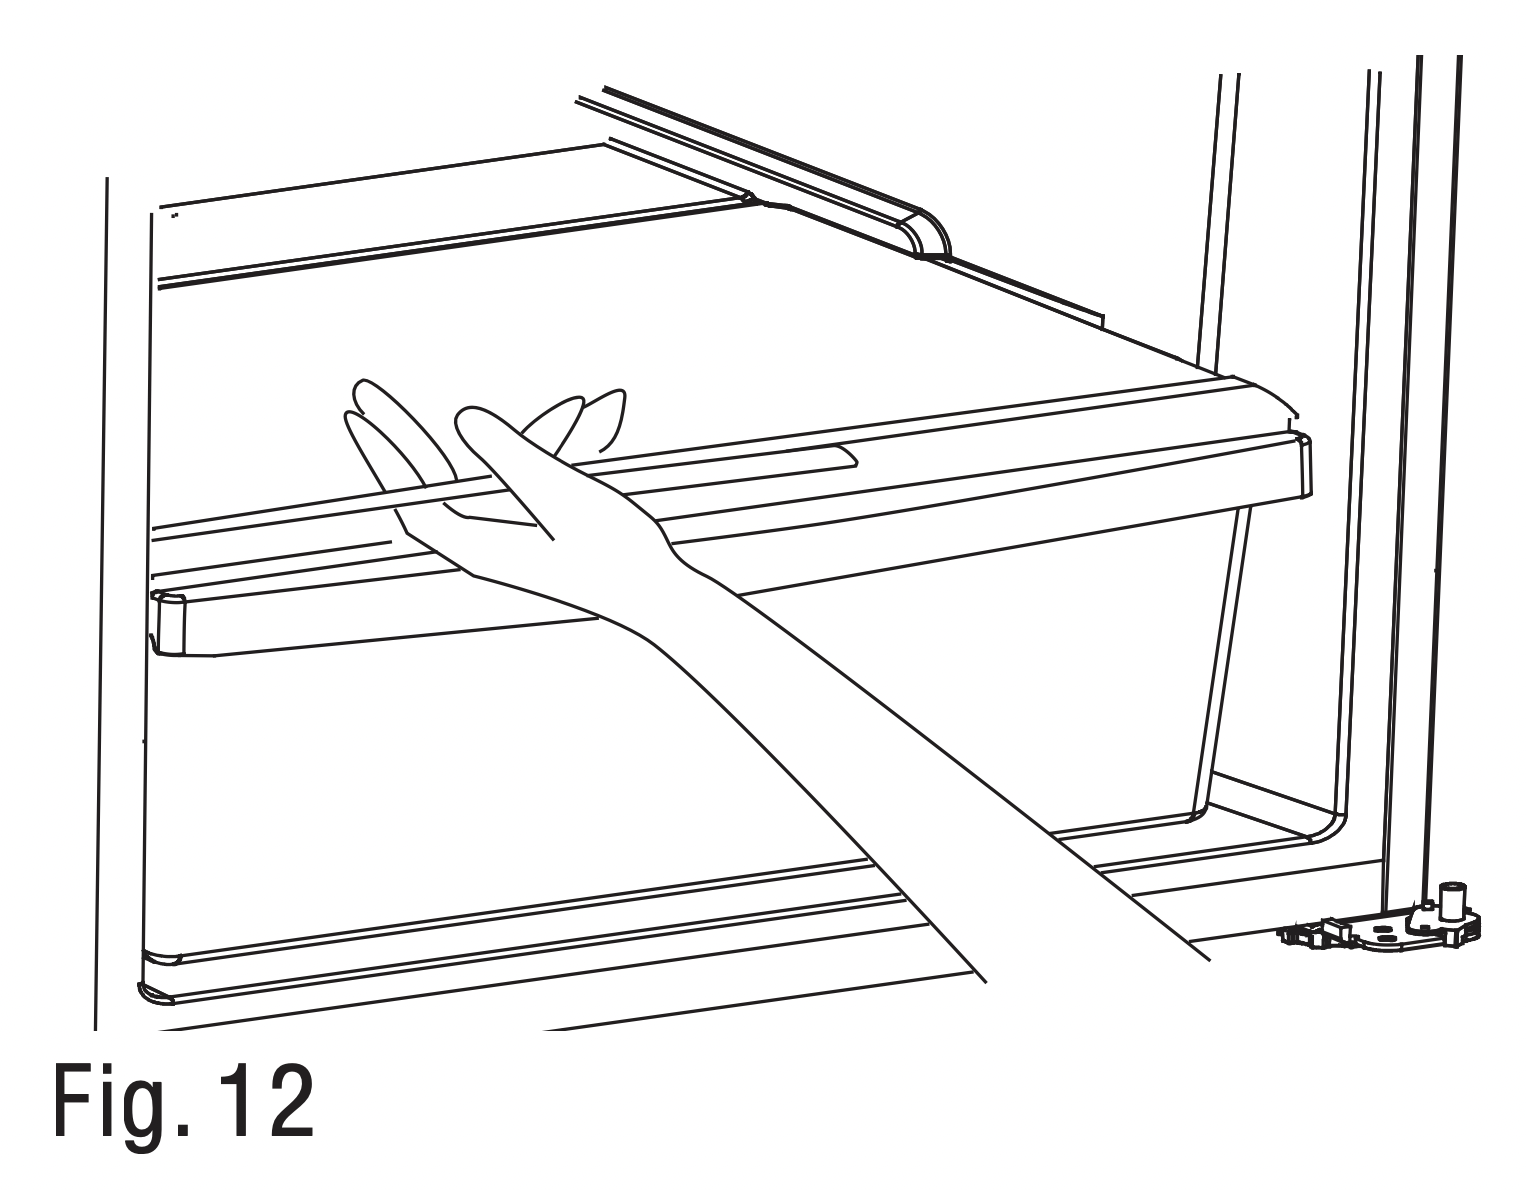
- To replace, slide the rear of the crisper cover into the right and left slots above the crisper area and gently slide back into place.
REFRIGERATOR CARE
WARNING: Before cleaning your refrigerator, ALWAYS unplug it from the power source. Failure to heed this warning could result in injury or death from electric shock.
NOTE: Before using any cleaning products, be sure to read the manufacturer’s instructions and warnings. This will help avoid personal injury or damage to property.
INTERIOR CLEANING
Prepare a cleaning solution of 3-4 tablespoons of baking soda mixed with warm water. Use a sponge or soft cloth, dampened with the cleaning solution, to wipe the inside of your refrigerator.
CAUTION
- Do not clean glass shelves or covers with warm water when they are cold. Glass shelves and covers may break if exposed to sudden temperature changes or impact, such as bumping or dropping. Tempered glass is designed to shatter into many small pieces if it breaks.
- Do not wash any plastic refrigerator/ freezer parts in the dishwasher.
Do not use harsh chemicals, ammonia, chlorine bleach, concentrated detergent, solvents, abrasives or metal scouring pads to clean your refrigerator, inside or out. They can damage and/or discolor the refrigerator finish.
EXTERIOR CLEANING
Use a clean, soft, lightly dampened cloth with kitchen appliance wax or a mild detergent to clean the exterior of the refrigerator.
Use a clean, soft, lightly dampened cloth with warm soapy water to clean the handles and trim. Use a clean, soft towel to dry.
For stainless steel models, use a dry cloth and stainless steel polish.
Door gaskets should be cleaned every three months following the instructions for interior cleaning. Clean gaskets will maintain a better seal than dirty gaskets. Lightly apply petroleum jelly to the hinge side of the gaskets to keep the gasket pliable and assure a good seal.
Never use a dirty cloth to clean the exterior of the refrigerator. Dirty cloths may leave residue on the refrigerator that can damage the finish. Also, avoid the use of harsh chemicals, ammonia, chlorine bleach, concentrated detergent, solvents, abrasives or metal scouring pads to clean the outside of the refrigerator.
LED LIGHTING REPLACEMENT
WARNING: Do not change the LED light by yourself. Please contact the after-sales service for replacement. Failure to heed this warning could result in injury or death from electric shock.
POWER INTERRUPTIONS
In the event of a power interruption, unplug your refrigerator from the power source. Avoid opening the doors until after power has been restored. Your refrigerator will maintain a cold temperature for longer if door opening is avoided or kept to a minimum.
Once power has been restored, plug your refrigerator back into the power source and inspect food in the refrigerator for spoilage or thawing. Cleaning your refrigerator after a prolonged power outage is strongly recommended to avoid odors and potential health hazards due to thawing.
VACATION
For long vacations or absences, unplug your refrigerator and remove all food from it. Clean the refrigerator, including the gaskets, according to the Proper Care and Maintenance section. Leave the doors propped open to allow air to circulate inside the refrigerator.
MOVING
Before moving your refrigerator, empty the food from it and use adhesive tape to secure all loose items such as shelves, door bins and racks, crispers and pans, etc. Unplug the refrigerator. Always move the refrigerator in an upright position in order to avoid damaging the sealed refrigerant system.
TROUBLESHOOTING
NORMAL OPERATING SOUNDS

- The new high efficiency compressor may run faster and longer than your old refrigerator and you may hear a high-pitched hum or pulsating sound while it is operating.
- You may hear a whooshing sound when the doors close. This is due to pressure equalizing within the refrigerator.

- You may hear the fans spinning at high speeds. This happens when the refrigerator is first plugged in, when the doors are opened frequently or when a large amount of food is added to the refrigerator or freezer compartments. The fans are helping to maintain the correct temperatures.
- The fans change speeds in order to provide optimal cooling and energy savings.
CLICKS, POPS, CRACKS and SNAPS
- You may hear cracking or popping sounds when the refrigerator is first plugged in. This happens as the refrigerator cools to the correct temperature.
- Expansion and contraction of cooling coils during and after defrost can cause a cracking or popping sound.
WATER SOUNDS

- The flow of refrigerant through the cooling coils may make a gurgling noise like boiling water.
- Water dropping on the defrost heater can cause a sizzling, popping or buzzing sound during the defrost cycle.
- A water dripping noise may occur during the defrost cycle as ice melts from the evaporator and flows into the drain pan.
- Closing the door may cause a gurgling sound due to pressure equalization.
If the refrigerator has been placed in a horizontal position for any period of time, wait 24 hours after returning it to the upright position before plugging it in.
IMPORTANT: During the automatic defrost cycle, you may notice a red glow in the vents on the back wall of your freezer compartment. This is normal during the defrost cycle.
| PROBLEM |
POSSIBLE CAUSE(S)
|
SOLUTION |
|
Refrigerator does not run.
|
Refrigerator is unplugged.
|
Plug refrigerator into power source
|
|
The circuit breaker is tripped/ turned off or the fuse is blown.
|
Reset/Turn on circuit breaker or replace fuse.
|
|
Refrigerator is in defrost mode
|
Wait about 30 minutes for defrost cycle to end and cooling system to restart
|
|
Refrigerator or freezer is too warm
|
Temperature control is not set lowenough
|
Turn temperature knob clockwise to adjust to a lower temperature; allow 24hours to adjust
|
|
Doors opened frequently or left open
|
Keep door closed / Check that a package isn’t preventing door from closing
|
|
Warm food added recently
|
Allow time for food and refrigerator to cool
|
|
Items against back of compartments are blocking proper airflow
|
Store items only inside the trim of the glass shelves; don’t place items against sides of the compartments or directly in front of any vents
|
|
Refrigerator is in adaptive defrost mode
|
This is normal. Defrost cycle lasts about 30 minutes
|
|
Refrigerator or freezer is too cold
|
Temperature control is set too low
|
Turn knob counter-clockwise to change to a warmer setting; allow 24 hours to adjust
|
|
Refrigerator compressor runs frequently or for long periods of time
|
Normal when first plugged in
|
Allow 24 hours for the refrigerator to cool down
|
|
Warm or large amounts of food added
|
This is normal
|
|
Door is left open
|
Ensure that door is not being held open by an item
|
|
Hot weather or frequent openings
|
This is normal
|
|
Temperature control set to coldest setting
|
Adjust knob to a warmer setting
|
|
Moisture on exterior/interior of refrigerator
|
High humidity
|
This is normal; Dry surface and adjust temperature knob to slightly colder setting
|
|
Doors opened frequently or leftopen
|
Keep door closed / Check that a package isn’t preventing door from closing
|
|
Open container of water inrefrigerator
|
Cover or seal container
|
|
Refrigerator has an odor
|
Food is not sealed or packaged properly
|
Re-seal packaging / Place an opened box of baking soda in the refrigerator, replace every three months
|
|
Interior needs to be cleaned
|
Follow cleaning instructions in Proper Care and Maintenance section
|
|
Light does not come on
|
Refrigerator is unplugged
|
Plug refrigerator in to power source
|
|
Light switch gets stuck
|
Switch located at the right of Fresh Food Compartment. Make sure it moves freely when manually pressed in and out
|
|
LED light broken
|
Contact after-sale service for replacement
|
|
Frost or ice crystals on frozen food
|
Freezer door left open or opened frequently
|
Turn temperature knob counter- clockwise to change to a warmer setting; allow 24 hours to adjust
|
|
Items blocking freezer air vents and preventing proper air flow
|
Move items away from rear wall
|
|
Hot or warm air from bottom of refrigerator
|
Air flow coming form compressor during refrigeration process
|
This is normal
|
|
Food freezing in refrigerator
|
Food placed too close to the air vent
|
Move items away from the air vents at the top and rear wall of the Fresh Food section
|
|
Temperature control knob set too low
|
Adjust the knob counter-clockwise to a warmer setting
|
|
Freezer door pops open when closing the refrigerator door
|
Normal if freezer door closes after wards onits own
|
This indicates a good seal if freezer door closes on its own
|
|
If freezer doesn’t close on its own after popping open, adjust leveling legs
|
See leveling leg feature instructions in Installing Your Refrigerator section
|
|
Door does not close properly
|
Refrigerator isn’t level
|
See leveling leg feature instructions in Installing Your Refrigerator section
|
|
Something is obstructing door closure
|
Check for and remove obstructions
|
|
Vibration or rattling
|
Refrigerator is not resting firmly on floor
|
See leveling leg feature instructions in Installing Your Refrigerator section
|