Loading ...
Loading ...
Loading ...
16
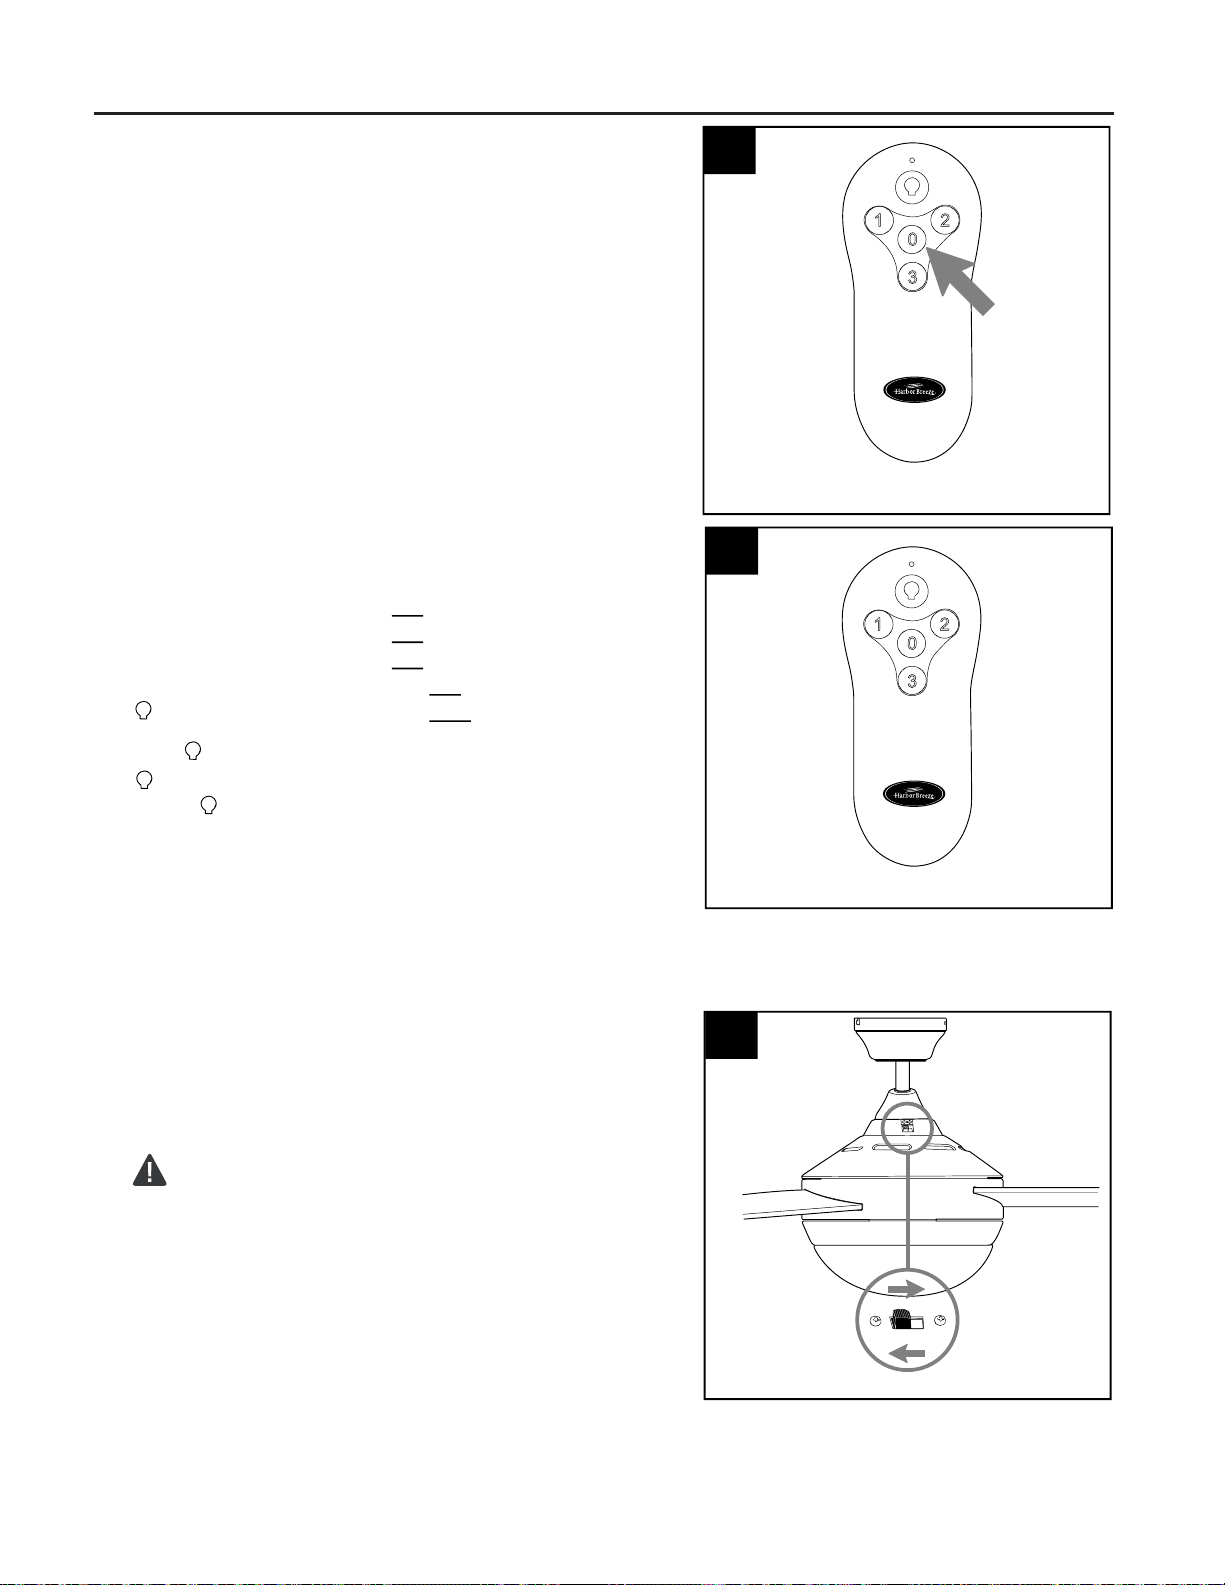
2.
Restore electrical power. Within 30 seconds of
restoring electrical power, press and hold the “0”
button on the remote control transmitter for 5 seconds
or until light on the fan blinks twice. Use the remote
control transmitter to test the light and fan functions to
confirm the learning process is complete.
NOTE: Remove protective covering from front of
remote control transmitter and discard.
IMPORTANT: To prevent damage to remote control
transmitter, remove the battery if not used for long
periods. Store the remote control transmitter away
from excess heat or humidity.
2
Remote Control Transmitter
OPERATING INSTRUCTIONS
Operation buttons on the panel of the remote control
transmitter:
3 button for fan HIGH speed
2 button for fan MEDIUM speed
1 button for fan LOW speed
0 button to turn fan OFF
button to turn light ON or OFF
Tap button quickly to turn lights off or on. Hold
button down to increase or decrease lights. If you
press button in excess of 0.7 seconds, it
becomes a dimmer. The lights vary cyclically in
8 seconds. The light button has an auto resume
function, which keeps the light at the same
brightness as the last time it was turned off.
NOTE: Most CFLs are NOT compatible for use with
dimmer controls.
3.
3
Remote Control Transmitter
4.
Use the fan reverse switch on the switch housing to
optimize the fan for seasonal performance. A ceiling
fan will allow you to raise your thermostat setting in
summer and lower your thermostat setting in winter
without feeling a difference in your comfort.
CAUTION: Turn fan off at wall switch and let
blades (J) come to a complete stop before manually
activating the reverse switch.
4
reverse switch
motor housing
Loading ...
Loading ...
Loading ...