Loading ...
Loading ...
Loading ...
FINAL INSTALLATION
14
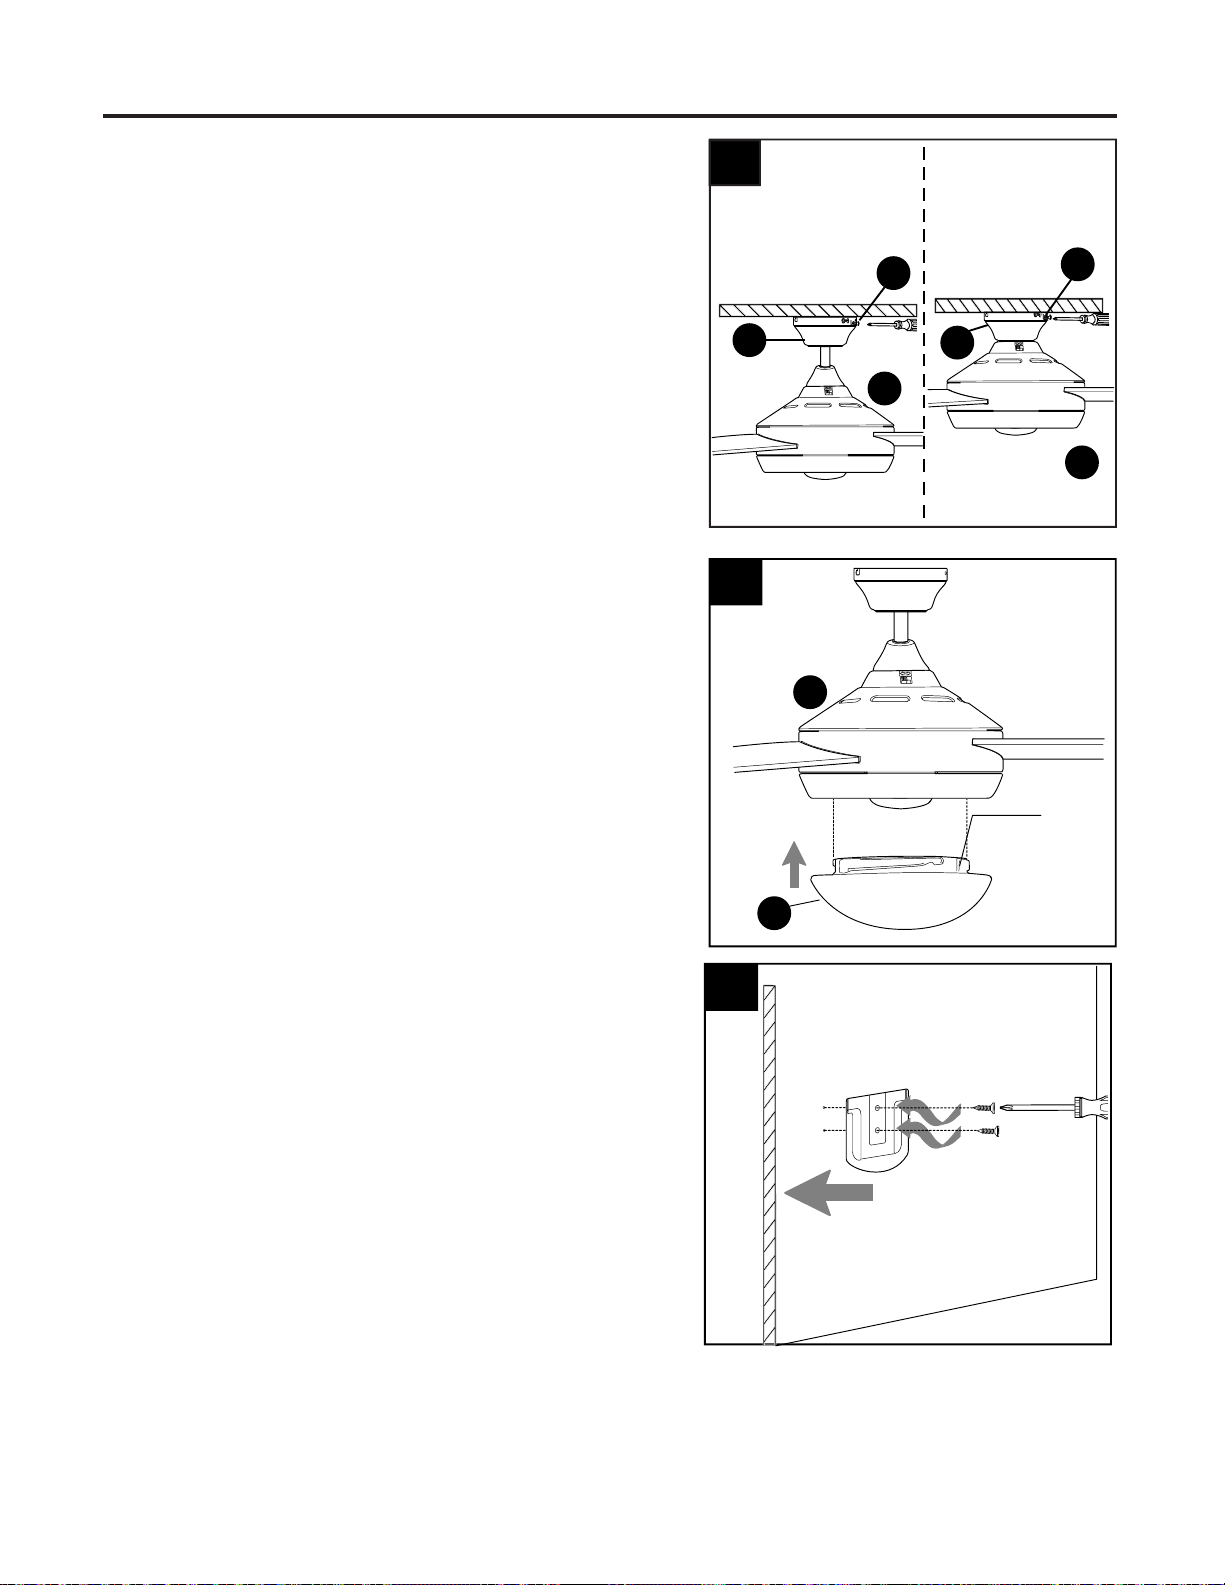
1.
Lift canopy (B) to mounting bracket (C) again,
aligning slotted holes in canopy (B) with loosened
canopy mounting screws (G) in mounting bracket
(C). Twist canopy (B) clockwise to lock. Re-insert
the two canopy mounting screws (G) previously
removed (Step 4, page 6) and tighten all canopy
mounting screws (G) securely.
1
Downrod
Option
Closemount
Option
2.
Align slots on glass shade (K) with protrusions on
underside of motor housing (D). Turn glass shade
(K) clockwise until it no longer turns.
NOTE: Pull down gently on the glass shade (K) to
make sure it is secured completely.
3
Remote Control
Bracket
Wall
3.
If you wish to use the remote control bracket from
remote pack (P), install screws from remote pack (P)
through bracket and into the desired installation site.
The remote control transmitter from remote pack (P)
rests inside the bracket.
Bracket
Screws
2
slot
K
B
G
D
G
D
B
D
Loading ...
Loading ...
Loading ...