
81cm(32”) LED TV
PT3210H
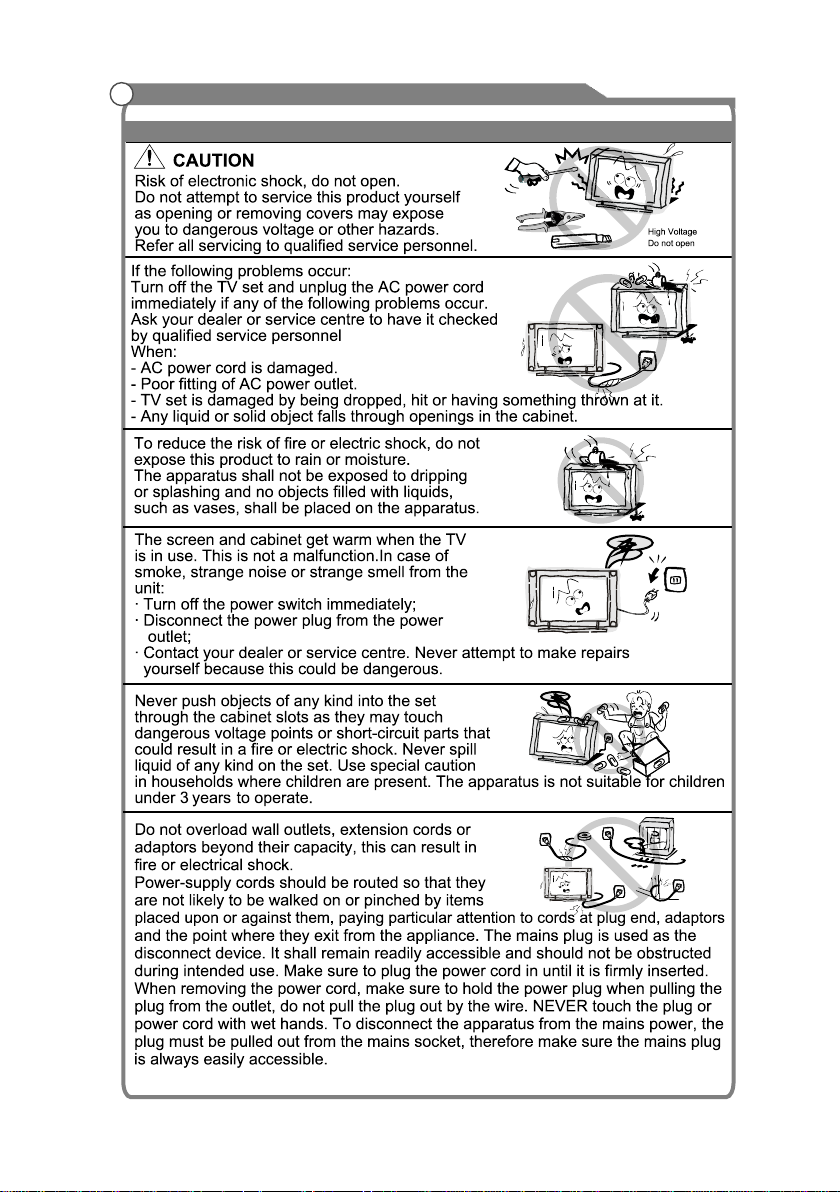
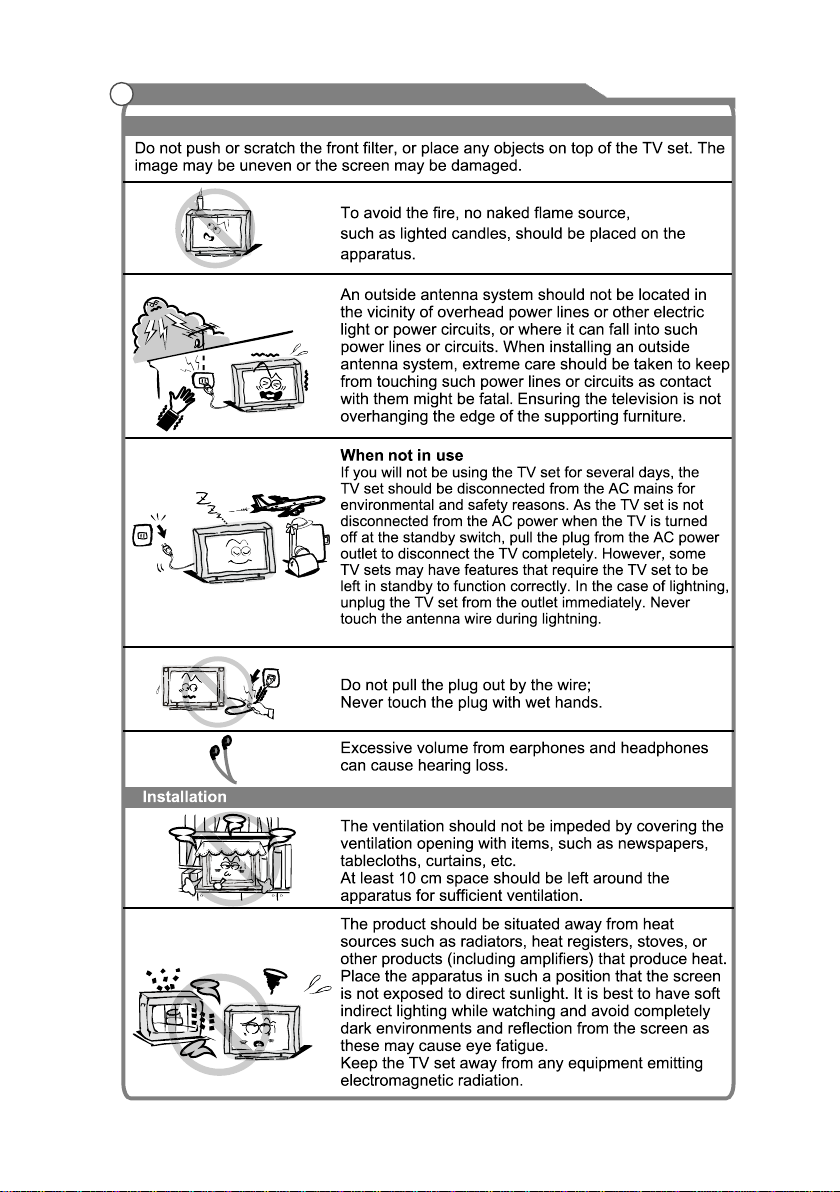
Important Safety Instructions and Maintenance
Important Safety Instructions
1
2
Important Safety Instructions and Maintenance
Important Safety Instructions
3
Important Safety Instructions and Maintenance
4
12
33
34
36
10
Me
Picture Issues and Solutions
dia Menu
28
General Description
5
AV
Ymini PbPr
TWO
One mini AV output socket
One Coaxial output socket
IMPORTANT INFORMATION
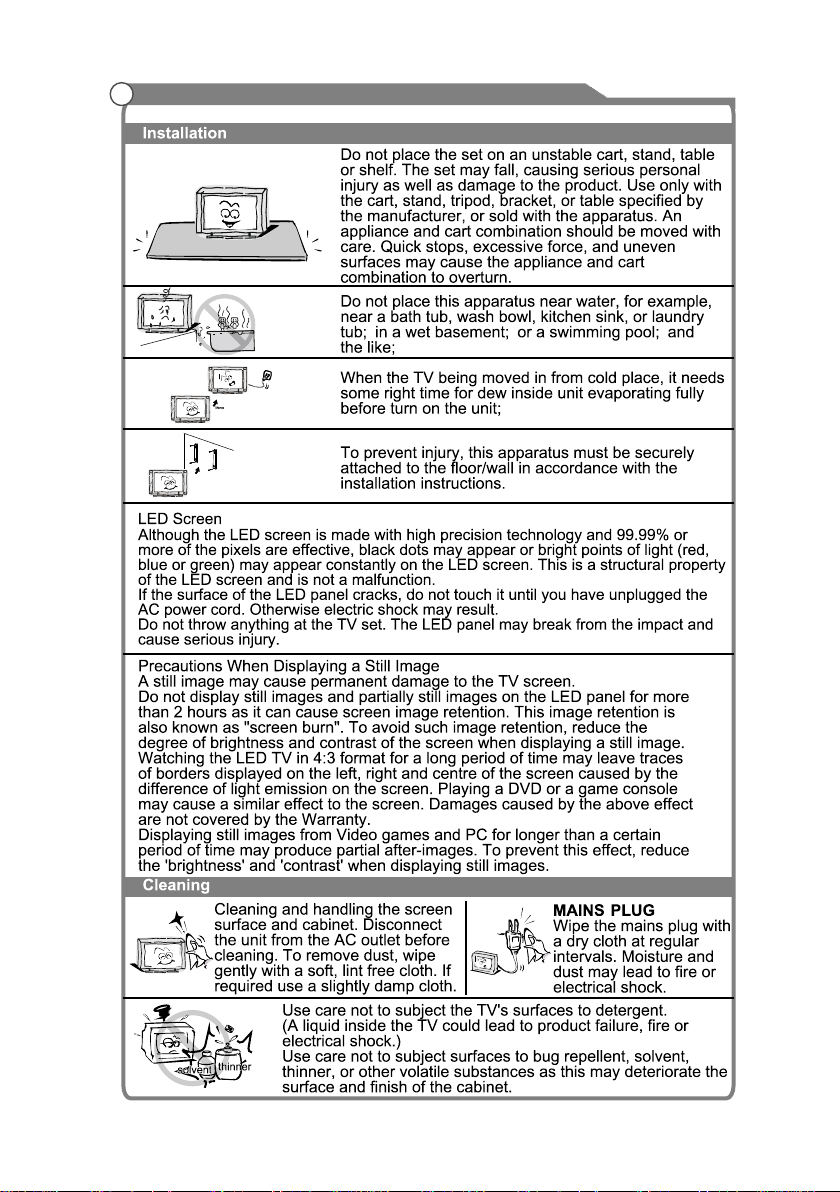
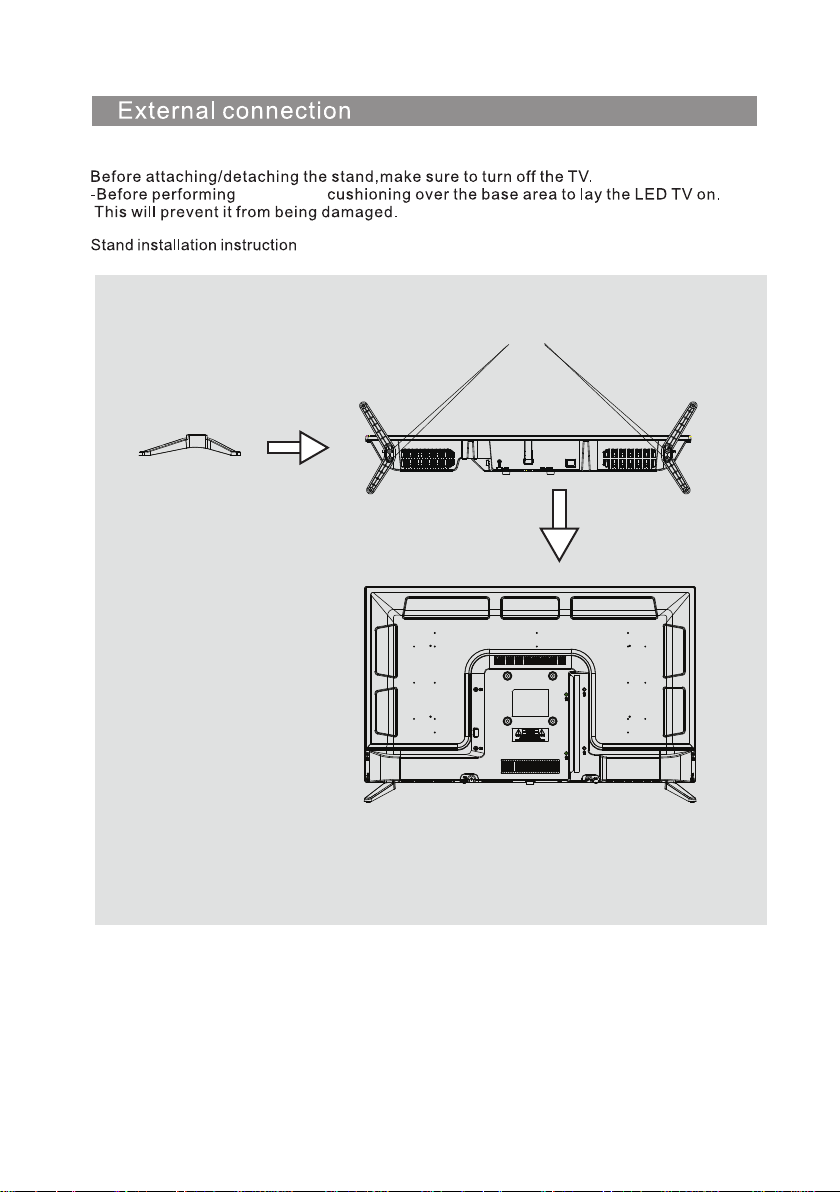
If a television is not positioned in a sufficiently stable location, it can be potentially hazardous
due to falling. Many injuries, particularly to children, can be avoided by taking simple precautions
such as:
Using cabinets or stands recommended by the manufacturer of the television.
Only using furniture that can safely support the television.
Ensuring the television is not overhanging the edge of the supporting furniture.
Not placing the television on tall furniture (for example, cupboards or bookcases) without
anchoring both the furniture and the television to a suitable support.
Not standing the televisions on cloth or other materials placed between the television and
supporting furniture.
Educating children about the dangers of climbing on furniture to reach the television or its
controls.

Wall-mounted accessories(Optional)
Specifications And Accessories
6
PAL:BG DK I;SECAM:BG DK
VGA support resolution
HDMI support resolution
2x8W
640x480/800x600
1366x768
480P 570I/P 720I/P
PT3210HModel name
Description
48W
32"
32" LED TV
1366X 768
NTSC
7
R/L:
Composite Audio or
Compone
Connect the other device output
the video and audio
nt Audio.
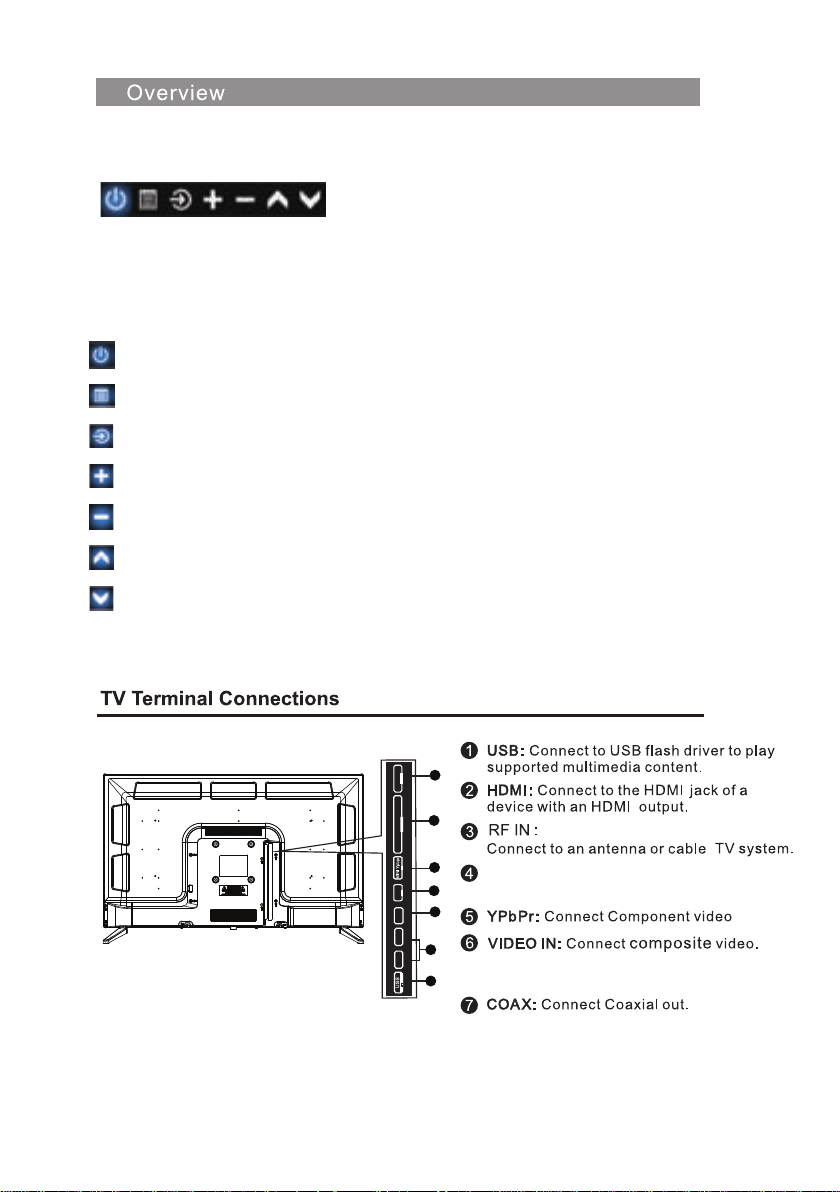
When one button is turned to the seven key function menu, when the function menu is not opened,
pressing the key board will pop up a key menu to turn the seven key function menu, as shown in
the following figure:
When the one key to seven key function menu opens, press the button short, move the focus to the right,
and focus to the corresponding function, then continue to press the key, the focus back to the loop.
The function of focal points can be executed by pressing buttons (over 0.5 seconds) when the menu is
opened with one button to turn seven keys. The corresponding functions of the focus are as follows:
The power off function corresponds to the "power button" of the ordinary seven key keyboards.
Open menu, menu button corresponding to ordinary seven button key board.
Open the signal source menu, corresponding to the ordinary seven key button
plate's "signal source" button.
Increase the volume, corresponding to the ordinary seven button button "volume +" button.
Reduce the volume to correspond to the volume button of the ordinary seven key button board.
Switch the channel back to the "seven +" button of the ordinary key button.
Switch the channel forward, corresponding to the ordinary seven key key board's "channel" button.
AV OUT :
1
2
3
4
5
6
7
5V 500mA
HDMI2
HDMI1
COAXIAL
OUT
MINI AV
OUT
IN
RF IN
AV IN
LVIDEO R
8
INPUT
PVR
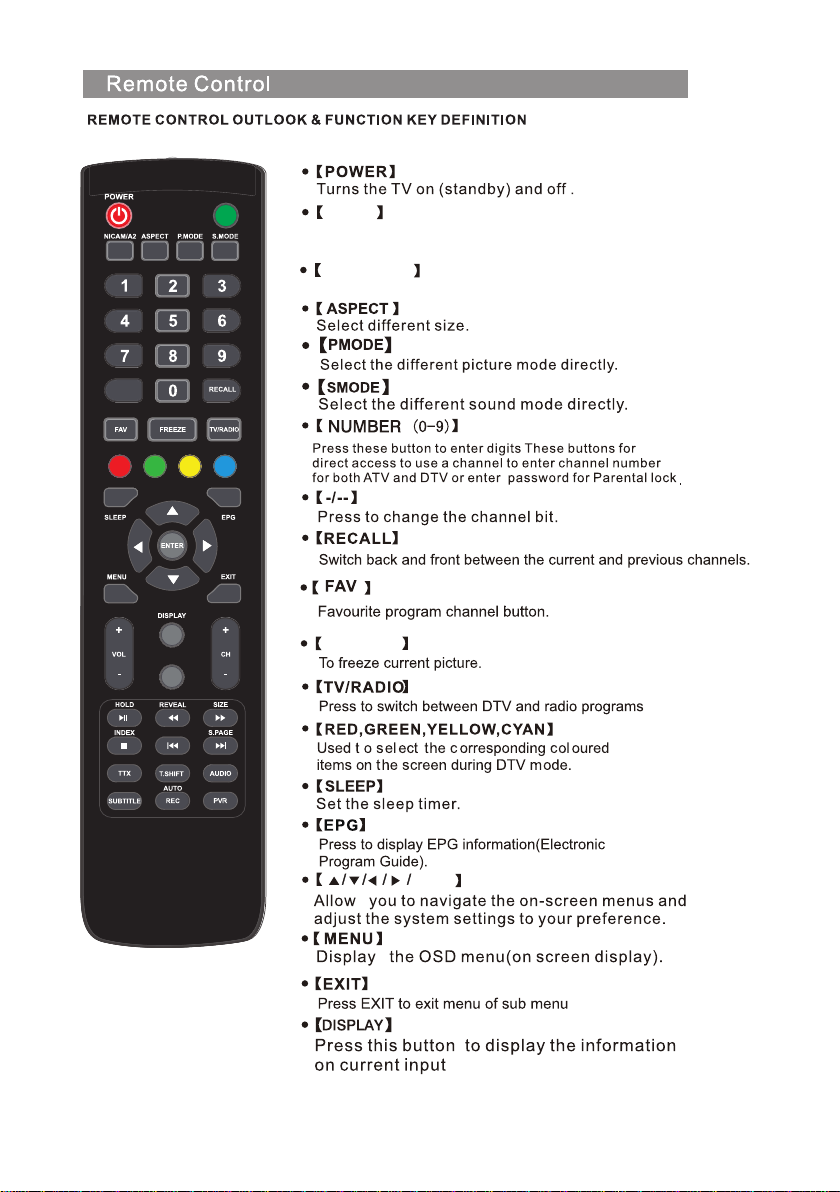
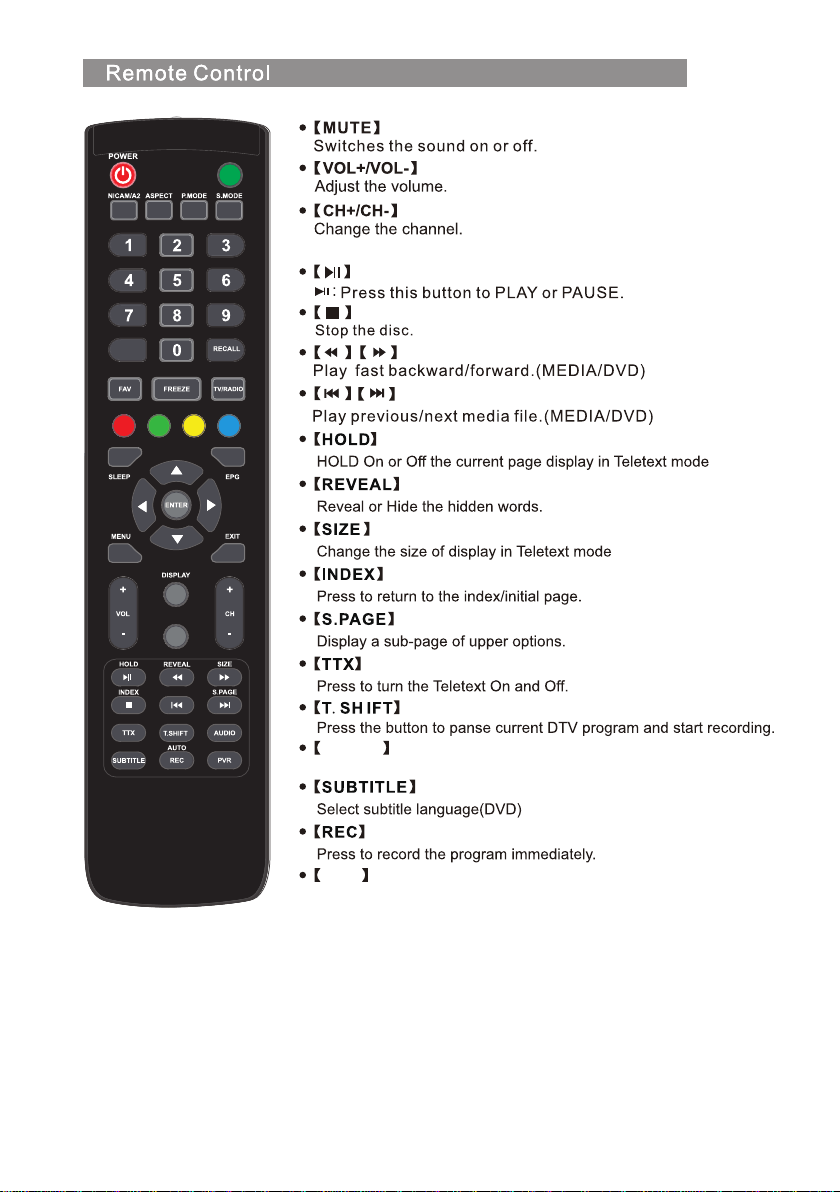
MUTE
-/--
FREEZE
NICAM/A2
INPUT
INPUT mode conversion button
TV Nicam/A2 select.
OK
9
AUDIO
Select Audio mode
PVR
PVR List
INPUT
PVR
MUTE
-/--
10
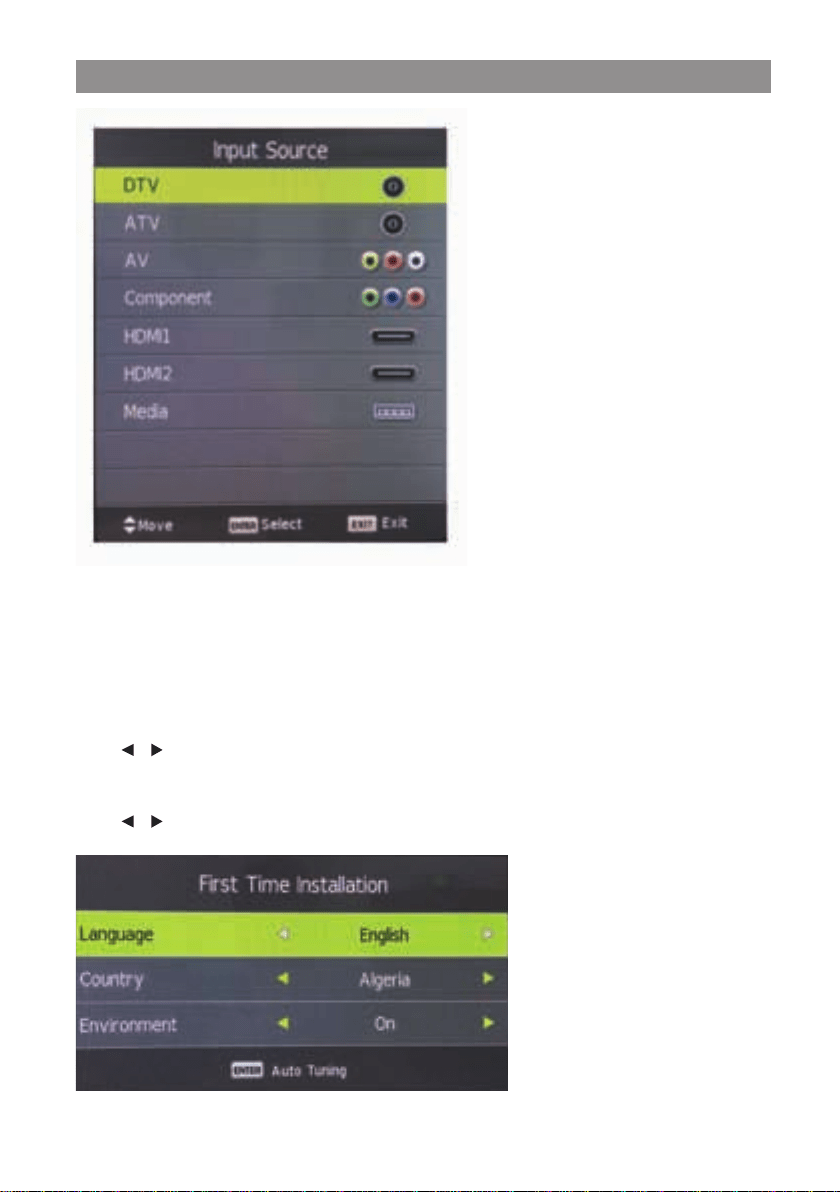
Press INPUT button to display the input source list,
Press ▼ / ▲ or OK button to select the input source you want to,
Press OK button to enter the input source,
Press EXIT button to quit.
Connect an RF cable from the Tv’s input called “RF-In” and to your TV Aerial socket.
Select Language
Press / button to select the language to be used for menus and message.
Select Country
Press ▼
/ ▲ button to highlight country menu.
Press / button to select the country you want to.

First Time Setup
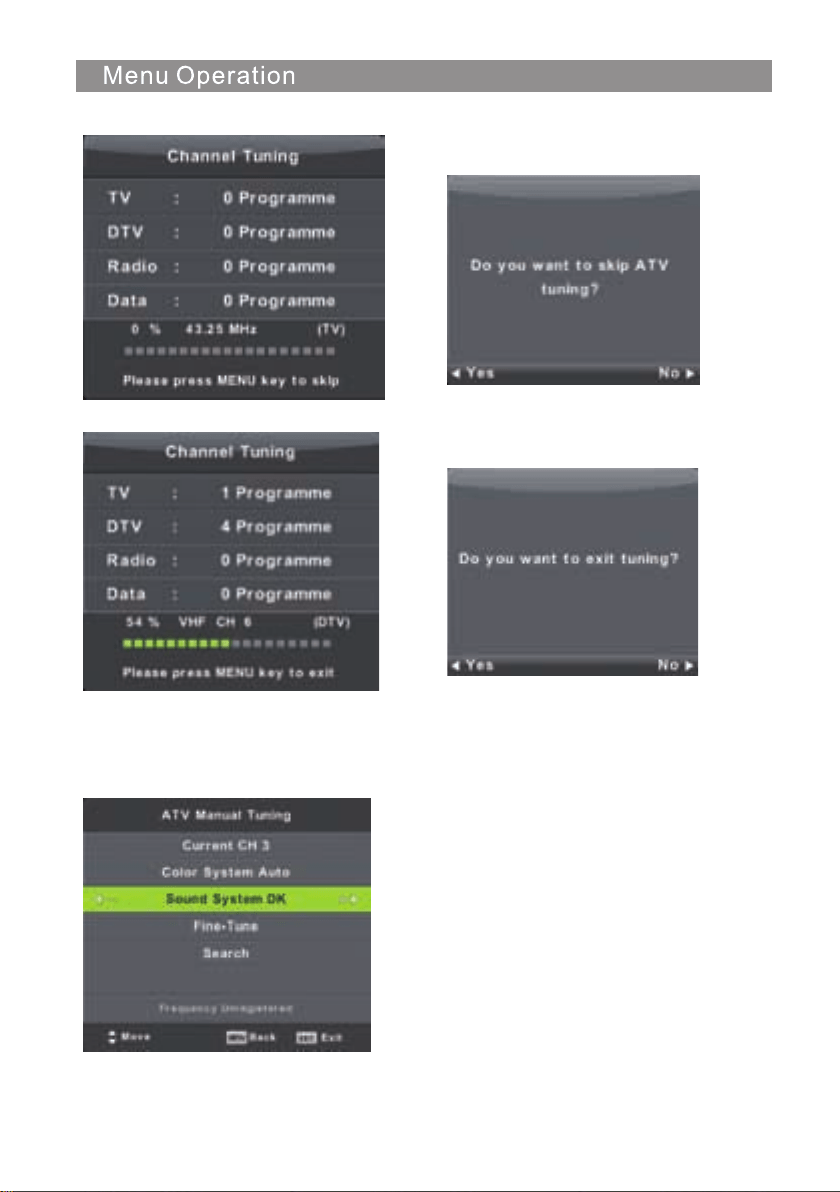
Auto Tuning
First tuning ATV, press Menu and left arrow button to skip ATV tuning,
Second tuning DTV, press Menu and left arrow button to skip DTV tuning.
11
12
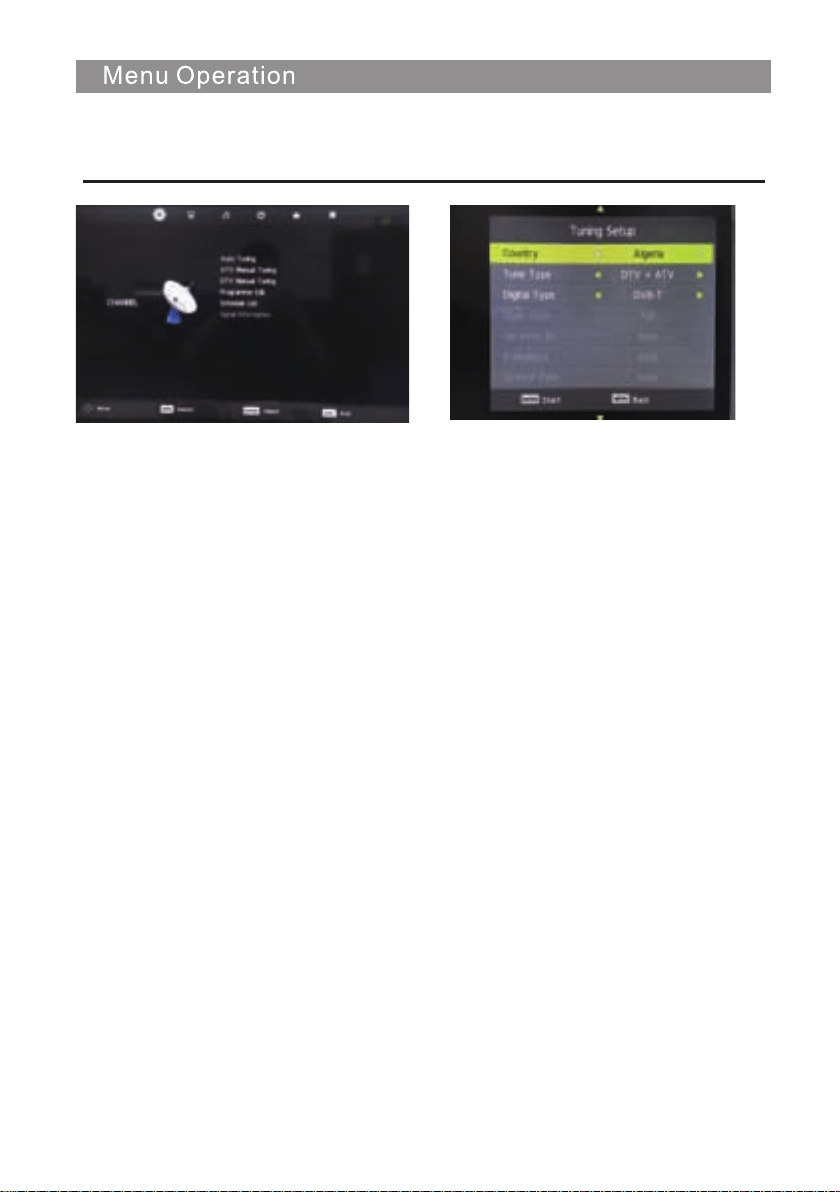
1. Press ▼ / ▲ button to select the option that you want to adjust in the CHANNEL menu.
2. Press Enter button to adjust.
3. After finishing your adjustment, Press Enter button to save and return to the previous menu.
Auto Tuning
Press ▼ / ▲ button to select
▲
Auto Tuning, then press Enter/ button to enter.
Channel
T2
Menu
13
ATV Manual Tuning
Current CH
Set the channel number.
Color System
Select the color system
(Available System: AUTO,PAL , SECAM )
Sound System
Select the Sound system
Fine-Tune
Adjust the frequency of the channel REMOVE THIS.
Search
Start searching channel.
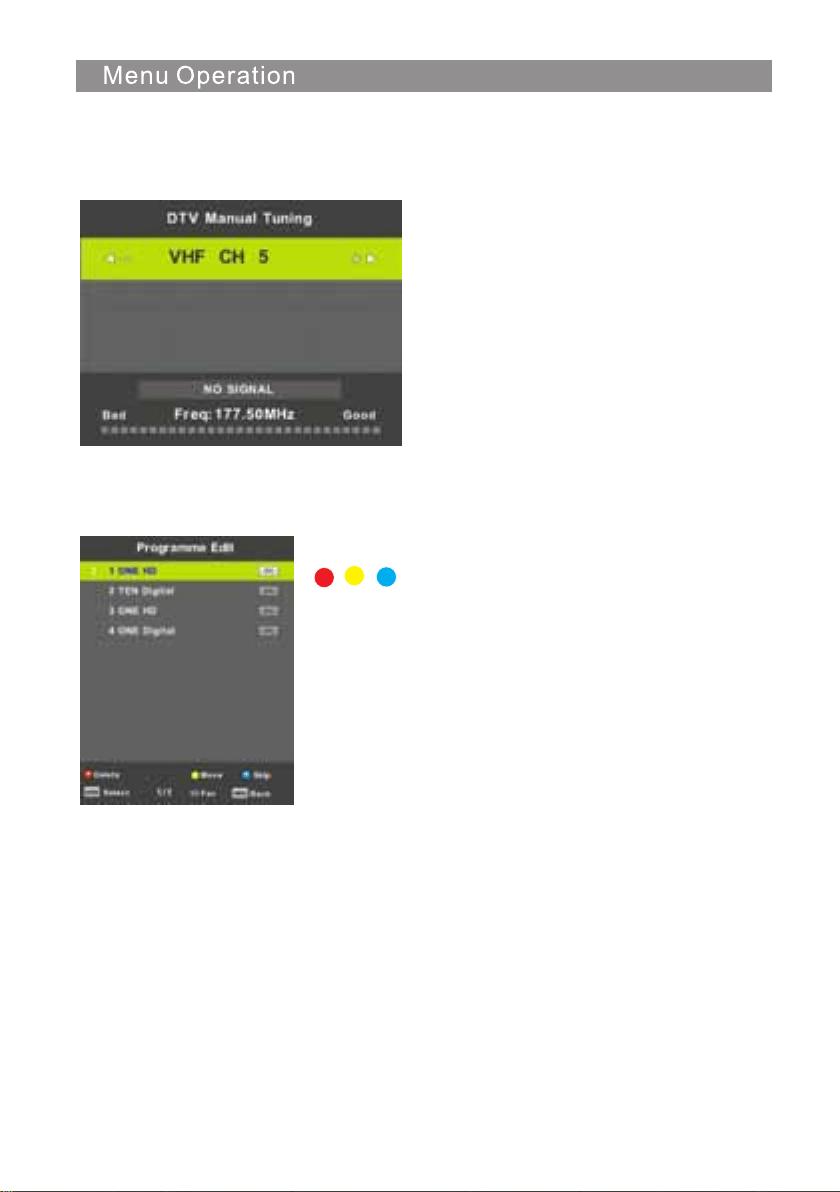
DTV Manual Tuning
Press ▼ / ▲ button to select DTV Manual Tuning, then press Enter button to enter sub-menu.
Press ◄ / ► button to select channel, then press Enter button to search program.
Program Edit
Press ▼ / ▲ button to select Program Edit, then press Enter button to enter sub-menu.
The three colored key is the shortcut key for programming
the channel.
First press ▼ / ▲ to highlight the channel you want to select, then:
Press the Red button to delete the program in the list.
Press the Yellow button to move the channel in favorite list.
Press the Blue button to skip the selected channel.
Press Fav button to add or remote the channel to your favorite list.
(Your TV set will skip the channel automatically when using
CH+/- to view the channels.)
14

15
If there is a time appointment conflict, a warning message will appear
Signal Information
Press ▼ / ▲ button to select Signal Information, press the Enter button to see the detail
information about the signal. Only available when there is signal in DTV.
16
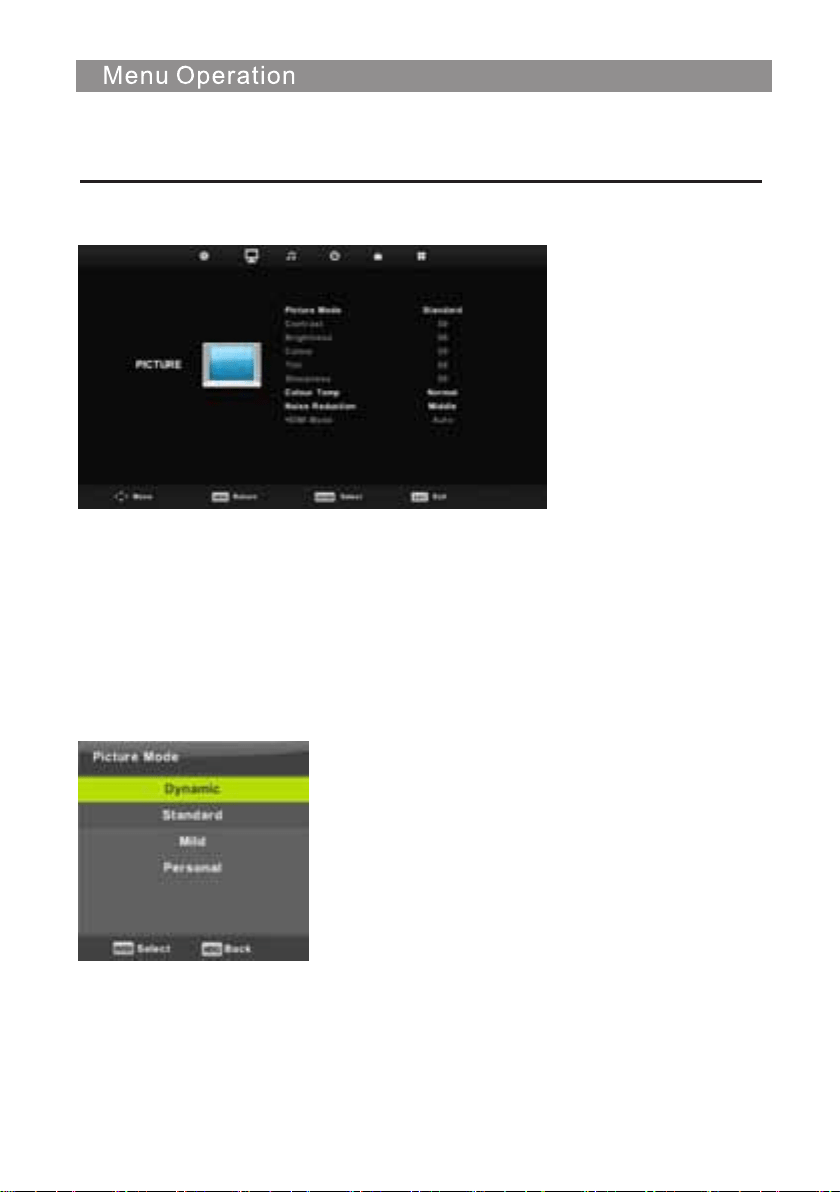
Picture Menu
Picture Mode
Press ▼ / ▲ button to select Picture Mode, then press OK button to enter sub-menu.
You can change the value of contrast, brightness, color, sharpness and tint when the picture is in
Personal mode.
TIPS: You can press PMODE button to change the Picture Mode directly.
Press MENU button to display the main menu.
Press ◄ / ► button to select PICTURE in the main menu.
1. Press ▼ / ▲ button to select the option that you want to adjust in the PICTURE menu.
2. Press OK button to adjust.
3. After finishing your adjustment, Press MENU button to save and return back to the previous menu.
17
Contrast/ Brightness/ Color/ Tint / Sharpness
Press ▼ / ▲ button to select option, then press ◄ / ► button to adjust.
Contrast Adjust the contrast for the selected display device.
Brightness Adjust the brightness for the selected display device.
Color Adjust the colors for the selected display device.
Tint Adjust the tint for the selected display device.
Sharpness Adjust the sharpness for the selected display device.
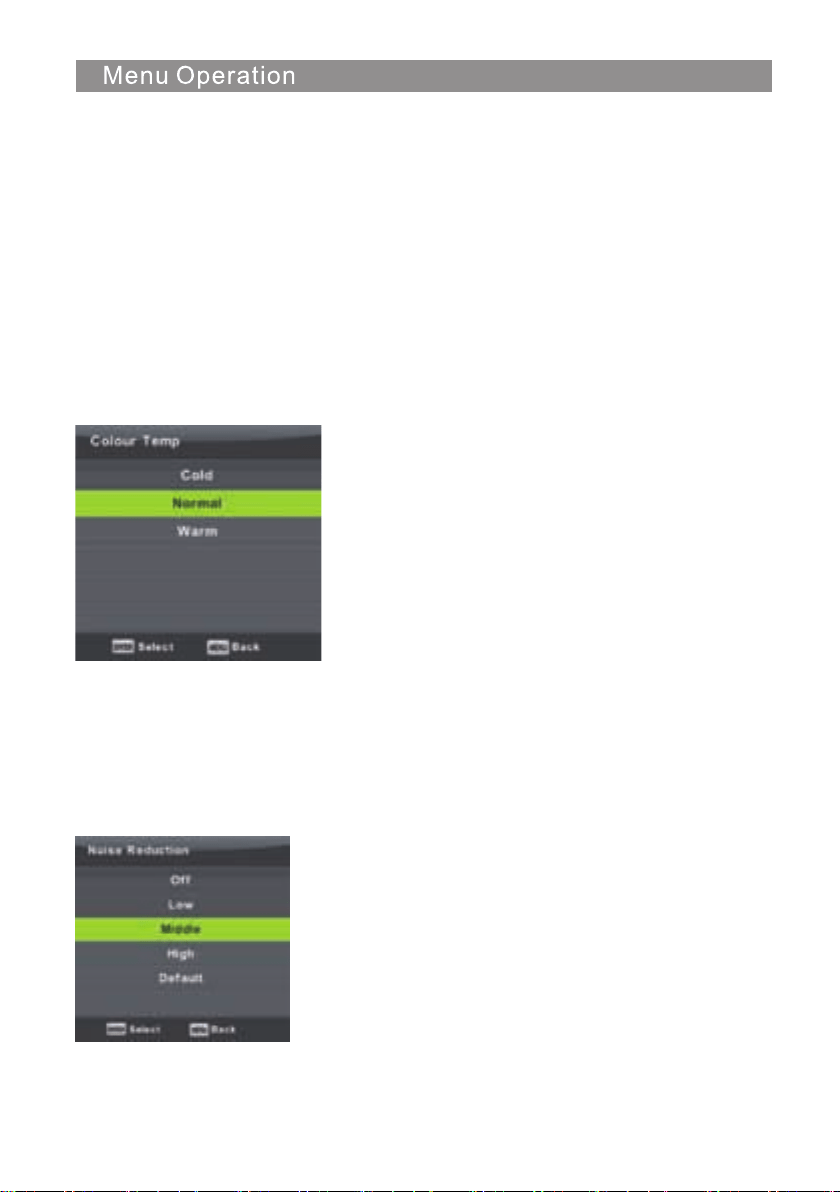
Color Temp
Adjust the color temperature for the selected display device.
Press ▼ / ▲ button to select Color Temperature , then press OK button to enter sub-menu.
Press ◄ / ►button to select. (Available Picture mode: Cool, Medium, Warm).
You can change the value of red,green and blue when the color temperature is in User mode.
Cold Adds blue tone
Normal Neutral
Warm Adds red tone
Noise Reduction
To filter out and reduces the image noise and improve picture quality.
Press ▼ / ▲ button to select Noise Reduction , then press OK button to enter sub-menu.
Off Select to turn off video noise detection.
Low Detect and reduce low video noise.
Middle Detect and reduce moderate video noise.
High Detect and reduce enhanced video noise.
Default Set as Default.
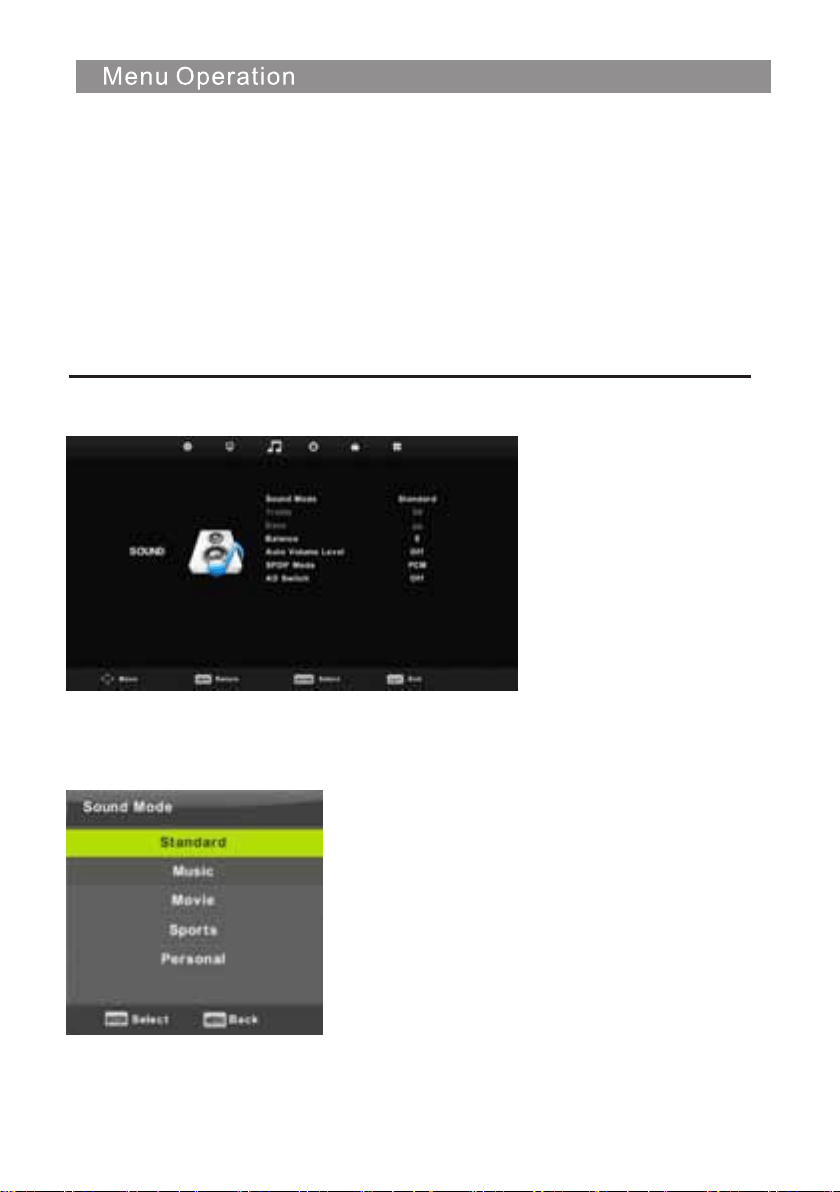
Sound Menu
Select
Back Adjust
Press MENU button to display the main menu.
Press ◄ / ► button to select SOUND in the main menu.
1. Press ▼ / ▲ button to select the option that you want to adjust in the SOUND menu.
2. Press Enter button to adjust.
3. After finishing your adjustment, Press Enter button to save and return to the previous menu.
Sound Mode
Press ▼ / ▲ button to select Sound Mode,
then press Enter button to enter sub-menu.
Press▼/▲ button to select.
18

Balance
Press ▼ / ▲ button to select option, Press ◄ / ► button to adjust.
You can change the value of Treble and Bass when the sound is in Personal mode.
TIPS: You can press SMODE button on the remote control to change the Sound Mode directly.
Auto Volume level
Press ▼ / ▲ button to select Auto Volume Level, then press ◄ / ► button to select On or Off.
SPDIF Mode
Press ▼ / ▲ button to select SPDIF Mode, then press ◄ / ► button to select Off / PCM / Auto.
NOTE:
Balance: This item can adjust the speaker’s output, it enables you to listen to best at your position.
Auto Volume: This item is used for reducing the difference between channel and program’s
volume automatically.
Standard Produces a balanced sound in all environments.
Music Preserves the original sound.Good for musical programs.
Movie Enhances treble and bass for a rich sound experience.
Sports Enhances vocals for sports.
Personal Select to customize sound settings.
Note:The treble and bass are only available in User mode,you can adjust them as you like.
AD Switch
Press ▼ / ▲ button to select AD Switch, then press ◄ / ► button to select On or Off.
Amblyopia function for the blind, the tracks will be mixed describe the current screen .
It need codestream to support.
19
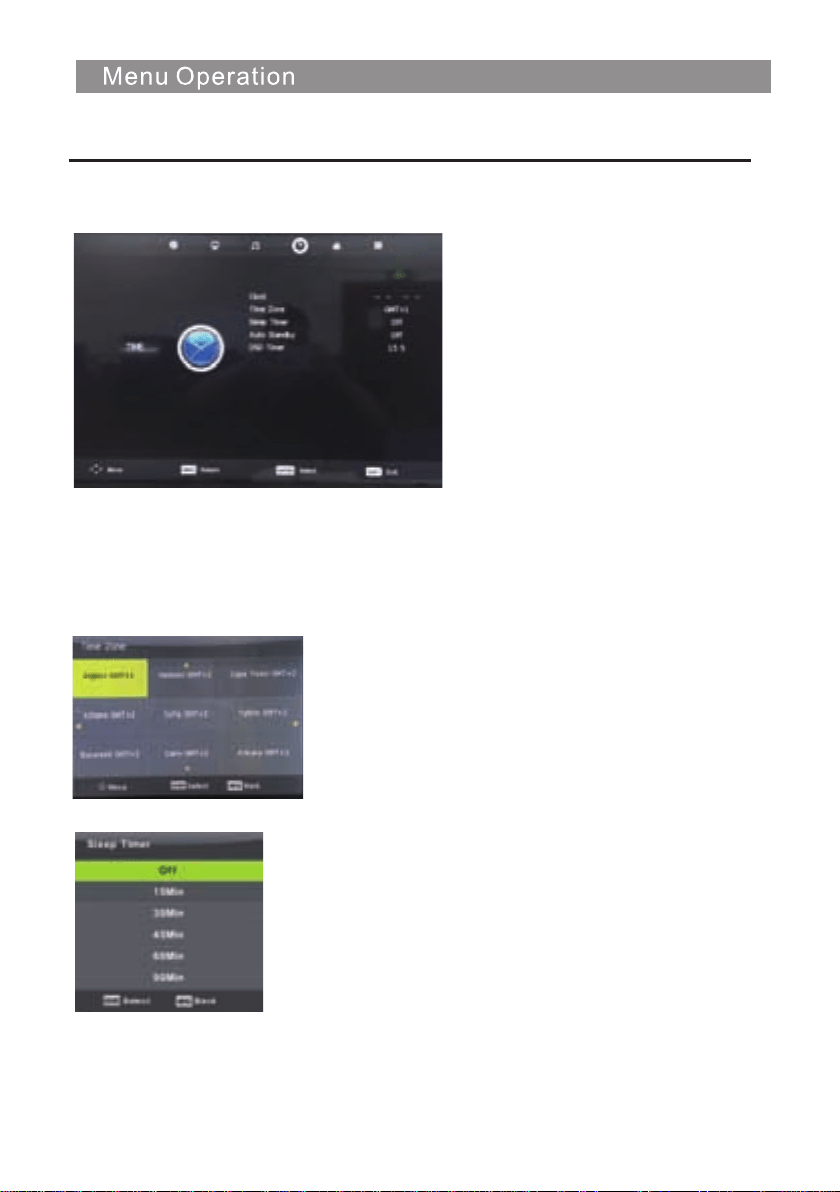
Time Menu
Press MENU button to display the main menu.
Press / button to select TIME in the main menu.
1. Press ▼ / ▲ button to select the option that you want to adjust in the
▼
▲
▼
▲
TIME menu.
2. Press Enter button l to adjust.
3. After finishing your adjustment, Press Enter button to save and return to the previous menu.
Time Zone
Press ▼ / ▲ button to select Time Zone, then press Enter button to enter sub-menu.
Press ▼ / ▲ / / button to select time zone.
Sleep Timer
Press ▼ / ▲ button to select Sleep Timer, then press
Enter button to enter sub-menu.
Press ▼ / ▲ button to select.
(Available options are:Off,10min,20min,30min,60min,
90min,120min,180min,240min).
20
21
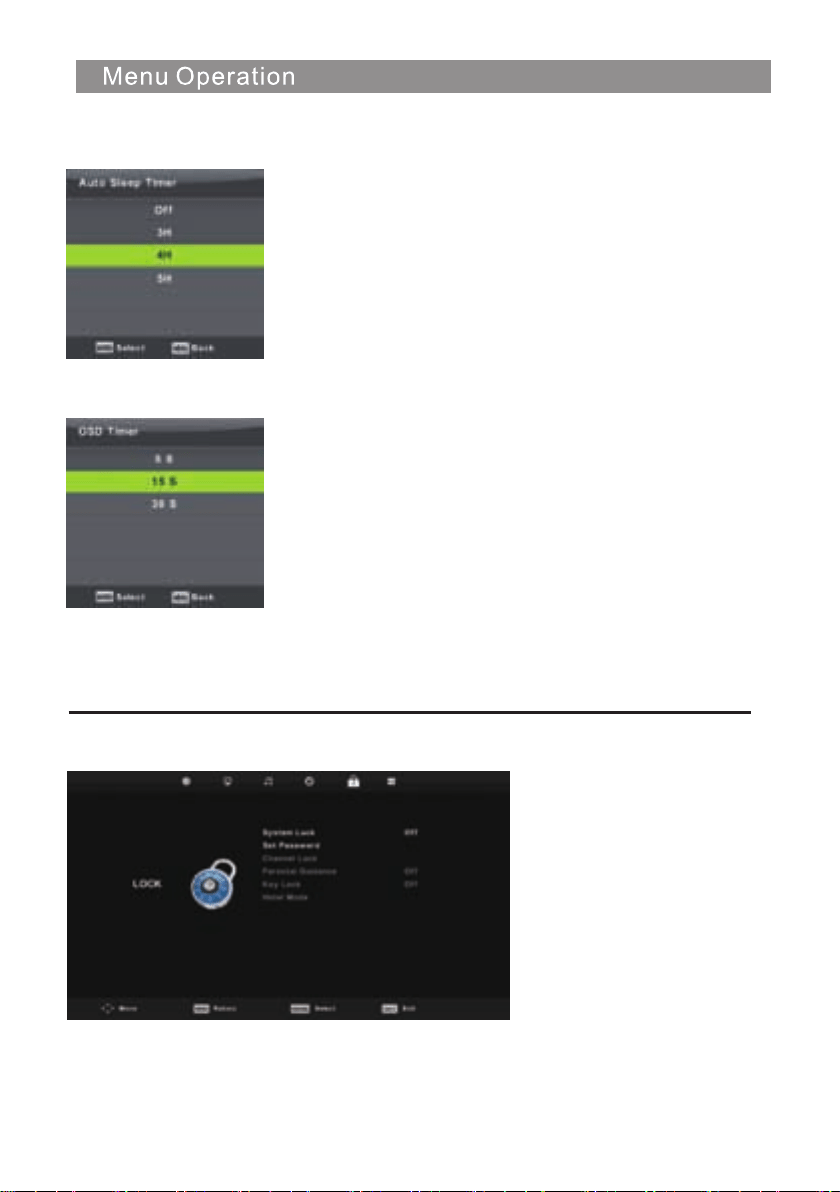
OSD Timer
Auto Standby
Press ▼ / ▲ button to select Auto Standby, then press Enter
button to enter sub-menu.
Press ▼ / ▲ button to select.
Tips: The standby mode will activate according to the selected timer
if no input signals are detected.
Press ▼ / ▲ button to select OSD Timer,
then press Enter button to enter sub-menu.
Press ◄ / ► button to select.
Lock Menu
Press MENU button to display the main menu.
Press ◄ / ► button to select Lock in the main menu.
1. Press ▼ / ▲ button to select the option that you want to adjust in the LOCK SYSTEM menu.
2. Press Enter/◄ / ► button to adjust.
3. After finishing your adjustment, Press MENU button to return back to the previous menu
.

Lock System
Press ▼ / ▲ button to select Lock System,
then press Enter button to make the following 3 options valid.
and if forget what you set, Default password is 0000,
please call the service center.
Set Password
Press ▼ / ▲ button to select Set Password,
then press Enter button to enter sub-menu to set new
password.
Channel Lock
Press ▼ / ▲ button to select Channel
Lock then press Enter button to enter
sub-menu to select.
Press button to lock or unlock the Green
channel.
22
Key Lock
Press ▼ / ▲ button to select Key Lock, then press ◄ / ► button to select Off or On.
When Key Lock’s status is activated, you can’t use the Key panel button.
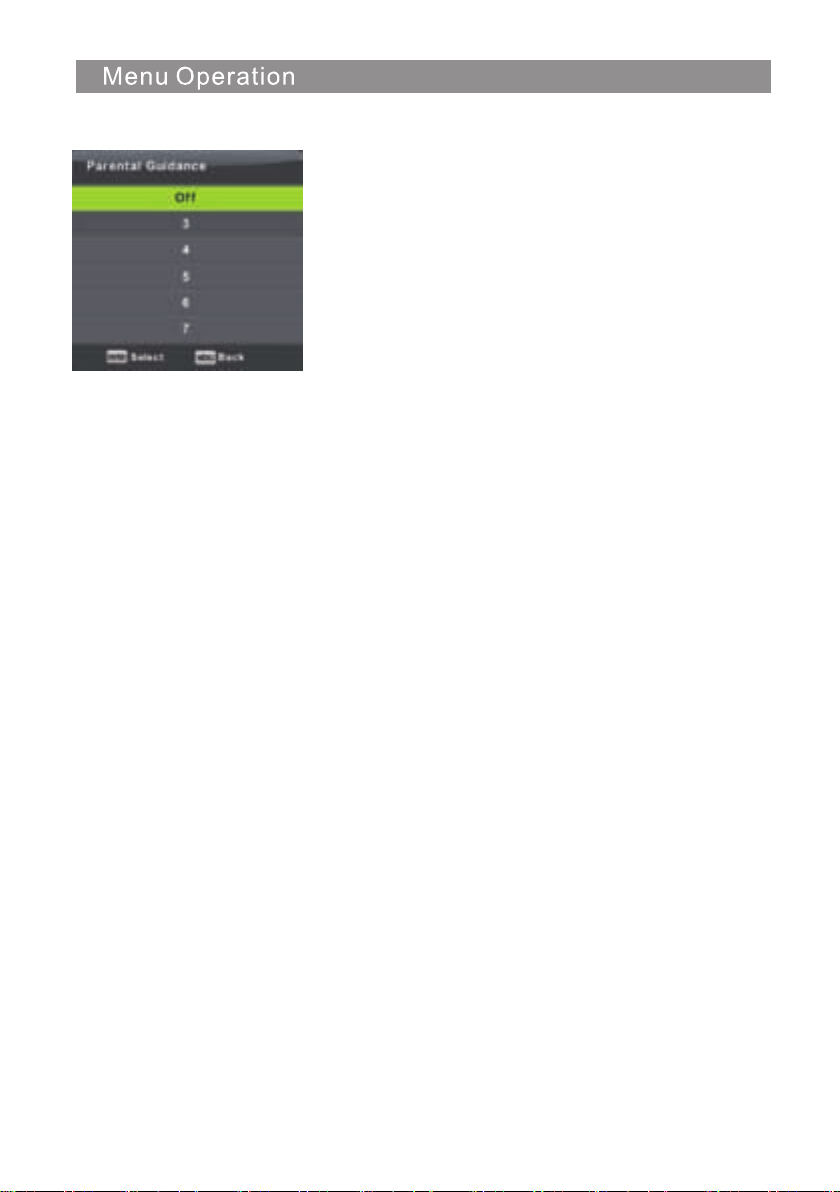
Parental Guidance
Press ▼ / ▲ button to select Parental Guidance,
then press Enter button to enter sub-menu to select
the number of age which is suitable for your children.
23
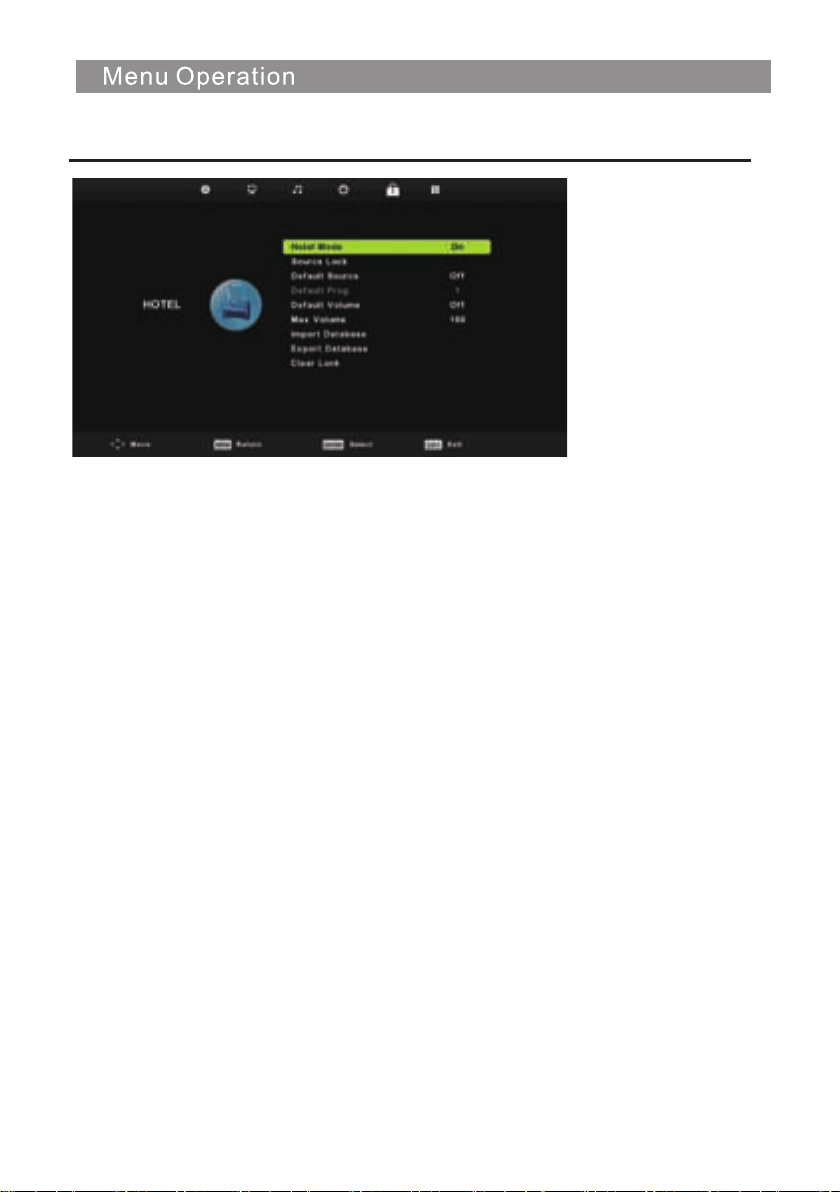
Hotel Mode
1. Press ▼ / ▲ button on the remote control to select hotel mode in the Lock menu.
2. Press Enter button on the remote control to enter the sub-menu.
3. After finishing your adjustment, Press MENU button to save and return back to the previous menu.
Hotel Mode
Press ▼ / ▲ button to select Hotel Mode, then press ◄ / ► button to select on or off.
Source Lock
Press ▼ / ▲ button to select Source Lock, then press Enter button to enter sub-menu to select.
Default Source
Press ▼ / ▲ button to select Default Source, then press Enter button to enter sub-menu to select.
Default Prog
Press ▼ / ▲ button to select Default Prog, then press ◄ / ► button to adjust.
It is available when the default source is TV.
Max Volume
Press ▼ / ▲ button to select Max Volume, then press ◄ / ► button to adjust.
Clear Lock
Press ▼ / ▲ button to select Clear Lock, then press Enter button to clear the setting you
have done before.
24
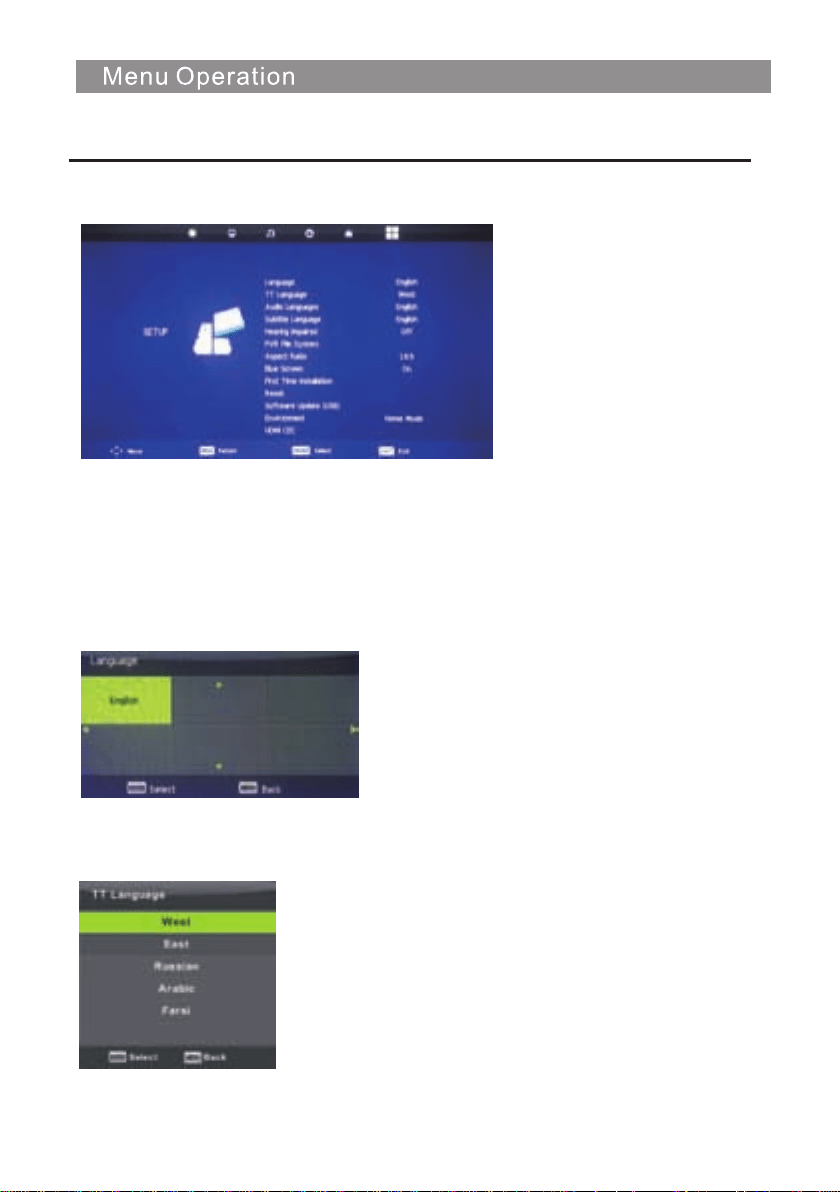
OSD Language
Setup Menu
Press MENU button to display the main menu.
Press / button to select SETUP in the main menu.
1. Press ▼ / ▲ button to select the option that you want to adjust in the SETUP menu.
2. Press Enter button to adjust.
3. After finishing your adjustment, Press Enter button to save and return to the previous menu.
TT Language
Press ▼ / ▲ button to select TT Language, then press Enter button to enter sub-menu.
Press ▼ / ▲
▲
▲
/ / button to select TT language.
Select an OSD menu language can be displayed.Default English
is selected as menu language.
Press ▼ / ▲
▲
▲
▲
▲
/ / button to select Menu Language.
25
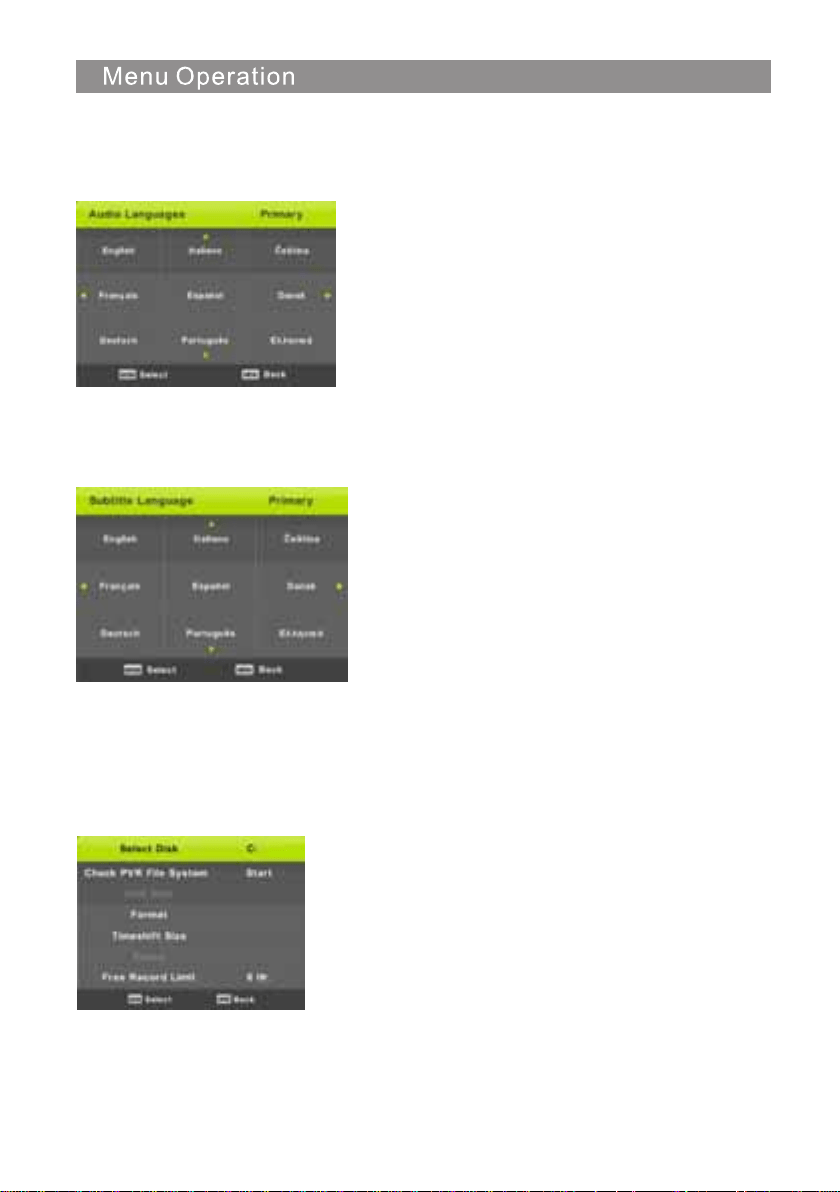
Audio Languages
Press ▼ / ▲ button to select Audio Languages, then press Enter button to enter sub-menu.
Press ◄ / ► button to select the primary of Audio Languages.
Press ▼ / ▲ / ◄ / ► button to select the Audio Languages.
Subtitle Language
Press ▼ / ▲ button to select Subtitle Language, then press Enter button to enter sub-menu.
Press ◄ / ► button to select the primary of Subtitle Language.
Press ▼ / ▲ / ◄ / ► button to select the Subtitle Language.
Hearing Impaired
Press ▼ / ▲ button to select Hearing Impaired, then press Enter button to select On or Off.
PVR File System
Press ▼ / ▲ button to select PVR File System, then press Enter button to enter sub-menu.
Press ▼ / ▲ button to select Check PVR File System ,
then press Enter button to enter. Then it will check the USB speed.
26

Aspect Ratio
Press ▼ / ▲ button to select Aspect Ratio, then press Enter button to enter sub-menu.
Press ▼ / ▲ button to select aspect ratio. (Available options are: Auto, 4:3,16:9, Zoom1, Zoom2).
Blue Screen
Press ▼ / ▲ button to select Blue Screen, then press Enter button to select On or Off.
First Time Installation
Press ▼ / ▲ button to select First time installation, then press Enter button to enter.
Reset
Press ▼ / ▲ button to select Reset, then press Enter button to enter sub-menu.
Software Update(USB)
Press ▼ / ▲
▼
/
▲
▼
/
▲
▼
/
▲
▼
/
▲
button to select Software Update (USB), plug your USB device in the USB slot,
then press Enter button to update the right software.
HDMI CEC
Press ▼ / ▲ button to select HDMI CEC, then press Enter button to enter the sub-menu.
CEC Control
Press button to turn the
CEC Control
on or off.
Audio Receiver
Press button to turn the
Audio Receiver
on or off.
Device Auto Power Off
Press button to turn the
Device Auto Power Off
on or off.
TV Auto Power On
Press button to turn the
TV Auto Power On
on or off.
Device List
Press Enter button to open the main menu of device.
Device Menu
Press Enter button to open the main menu of device.
27
Device Auto Power Off
TV Auto Power On Off
Audio Receiver
Device List
Device Menu
CEC Control
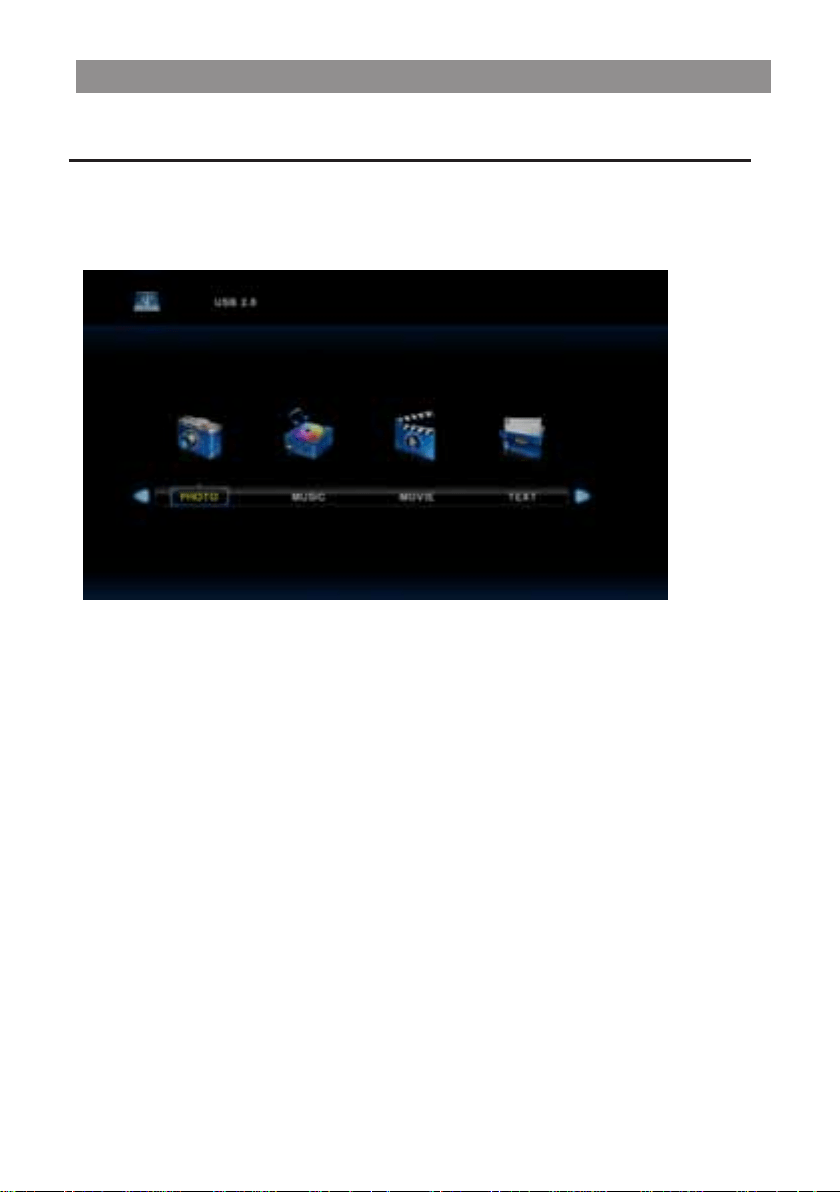
Note: Before operating Media menu,Plug in USB device,then press INPUT button to set the
Input Source to Media .
Press ▼ / ▲ button to select Media in the Source menu, then press Enter button to enter.
Press ◄ / ► button to select the option you want to adjust in the main Media menu,
then press Enter button to enter.
USB
28
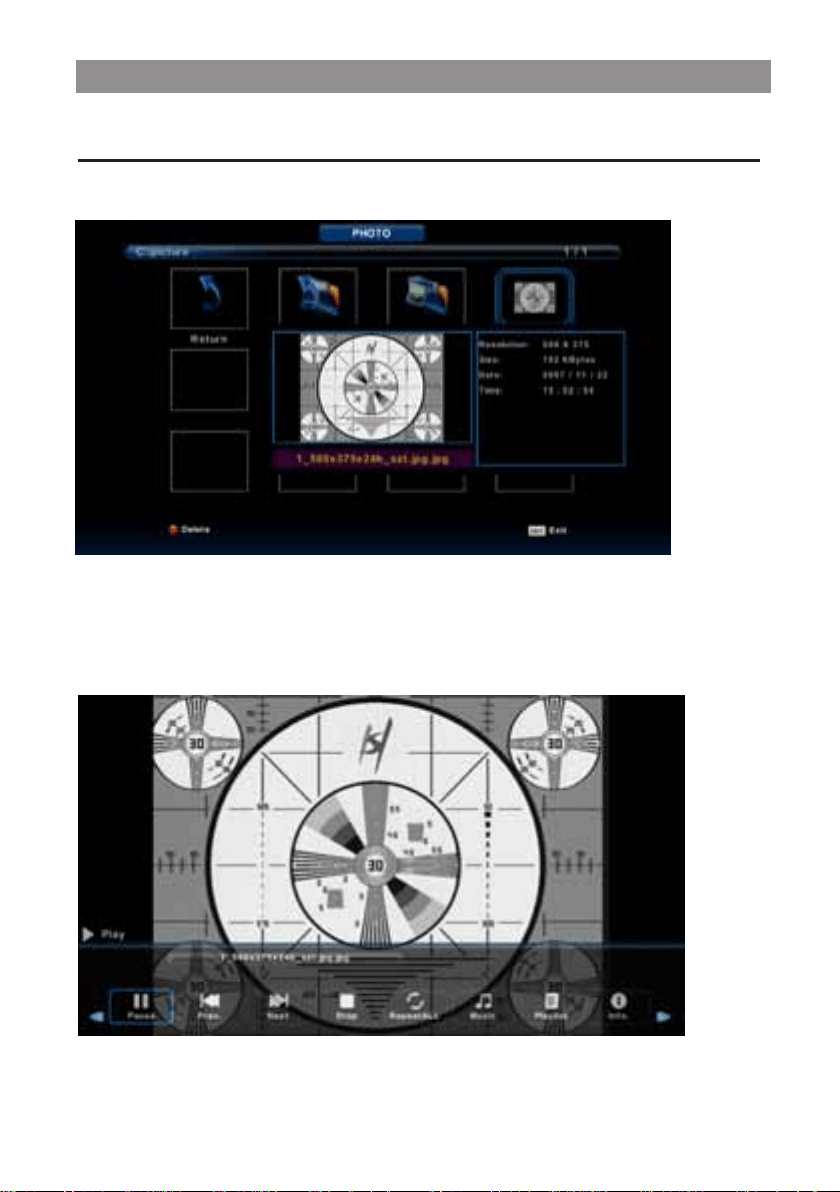
Press ◄ / ► button to select PHOTO in the main menu, then press Enter button to enter.
Press Exit button to return to the previous menu and exit menu to quit.
Photo Menu
Press ◄ / ► button to select the file you want to watch in the file selecting menu,
then press media button to display picture.
When highlighting the option you select, the file information will appear on the right and picture
will be previewed in the center.
29
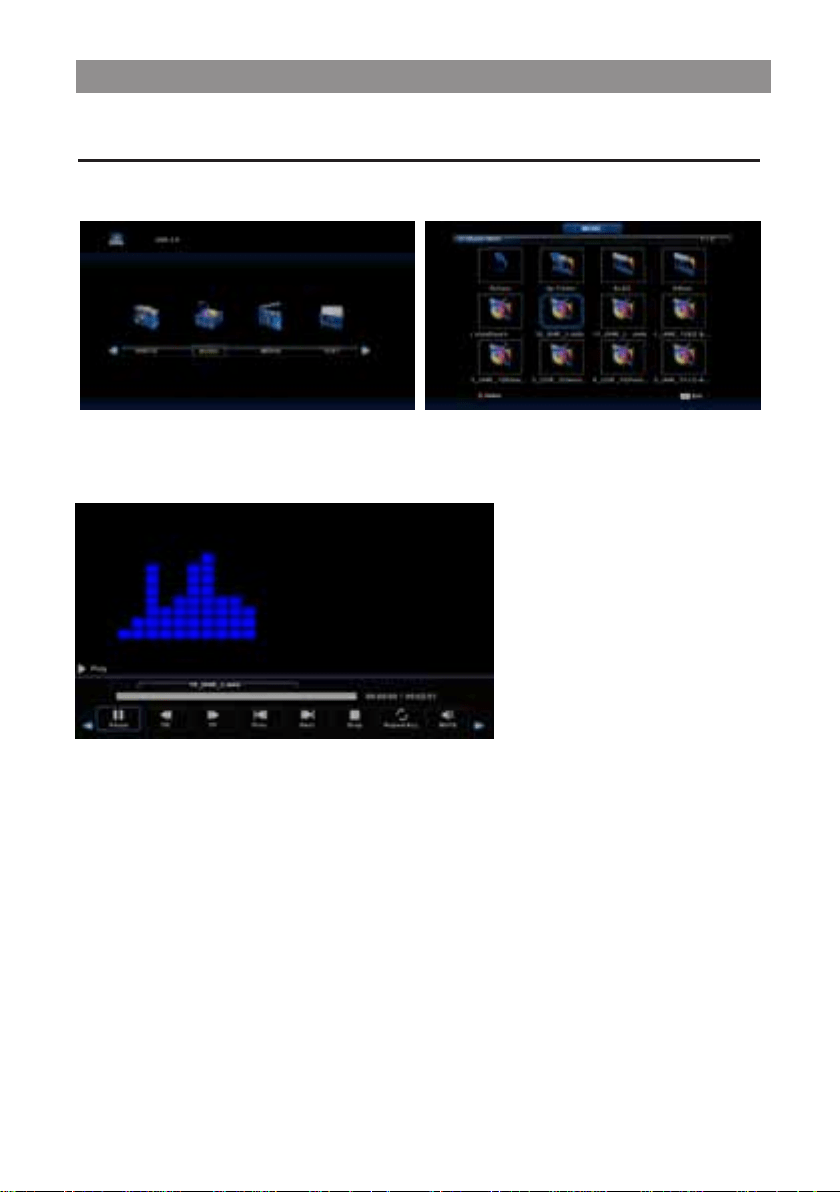
Press ◄ / ► button to select MUSIC in the main menu, then press Enter button to enter.
Press Exit button to return to the previous menu and exit menu to quit.
Music Menu
Press ◄ / ► button to select drive disk you want to watch, then press Enter button to enter.
Press ◄ / ► button to select return option to the previous menu.
30
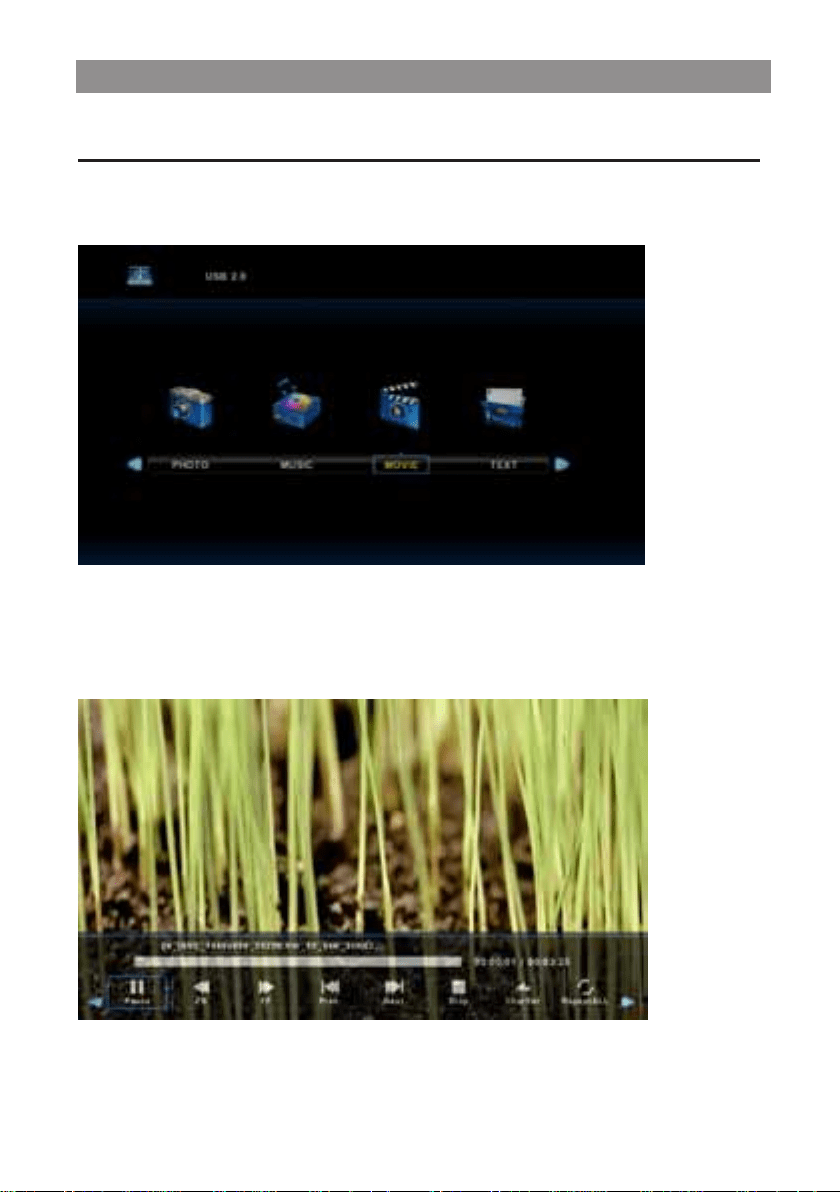
Movie Menu
Press display button to select menu in the bottom you want to run, then press Enter button to operate.
Press Exit button to back to the previous menu and exit button to quit the entire menu.
Press ◄ / ► button to select drive disk you want to watch, then press Enter button to enter.
Press ◄ / ► button to select MOVIE in the main menu, then press Enter button to enter.
Press Exit button to return to the previous menu and exit menu to quit.
Press media button to play the selected movie.
31
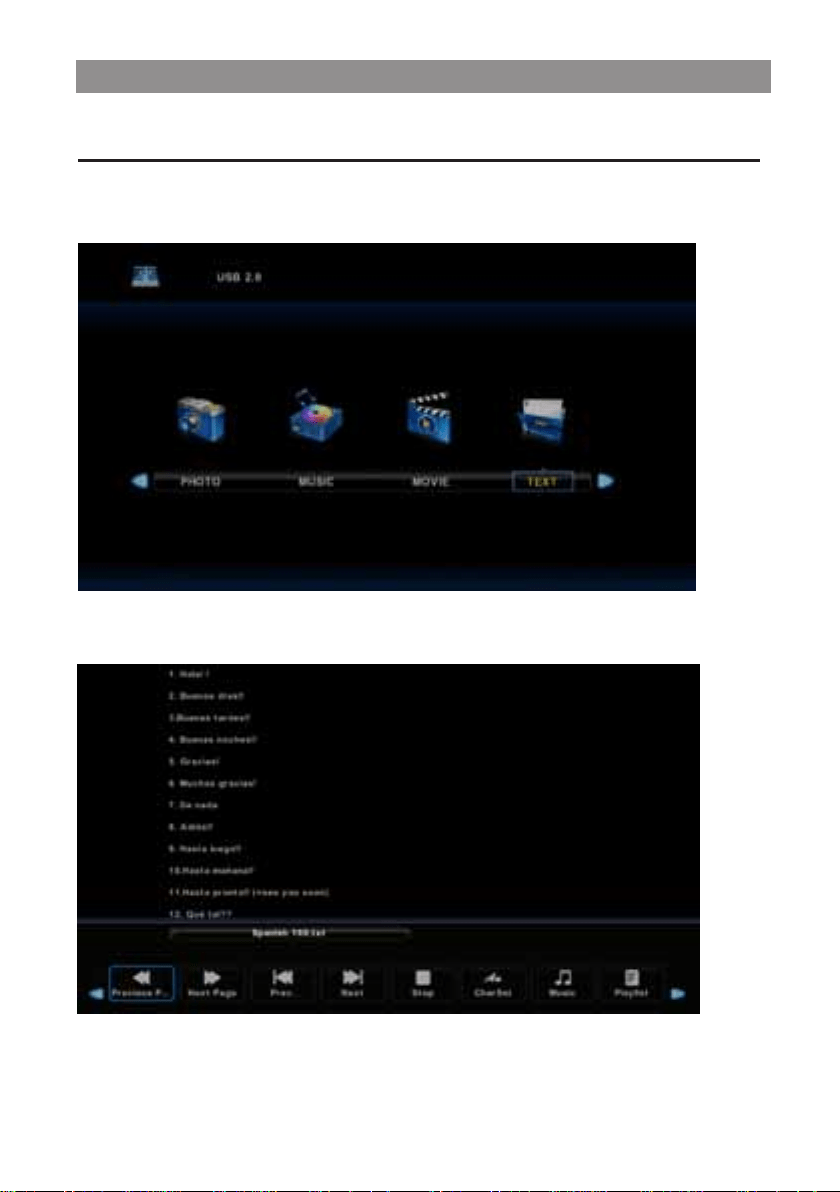
Text Menu
Press ◄ / ► button to select TEXT in the main menu, then press Enter button to enter.
Press Exit button to return to the previous menu and exit menu to quit.
Press ◄ / ► button to select drive disk you want to watch, then press Enter button to enter.
Press ◄ / ► button to select return option to back to the previous menu.
32
33
work, place
BB4X16(4pcs)
34
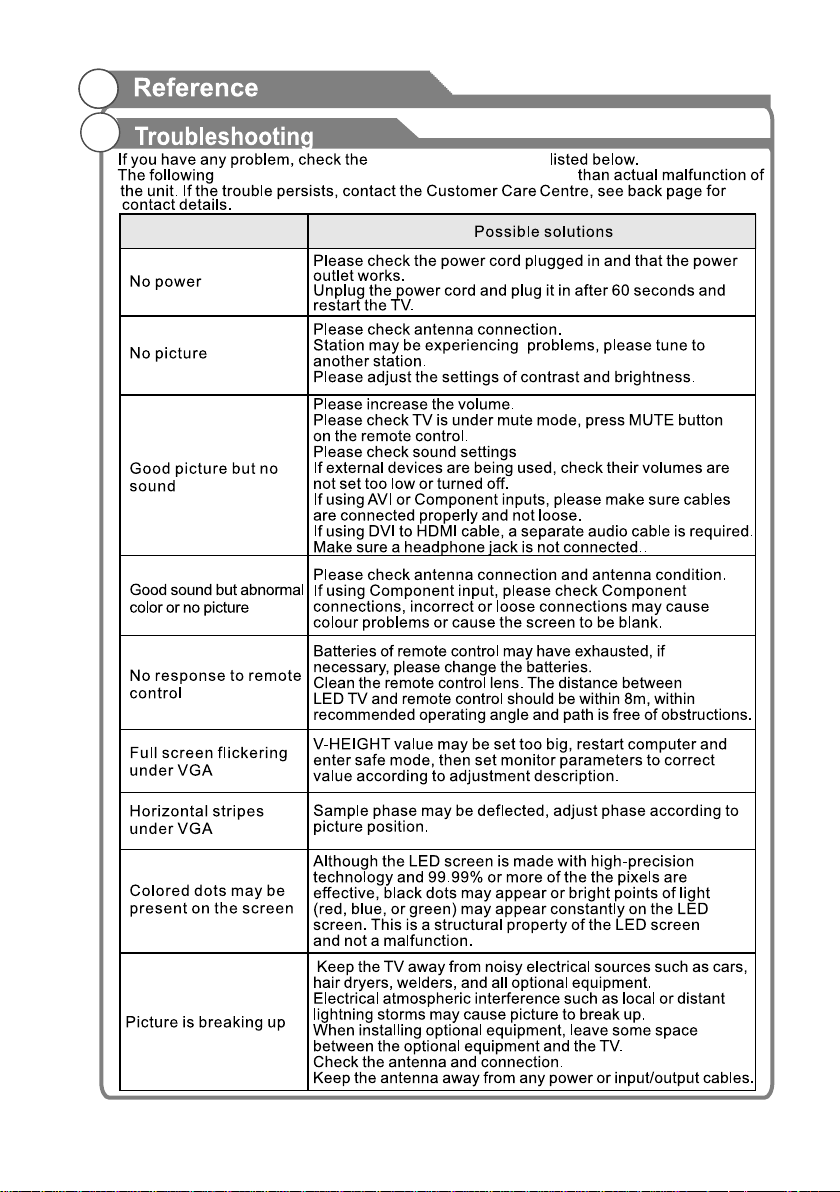
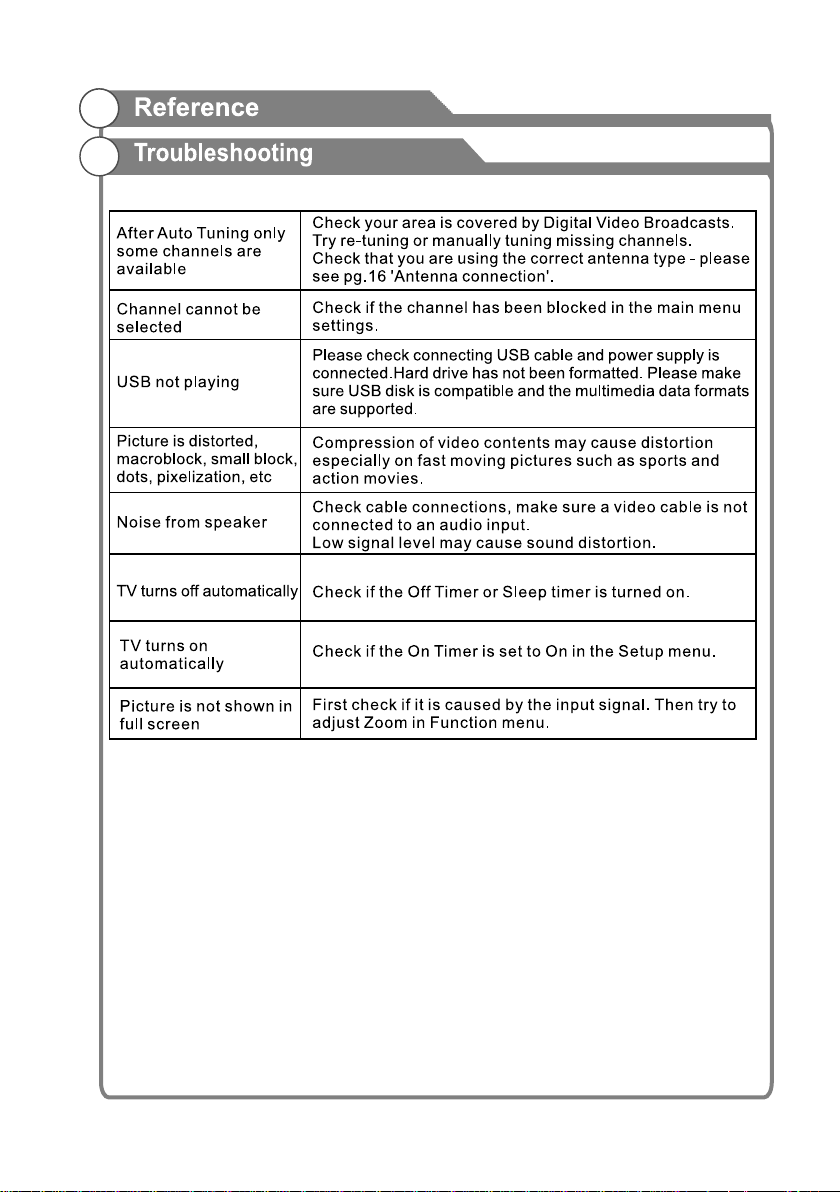
solutions for each issues
issues may result from inappropriate settings rather
Issues
35

36
Picture Issues and Reasons

Palsonic Customer Service
Telephone (Australia) 1300 657 888
Palsonic C
ABN 34 000 474 108
1 Joynton Avenue, Waterloo NSW 2017 Australia
Telephone (02) 9313 7111 Facsimile (02) 9697 0655
www.palsonic.com.au