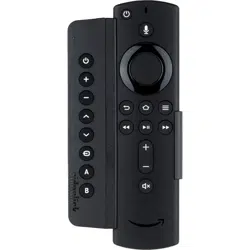
Universal Remote Attachment for
Streamline Your Streaming Experience
Universal Remote Attachment for
NVIDIA® SHIELD
TM
NVIDIA
®
SHIELD
TM
1
st -
2
nd
Generation Gen NVIDIA SHIELD Remote
Getting Started
What’s Included
Tips
Streamline Your Streaming Experience
•
Sideclick Universal Learning Remote
•
2 AAA Batteries
•
2 NVIDIA SHIELD Adapter Clips*
*NVIDIA SHIELD remote not included
All Rights Reserved
Sideclick Remotes™ operates under True Bloom LLC and is not
afliated with NVIDIA Corporation.
NVIDIA and SHIELD are trademarks of NVIDIA Corporation, registered in the
United States and other countries
Please visit our website, www.sideclickremotes.com for additional information
including:
•
Assembly videos
•
Programming videos
•
Troubleshooting
•
Additional Sideclick products and accessories
•
Registering your device
Simple Setup
Insert the included 2 AAA Batteries into your Sideclick Remote.
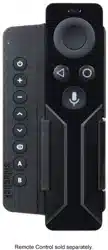
Snap your NVIDIA SHIELD remote into the Adapter Clip.
Program Sideclick and you’re ready to go.
(Detailed instructions on reverse)
1
2
3
Easy to Use
Fast Setup
Long Battery Life
Control Multiple Devices
Identify Your Shield Remote01
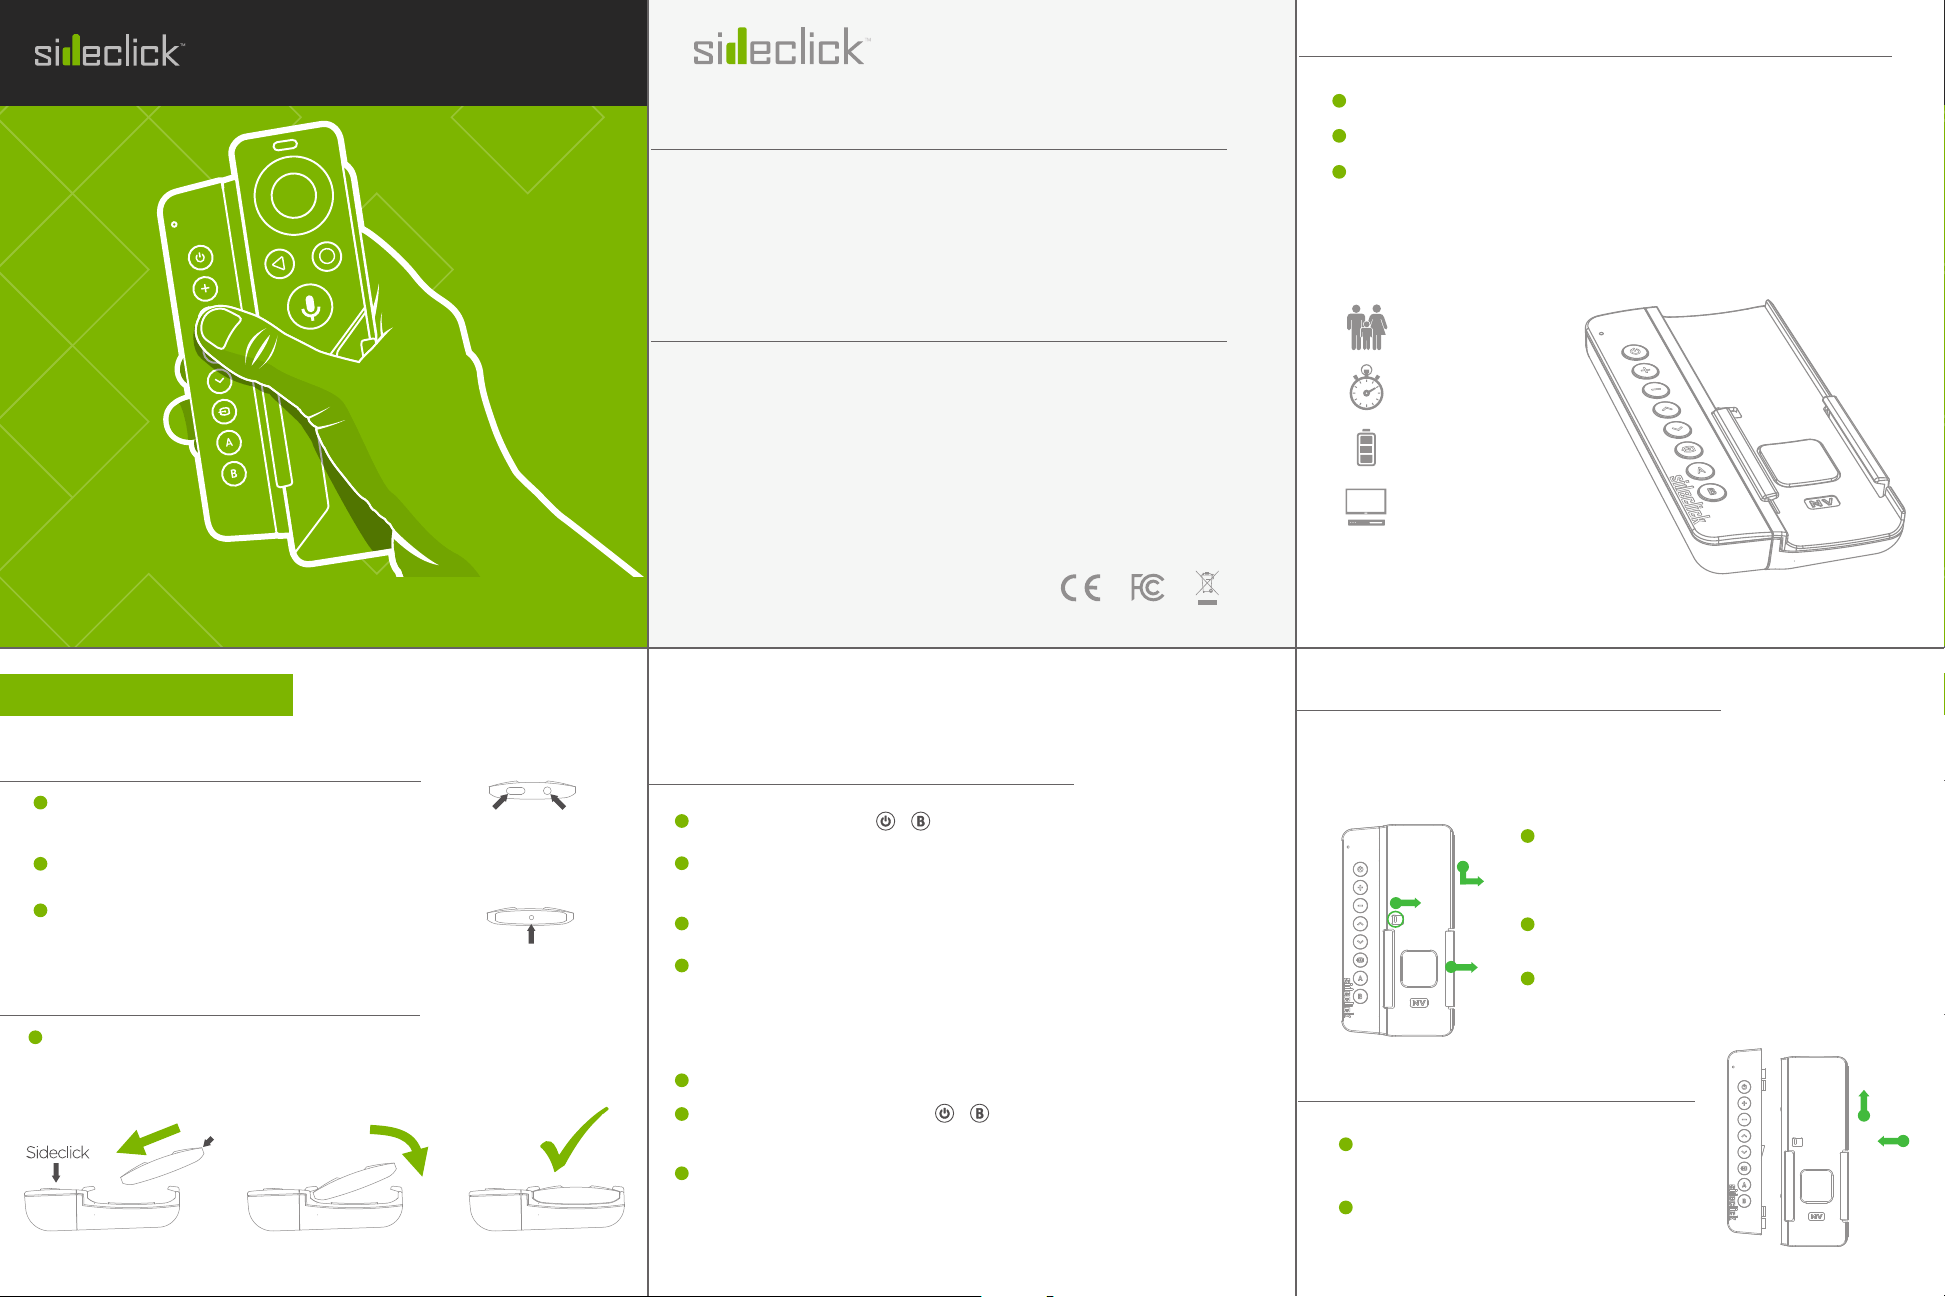
Install Your Remote02
Install your NVIDIA SHIELD remote into the clip by sliding the left side of the
remote under the left tab of the clip and then firmly pressing down on the
right hand side of the remote until it snaps into place.
1
1
NVIDIA SHIELD
Remote
Look at the bottom of your NVIDIA SHIELD
remote and use the image to the right to identify
which generation remote you own.
Your Sideclick is packaged with the gen 2 adapter
clip (NX) installed.
If you own the Gen 1 remote, jump to section 4 and
5 to remove the NX adapter clip and attach the
gen 1 (NV) clip. Once you have completed section
5 proceed to section 2.
1
2
3
Charging
Port
Headphone
Jack
Battery Door
Gen 1
Gen 2
On Sideclick, hold down the + buttons simultaneously until the LED lights solid.
Position your Sideclick remote and the device remote you are learning from on a table, head to
head, approximately 1 inch apart.
Press and release the Sideclick button you wish to program. The LED will start blinking.
Press and hold the button you want it to learn from on your device remote.
-The LED will blink 3 times indicating a successful learn, then will return to solid indicating you
are ready to program other buttons.
-If the LED does not return to solid, a problem in programming has occurred. Exit programming
mode via step 6 and try again.
While LED is on solid, repeat steps 3 & 4 for each button you would like to program.
To exit programming mode, press the + simultaneously and the LED will turn o.
You can also wait approximately 10 seconds and it will exit programming mode automatically.
Your Sideclick is now ready to use.
Program Your Sideclick03
1
2
3
4
5
6
7
If installed, remove your
NVIDIA SHIELD
remote by
pushing the right side tab towards the right. Once the tab
clears the edge of the remote, pull the right hand side of the
remote toward you to free it from under the tab.
Using your finger tip, slide the release tab to the right as
indicated in picture
While maintaining pressure on the tab, slide clip down and
then away from remote.
Removing Your Remote and Clip04
To attach the new clip, line up tabs on
Sideclick remote with keyholes on the side of
the clip.
Press clip against Sideclick remote and slide
clip up until it locks in place.
4
5
2
3
1
4
5
1
2
3
Sideclick features an interchangeable clip system. If you ever change streaming
devices, you can go to www.sideclickremotes.com and purchase a new adapter clip
to accommodate your new streaming device remote. This section explains how to
remove and re-attach the NVIDIA SHILED adapter clip.
Attaching Your Adapter Clip05