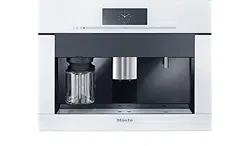
Miele CVA 6805 Coffee System

User Manual

For CVA 6805.

PDF File Manual, 108 pages, Read Online | Download pdf file

CVA 6805 photo
background
Operating and Installation Instructions
Built-in Coffee System
To prevent accidents and machine damage, you absolutely must read
these instructions before installation or use.
en – US, CA M.-Nr. 10 215 120
Loading page 2...
Loading page 3...
Loading page 4...
Loading page 5...
Loading page 6...
Loading page 7...
Loading page 8...
Loading page 9...
Loading page 10...
Loading page 11...
Loading page 12...
Loading page 13...
Loading page 14...
Loading page 15...
Loading page 16...
Loading page 17...
Loading page 18...
Loading page 19...
Loading page 20...
Loading page 21...
Loading page 22...
Loading page 23...
Loading page 24...
Loading page 25...
Loading page 26...
Loading page 27...
Loading page 28...
Loading page 29...
Loading page 30...
Loading page 31...
Loading page 32...
Loading page 33...
Loading page 34...
Loading page 35...
Loading page 36...
Loading page 37...
Loading page 38...
Loading page 39...
Loading page 40...
Loading page 41...
Loading page 42...
Loading page 43...
Loading page 44...
Loading page 45...
Loading page 46...
Loading page 47...
Loading page 48...
Loading page 49...
Loading page 50...
Loading page 51...
Loading page 52...
Loading page 53...
Loading page 54...
Loading page 55...
Loading page 56...
Loading page 57...
Loading page 58...
Loading page 59...
Loading page 60...
Loading page 61...
Loading page 62...
Loading page 63...
Loading page 64...
Loading page 65...
Loading page 66...
Loading page 67...
Loading page 68...
Loading page 69...
Loading page 70...
Loading page 71...
Loading page 72...
Loading page 73...
Loading page 74...
Loading page 75...
Loading page 76...
Loading page 77...
Loading page 78...
Loading page 79...
Loading page 80...
Loading page 81...
Loading page 82...
Loading page 83...
Loading page 84...
Loading page 85...
Loading page 86...
Loading page 87...
Loading page 88...
Loading page 89...
Loading page 90...
Loading page 91...
Loading page 92...
Loading page 93...
Loading page 94...
Loading page 95...
Loading page 96...
Loading page 97...
Loading page 98...
Loading page 99...
Loading page 100...
Loading page 101...
Loading page 102...
Loading page 103...
Loading page 104...
Loading page 105...
Loading page 106...
Loading page 107...
Loading page 108...

Other documents for Miele CVA 6805

The following documents are available:
User Manual Specification Photos

Specifications

Miele CVA 6805 Questions and Answers


#1 Does the 6805 need a drain?

No, it is plummed. The plumbed version allows you to directly connect a water supply line to the system

#2 How long does it take to heat up and dispense hot water? and is it hot enough for tea?

It takes about a minute to heat up and it is hot enough to make tea.

User Manual - Transcript

  • Page 1 - English - : Operating and Installation Instructions Builtin Coffee System To prevent accidents and machine damage you absolutely must read these instructions before installation or use en US CA MNr 10 215 120
  • Page 2 - English - : Contents IMPORTANT SAFETY INSTRUCTIONS 5 Preparing your appliance for an extended vacation 15 SAVE THESE INSTRUCTIONS 15 Guide to the appliance 16 Front view 16 Accessories 18 Operation 19 Touch display 19 Operating actions 20 Symbols in the display 23 Before using for the first time 24 Before using for the first time 24 Turning on for the first time 24 Water hardness 25 Filling the water tank 27 Filling the coffee bean container 28 Turning the machine On and Off 29 Dispenser adjustment 30 Preparing beverages 31 Making a coffee drink 31 Double portion 32 Canceling preparation 32 Coffee pot Preparing several cups of coffee one after the other 32 Making coffee drinks from ground coffee 33 Drinks with milk 34 Preparing hot water 36 Preparing user profile drinks 36 After a drink has been prepared 37 Coffee the way you like it 38 Grinder setting 38 Changing the parameters of a drink 39 Amount of coffee 39 Brewing temperature 40 Prebrewing ground coffee 40 Portion size 41
  • Page 3 - English - : Contents Resetting drinks 42 User profiles 43 Accessing a user profile 43 Creating a profile 43 Selecting a user profile 43 Changing the name 43 Deleting a user profile 43 Changing a user profile 44 User profiles Creating and editing your own drinks 45 Creating a drink 45 Changing drinks Changing portion sizes parameters and names 45 Deleting a drink 45 MyMiele 46 Settings 47 Accessing the quotSettingsquot menu 47 Changing and saving settings 47 Setting options 48 Language 50 Time of day 50 Date 50 Timer 51 Eco mode 53 Lighting 53 Start screen 54 Info displaying information 54 Locking the coffee system System lock 54 Water hardness 55 Display brightness 55 Volume 55 Activating and deactivating water connection 55 Dispenser adjustment 55 Factory default setting 55 Showroom program Demo mode 55 Cleaning and care 57 Overview 57 Clean by hand or in dishwasher 58 Drip tray 60 Drip tray cover 61 Water tank 61
  • Page 4 - English - : Contents Waste unit 62 Main dispenser 62 Sensor cover 65 Maintenance of the milk valve 65 Milk flask with lid 66 Bean container 67 Interior and machine front 68 Main dispenser connector 68 Brew unit 69 Remove the brew unit and wash by hand 69 Care programs 70 Accessing the quotMaintenancequot menu 70 Rinsing the coffee system 71 Rinsing the milk pipework 71 Cleaning the milk pipework 72 Degreasing the brew unit 73 Descaling the machine 75 Frequently Asked Questions 78 Messages in the display 78 Unusual performance of the coffee system 81 Unsatisfactory results 86 Problems when preparing milk 88 Exchanging the elbow connector 89 Technical Service 91 Saving energy 92 Packaging material Disposal of old machine 93 Plumbing 94 Electrical connection 97 Installation 98 Installation and combination options 98 Ventilation 100 Installing the coffee system 101 Adjusting the door hinges 102 Copyright and licenses 103
  • Page 5 - English - : IMPORTANT SAFETY INSTRUCTIONS Please read these instructions carefully to prevent accidents and machine damage This appliance complies with current safety requirements Im proper use of the appliance can cause personal injury and material damage Read this safety information carefully before operating the appliance They contain important information on the safe installation opera tion and care of your coffee system To avoid the risk of personal injury or damage to the coffee system it is important that you carefully read the instructions Miele cannot be held liable for dam age caused by noncompliance with these IMPORTANT SAFETY INSTRUCTIONS Keep these instructions in a safe place and pass the on to any fu ture user
  • Page 6 - English - : IMPORTANT SAFETY INSTRUCTIONS Intended use Use this coffee system only in standard household environments for making coffee beverages such as espresso cappuccino latte macchiato etc Any other type of use is not permitted The coffee system is not suitable for outdoor use The machine is intended only for the preparation of coffeebased drinks such as espresso cappuccino latte macchiato etc Any other usage is not supported Persons which lack physical sensory or mental abilities or experi ence with the machine should not use it without supervision or in struction by a responsible person
  • Page 7 - English - : IMPORTANT SAFETY INSTRUCTIONS Safety with children Caution Danger of burning and scalding on the dispensing dispensers Childrens skin is far more sensitive to high temperatures than that of adults Ensure children do not touch hot surfaces of the coffee system or place parts of their body under the dispensing dispensers Keep the coffee system out of reach of children Children must be kept away from the machine unless they are constantly supervised Children should be supervised when they are near the coffee sys tem Do not allow them to play with it or to use the controls Children must not be allowed to clean the coffee system unsuper vised Remember that coffee and espresso are not suitable drinks for children Danger of suffocation Keep children away from any packing material
  • Page 8 - English - : IMPORTANT SAFETY INSTRUCTIONS Technical safety Installation and repairs may only be carried out by a Mieleautho rized service technician Installation repairs and other work by un qualified persons can cause considerable danger to users A damaged coffee system could be dangerous Before building in the machine check it for any externally visible damage Do not use a damaged machine Before connecting the coffee system check the voltage and fre quency indicated on the data plate against the voltage and fre quency of the household electrical supply This data must correspond in order to prevent damage to the coffee system If in doubt consult a qualified electrician Be certain your appliance is properly installed and grounded by a qualified technician To guarantee the electrical safety of this appli ance continuity must exist between the appliance and an effective grounding system It is imperative that this basic safety requirement be met If there is any doubt have the electrical system of the house checked by a qualified electrician Reliable and safe operation of the coffee system can only be guar anteed if it is connected to the electrical supply Do not connect the machine to the electrical supply using an ex tension cord or power bar The coffee system may not be used in mobile installations such as ships For safety reasons this machine may only be used when it has been built in If the coffee system is to be built in above another appliance there must be a fullwidth closed shelf between them Only use the coffee system in rooms where the ambient tempera ture is between 50F 10C and 100F 38C
  • Page 9 - English - : IMPORTANT SAFETY INSTRUCTIONS Do not cover or block the aeration and ventilation crosssections Condensation water can damage the coffee system or surrounding cabinets Ensure that there is sufficient ventilation around the coffee sys tem The ventilation gaps in the housing unit and the gap between the top of the housing unit and the ceiling must be at least 78 34quot 200cm Otherwise condensation can build up and damage the machine or the housing unit If the coffee system is installed behind a cabinet door it may only be used with the door open This will prevent the formation of heat and humidity and subsequent damage to the appliance andor hous ing unit Do not close the cabinet door while the coffee system is in use Ensure the coffee system has cooled down completely before closing the door Repair work should only be performed by a Mieleauthorized ser vice technician Repairs by unqualified persons can cause consider able danger to users For repairs the coffee system must be disconnected from the electrical power supply The coffee system is only disconnected from the power supply if the circuit breaker has been tripped or the fuse is removed or the power cord is disconnected from the power supply Pull the plug not the cord to disconnect the appliance from the power supply Repairs must only be performed by a trained technician in accor dance with national and local safety regulations Repairs and other work by unauthorized persons could be dangerous and may void the warranty
  • Page 10 - English - : IMPORTANT SAFETY INSTRUCTIONS Defective components should be replaced by Miele original parts only Only with original Miele parts can the manufacturer guarantee the safety of the appliance Never open the outer casing of the machine Tampering with elec trical connections or components and mechanical parts is highly dangerous to the user and can cause operational faults or electric shock Use only genuine original Miele parts If parts or accessories from other manufacturers are used the warranty may become void The use of accessory attachements not recommended by Miele may result in fire electric shock or injury to persons
  • Page 11 - English - : IMPORTANT SAFETY INSTRUCTIONS Plumbing Do not connect the coffee system to a hot water supply The nonreturn valve must be easily accessible when the coffee system is built in The protective sleeve of the water intake hose must not be dam aged or become kinked This will cause it to leak The integrated Waterproof System offers protection from water damage provided the following conditions are met the coffee system is correctly installed connected to the electrical supply and plumbed inthe coffee system is correctly installed connected to the electrical supply and plumbed in if a fault is identified the machine must be repaired immediately The water supply is shut off during extended periods of nonuse eg vacation
  • Page 12 - English - : IMPORTANT SAFETY INSTRUCTIONS Proper use Danger of burning and scalding from the dispensers The liquids and steam dispensed are very hot Please note Keep away from the area underneath the dispensers when hot liq uids and steam are being dispensed Do not touch hot components Hot liquid or steam could spatter from the dispensers Ensure that the main dispenser is clean and fitted correctly Water in the drip tray can also be very hot Take care when emp tying it Never look directly at the lighting or use optical instruments to look at it Please note the following regarding water In case a water tank is used Fill the water tank only with fresh cold tap water Hot or warm water or other liquids could damage the coffee system Change the water every day to prevent a buildup of bacteria If the machine is connected to the water supply Empty the water tank once a day Do not use mineral water Mineral water will cause lime scale de posits to build up in your machine and damage it Do not use water from a reverse osmosis unit in this machine This would damage it Only fill the bean container with roasted espresso or coffee beans Do not fill the bean container with coffee beans that have been treated or with ground coffee Do not fill liquids in the bean container
  • Page 13 - English - : IMPORTANT SAFETY INSTRUCTIONS Do not use green unroasted coffee beans or mixtures of coffee beans which contain green coffee beans Green coffee beans are very hard and still contain a certain amount of residual moisture These can damage the coffee system grinder as soon as grinding begins Do not use coffee beans that have been treated with caramel sugar or other substances Sugar will damage the coffee system Only add ground coffee or cleaning tablets to the ground coffee chute Do not use any caramelized ground coffee The sugar in the cof fee will stick to and block the brew unit of the coffee system The cleaning tablets for degreasing the brew unit will not remove this type of deposit Only use plain milk Most sugary additives can clog the milk lines and damage the machine If using dairy milk make sure that it has been pasteurized Do not place any alcohol mixtures which are alight underneath the main dispenser The flames could ignite plastic components and cause them to melt Do not swing from or hang anything on the machine front when it is open as this could damage the hinges of the machine The main dispenser connector cap is lubricated with silicone grease Take care not to get this on your clothes when removing or replacing the containers or other components Do not use the coffee system to clean objects
  • Page 14 - English - : IMPORTANT SAFETY INSTRUCTIONS Cleaning and care The coffee system must be disconnected from the electrical sup ply before cleaning or maintenance Clean the coffee system and the milk flask thoroughly before us ing for the first time see quotCleaning and carequot All parts of the milk system need to be cleaned thoroughly and regularly Do not use a steam cleaner to clean this machine Steam could reach electrical components and cause a short circuit Descale the coffee system regularly depending on the water hard ness level in your area Descale the machine more frequently in areas with very hard water Miele cannot be held liable for damage arising from insufficient descaling the use of incorrect descaling agent or the use of descaling agent that is not of the appropriate concentra tion Degrease the brew unit regularly with Miele cleaning tablets De pending on the natural oil content of the coffee used the brew unit can become blocked quite quickly Rinsing coffee grounds down the drain can cause the sink to clog Instead dispose of your coffee grounds appropriately as biodegrad able waste where facilities exist or by composting
  • Page 15 - English - : IMPORTANT SAFETY INSTRUCTIONS For machines with stainless steel surfaces Do not use sticky notes transparent adhesive tape masking tape or other types of adhesive on stainless steel surfaces These dam age the surface causing it to lose its dirt repellent protective coating The finish on stainless steel surfaces is susceptible to scratching Even magnets can cause scratching Preparing your appliance for an extended vacation If you elect to turn off the water to your home for an extended pe riod of time please note that this may not be enough to reduce the risk of a leak To be completely safe you must turn off the water supply to each individual appliance This means under the sink for a dishwasher at the laundry bib for your washer etc SAVE THESE INSTRUCTIONS
  • Page 16 - English - : Guide to the appliance Front view a On Off button b Touch display c Back sensor button d Door handle e Hot water dispenser f Drip tray cover g Main dispenser with automatic heightadjustment and lighting h Milk flask with lid
  • Page 17 - English - : Guide to the appliance Interior view i Ground coffee chute cover j Brew unit k Ground coffee chute l Grind control lever m Coffee bean container n Water tank with intake device o Drip tray with nospill grid p Waste unit q Drip catcher r Main dispenser connector s Service cover
  • Page 18 - English - : Accessories Additional accessories are available Contact Miele or visit the Miele website for more information These products and other useful accessories can be or dered via the Miele website Miele online shop mielestorecom Included accessories Measuring scoop For ground coffee Milk flask with lid For storing milk and preparing drinks with milk Compact lid For storing the milk flask in the refrig erator Cleaning agent for milk pipework For cleaning the milk system starter set 2 cleaning containers large and small For cleaning and maintenance of the machine Descaling tablets For descaling the water pipework starter set Cleaning tablets For degreasing the brew unit starter set Test strips For determining the water hardness level Silicone grease For lubricating the seal on the main dispenser connector Cleaning brush For cleaning the milk pipework Main dispenser connector cap Spare part Milk pipework elbow connector Spare part Optional accessories Miele also offers a range of optional ac cessories as well as cleaning and con ditioning products for your coffee sys tem Milk flask with lid For storing milk and preparing drinks with milk Cleaning agent for milk pipework for cleaning the milk system Descaling tablets for descaling the water pipework Cleaning tablets for degreasing the brew unit Silicone grease For lubricating the seal on the main dispenser connector
  • Page 19 - English - : Operation Touch display The touch display can be scratched by pointed or sharp objects eg pens and pencils Only touch the touch display with your fingers Touching the display with your finger emits a small electrical charge which in turn triggers an electrical pulse that is detected by the surface of the touch display The touch display does not react when you touch it with objects If your fingers are cold the touch display may not react The touch display is divided into three areas Espresso Coffee Lungo Coffee Cappuccino Latte Macchiato Edit Profiles DrinksMain Menu The top row shows you where you are with the menu you are in highlighted in white You can call the respective menu by tapping the desired menu name The time of day is shown at the right The middle section shows the current menu and menu items You can scroll to the right or left by swiping your finger across the display The and arrows at the bottom of the screen are used for scrolling to the left or right The number of small squares between the arrows indicates the number of pages available and your position within the current menu
  • Page 20 - English - : Operation Operating actions Each time you tap a possible option the relevant field will light up orange To select or open a menu Tap the desired field to select it Scrolling You can scroll to the right or the left Some menu options allow you to scroll up and down too Swipe the screen ie place your finger on the touch display and swipe it in the direction you want Or Tap the or arrows to scroll to the left or to the right in the display Exiting a menu quotBackquot sensor button Tap Back to go to the previous screen All selected entries which have not been confirmed with OK will not be saved Tapping Back three times in succession will take you to the drinks menu In the Profiles menu tap Back to return to the beginning step by step Entering numbers You can enter numbers by swiping and touching the roller or via the numerical key pad Wait until the roller goes gray again The entered setting will not be saved until it goes gray Tap quotSettingsquot
  • Page 21 - English - : Operation The numerical keypad will appear Tap the desired numbers Once you have entered an accepted value OK will light up green Tap OK Entering letters Profile names or the names for your own drinks are entered using a keyboard It is best to select short names Select the required letters or characters Tap Save
  • Page 22 - English - : Operation Help When maintenance programs are selected a context help appears in the bottom line Help To display the information with images and text tap Help To return to the maintenance program tap Close
  • Page 23 - English - : Operation Symbols in the display The following symbols can appear in addition to the text and the drinks symbols Symbol Description Settings eg the brightness of the display or the volume of the buzzer and keypad tones are selected via a bar chart This indicates information and instructions about operating the coffee system Confirm the messages with OK The system lock is active see quotSettings Locking the coffee system System lock The coffee system cannot be oper ated The timer Turn on at is activated see quotSettings Timerquot The symbol and desired switchingon time will appear in the dis play 2359 hours before the coffee system is due to switch on as long as On or Night Dimming is selected for the time display This appears while Clean the milk pipework is visible in the dis play The symbol can also be found on the water tank fill up to this mark This appears while Descaling is visible in the display The symbol can also be found on the water tank fill up to this mark
  • Page 24 - English - : Before using for the first time Before using the coffee system for the first time please read these in structions and make yourself familiar with the appliance and its controls Before using for the first time Install the coffee system and connect it to the electrical supply see quotElectri cal connectionquot and quotInstallationquot Remove any protective coverings from the front of the machine Clean the appliance thoroughly be fore filling it with water and coffee beans see quotCleaning and carequot Turning on for the first time When the coffee system is switched on for the first time you will be asked to set the following settings Language and country Date Time of day Display time of day Tap the On Off button Miele Willkommen appears briefly in the display Setting the language Select the language and then tapOK Select the country and then tapOK The setting is now saved Setting the date Enter the current date and tap OK The setting is now saved Setting the time of day Enter the current time of day and tap OK The setting is now saved Display You can choose from the following op tions On The time and date are always vis ible in the display when the appliance is turned off Off The display is dark when the ap pliance is turned off Night Dimming The date and time of day is displayed from 500 am to 1100 pm Tap the desired time display and thenOK The coffee system will use more en ergy depending on the option you choose for the display Information about this will appear in the display
  • Page 25 - English - : Before using for the first time Select the water supply Main Water The coffee system is intended for oper ation with a water connection You can select the water supply from the follow ing possibilities On The water tank is automatically filed with water through the water connection Off You must fill the water tank man ually A corresponding message ap pears in the display Select the water supply and tapOK The setting is now saved The coffee system is now successfully set up for use Fill the water reservoir with cold fresh tap water Water hardness The water hardness level indicates how much calcium is dissolved in the water The higher the calcium content the harder the water and the harder the water the more often the coffee system will need to be descaled The coffee system measures the amount of water used and steam made Depending on the level of water hard ness set more or fewer drinks can be dispensed before the appliance needs to be descaled Program the coffee system to the water hardness level of your area so that it functions correctly and does not get damaged At the correct time a prompt will then appear in the display to descale the appliance You can program four hardness levels on the appliance Water hardness Water hardness level in your area Setting water hard ness level 0 87 grgal 0 84dH Soft Soft 1 87 146 grgal 84 14dH Medium Medium 2 146 219 grgal 14 21dH Hard Hard 3 gt 219 grgal 21dH Hard Very hard 4 The appliance is programmed exworks to hardness level 3
  • Page 26 - English - : Before using for the first time Determining the water hardness You can measure the water hardness yourself using the enclosed test strip Alternatively your local water authority will be able to tell you the hardness of water in your area Dip the test strip in your drinking wa ter for approximatelyonesecond then shake off any excess water The result will be evident after about aminute Setting the water hardness level Tap Settings Swipe across the screen until Water Hardness appears and tap the menu option Select the desired hardness level and then tapOK The setting is now saved
  • Page 27 - English - : Filling the water tank Change the water every day to prevent a buildup of bacteria If the coffee system is plumbed into the water supply the water tank will fill au tomatically as soon as the machine is switched on The intake device in the lid ensures that the water is taken in slowly If the coffee system has not been used to make any drinks for a long time the water is left in the supply hose This can impair the taste of the cof fee Discard the first full container of wa ter You can also fill the container manually if you are not using the water supply see quotSettings Main waterquot When using the coffee system with water tank operation Fill the water tank only with fresh cold tap water Hot or warm water or other liquids can damage the coffee system Do not use mineral water Mineral water will cause serious limescale deposits to build up in your machine and damage it Open the appliance door Pull the water tank forwards to re move it Take off the lid and fill the water tank with fresh cold tap water up to the quotmaxquot mark Push the water tank back in the ma chine until it clicks into place If the water tank protrudes slightly or is a little high check whether the sur face that the water tank sits on is dirty If the water tank is not positioned cor rectly the outlet valve will not connect properly and could leak Clean the surface if necessary
  • Page 28 - English - : Filling the coffee bean container Fill the coffee bean container with roasted coffee or espresso beans if you want to use freshly ground coffee beans for each cup of espresso or coffee Alternatively you can make coffee or espresso with ground coffee see quotMak ing coffee drinks from ground coffeequot Important Risk of damage to the grinder Only put roasted coffee or espresso beans in the container Anything else including ground coffee will damage the grinder Do not pour liquids in the bean con tainer Important Sugar damages the coffee system Do not use coffee beans that have been treated with sugar caramel or other substances containing sugar in the coffee bean container Do not use green unroasted coffee beans or mixtures of coffee beans which contain green coffee beans Green coffee beans are very hard and still contain a certain amount of residual moisture These can dam age the coffee system grinder as soon as grinding begins Tip You can use a nut or seed grinder to grind green coffee beans These types of grinder generally have a rotat ing stainless steel blade You can then add the ground green coffee portion by portion to the ground coffee chute and make the desired coffee drink see quotMaking coffee drinks from ground cof feequot Pull out the coffee bean container Push back the lid and fill the con tainer with roasted coffee beans Slide the lid back into place Push the coffee bean container fully back into the coffee system Close the front
  • Page 29 - English - : Turning the machine On and Off Turning on When the coffee system is switched on it heats up and rinses the pipework This not only cleans the pipework but also warms it before coffee is prepared If the coffee system still has an operat ing temperature higher than 140F 60C rinsing will not take place Tap the On Off button The appliance will begin rinsing after the heatingup phase Hot water will come out of the main dispenser You can now prepare drinks Tip If you do not want the water from the rinsing process to flow into the drip tray place a suitable container eg the small cleaning container underneath the main dispenser before preparing the first coffee of the day Turning off Tap the On Off button After a coffee has been dispensed the machine pipework is rinsed before the machine switches off Turning off for longer periods of time If the coffee system is not going to be used for a longer period of time Empty the drip tray the waste unit and the water tank Clean all components thoroughly in cluding the brew unit the main dis penser connector and the small drip tray located inside the door Turn off the appliance If you leave the door open for an ex tended period of time unplug or dis connect it from the power supply to save energy
  • Page 30 - English - : Dispenser adjustment The height of the main dispenser can not be manually adjusted The coffee system automatically de tects the height of the cup or glass un derneath the main dispenser When a drink is requested the main dispenser moves into the correct position before the drink is prepared Make sure that you do not leave a spoon or other utensil in the cup as the height of the cup will be incor rectly determined Height adjustment can be turned off If it is switched off the main dispenser will remain in the highest position as long as the coffee system is turned on When maintenance programs are being carried out the main dispenser moves to a maintenance position or changes position according to the height of the vessel being used When the coffee system is turned off the main dispenser is located at a medium height Turning the dispenser adjust ment on and off TheDrinks menu is displayed Tap Main Menu or Back Tap Settings Swipe across the screen and select Dispenser adjustment Tap the required setting to turn dis penser adjustment on or off Tap OK The setting is now saved
  • Page 31 - English - : Preparing beverages Danger of burning and scalding from the dispensers The liquids and steam dispensed are very hot Keep away from the area underneath the dispensers when hot liquids and steam are being dispensed Do not touch hot components You can choose from a variety of spe cialty coffees Espresso is a strong aromatic coffee with a thick hazelnutbrown cream layer the crema on top Use espressoroasted coffee beans for preparing espresso Coffee differs from espresso by the increased amount of water and the roast of the beans Use coffee beans of the correct roast to make coffee Lungo coffee is a coffee with sig nificantly more water Making a coffee drink Place a cup under the main dis penser Select a coffee drink Preparation starts and the coffee drink is dispensed from the main dispenser into the cup To ensure that any residues from the factory testing process are removed from the brewing system please dis card the first two cups of coffee when using the machine for the first time
  • Page 32 - English - : Preparing beverages Double portion You can request two portions of espresso or coffee at once in one cup or in two separate cups simultaneously To fill two cups at the same time Place one cup under each of the cof fee dispensers Tap the double symbol for the desired drink Two portions of the desired drink will be dispensed from the main dispenser Canceling preparation Tap Stop orCancel Coffee pot Preparing several cups of coffee one after the other You can automatically prepare several cups of coffee one after the other max1l using the Coffee Pot func tion Up to eight cups can be prepared at the one time TheDrinks menu is displayed Place a sufficiently large container under the main dispenser Select Coffee Pot Select the number of portions you want to dispense 38 Follow the instructions in the display Each portion will be ground brewed and dispensed individually The display will inform you about the progress You can cancel the procedure at any time Tap Cancel orStop You can use the Coffee Pot function twice in a row After that a longer cooling down time of one hour is nec essary so that the coffee system does not become damaged
  • Page 33 - English - : Preparing beverages Making coffee drinks from ground coffee To make espresso or coffee using ground coffee add a portion of ground coffee to the ground coffee chute This gives you the option of preparing a cup of decaffeinated coffee for exam ple even though the coffee bean con tainer is filled with roasted coffee beans The coffee system will automatically recognize that ground coffee has been placed in the chute Only one portion of coffee or espresso can be prepared at a time when using ground coffee Adding ground coffee Do not add more than one level scoop of ground coffee to the coffee chute If too much is added the brew unit will not be able to process the coffee The coffee system will use all the ground coffee that has been added to the chute to make the next coffee Use the scoop supplied with the ma chine to ensure the correct amount of ground coffee is used Open the appliance door Remove the coffee chute cover and open the lid of the coffee chute Add one level scoop of ground coffee to the chute Close the lid replace the coffee chute cover and close the appliance door Use ground coffee appears on the dis play
  • Page 34 - English - : Preparing beverages Making coffee drinks from ground coffee If you want to make a drink with ground coffee Tap Yes You can now select which type of drink you would like to make with ground cof fee Place a cup under the main dis penser Select a drink The coffee system will now prepare the desired drink If you do not want to made a drink with ground coffee Tap No The ground coffee will be directed into the waste unit If you do not tap a drink button within approx15 seconds the ground coffee will also be directed into the waste unit Drinks with milk Danger of burning and scalding from hot steam coming out of the main dispenser The liquids and steam dispensed are very hot Only use plain milk Most sugary ad ditives can clog the milk lines and damage the machine If using dairy milk make sure that it has been pasteurized The following drinks with milk can be made Cappuccino consists of approx 23 milk froth and 13 espresso Latte macchiato consists of 13 each of hot milk milk froth and espresso Caffè latte consists of hot milk and espresso Hot milk and milk froth can also be made
  • Page 35 - English - : Preparing beverages Notes on the milk flask Milk is not cooled in the milk flask Therefore place the milk flask in the refrigerator if you are not going to use milk for a while Good milk froth can only be achieved when cold milk be low 50F 10C is used a Lid b Sensor rod c Milk intake tube d Glass container Fill the milk flask up to max 34quot 2cm below the rim with milk Seal the milk flask with the lid It is important to keep the opening and neck of the milk flask clean while filling it and carrying it Any soiling can lead to a malfunction of the container in the machine Push the milk flask into the coffee system Preparing drinks with milk TheDrinks menu is displayed Place a suitable container under the main dispenser Select the desired drink The coffee system will now prepare the selected drink
  • Page 36 - English - : Preparing beverages Preparing hot water Caution Danger of burning and scalding The water dispensed is very hot TheDrinks menu is displayed Place a suitable container under the hot water dispenser Select Hot Water Hot water is dispensed into the con tainer under the spout To cancel preparation Tap Stop orCancel Preparing user profile drinks If you have already created a user pro file see quotUser profilesquot you can select it before preparing a drink Tap Profiles and select the user profile you want The name of the user profile and the created drinks will appear in the display You can now make the drink you want
  • Page 37 - English - : Preparing beverages After a drink has been pre pared Start rinse cycle appears in the display a few minutes after a drink with milk has been prepared Tap OK The milk pipework will now be rinsed Even if you do not confirm the mes sage with OK the milk pipework will automatically be rinsed after some time Tip Remove the milk flask rinse the cover under running water and close the milk flask using the compact cap Cool the milk until the next time you use it Milk froth can be made only using cold milk lt50F 10C
  • Page 38 - English - : Coffee the way you like it In order to customize the coffee system to the type of coffee being used you can Change the grinder setting Change the amount of coffee Set the brewing temperature Prebrew the coffee powder Grinder setting When the beans are ground correctly the coffee or espresso will flow evenly into the cup with a good crema The crema should have an even nut brown colour The grinder setting you select will be used for all coffee drinks There are various ways to tell whether the coffee grinder is set correctly The coffee is ground too coarse if espresso or coffee flows into the cup too quickly the crema is very pale and uneven Set a finer grinder setting The coffee is ground too fine if espresso or coffee flows into the cup very slowly the crema is dark brown Set a coarser grinder setting To avoid damaging the grinder please note the following Only adjust the grinder one setting at a time Grind the coffee beans again if you want to adjust the grinder to the next setting Open the appliance door Push the slide control one setting to the left for finer grinding or one set ting to the right for coarser grinding Close the machine door Prepare a coffee drink After that you can adjust the grinder setting again The altered grinder setting not consid erably noticeable until after the second coffee has been dispensed
  • Page 39 - English - : Coffee the way you like it Changing the parameters of a drink You can change the amount of coffee prebrewing and the brewing tempera ture for each drink TheDrinks menu is displayed Tap Edit or select Make drinks Tap Change drink Select a drink Tap Drinks parameters For this coffee drink you can do the fol lowing Change the amount to be ground Set the brewing temperature Turn on the quotPrebrewingquot option Amount of coffee The coffee system can grind and brew 614 g of coffee beans per cup The greater the quantity the stronger the coffee There are various ways to tell whether the amount of coffee is set correctly The amount of coffee is too low if espresso or coffee flows into the cup too quickly the crema is very pale and uneven the espresso or coffee lacks body Increase the amount of coffee so that more ground coffee is brewed The amount of coffee is too high if espresso or coffee flows into the cup very slowly the crema is dark brown the espresso or coffee tastes bitter Decrease the amount of coffee so that less ground coffee is brewed Tap Amount of coffee Using the bar chart select the de sired amount to be ground and then tapOK The setting is now saved Tip If the coffee is too strong for you or it tastes bitter try a different type of bean
  • Page 40 - English - : Coffee the way you like it Brewing temperature The ideal brewing temperature will de pend on the type of coffee whether an espresso or a coffee is being prepared and the altitude of the region If the coffee system is located at more than 6562 ft 2000 meters above sea level the brewing temperature needs to be set lower due to the change in pres sure This is because the boiling point for water at a high altitude above sea level is lower than the boiling point for water at sea level Tip Not all types of coffee can with stand high temperatures Certain types are too delicate the crema on top would not be as good and the taste would be impaired The coffee system has five brewing temperatures Swipe across the display in the Brew temperature field until the required set ting appears Tap OK The setting is now saved Prebrewing ground coffee When the prebrewing function is turned on the freshly ground coffee is first moistened with a little hot water Then the remaining water is forced through the moistened coffee at high pressure This helps release the flavor of the coffee You can set prebrewing for a normal length of time or an extra long length of time Alternatively you can turn off the quotPrebrewingquot function The machine is supplied with the quotPre brewingquot function turned off Swipe across the display in the Pre Brewing field until the required setting appears Tap OK The setting is now saved
  • Page 41 - English - : Portion size The flavor of the coffee produced de pends not just on the type of coffee used but also on the amount of water used You can program the amount of water to suit the size of your cups and the type of coffee you are using For coffee drinks that use milk you can also set the amount of milk or milk froth to be dispensed with these drinks Ad ditionally you can set the portion sizes for hot milk and milk froth alone Each type of drink has a maximum por tion size that can be programmed into the machine The coffee system halts preparation of the coffee once this por tion size has been reached The maxi mum possible portion size for this type of drink is then saved in the machine The changed portion size is always saved in the current User profile The name of the current profile appears in the top lefthand side of the display If the water tank becomes empty while making a drink the machine will stop programming the portion size The portion size will not be saved TheDrinks menu is displayed Place the desired cup under the main dispenser Tap Edit and then Change drink Select a drink Tap Change the portion size The desired drink is prepared and Save appears in the display When the cup is filled up to the de sired level tap Save If you want to change the the drink por tions for coffee specialties with milk the ingredients are the drink are saved one after the other during preparation When the quantity for each ingredient reaches the desired level tap Save The programmed mix of ingredients and portion sizes will now be dispensed ev ery time that particular drink is selected
  • Page 42 - English - : Resetting drinks You can reset drink portions and pa rameters for all drinks to the factory de fault TheDrinks menu is displayed Tap Edit and then Reset drinks Reset all drinks to default appears on the display Tap Yes
  • Page 43 - English - : User profiles If the coffee system is used by several people with different coffee prefer ences you can create individual user profiles in addition to the Miele profile In each user profile you can make set tings for individual drinks portion size amount of ground coffee brewing tem perature and prebrewing The name of the current user profile is shown at the top left of the display Accessing a user profile Tap Profiles in Main Menu or in theDrinks menu You can now create a user profile If you have allocated a user profile in addition to the Miele standard user pro file you have the following options Select profile from the user profiles that have already been allocated Change name if the name of a user profile needs to be changed Delete profile if you want to delete a user profile Change profile to set whether the coffee system automatically always reverts to the Miele standard user profile or retains the last selected user profile Creating a profile Tap Create Profile The editor will open in the display Select the name you want using the keyboard and tap OK Selecting a user profile Select the user profile you want The name of the current user profile is shown at the top left of the display Changing the name Select Edit and then Change name Select the desired profile and then tap OK Select the name you want using the keyboard and then tap OK Deleting a user profile Select Edit and then Delete profile Select the desired user profile and then tap OK
  • Page 44 - English - : User profiles Changing a user profile You can set up the coffee system so that after each use it automatically re verts back to the Miele standard user profile or it retains the last selected user profile Select Edit and then Change profile You now have the following options Manually The selected user profile will be retained until you select an other user profile manually After each use The machine will change back to the Miele standard user profile automatically after a drink is dispensed When turned on Each time the ma chine is turned on it will automatically select the Miele standard user profile regardless of which user profile was set before the machine was last turned off Select the desired option and then tapOK
  • Page 45 - English - : User profiles Creating and editing your own drinks You can create your own drinks for each user profile and for each drink you can adjust the portion size and other parameters eg amount of cof fee temperature You can also change the names of your drinks and delete any unwanted drinks from your user profile A maximum of nine drinks can be saved under one user profile First call the desired user profile In Main Menu select Profiles or tap Profiles in the Drinks menu Select the user profile The name of the current user profile is shown at the top left of the display Creating a drink You can create new drinks while using the drinks already available as a basis A maximum of nine drinks can be saved under one user profile Tap Edit Tap Create Drink Make a selection from the standard drinks available Select a drink Change the drink parameters and portion size for this drink according to your preferences see quotCoffee the way you like itquot and quotChanging the portion sizequot Drink preparation will be begin and you can save the portions of each compo nent as desired Enter a name for the new drink maxi mum 8 characters and tap Save The new drink will appear in the current user profile Changing drinks Changing portion sizes parameters and names Tap Edit Select Change drink Select a drink Now you can adjust the portion sizes change the parameters or change the names Deleting a drink Tap Edit Select Delete drink Select the drink you want and tap OK
  • Page 46 - English - : MyMiele You can display drinks you make fre quently drinks from profiles and pre ferred maintenance programs in the MyMiele screen The MyMiele screen can be set to ap pear as the start screen see quotSettings Start screenquot The MyMiele screen will then appear when the coffee system is turned on Calling MyMiele In Main Menu tap MyMiele You can now set up MyMiele If you have already created some en tries you can perform the following un der Edit Sorting entries Deleting entries Adding entries Tap Add entry You can add entries from the following categories Drinks User profiles Maintenance Select the entry and then tapOK A box will appear next to the selected option together with the menu it comes from Deleting entries Tap Edit Select Delete entry Select the entry and then tapOK The entry will be deleted Sorting entries If you have added more than four en tries you can sort them Tap Edit Select Sort entry Now select the entry you want to move and the desired position Confirm the new position with OK
  • Page 47 - English - : Settings You can use the quotSettingsquot menu to customize the coffee system to suit your individual requirements Accessing the quotSettingsquot menu TheDrinks menu is displayed Tap Main Menu or Back Select Settings Now you can check or change the set tings You can recognize currently selected settings by the color frame Tapping Back takes you back to the previous menu Changing and saving settings Tap Main Menu or Back Select Settings Select the option you want to change Change the setting and tap OK The setting is now saved
  • Page 48 - English - : Settings Setting options The factory default for each option is indicated by Menu item Available settings Select language deutsch and other languages Country Time Display Off On Night Dimming Clock Type Analog Digital Clock Format 12 h ampm 24 h Set Date Set Timer Timer 1 Set Turn on at Turn off after 1230 Turn off at Days of the week Monday Tuesday Wednesday Thursday Friday Saturday Sunday Activate Turn on at Yes No Turn off at Yes No Timer 2 Set Turn on at Turn off at Days of the week Monday Tuesday Wednesday Thursday Friday Saturday Sunday Activate Turn on at Yes No Turn off at Yes No Eco Mode On Off Lighting Brightness Turn off after
  • Page 49 - English - : Settings Menu item Available settings Start Screen Main Menu Drinks Profiles MyMiele Info Number of drinks Total coffee drinks Espresso Coffee Lungo Coffee Cappuccino Latte Macchiato Caffè Latte Milk Froth Hot Milk Hot Water No of uses until Descale Appliance Degrease the brew unit System Lock On Off Water hardness Soft 1 Medium 2 Hard 3 Very hard 4 Volume Buzzer tones Keypad tone Dispenser adjustment On Off Main Water On Off Showroom Program Demo Mode On Off Factory default Settings MyMiele
  • Page 50 - English - : Settings Language You can select the language and coun try variant of that language for all dis play text Tip If you select the wrong language by mistake you can find the quotLan guagequot option by following the flag symbol Time of day You can set the clock type time dis play clock format and time of day Display time of day You can choose from the following op tions On The time and date are always vis ible in the display when the appliance is turned off Off The time and date are not dis played when the appliance is turned off Night Dimming The date and time are displayed from 500 am to 1100 pm Depending on the setting selected the coffee system may use more energy A message will appear in the display to inform you of this Clock type You can display the time of day in an analog or digital manner Clock format Available options are 24hour display 24 h 12hour display 12 h ampm Setting Set the hours and the minutes Date You set the day month and year