
USB Menu
VGA(PC) Connection
USB Port Function
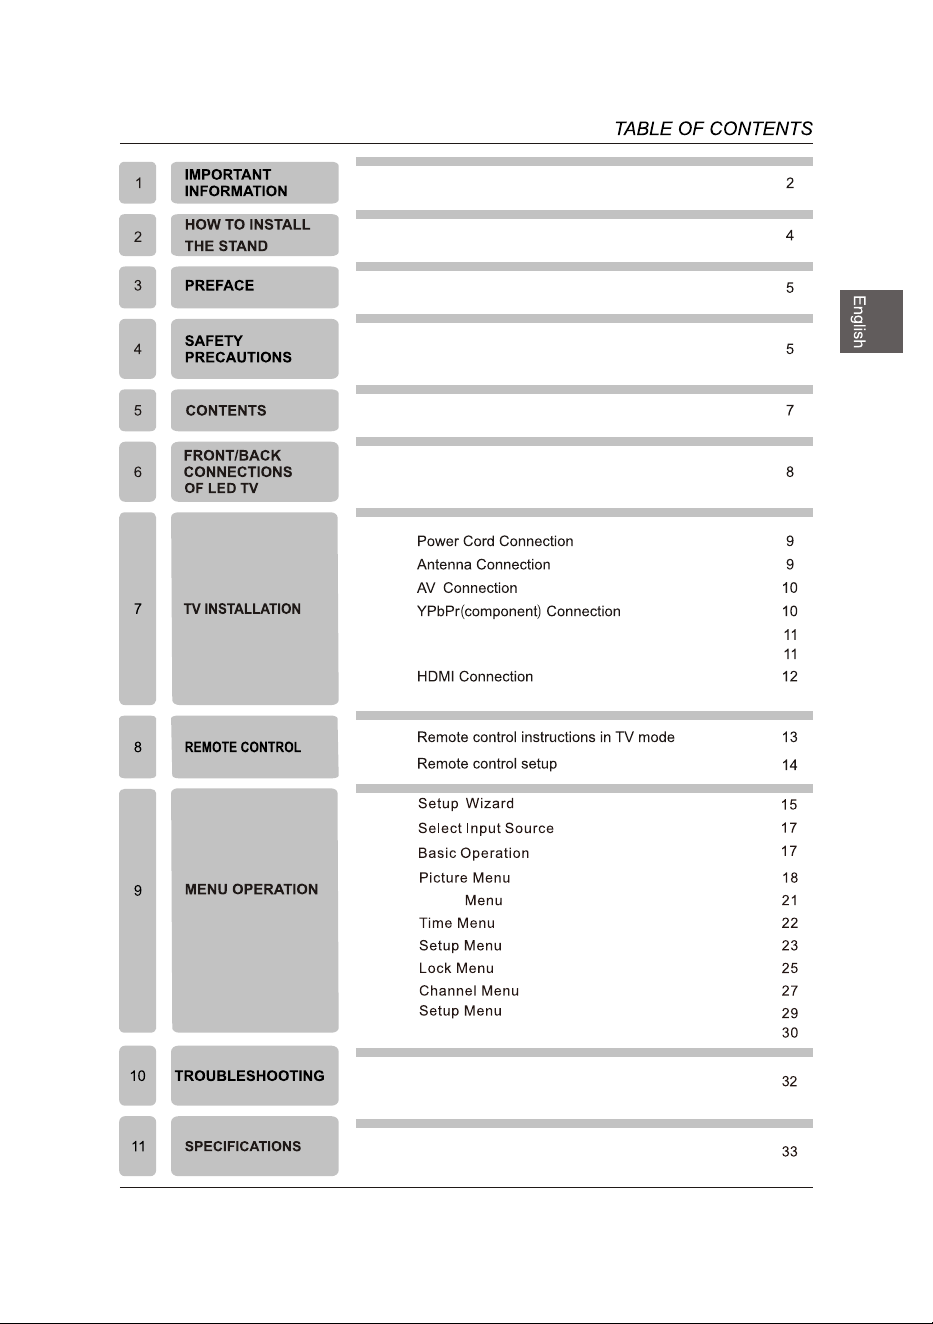
1
Audio
2
60W
3
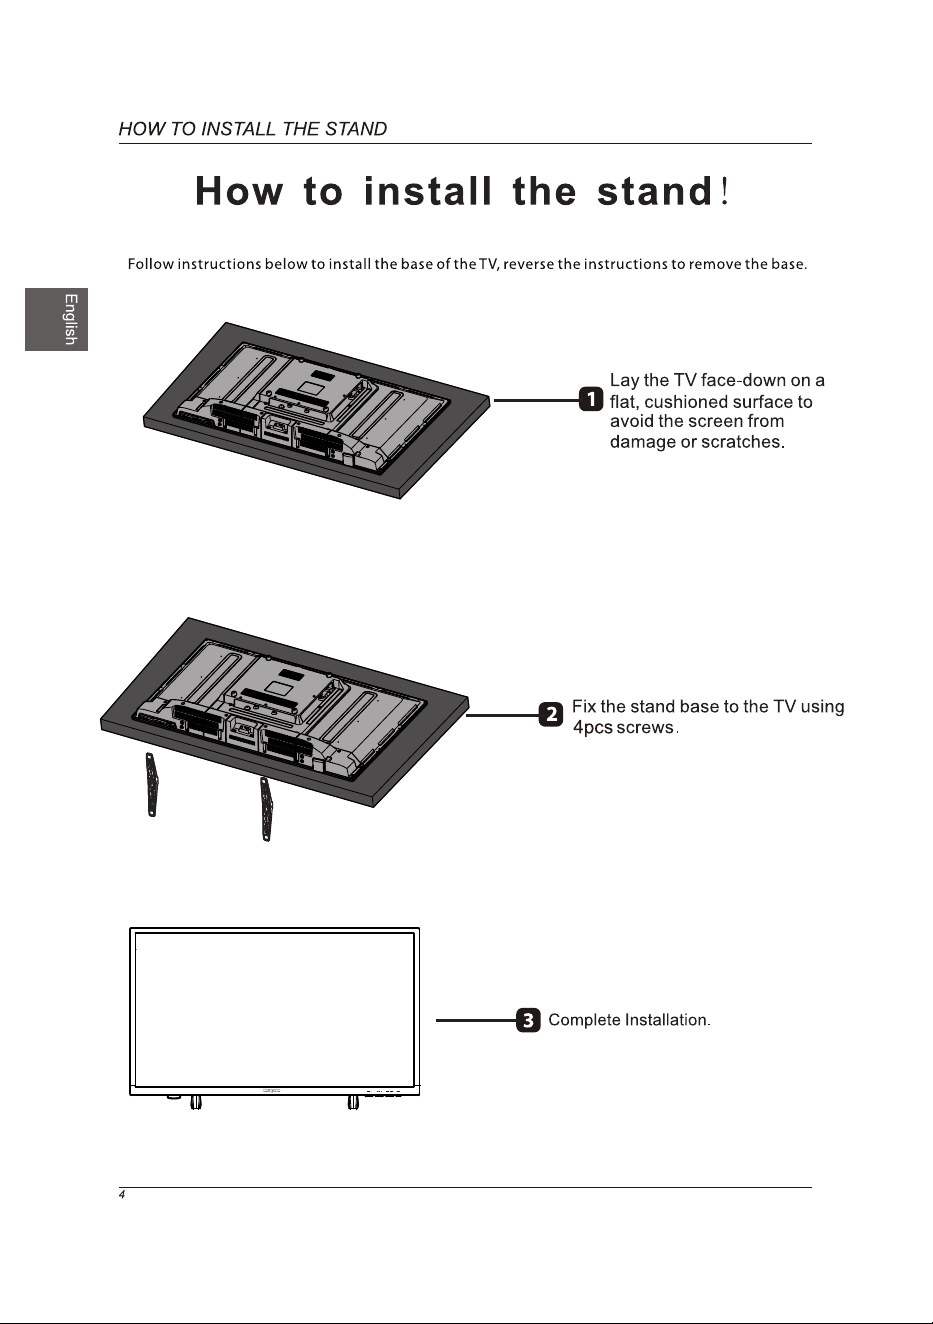
Note: Design of symmetric base
bracket,no direction when installation.
5

6
7
and Audio
and Audio
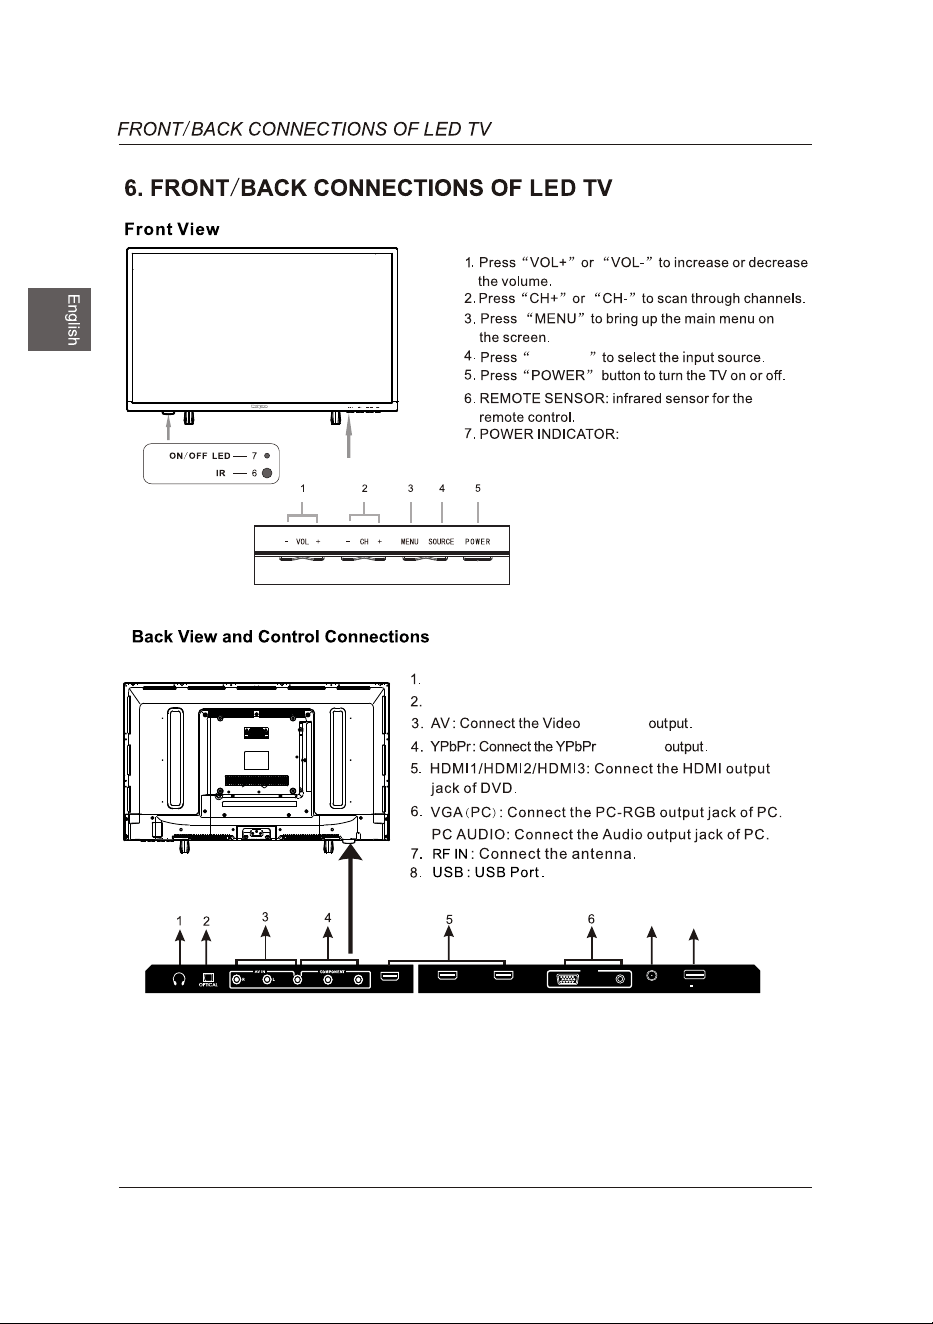
SOURCE
Red when TV is powered off.
Blue when TV is powered on.
Headphone: Connect a stereo headphone for private listening.
HDMI3 HDMI2
PC IN
VGA
PC AUDIO
USB
5V 500 mA
8
Y
Pb
Pr
HDM I1
7
8
HDM I3 HDM I2
PC IN
VGA
PC AU DIO
USB
5V 500 mA
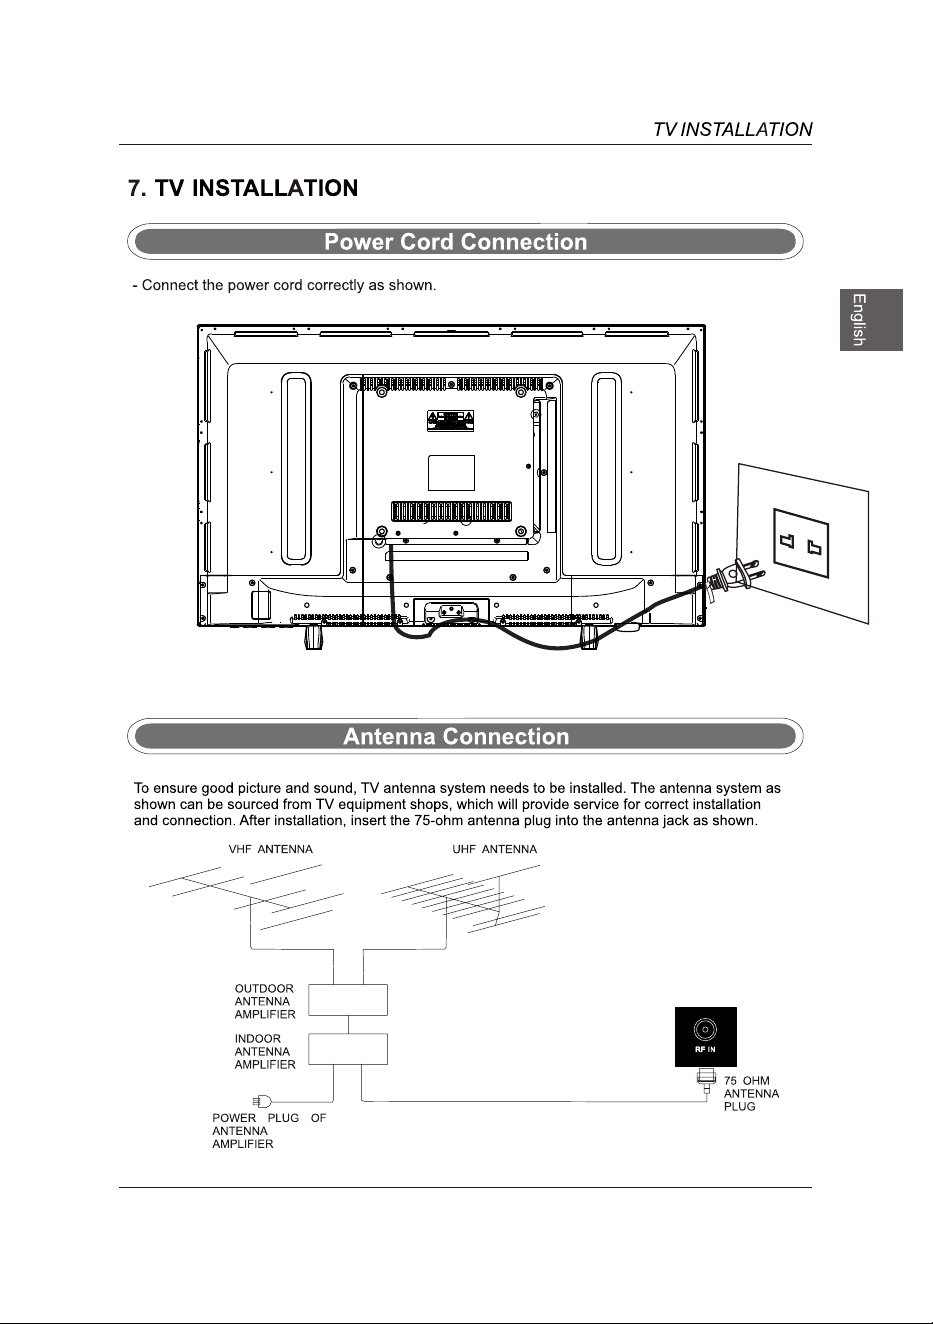
RF IN
Optical Output:
Connect a digital sound system to this jack.
9
Y
Pb
Pr
HDMI1
Y
Pb Pr
HDMI1
10
HDMI3 HDMI2
PC IN
VGA
PC AU DI O
USB
5V 50 0mA
HDMI3 HDMI2
PC IN
VGA
PC AU DI O
USB
5V 50 0mA
RF IN
RF IN
USB
11
Y
Pb Pr
HDMI1
HDMI3 HDMI2
PC IN
VGA
PC AU DIO
USB
5V 500 mA
RF IN
12
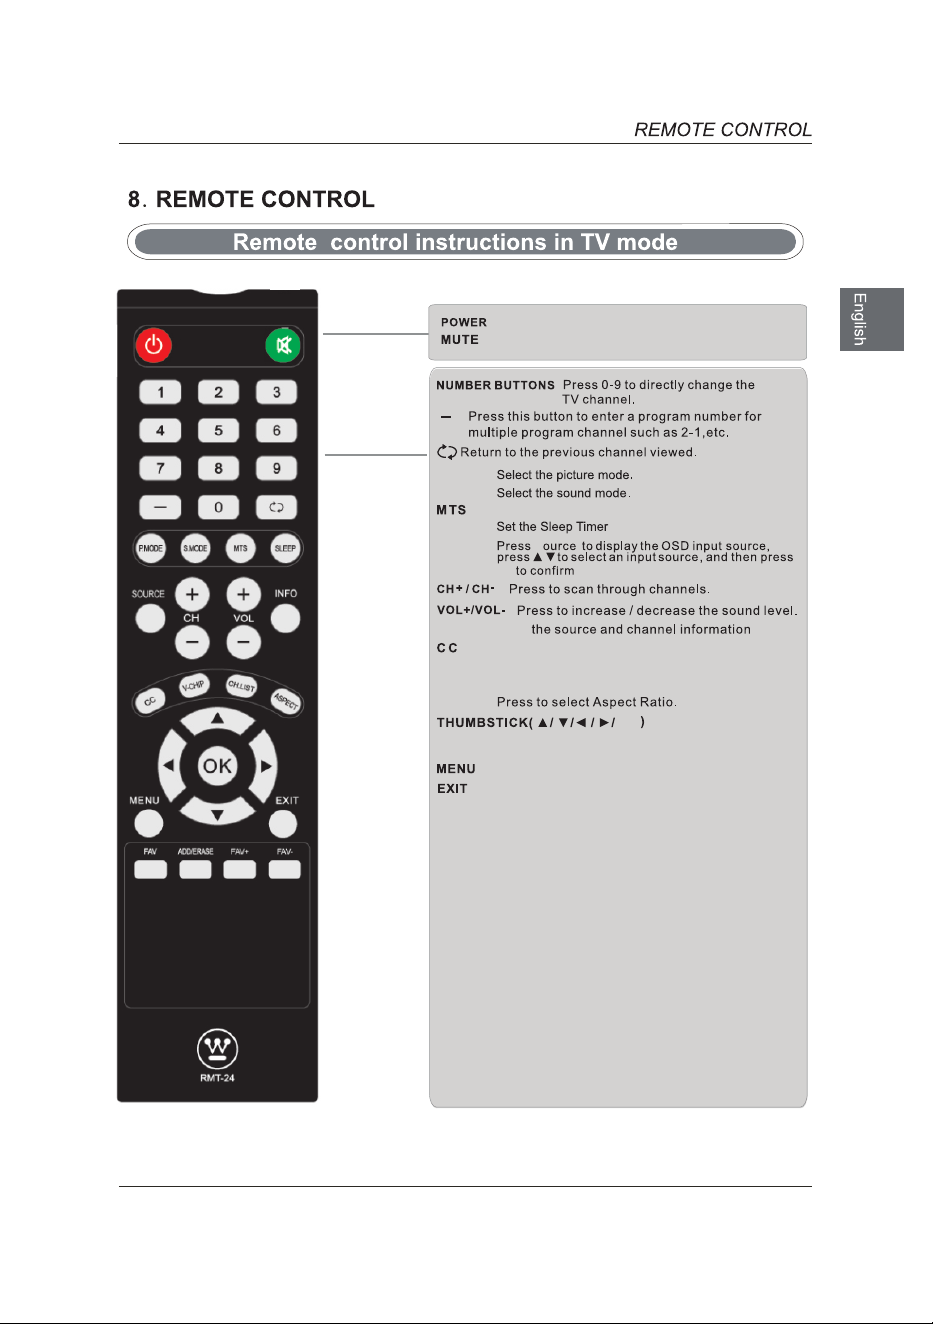
Turn the LED TV on or off.
Press once to disable the audio and press again to
enable the audio.
P.MODE
S.MODE
SLEEP
Press to adjust between available audio channel.
SOURCE
OK
S
INFO
Displays
Press to set the closed caption.
V-CHIP
Switch to V-CHIP input.
CH.LIST
Press to display TV program list.
ASPECT
Allows you to navigate the on -screen menus and adjust the
system settings to your preference.
Displays the main TV menu.
Exit the main TV menu.
FAV
Press to display the favourite program list.
Add/Erase channel to favourite program list.
ADD/ERASE
FAV+ FAV-
Press these two keys to switch to your favourite program.
ok
13
14
OK
15
60
Left,Ri gh t
Left,Ri gh t
YPbPr
YPbPr
s
YPbPr/AV
OK
OK
OK
OK
Menu : Skip DTV
OK
16
HDMI1
HDMI2
HDMI3
VGA
USB
YPbPr/AV
ok
ok
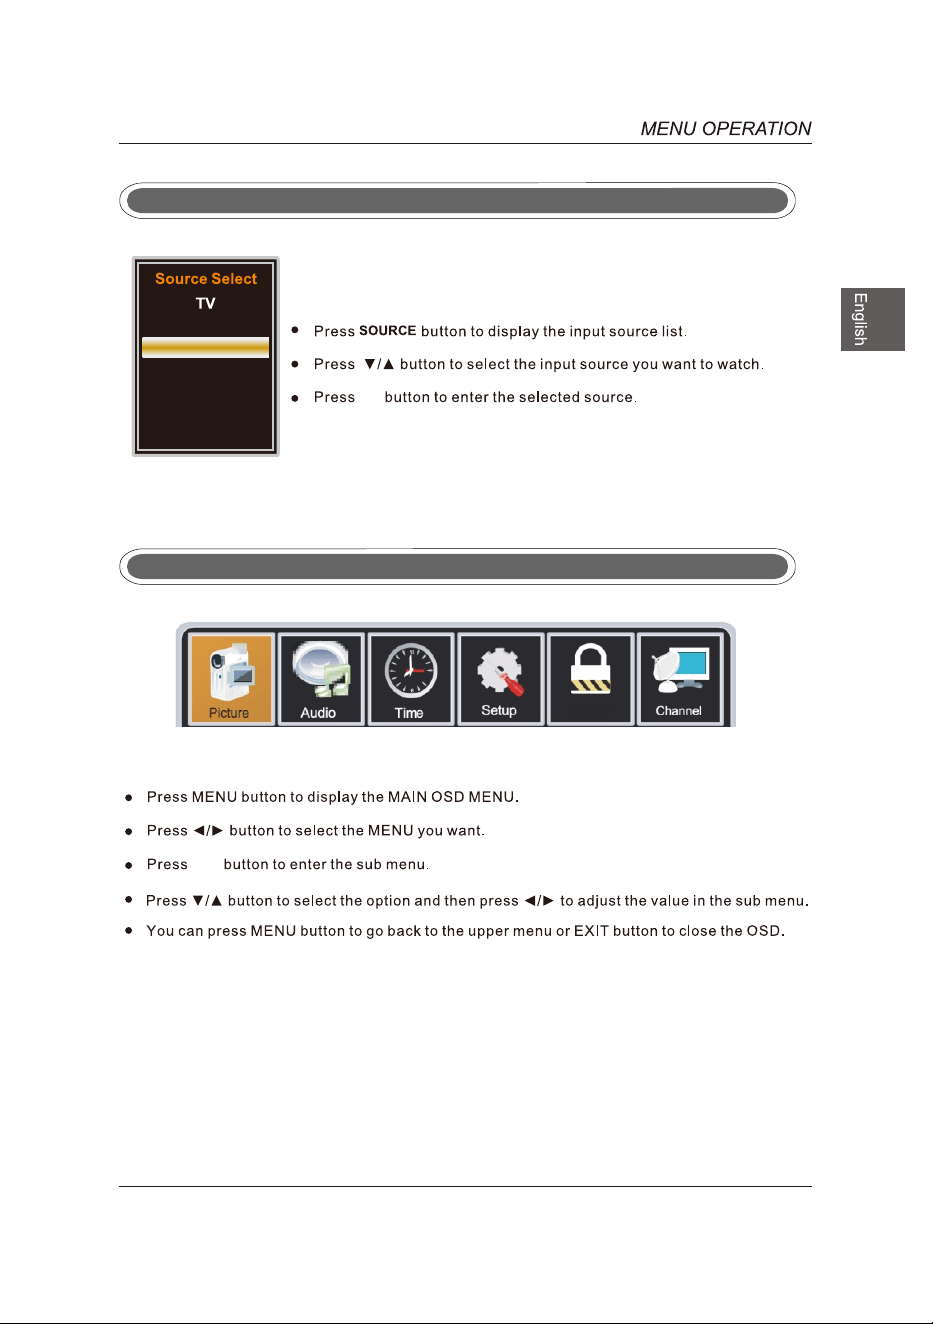
Select Input Source
Basic Operation
Lock
17
Normal
Color Temperature,
Lock
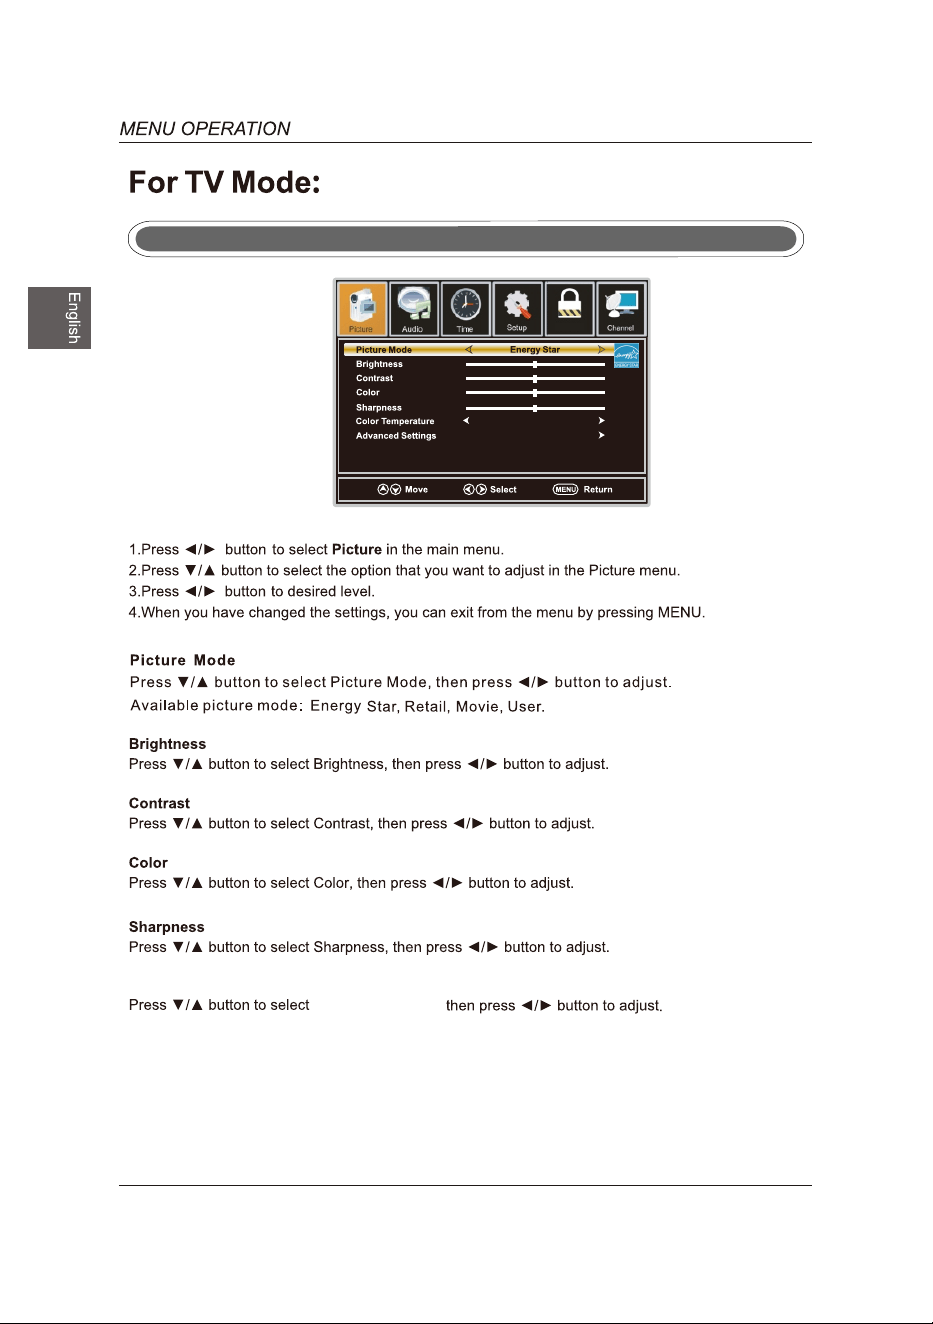
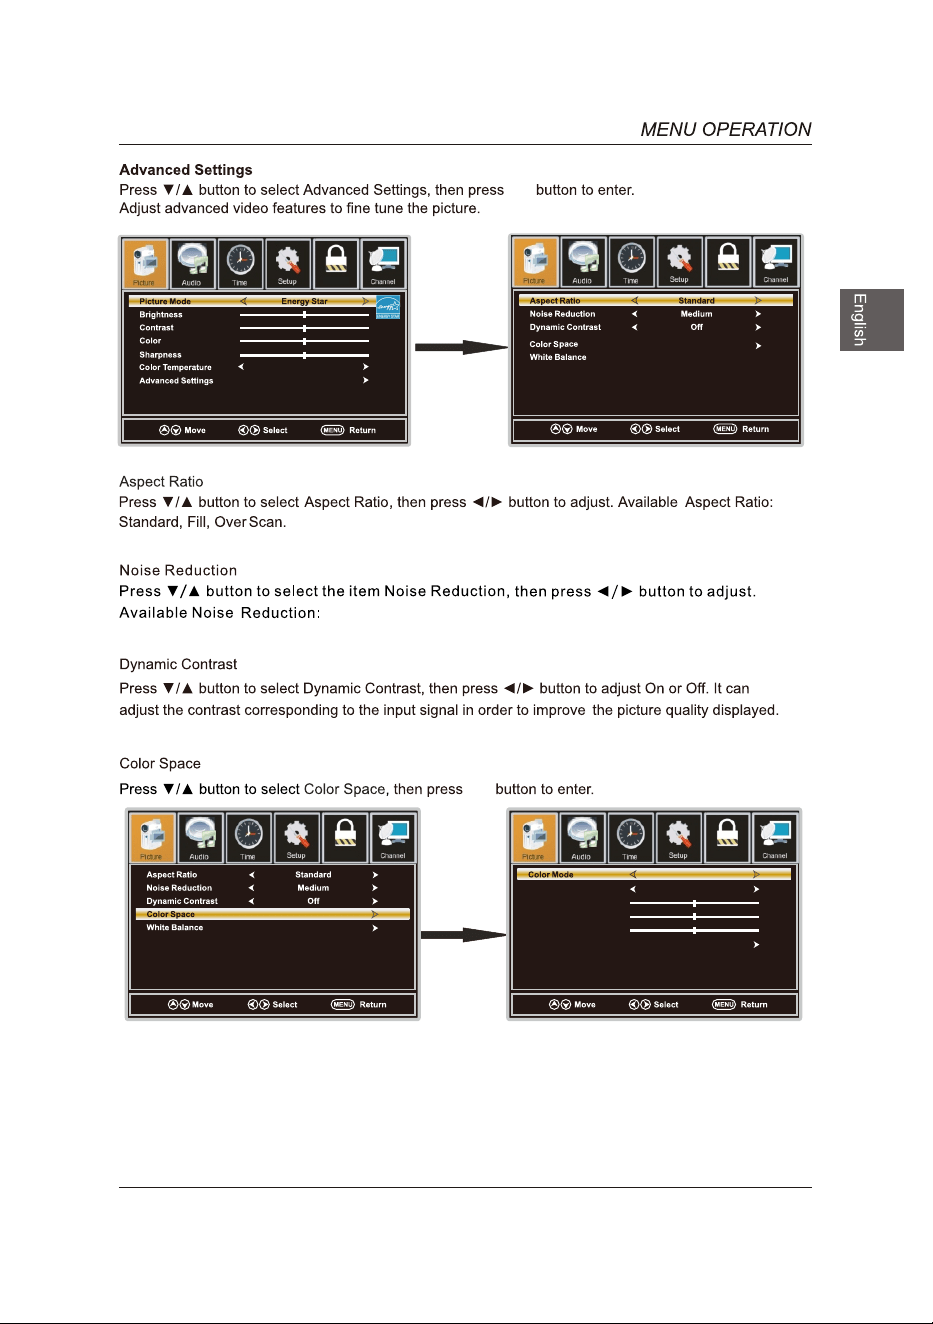
Picture Menu
18
Color Temperature
Custom
ok
Normal
Off,Weak,Medium,Strong.
ok
ok
Lock
ok
LockLock
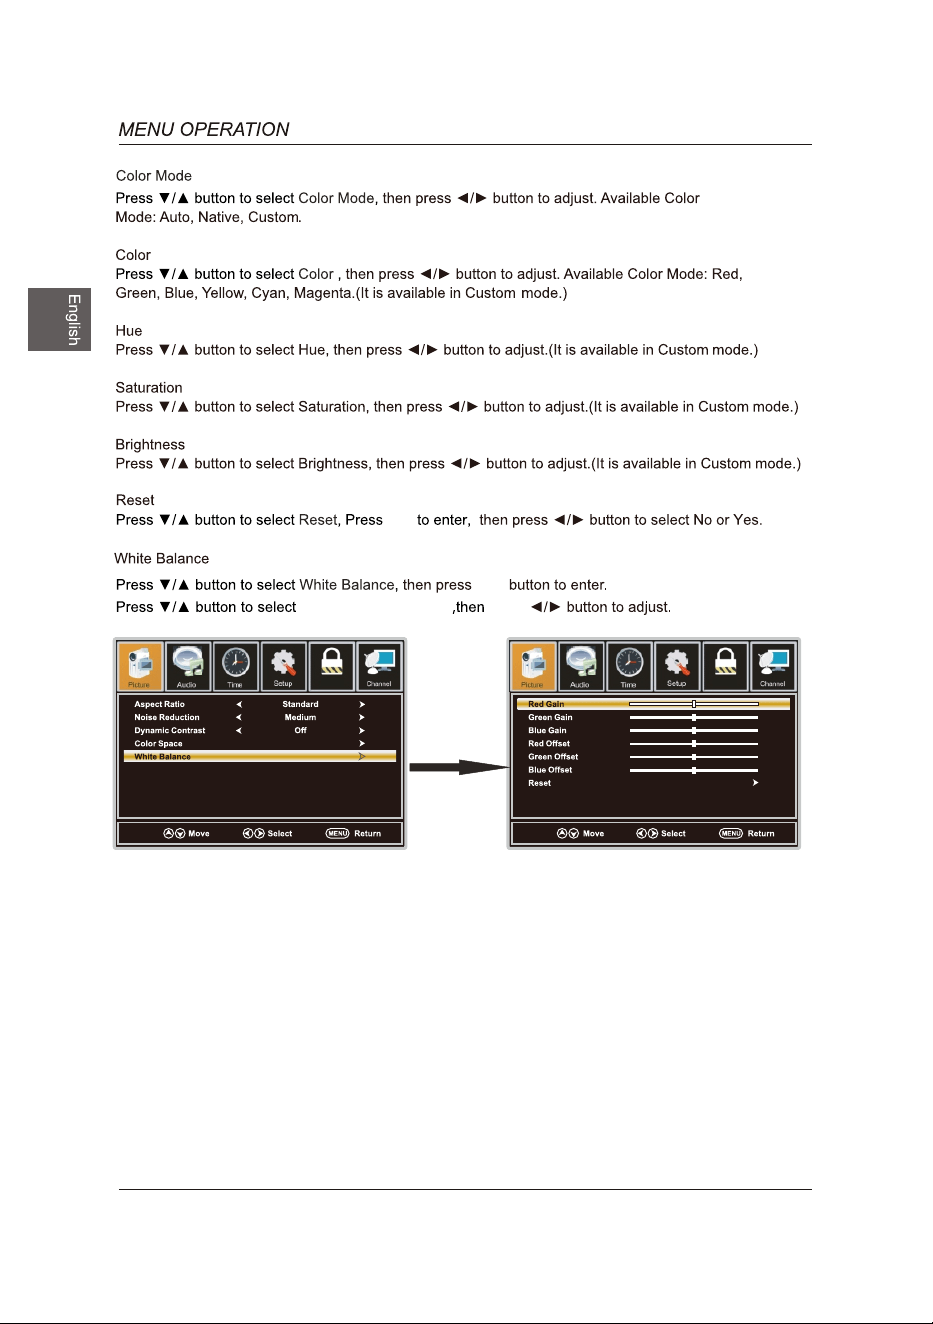
Colo r
HUE
Satu ration
Brightness
Rese t
Red
Lock
19
ok
ok
the option you want
press
ok
Lock
Lock
20
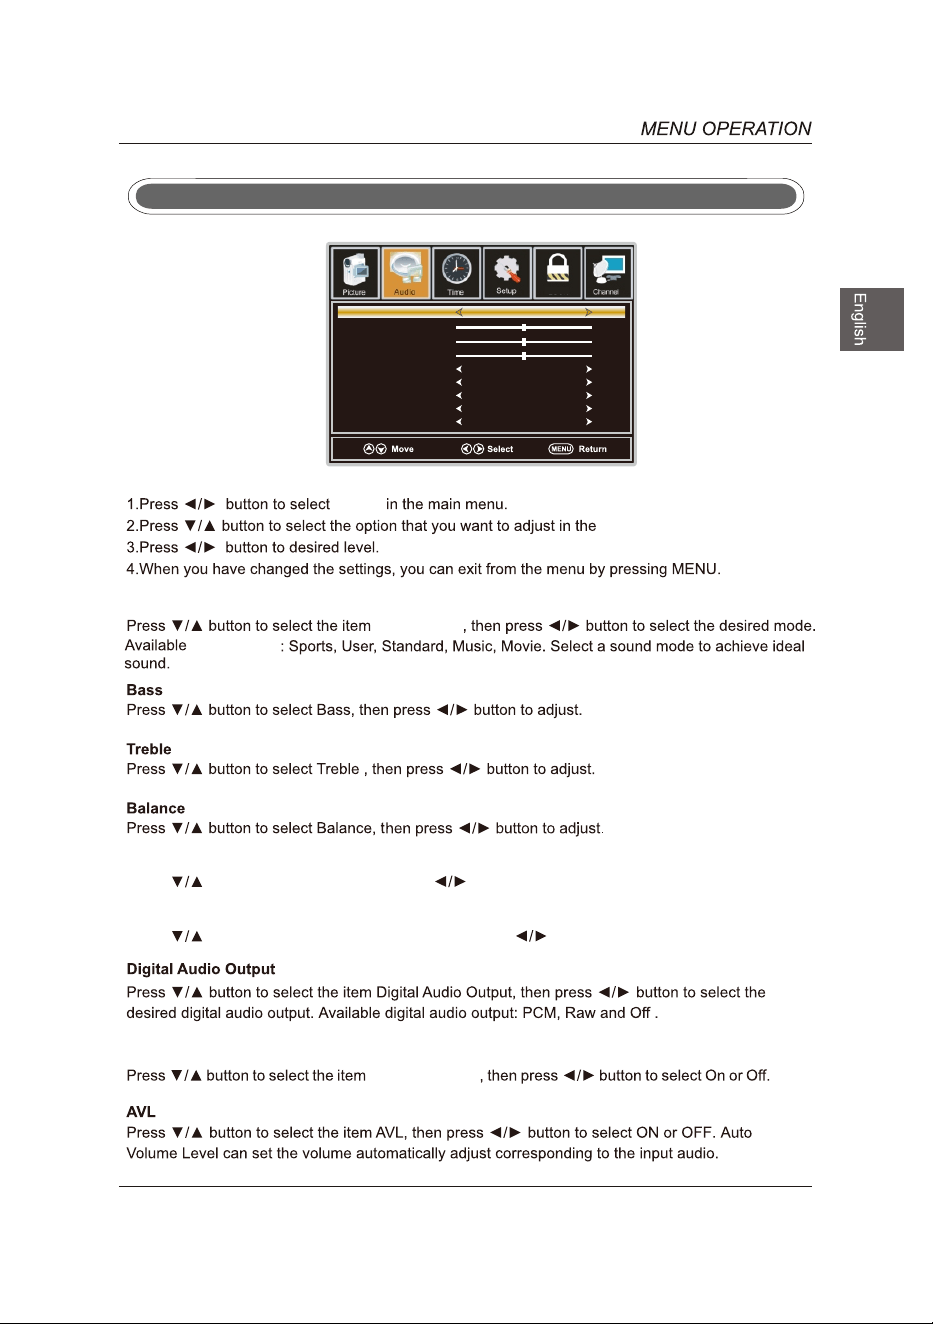
Sound Mode
Standard
Audio
Bass
Treble
Balance
Audio Language
Digital Audio Ouput
Surround Mode
AVL
English
Raw
On
Off
Lock
Sound Mode
Sound Mode
Sound Mode
Audio Language
Press button to select Audio Language, then press button to adjust.
Surround Mode
Surround Mode
Audio Menu
MTS
MONO
MTS
Press button to select MTS, then press button to adjust.
21
Audio menu.
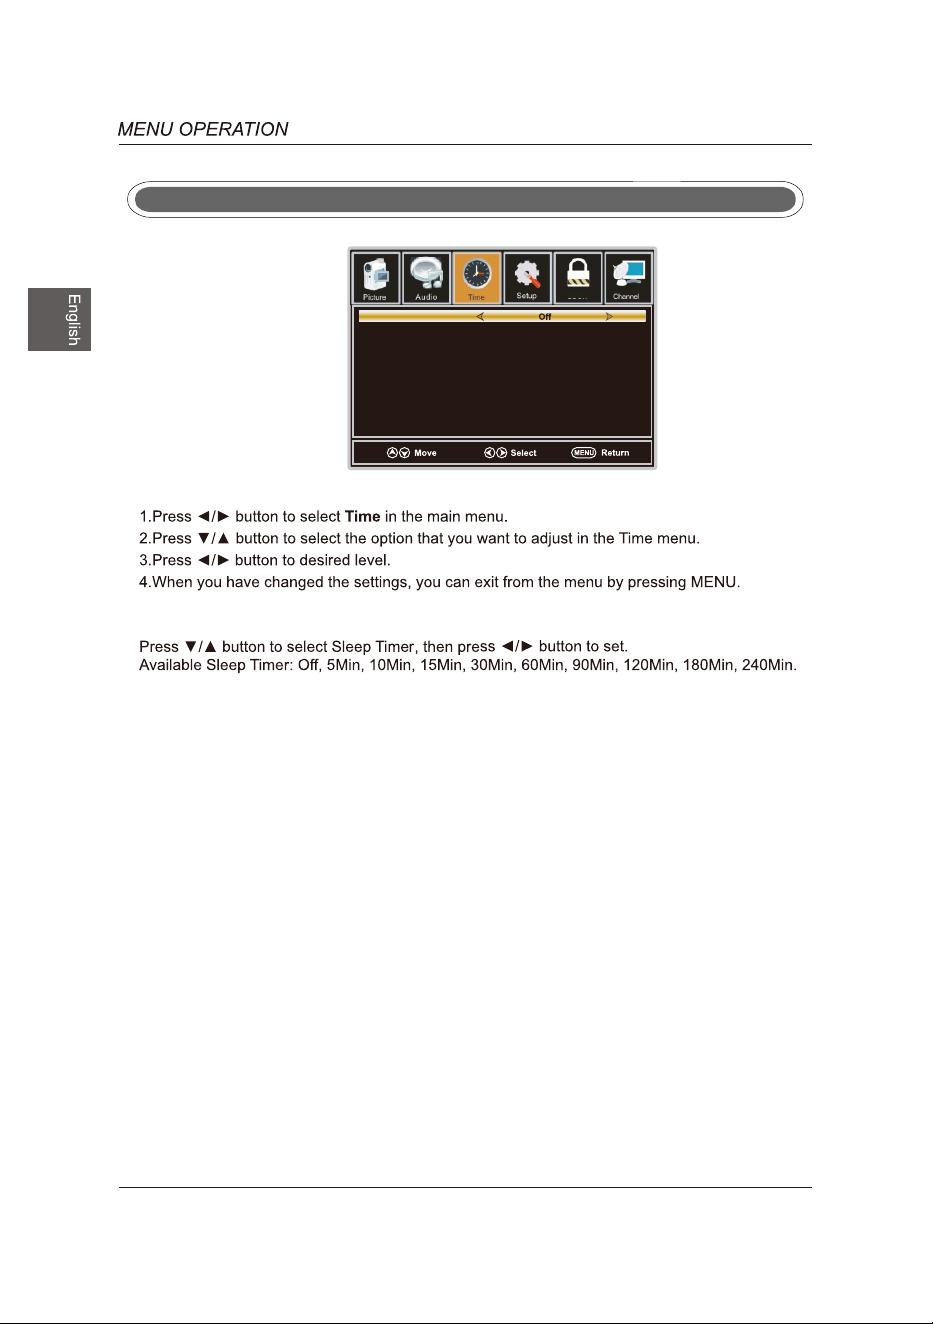
Sleep Timer
Sleep Time
Time Menu
Lock
22
Lock
23
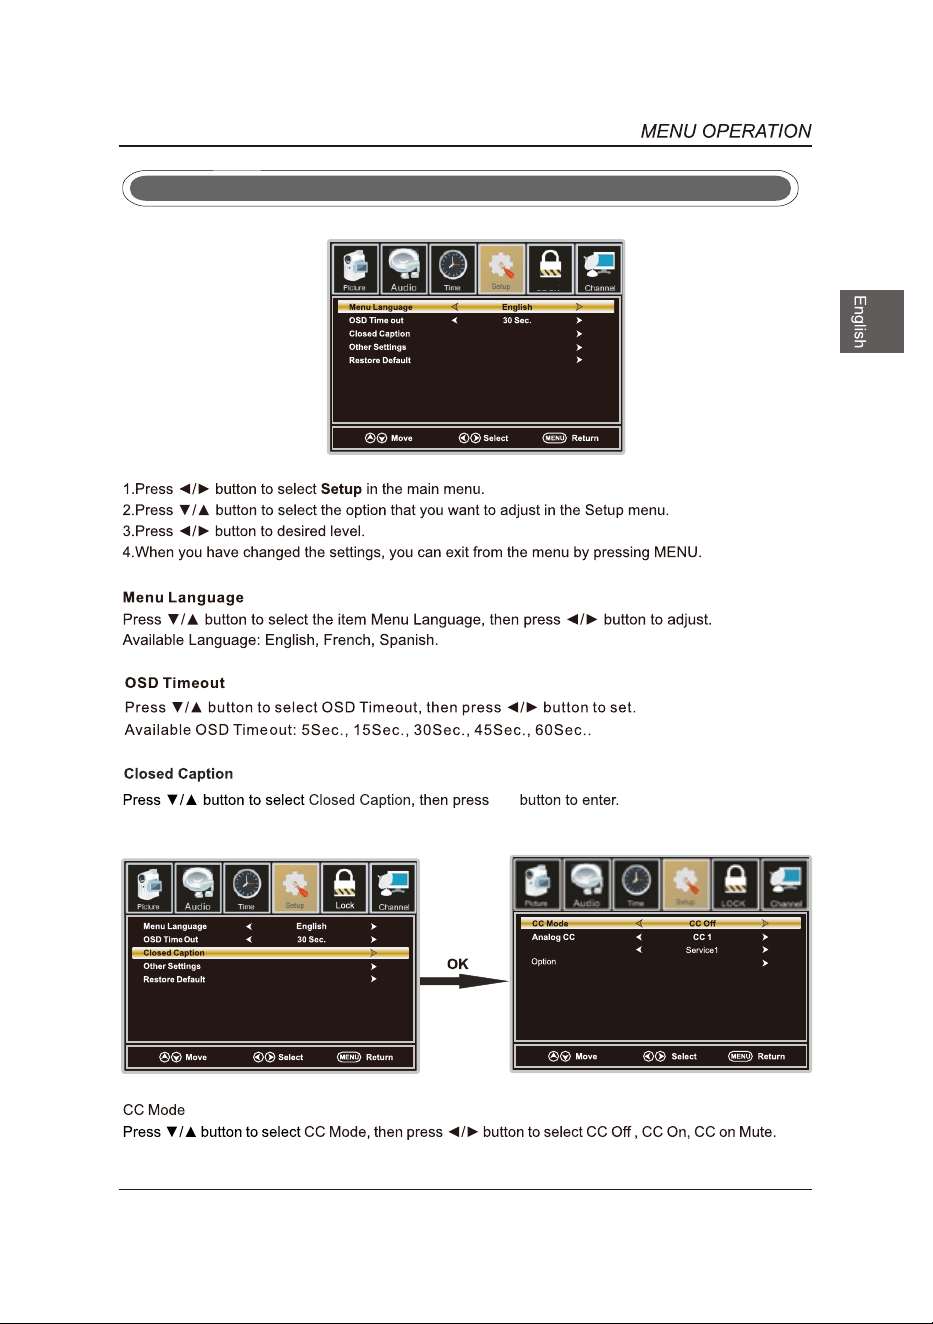
Setup Menu
OK
Digital CC
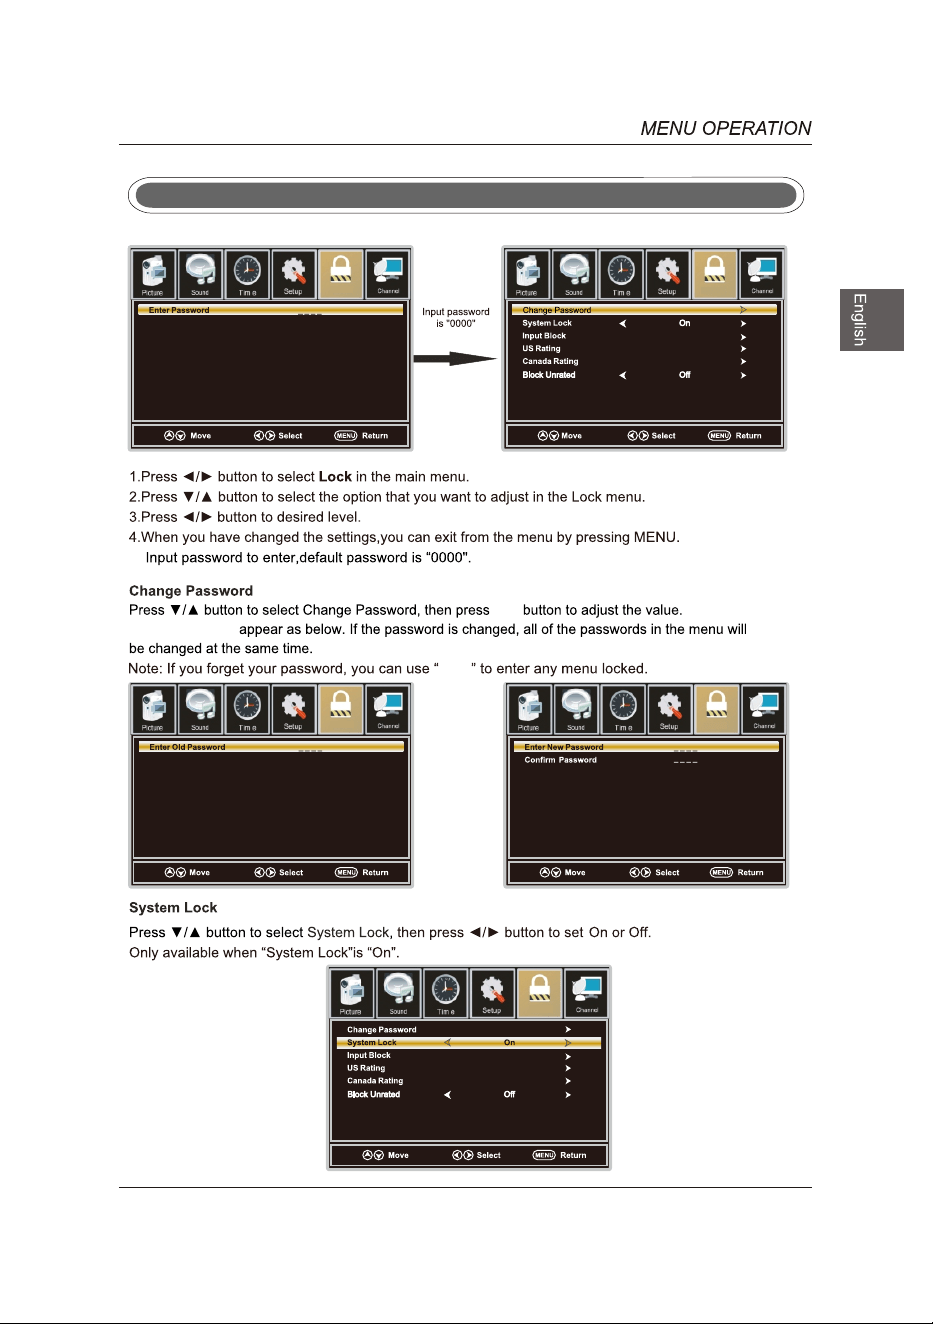
Enter Password
Press to confirm"OK"
(0000)
OK
(0000)
OK
ok
ok
ok
Lock
Lock
Lock
Lock
24
ok
ok
a sub menu will
8899
Lock
Lock
Lock
Lock
Lock
25
Lock Menu
ok
ok
ok
HDMI 1
HDMI 2
HDMI 3
VGA
USB
YPbP r/AV
Lock
Lock Lock
Lock
Lock
26
ok
ok
ok
Signal Type
Signal Type
Signal Type
Lock
Lock
Lock
Lock
27
Channel Menu
ok
ok
ok
Lock
Lock
28
ok
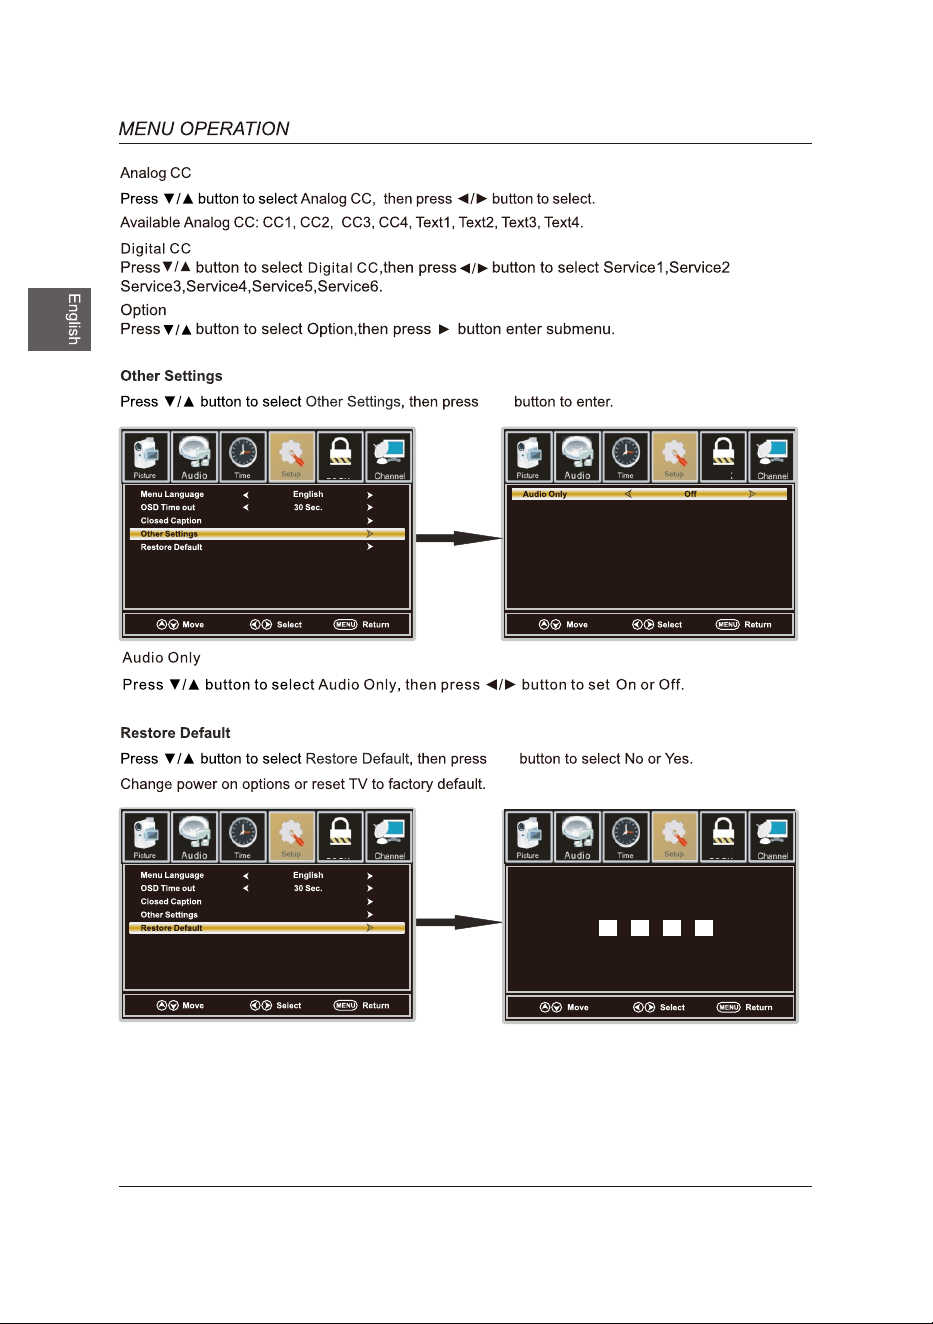
Setup
ok
AUDIO
are
ok
Lock
Lock
29
Setup Menu
M-JPEG
M-JPEG
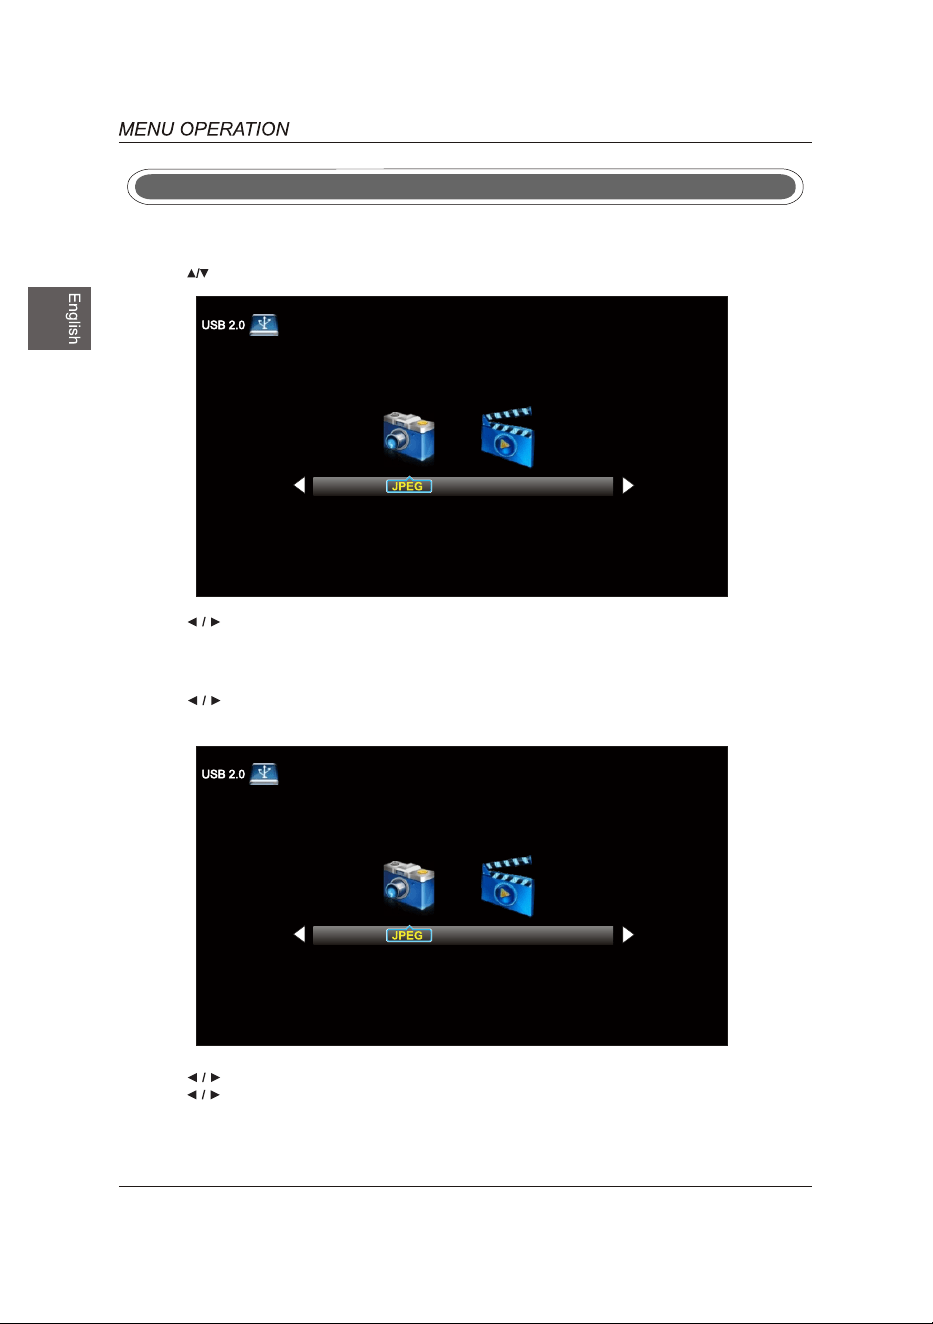
Source to USB.
Press button to select USB in the Source menu,then press OK button to enter.
Press button to select the option you want to adjust in the main Media menu, then press
OK button to enter.
Press button to select JPEG in the main menu,then press OK button to enter.
Press Exit button to return back to the previous menu.
Press button to select drive disk you want to watch, then press OK button to enter.
Press button to select Return option to go back to the previous menu.
USB Menu
Note:Before operating Media menu,Plu in USB device,then press SOURCE button to set
the Input
30
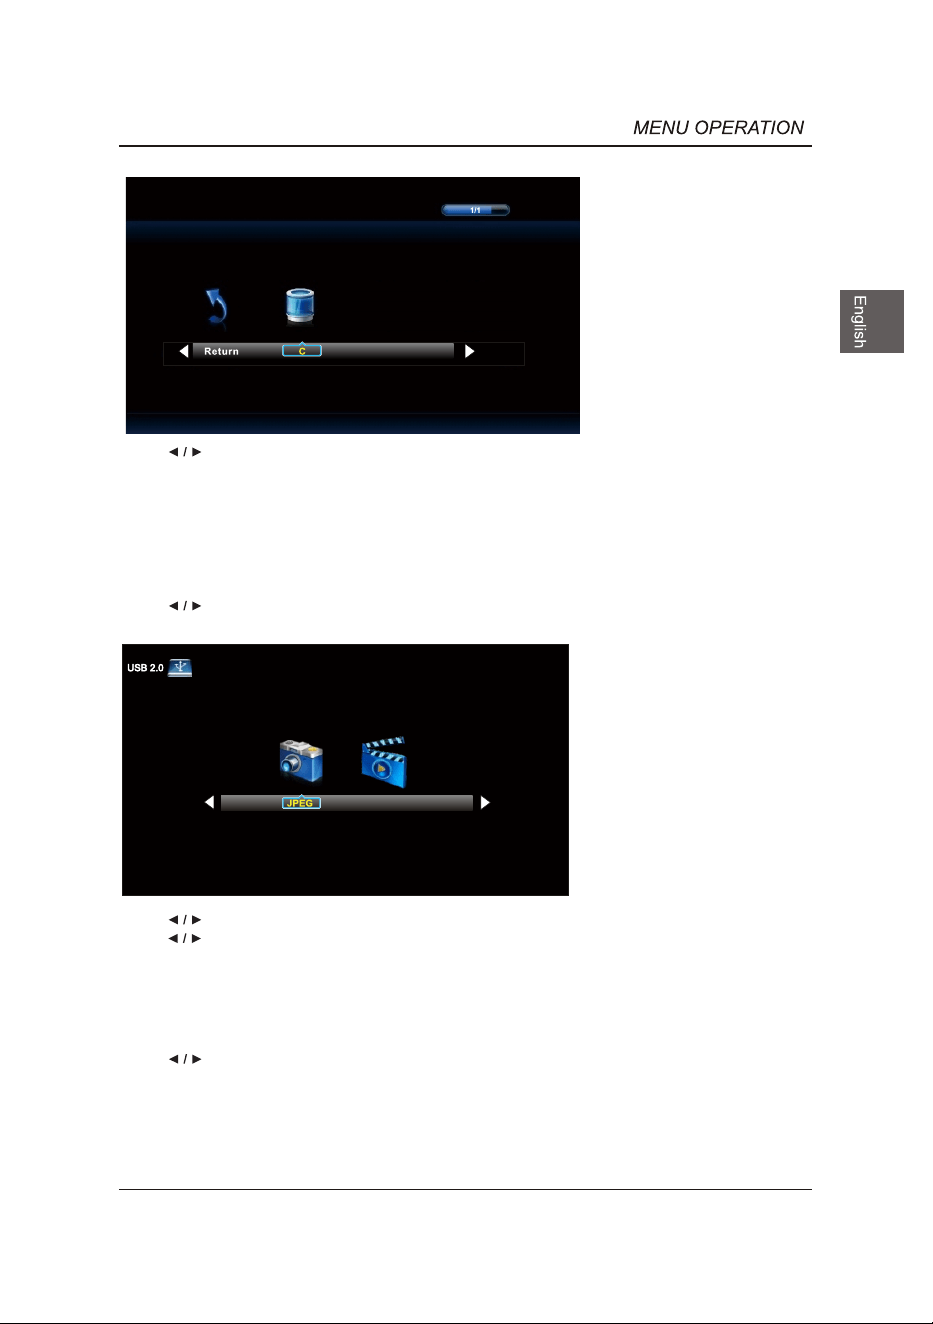
M-JPEG
Press button to select the file you want to watch in the file selecting menu, then press OK
button to display picture.
When highlighting the option you select, the file information will appear on the right and picture will be
previewed in the center.
Press button to select M-JPEG in the main menu, then press OK button to enter.
Press Exit button to return back to the previous menu.
Press button to select drive disk you want to watch, then press OK button to enter.
Press button to select Return option to go back to the previous menu.
Press button to select menu in the bottom you want to run, then press OK button to operate.
When highlighting the option you select, the file information will appear on the right and Movie will be
previewed in the center.
Press OK button to play the selected movie.
Press display button to show select menu in the bottom.
31
32
60
31.5
LED
JPEG,M-JPEG
AC 120V~ 50/60Hz
33
731 x 468 x 230 mm
731 x 433 x 78 mm
4.3
6.5
OPTICAL-OUT
1366 x 768
6
ATSC/NTSC M