Instruction manual Smart Thermostat
Guided Setup Process
The Installation Guide that ships with your ecobee has the necessary instructions to wire up and install your device. After installing your ecobee3 thermostat on the wall and powering it up, you will be guided through the first-run process. Complete these steps to get it configured and connected online so you can make use of all its smart features.
This will take you through the following steps:
- Wiring configuration and equipment configuration
- Setting your preferences
- Wi-Fi configuration
- Registering your ecobee3
If you make a mistake at any time or want to review a setting, you can touch Back to display the previous screen.
Step 1. Wiring Configuration
Your ecobee3 automatically detects and displays which wires are connected to it when it first powers on. It will warn you if you’ve wired a configuration that it doesn't recognize.
If the reported connections are different than what you have actually connected, call ecobee support for guidance.
Touch Next to continue.
Step 2. Accessory Confirmation
Your ecobee3 will ask if you have any accessories like humidifier, dehumidifier, or ventilator connected to it.
Touch Yes if you have one of these devices; otherwise touch No.
If you selected Yes, you will need to specify if the accessory is internally powered:
- Touch Yes if your accessory is externally powered i.e. the ecobee3 does not provide power to it). This is the case if there are connected to both ACC+ and ACC-.
- Touch No if your accessory receives power from your ecobee3. There will be a single wire to ACC+.
Need Help? See page 32 for information on how to determine your accessory device's power configuration. Touch Next to continue.
Step 3. Temperature Preference Setup
Your ecobee3 will ask you to select Fahrenheit or Celsius as your preferred temperature units. Touch Next to continue.
Step 4. Equipment Configuration
Your ecobee3 will ask you to configure your equipment. Depending on your wiring, different options will be available. These options will configure basic system operation as well as optimize the system for your specific type of equipment.
Review the list to see if any devices require additional configuration ("Configuration needed") and if the default settings are valid.
Once you are done, touch Next to continue.
Heat Pumps
If you have a heat pump installed:
- Select the heat pump menu.
- Select Air to Air or Geothermal depending on the type of your heat pump system
- Specify what the heat pump runs when the O/B Reversing Valve is engaged: On Cool runs cooling when O/B engages (most cases), or On Heat runs heating when O/B engages.
- Touch Next. You will be returned to the Equipment configuration menu.
Furnaces/Boilers
If you have a furnace or boiler installed:
- Select the heating menu.
2. Configure the heater type:
- Furnace: Optimizes ecobee3 for systems using forced air
- Boiler: Optimizes your ecobee3 for systems using radiators or in-floor heat.
3. Touch Next. You will be returned to the Equipment configuration menu.
Fans
If your furnace uses forced air, you may configure fan operation:
- Select Fan menu.
- Select Fan operation:
- Thermostat: Your ecobee3 thermostat controls the fan during heat and cool cycles.
- HVAC: Your equipment controls the fan during heat and cool cycles (typical configuration).
3. Touch Next. You will be returned to the Equipment configuration menu.
Humidifier
If you have a humidifier installed:
- Select Accessory menu.
- Select Humidifier.
- Touch Next.
- Select the type of humidifier you have: Evaporative or Steam. If unsure, select Evaporative.
- Touch Next. You will be returned to the Equipment configuration menu.
Dehumidifier
If you have a dehumidifier installed:
- Select Accessory menu.
- Select Dehumidifier.
- Touch Next.
- Select Open if the dehumidifier is active when the relay is open; otherwise select Closed. If unsure, select Closed (if the dehumidifier runs when it shouldn't, you can change this option in the Equipment Configuration menu (page
- Touch Next. You will be returned to the Equipment configuration menu.
Ventilators (ERV/HRV)
If you have a ventilator (ventilator, ERV or HRV) installed:
- Select Accessory menu.
- Select Ventilator.
- Touch Next.
- Select the type of ventilator you have installed: Ventilator, Energy Recovery Ventilator or Heat Recovery Ventilator.
- Touch Next.
- Select the preferred minimum runtime (min/hr) when your home is occupied and the runtime for when your home is unoccupied. If unsure, keep the default 20 min/hr value or contact a professional.
- For HRVs, select whether or not you would like to use it t use it to dehumidify in winter.
- For Ventilators, select whether or not you would like to enable free cooling.
- Touch Next. You will be returned to the Equipment configuration menu.
Step 5. Name Your Thermostat
After configuring your equipment, you will be prompted to give your ecobee3 a name. Select a name from the list or enter your own using the on-screen keyboard.
This name will appear in your web portal, so pick a name that makes it easy to identity your thermostat (this is especially important if you have more than one in your house).
Touch Next to continue.
Step 6. Configure Ideal Temperatures
Next, slide the set-point bubble up and down to select the preferred, normal temperature for your home during winter and summer (touch Next after each). This setting will be used to generate the default comfort settings.
Step 7. Select Current HVAC System Mode
Select the operating mode of your HVAC equipment. For example, if you want to set your HVAC system to heat, select Heat. If you do not want the system to run, select Off.
Touch Next to continue.
Step 8. Configure Sensor Settings
Your ecobee3 includes sensors that can determine when you are home. You can have your thermostat automatically go into energy savings mode when you are away. For a detailed description of how the settings work, see page 13.
- Enable or disable Smart Home/Away setting. If enabled, your ecobee3 senses when you are home during a scheduled Away period, or away during a scheduled Home period, and will automatically override your scheduled settings to maximize comfort and savings.
- Touch Next to continue.
Step 9. Wi-Fi Configuration
To get the most out of your ecobee3, it needs to connect to your home's Wi-Fi network.
Touch Next to configure your network settings. If you do not want the ecobee3 to connect to the Internet, touch Skip and confirm the action by pressing Next.
When configuring your network settings, your ecobee3 will display a list of all visible Wi-Fi networks along with their signal strength. If your network has weak signal strength, try moving your router closer to the ecobee3.
If your network appears in the list
- Select your network from the list
- Touch Next.
- Enter your password, if prompted.
- After connecting to the Internet, your ecobee3 will register itself with the ecobee servers and provide you with a 4-digit registration code.
- Write down the 4-digit code. You will need it when registering your ecobee3 (You can register from either ecobee's Mobile App or Web Portal).
If it's not listed, select My network is not visible and touch Next you will have to enter your network parameters manually, including the SSID).
- If your network is password-protected, enter the password.
- This will take you through the manual Wi-Fi set-up process where you will have to enter in information about your network such as if it’s a DHCP or a static IP, the network SSID name, the encryption, the password etc.
- After connecting to the Internet, your ecobee3 will register itself with the ecobee servers and provide you with a 4-digit code.
- Write down the 4-digit code. You will need it when registering your ecobee3 (You can register from either ecobee's Mobile App or Web Portal).
Touch Next to continue.
Step 10. Date & Time
The Date & Time screen lets you configure your time zone settings. If you didn't configure Wi-Fi in the previous step, you may need to reconfigure the current time and date. These settings are required in order for the scheduling features of your ecobee3 to work properly.
If Wi-Fi is configured:
- Touch Time zone.
- Select your country from the list and touch Next.
- Select your time zone by picking the name of the nearest community from the list.
- Touch Next.
- Touch Next to continue.
If Wi-Fi is not configured:
- Touch Date.
- Slide up and down to set the current date and touch Save
- Touch Time.
- Slide up and down to set the current time and touch Save.
- Touch Time zone.
- Select your country from the list and touch Next.
- Select your time zone by picking the name of the nearest community from the list.
- Touch Next.
- Touch Next to continue.
Step 11. Web Portal/Mobile App Registration
After setting up Wi-Fi on your ecobee3 and obtaining the registration code, you need to configure your account from either the ecobee3 Mobile App or the Web Portal.
To register from the Web Portal:
- From a web browser, visit ecobee
- Click on the Register link.
- Follow the on-screen instructions to register your account.
To register from the Mobile App:
- Download the app to your iPhone or Android device from the respective app store.
- Launch the ecobee3 app.
- Follow the on-screen instructions to register your account.
Basic Functions
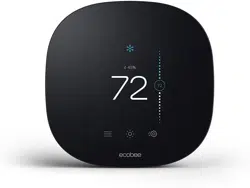
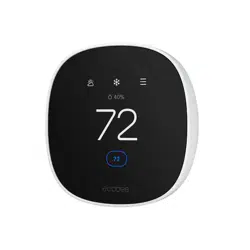
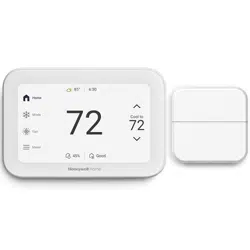
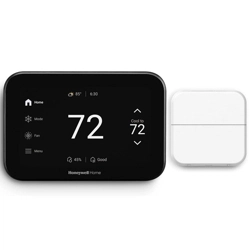
The bright, easy-to-read touch screen on your ecobee3 thermostat makes it simple to review and adjust settings any time you want.
Home Screen
Your ecobee3 will automatically display the home screen when you approach it.

- Current system mode and any equipment currently running
- Current relative humidity
- Current indoor temperature
- Messages indicating any special operating mode or state (e.g. resume, temperature hold, etc)
- Main menu. If a dot appears on the icon, you have important message(s) to read.
- Weather forecast
- Quick Change menu
- Adjustable heat and cool set points. If the System Mode is set Auto, both are displayed; otherwise only heat or cool is displayed.
Standby Screen
The standby screen activates whenever the thermostat is not in use. It shows the current indoor temperature and outdoor weather conditions.

1 Current indoor temperature
2 Current outdoor weather and temperature
The standby screen is configurable. You can adjust:
- Standby screen activation time (page 21)
- Standby screen brightness (page 21)
Adjusting the Temperature
You can override the scheduled temperature by moving the bubble on the temperature slider up or down. The blue number represents the cool set point; the orange number represents the heat set point.
The new desired temperature will be the set point used for the Hold. The duration of the Hold is the last configured value (the default value is Until I change it, meaning it keeps the value indefinitely, until you choose to revert to the schedule or change it). You can adjust the default Hold time in the Preferences menu (page 21).
To cancel the current Hold, touch the Hold message box displayed on the Home screen. You can touch the box anywhere and not just the X displayed on the box.
Main Menu
To show the main menu, touch the screen and touch 


Quick Changes
The Quick Changes screen lets you quickly adjust the operation of the ecobee3 and your equipment.

- Current time and date display
- Home and Away buttons. Touch these buttons to override your programmed schedule. To cancel this action, touch the message box on the Home screen.
- Toggle fan between Auto and On. Touch On to run the fan continuously. Touch Auto to run the fan according to the Minimum Runtime per Hour setting (page 24).
- If you have a ventilator, ERV or HRV installed, touch On to run the device for 20 minutes page 26)
- Icons indicate if heat, cool, fan, and any accessories are actively running (see page 11 for icon descriptions)
- Internet connection and ecobee server connection status. If this icon is red, you can contact our technical support team for help page 4).
Hint: You can also apply quick changes from the web portal by clicking on the Fan or Quick Changes tiles.
Weather
Touch the Weather icon to display a local weather forecast for the week as well as a detailed daily forecast.

- 1 Current weather conditions
- 2 Current outdoor temperature
- 3 Probability of precipitation (POP), relative humidity, and daily high/low temperature
- 4 24-hour weather forecast
Note: To receive the local weather forecast, you must first register your thermostat (page 22). For a complete list of weather icons, see page 33.
System Icons
The icons on the Home screen and Quick Changes menu show information about the status of your HVAC system.
 Heat - An orange heat icon indicates that your thermostat is calling for heat. A white heat icon indicates that your system is in heat or auto mode but is not currently calling for heat.
 Cool - A blue cool icon indicates that your thermostat is calling for cool. A white cool icon indicates that your system is in cool or auto mode but is not currently calling for cool.
 Fan - A fan icon indicates that your thermostat is calling for the fan to run.
 Auto - If both heat and cool icons are shown, your system is in Auto mode, meaning your ecobee3 will call for heat or cool as required.
Selecting System Operation Mode
The System menu controls the basic operation of the different components in your HVAC system, including the heat/cool mode, fan operation, and the operation of accessories like humidifiers, dehumidifiers, and ventilators.
HVAC System
The HVAC System settings depend on the type of system you have. Depending on your system, one or more the following options are shown:
- Cool: Turn on the air conditioner when the current temperature rises above the set temperature.
- Heat: Turn on the heat when the current temperature drops below the set temperature.
- Auto: Activate the heating or cooling system as required to keep your home within the configured range of set temperatures.
- Aux: Only use the auxiliary or backup heat source to maintain the heat set point temperature. This option only appears if auxiliary heat is configured in the Equipment menu.
- Off: Turn the system off. When the system is off, only the current temperature will be displayed on the Home screen.
On Thermostat and Mobile: Select Main Menu > System > HVAC System
On Web: Select System tile > HVAC
Fan
The Fan menu displays the current furnace fan setting.
Depending on your system, one or more of the following options are shown:
- On: Force fan to run continuously, regardless of the scheduled programming. The fan will also run if the System Mode is Off.
- Auto: Enable fan when the system is actively heating or cooling your home, or to satisfy the Minimum Fan Runtime setting (page 12).
On Thermostat and Mobile:
Select Main Menu > Quick Changes > Fan
On Web:
Select Fan tile
Minimum Fan Runtime (Auto mode only)
When the fan is in Auto mode, ecobee3 operates it according to the Minimum Fan Runtime setting. You can adjust this setting from 0 to 55 minutes.
When your system is in heat or cool mode, the fan will always run for this minimum amount of time. A longer runtime improves air circulation and results in a more consistent temperature than with the Auto setting while being more cost-effective than the On setting.
Your ecobee3 will meet this minimum runtime over the hour while making sure it never runs for less than five minutes.
On Thermostat and Mobile:
- Select Main Menu > System > Fan
- Swipe left or right to adjust the value.
On Web:
- Select System Tile > Fan
- Swipe or drag left or right to adjust the value.
Humidifier (if installed)
The Humidifier menu enables or disables the humidifier, if installed:
- On: Run the humidifier to increase the humidity to the configured set point.
- Off: Do not operate the humidifier.
- Frost control: Automatically maintain the humidity to stay comfortable but prevent condensation or frost on your windows
To adjust the humidity set point and other options, see page 14.
On Thermostat and Mobile:
Select Main Menu > System > Humidifier
On Web:
Select System tile > Humidifier
Dehumidifier (if installed)
The Dehumidifier menu enables or disables the dehumidifier, if installed:
- On: Run the dehumidifier to reduce the humidity to the configured set point.
- Off: Do not operate the dehumidifier.
To adjust the dehumidifier set point, see page 12.
On Thermostat and Mobile:
Select Main Menu > System > Dehumidifier
On Web:
Select System tile > Dehumidifier
Adjusting Sensor Modes
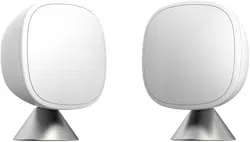
Your ecobee3 supports wireless remote sensors that detect motion and temperature in different rooms (one was included with your thermostat). Your ecobee3 also has a built-in motion sensor. With these sensors, you can optimize the operation of your thermostat to ensure comfort in the rooms and times that matter most.
For information about installing new sensors, see the ecobee Installation Guide, or the documentation included with the sensor itself.
Smart Home/Away
Smart Home/Away applies all the sensors in your network – including the sensors built-in your thermostat. It works by following your schedule unless any sensor in your network is in conflict with your schedule. In other words, if your ecobee3 senses that you are home during a scheduled Away period, or away during a scheduled Home period, it will automatically override your schedule by placing you in Smart Home/Away mode to maximize comfort (Smart Home) and savings (Smart Away).
On Thermostat:
- 1. Select Main Menu > Sensors > Smart Home/Away
- 2. Touch Enable to have your sensor network and thermostat detect occupancy. To have your thermostat strictly follow your programmed schedule, touch Disable.
Follow Me
Follow Me is a feature that applies to a selected group of the sensors in your network (including the sensor built-in your thermostat). It works by looking for motion triggered by any of 14 the selected sensors. If motion is detected, the temperature reading from that sensor will be used by your ecobee3 to decide when to operate your heating or cooling system. This ensures that you are comfortable in the rooms that you are occupying. If more than one sensor detects motion, the average of these sensors will be used. Your ecobee3 makes changes gradually when many sensors are detecting motion to make sure there are no sudden or large changes for your heating and cooling system to deal with.
When Follow Me is disabled, your ecobee3 will continuously use the average temperature readings from all the sensors that you’ve selected as the desired temperature to control your ecobee3. For example, suppose you have a room in your house that is far from your thermostat and you want this room to be at the thermostat's set temperature, regardless if motion is occurring. In this case, set Follow Me to Disable and only select this room. Your ecobee3 will now only use the temperature in this room to decide when to operate your heating or cooling system.
On Thermostat:
- 1. Select Main Menu > Sensors > Follow Me
- 2. Enable or disable the Follow Me feature.
- 3. If enabled, select which sensors are affected by pressing on each checkbox.
Adjusting Comfort Settings
You can configure your ecobee3 to fit your schedule and comfort needs while maximizing your energy savings. Your ecobee3 organizes your temperature and fan settings into different Comfort Settings. These settings are used in the Schedule, Smart Home and Quick Changes menus

By default, your ecobee3 includes three configurable Comfort Settings:
- Away: Settings for when you are not at home.
- Home: The normally settings for when you are at home and awake.
- Sleep: Settings for when you are sleeping.
Note: You can create new Comfort Settings (or remove them) from the Web Portal.
On Thermostat and Mobile:
- Select Main Menu > Comfort Settings
- Select the Comfort Setting you want to customize.
- Adjust the set points for heat and cool, as well as fan mode as required.
- You can also now select which sensors are participating in this comfort setting.
- Touch Save.
On Web:
- Select Schedule tile.
- Select the Comfort Setting you want to customize, or select New Comfort Setting to add a new one.
- Adjust the name, set points for heat and cool, as well as fan mode as required.
- Select if this Comfort Setting is for when the home is Occupied or Unoccupied.
- Select Save. The new Comfort Setting will appear in the Schedule tile as well as on the thermostat itself.
To delete a Comfort Setting:
- Select Schedule tile.
- Select the Comfort Setting you want to delete.
- Select Delete.
- Confirm by selecting Delete.
Setting Your Weekly Schedule
Your heating and cooling needs change depending on the time of day, day of the week, as well as when you are home or away. For example, if there’s no one in the house during the workday you might want to let the temperature go up in the summer, to reduce energy used by the air conditioning system, and down in the winter, to reduce heating energy.
The ecobee3 adapts to how your home and heating and cooling equipment perform. Intelligent algorithms combine weather data, your equipment run times and occupancy schedules to optimize performance and maximize energy savings. This means you can be comfortable when you are home and save money when you are not.

On Thermostat and Mobile:
- Select Main Menu > Schedule
- Touch the day of the week you want to adjust.
- Select an existing scheduled activity to edit. You can also create a new activity by touching +.
- Select Start time.
- Swipe to select the new time value. Note: You can only select time values that are at least 30 min after the previous activity to 30 min before the next scheduled activity (i.e. you cannot overlap activity times).
- Touch Save.
- If you have added a new activity, you need to select Comfort Setting to use.
- Touch Save.
- Touch the Back arrow to return to the Schedule screen where you can make additional changes as required.
Hint: You can copy the entire schedule from one day to another day (for example, if all your week days follow the same schedule). Display the first day, touch the copy button, select which days to apply the changes to, and touch Save.
On Web:
To edit an existing activity:
- Select Schedule tile.
- Select an existing scheduled activity to edit.
- Select Start time.
- Select Save.
To create a new activity:
- On the Schedule tile, select Add activity.
- Select the day.
- Select Next.
- Select the Comfort Setting to use during the activity.
- Select Next.
- Select Start time.
- Select Save.
To copy the entire schedule from one day to another day (for example, if all your week days follow the same schedule):
- 1. On the Schedule tile, select Copy.
- 2. Select the day to copy.
- 3. Select Next.
- 4. Select the days that will use the copied schedule (you can select more than one).
- 5. Select Save.
Going on Vacation
Your ecobee3's Vacation feature helps you conserve energy while you are away for extended periods of time. It also ensures your home is comfortable when you return.
A vacation event has a start date and time, as well as an end date and time. You can enter any number of vacations, as long as each has a unique start time.
The Vacation feature overrides your programmed schedule – you can leave your Schedule settings as-is when you go away for a special or unscheduled trip.

On Thermostat and Mobile:
- 1. Select Main Menu > Vacation
- 2. Touch + to create a new vacation event.
- 3. Select Vacation schedule.
- 4. Enter the Departure date and time.
- 5. Touch the Back arrow.
- 6. Select Vacation settings.
- 7. Select Heat or Cool to enable/disable heat and cool during the vacation event.
- 8. Configure the set point(s) for heat and/or cool during the vacation event by selecting Heat set to or Cool set to, adjusting the temperature, and then pressing Save.
- 9. Touch the Back arrow.
- 10. Touch Save.
The vacation event is now set. You can adjust it at any time by selecting it from the Vacation menu.
To delete a vacation event:
- 1. Select Main Menu > Vacation
- 2. Select the vacation you want to delete.
- 3. Touch Remove

- 4. Confirm the deletion by pressing Delete.
On Web:
- 1. Select Vacation tile.
- 2. Select New Vacation
- 3. Enter the depart and return date and times
- 4. Select Heat and Cool.
- 5. Enable or disable heat and cool during the period as required.
- 6. Select the set points for heat and/or cool.
- 7. Select Save.
- 8. Select Fan and set the minimum fan run time per hour, if different than your normal settings.
- 9. Select Save.
The vacation event is now set. You can adjust it at any time by selecting it from the Vacation tile.
Caring for your Thermostat
Cleaning
You can clean your ecobee3 screen by spraying water on to a clean, microfiber cloth. Wipe the surface of the screen with the dampened cloth.
Note: Never spray any liquids directly onto your ecobee3.
Rebooting
You can reboot your ecobee3 by gently pulling the thermostat from the back plate. To pull the thermostat off the wall, make sure you that firmly hold on to the black front of the thermostat. Ensure that you are not pulling the white trim plate as that is attached to the wall.
Rebooting will not alter programming or configuration options.
Resetting the Thermostat
At some point during the life of your ecobee3 thermostat you may want to quickly reconfigure it or restore it to the default state.
- Reset Registration: Deletes your registration settings (i.e. username and password). Equipment settings and personal preferences are kept as-is.
- Reset Preferences: Resets all your preferences, reminders, alerts and programming back to the default state.
- Reset All: Resets the thermostat back to its default factory settings and removes any registration information.
On Thermostat:
- Select Main Menu > Settings > Reset
- Select a reset option:
- Reset Registration
- Reset Preferences
- Reset All
3. Touch Yes to confirm the reset.
Troubleshooting
The About menu shows technical information about your ecobee3, including:
- Thermostat name
- Software version
- Serial number
- Contact information for support
- Wi-Fi settings
This information is useful when troubleshooting network issues or contacting ecobee technical support.
On Thermostat or Mobile:
Select Main Menu > About
On Web:
Select About tile
Wiring Diagrams
The following pages provide wiring diagrams for common HVAC equipment configurations.
Conventional heating and cooling
Heat Only

Note : Do not jumper Rc or Rh, ecobee3 does this automatically. R can go into either Rc or Rh terminals on your ecobee3.
Heat and Cool

Note: Do not jumper Rc or Rh, ecobee3 does this automatically. R can go into either Rc or Rh terminals on your ecobee3.
Heat and Cool (2 Stage Heat)

Note : Do not jumper Rc or Rh, ecobee3 does this automatically. R can go into either Rc or Rh terminals on your ecobee3.
Heat pumps
Air or Geothermal Heat Pump with Auxiliary Heat

Note : Do not jumper Rc or Rh, ecobee3 does this automatically. R can go into either Rc or Rh terminals on your ecobee3.
Air or Geothermal Heat Pump (2 Stages) with Auxiliary Heat

Note: Do not jumper Rc or Rh, ecobee3 does this automatically. R can go into either Rc or Rh terminals on your ecobee3.
Boiler or radiant systems
Boiler or Radiant System with Air Handler and Conventional Cooling or Heat Pump

Note: Do not jumper Rc or Rh, ecobee3 does this automatically. R can go into either Rc or Rh terminals on your ecobee3.
Boiler or Radiant System (2 stages) with Air Handler and Conventional Cooling or Heat Pump

Note: Do not jumper Rc or Rh, ecobee3 does this automatically. R can go into either Rc or Rh terminals on your ecobee3.
Accessory devices
The ecobee3 can control an accessory HVAC device like a humidifier, dehumidifier, or ventilation device from its ACC terminals.
If the accessory is internally powered, connect the 24V to ACC+. Also connect the common for the accessory to common on the control board.

Note : You will need to configure the accessory device when you first power on your ecobee3.
PEK thermostat wiring

Icon Reference
Note: Depending on your equipment configuration, not all the icons may be available.
Home Screen

System Operation

Menus

Comfort Settings

Weather

Wi-Fi Connectivity