Loading ...
Loading ...
Loading ...
20 GAS SPECIFICATIONS
GAS SPECIFICATIONS
TIPS & INFORMATION
IMPORTANT
When disconnecting and removing the gas cylinder for the
purpose of refilling, always observe the following procedure:
• Ensure that all gas control valves on the appliance and
the gas cylinder are turned off before disconnecting the
gas line from the cylinder.
• Do not smoke or use a naked flame near the appliance
or gas cylinder while disconnecting the gas line between
the appliance and gas cylinder.
• Remove the gas cylinder from the enclosure before
disconnecting the gas line from the appliance.
• Tighten all connections before placing the gas cylinder
back in its enclosure.
The Gas Leak Testing Procedure should be conducted
every time.
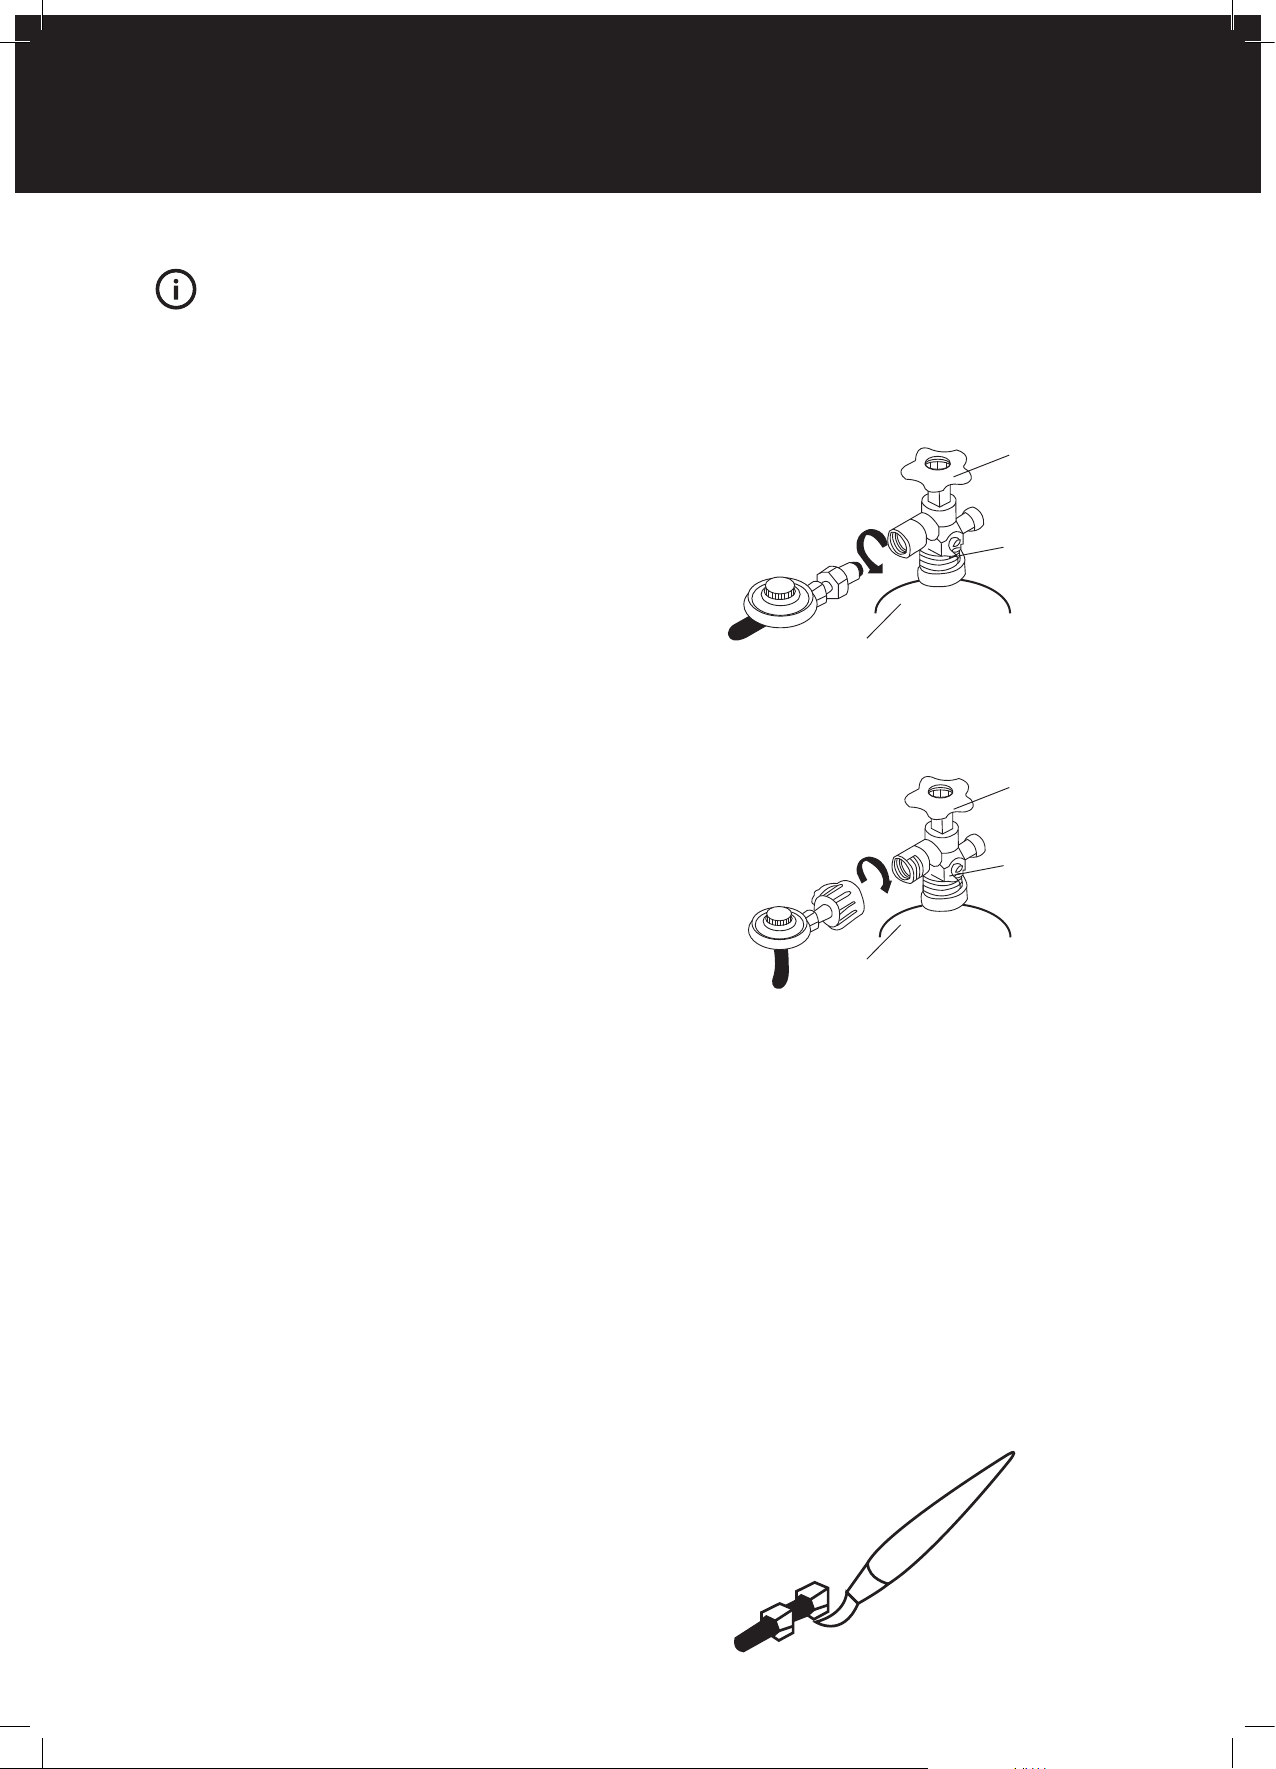
Regulator connection
1. Check that all control knobs are in the ‘Off’ position.
2. Make sure the cylinder valve is off by turning the valve
knob all the way clockwise.
3. Remove the protective cap from the cylinder if present.
4. Make connection as described in figures 1 and 2.
5. Leak-test the connection with a soapy water solution.
(See Gas Leak Testing Procedure).
Hose and regulator replacement must be a genuine part
specified for this appliance, and can be obtained at your
nearest BeefEater stockist.
Gas leak test procedure
Use the following procedure to check for gas leaks.
Never use a naked flame to check for gas leaks.
FIG 1
Standard POL regulator (AU/NZ regulator)
FIG 2
Quick connect regulator (North America regulator)
1. In a small container, mix up a solution of water and
detergent or soap. Mix the solution well.
2. For LPG make sure that the gas supply valve on the gas
cylinder is turned on. For Natural gas make sure that
the gas line is correctly fitted to the appliance.
3. Make sure that the gas control valves on the appliance
are all turned off.
4. Using a brush or spray bottle apply the solution to the
gas line and each join in the gas line. See Fig 3.
5. Bubbling of the solution will indicate that there is a
leak present.
6. Re-tighten or re-seal any joints that are leaking.
7. If a leak persists then contact your distributor or the
manufacturer for assistance.
FIG 3
Gas shutoff valve
Gas shutoff valve
Bleeder valve screw
Bleeder valve screw
Protector cap
Protector cap
Gas cylinder
Gas cylinder
Regulator and hose
Regulator and hose
Tighten in this direction
Tighten in this direction
Loading ...
Loading ...
Loading ...