Loading ...
Loading ...
Loading ...
108
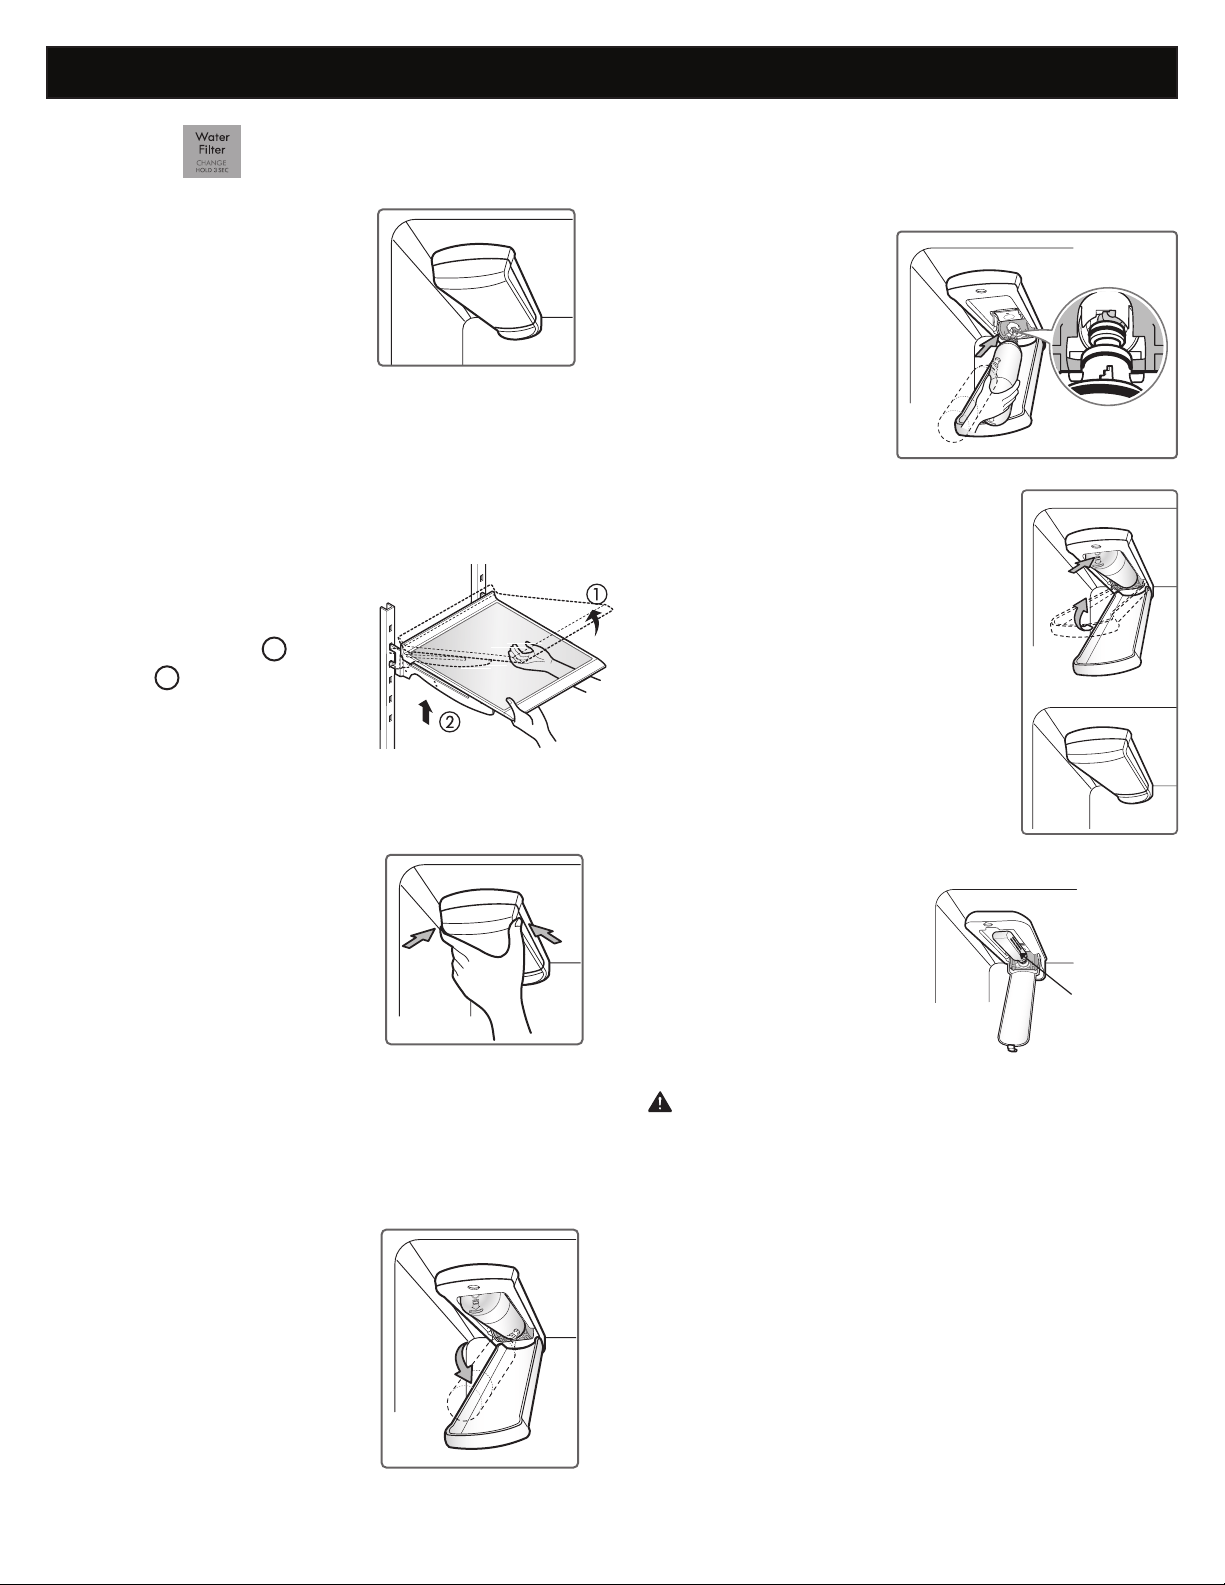
2. Remplacez par un nouveau ltre à eau.
puis retirez l’enveloppe de protection des joints
toriques. Les pattes du
en position horizontale,
introduisez le nouveau
le collecteur.
FILTRE À EAU
FILTRE À EAU
Environ tous les 6 mois.
s’allume.
Lorsque les cubes de glace sont
plus petits que d’habitude.
position et fermez le couvercle.
Le couvercle s’enclenche s’il est
3. Bouchon de dérivation du ltre à eau
Conservez le bouchon
eau. Vous DEVEZ utiliser
de remplacement n’est pas
disponible.
ATTENTION :
REMARQUE :
rendez-vous dans un magasin Sears ou composez le 1-800-
4-MY-HOME
®
. En outre, vous pouvez commander en ligne à
l'adresse www.sears.com/partsdirect
1. Retirez l'ancien ltre à eau.
complètement.
Appuyez sur le bouton-poussoir
eau.
REMARQUE : Le remplacement du
1 once ou 25 cc). Placez une tasse sous
Bouchon de
Avant de remplacer le ltre à eau :
Pour retirer une clayette –
Inclinez la partie avant de
la clayette vers le haut
1
et
soulevez-la
2
pour la retirer.
25
REFRIGERATOR SHELVES
The shelves in your refrigerator are adjustable to meet
your individual storage needs. Your model may have glass
or wire shelves.
Adjusting the shelves to fit different heights of items will
make finding the exact item you want easier. Doing so will
also reduce the amount of time the refrigerator door is
open which will save energy.
IMPORTANT: Do not clean glass shelves with warm water
while they are cold. Shelves may break if exposed to
sudden temperature changes or impact.
NOTE: Glass shelves are heavy. Use special care when
removing them.
Adjusting Shelves (Cantilever)
Remove shelves from the shipping position and replace
shelves in the position you want.
To remove a shelf—Tilt up the front of the shelf in the
direction of
1
and lift it in the direction of
2
. Pull
the shelf out.
To reinstall a shelf—Tilt the front of the shelf up and
guide the shelf hooks into the slots at a desired height.
Then, lower the front of the shelf so that the hooks
drop into the slots.
Folding Shelf (on some models)
You can store taller items, such as a gallon container
or bottles, by simply pushing the front half of the shelf
underneath the back half of the shelf. Pull the front of the
shelf toward you to return to a full shelf.
CAUTION: Make sure that shelves are level from one
side to the other. Failure to do so may result in the shelf
falling or spilling food.
USING YOUR REFRIGERATOR
Loading ...
Loading ...
Loading ...