Loading ...
Loading ...
Loading ...
1. You will need to flush water thru the system when a new filter is installed or when using for the first
time. This will prime the filter and also rinse your system thoroughly. It is normal to see particles in
the water while priming.
NOTE:
It is normal when priming the system prior to first use or when changing the filter to
see residue, and/ or cloudy water dispense. Once you have flushed the system with one full
tank of water and disposed of the water, refill with fresh water and the water will dispense
clean and clear.
2. If needed, plug in the Water Filtration system and turn on power – switch located in the back of the
unit; slide to ON.
3. With the new PUR
®
Mineralclear
®
filter in place (see previous sections to install the filter). Remove
the fill cap and pour water thru the fill zone (with blue ring) to MAX fill line. Water will drain down
through the system, so keep filling until it reaches the MAX fill line and replace cap. (Also see page
9, Filling the Appliance.) The blue water window also indicates the unit is full, with the white ball on
top. Bubbling sounds are normal as air escapes as water is poured in.
NOTE: Never use hot water as it will damage the filter and reduce filter life. Always fill with
cool water.
4. Press the oval dispensing lever until a steady stream of water is present and flowing steadily into
a glass. Continue dispensing until all the water has been dispensed. The system is empty when
the white ball on the blue water window is at bottom of window.
5. The Oster
®
Water Filtration System with PUR
®
Mineralclear
®
filter is all ready to go. Refill to MAX
fill line, replace cap. The white ball will now be at the top of the blue water window on the front,
showing the appliance is full.
6. Repeat the above steps each time a new filter is put into place. The filter life indicator lights will
go to red when a new filter is needed.
NOTE: Instructions for Priming the system with a new filter are also located on the
underside of the inner cover, for reference.
osterwater.com •
7
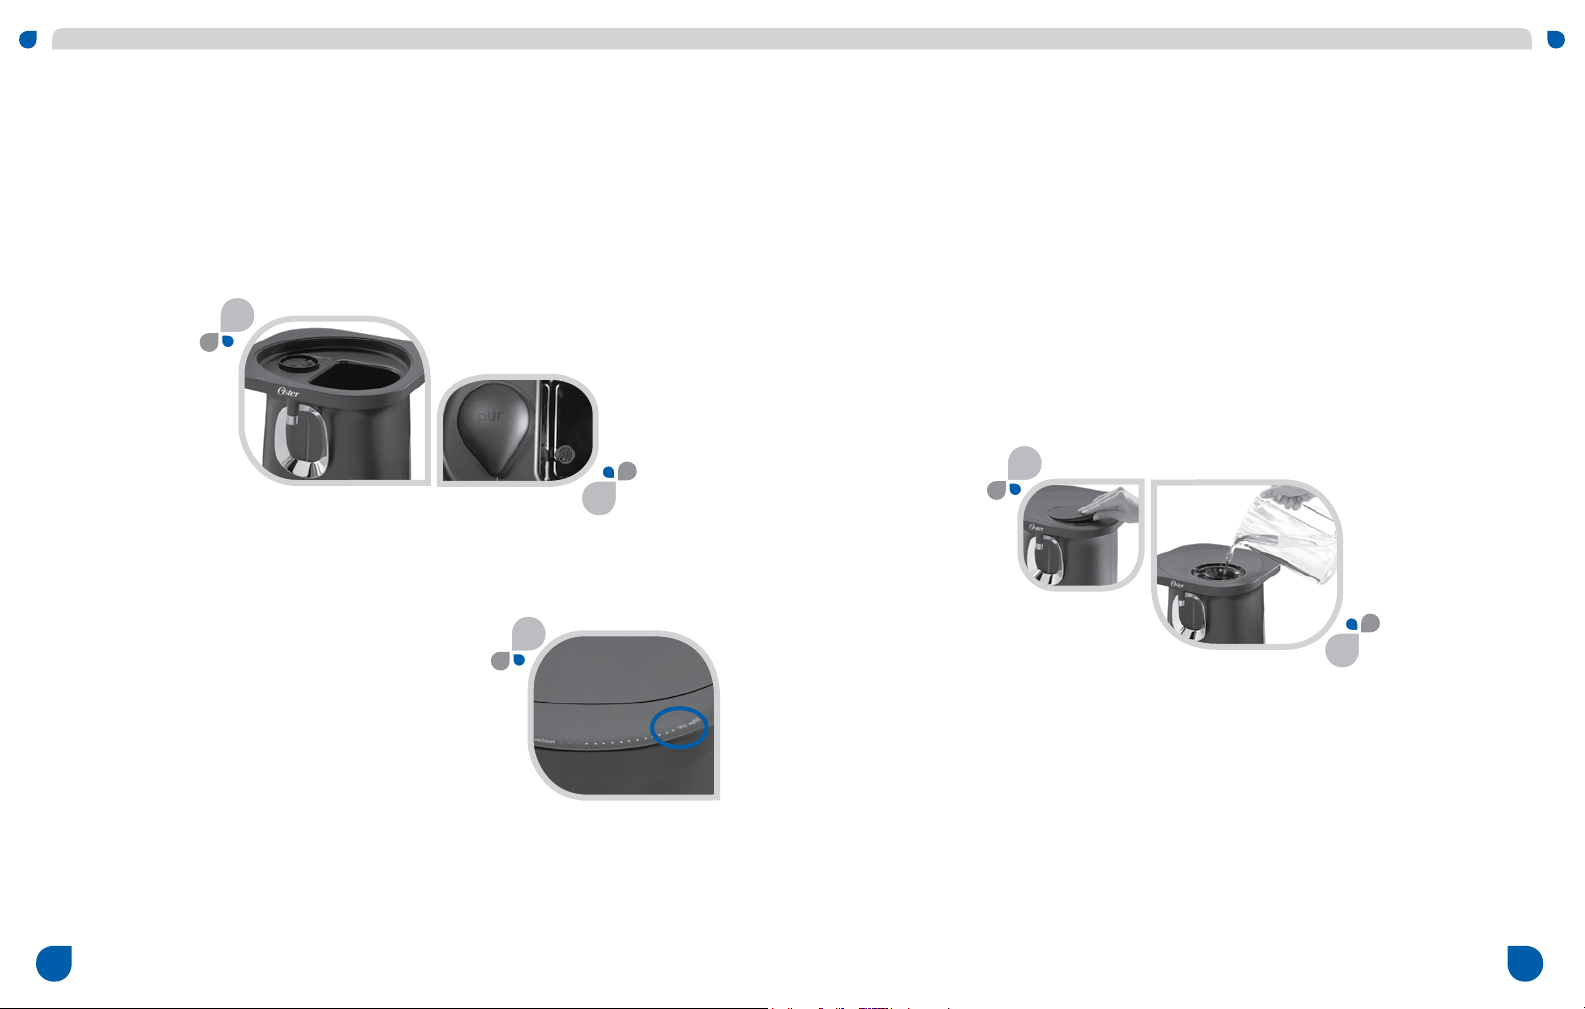
1. Remove the fill cap and cover of the unit if already in place, then unscrew the PUR
®
filter cap
counterclockwise 360° and remove.
2. Remove the filter from the foil pouch.
3. Take the PUR
®
Mineralclear
®
filter and drop into the filter chamber so the flat portion of
the filter with the tab is on top and showing. Replace PUR
®
filter cap by screwing the cap
clockwise 360° to tighten, so the point of the water drop shaped cap is pointing to the mark.
• osterwater.com
6
4. With filter properly installed, the filter life lights will be all white indicating that the filter has 100%
life. White lights will sequentially disappear as the filter is used. When filter life is completely
used, the red lights will illuminate.
5. Replace top cover and fill cap. Ensure the top cover is
properly in place on the appliance with the pour spout
pointing in the forward right corner and fill zone (with blue
ring) is visible.
6. Now unit is ready to be filled with water to prime the
water filtration system. Only use water in the Oster
®
water filtration system. Do not pour any other liquid into
the system except for potable water.
NOTE: The appliance will not operate without a filter
installed in the system. If no filter is in place the filter
life lights will flash.
Loading ...
Loading ...
Loading ...