Loading ...
Loading ...
Loading ...
36
CARE AND CLEANING
Cleaning the Sealed Burners
To avoid possible burns do not attempt any of the cleaning
instructions provided below before turning off all surface
burners and allow them to cool.
To avoid possible burns do not attempt to operate the
surface burners without the burner caps.
Routinely clean the cooktop. Wipe with a clean, damp cloth
and wipe dry to avoid scratches. Keeping the surface
burner head ports and slots clean will prevent improper
ignition and an uneven flame. See the following sections for
more instructions.
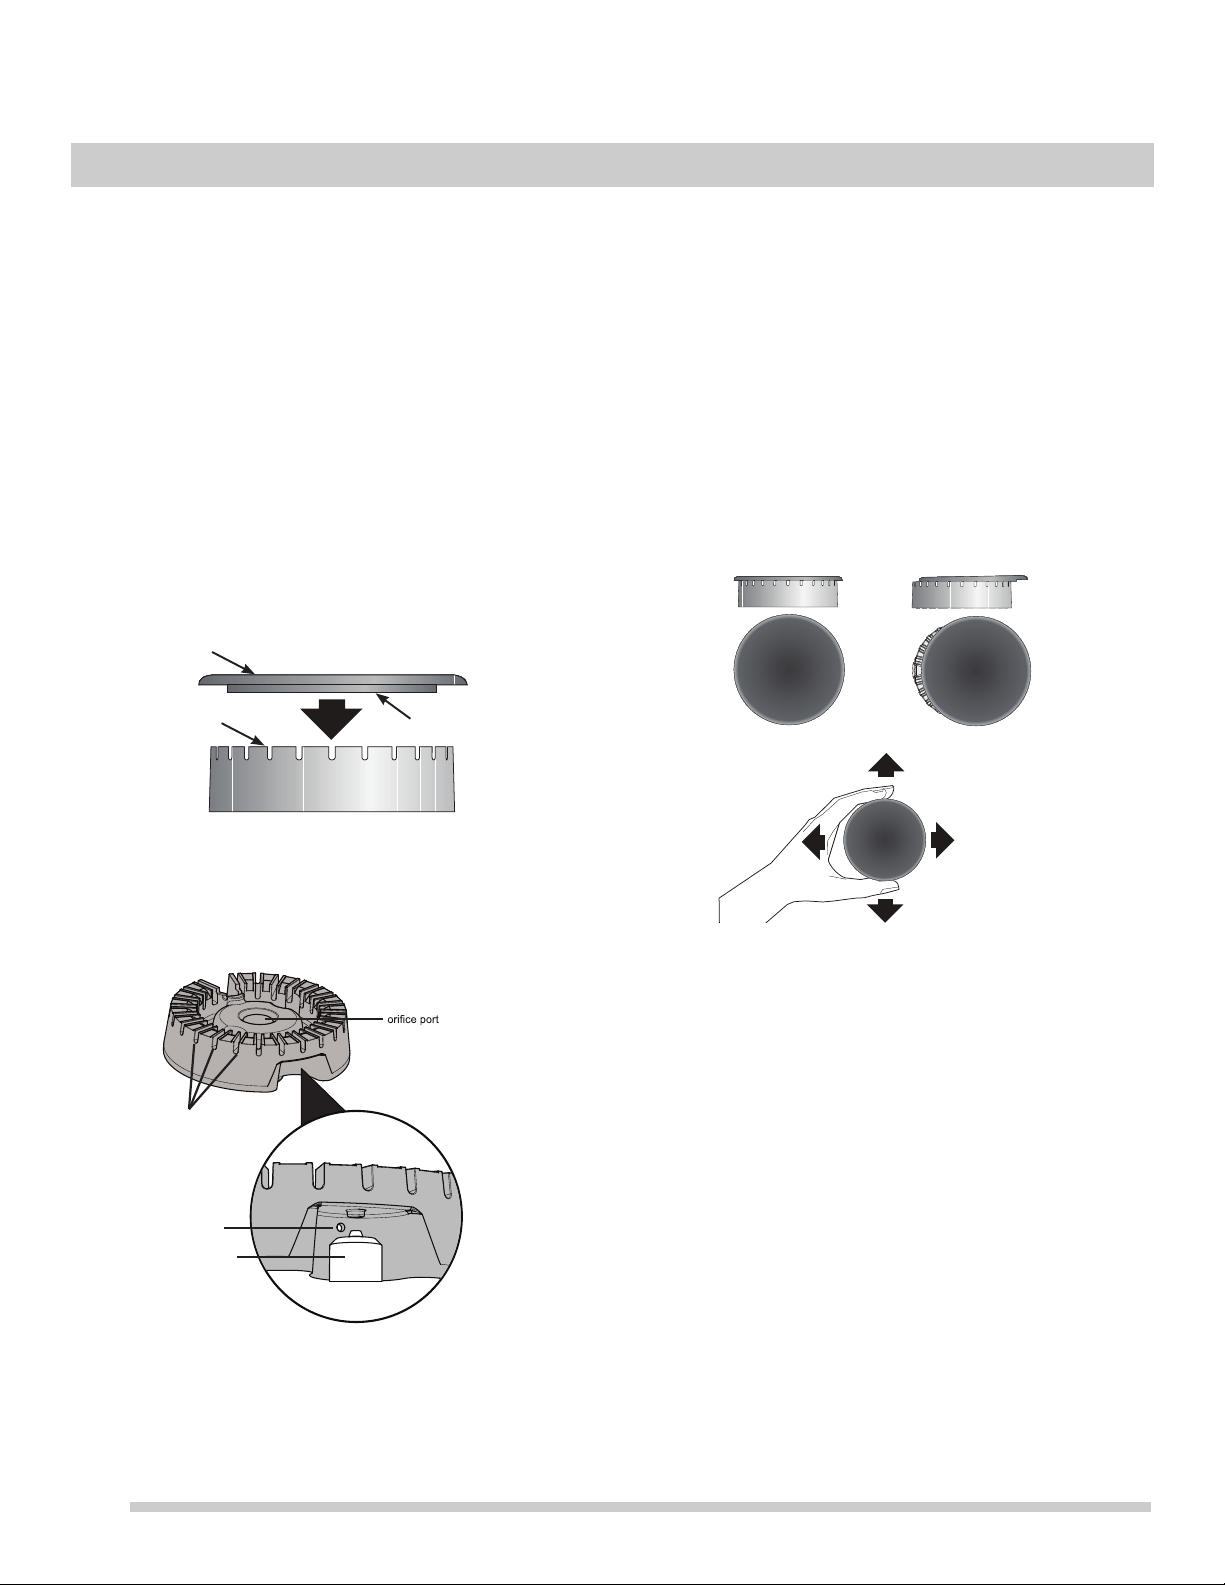
To clean burner caps:
1. Remove caps from burner heads after they have
cooled. Clean the cap with hot soapy water and dry
thoroughly.
2. For burned-on and dried spills, apply hot soapy water to
the burner head (Figure 28). Allow time for the soils to
soften.
3. Use a small cleaning brush such as an old toothbrush to
clean all over the burner head (Figure 28) and to clean
the slots and holes in the burner.
4. Use a needle or paper clip to clean out the ignition port
(
Figure 36).
5. Wipe burner head clean with a soft, clean cloth, sponge,
or scratch-free cleaning pad.
6. Before using the cooktop again make sure the burner
caps are properly placed and seated on the burner
heads (
Figure 37). When placed correctly, the burner
cap is centered on the burner head and will click into
place on the burner head. You can wiggle the cap to
test placement, it should not move off the burner head.
Important: During cleaning, keep debris and liquids out of
the orifice port.
• Do not use abrasive cleaners, oven cleaners, or steel
wool on the cooktop around the burner head. These
products can damage the cooktop finish.
• The burner head does not need to be removed to be
cleaned. Only qualified service professionals should
disassemble the burner head from the cooktop surface.
• Do not attempt to disassemble any part of the appli-
ance.
Figure 35: Burner head components
Figure 36: Burner head areas to clean
Burner Cap
Burner Head
Burner Cap Lip
slots
ignition port
ignitor
Figure 37: Replacing burner caps correctly
Correct Burner Cap
Placement
Incorrect Burner Cap
Placement
Loading ...
Loading ...
Loading ...