Loading ...
Loading ...
Loading ...
49-80783-6 17
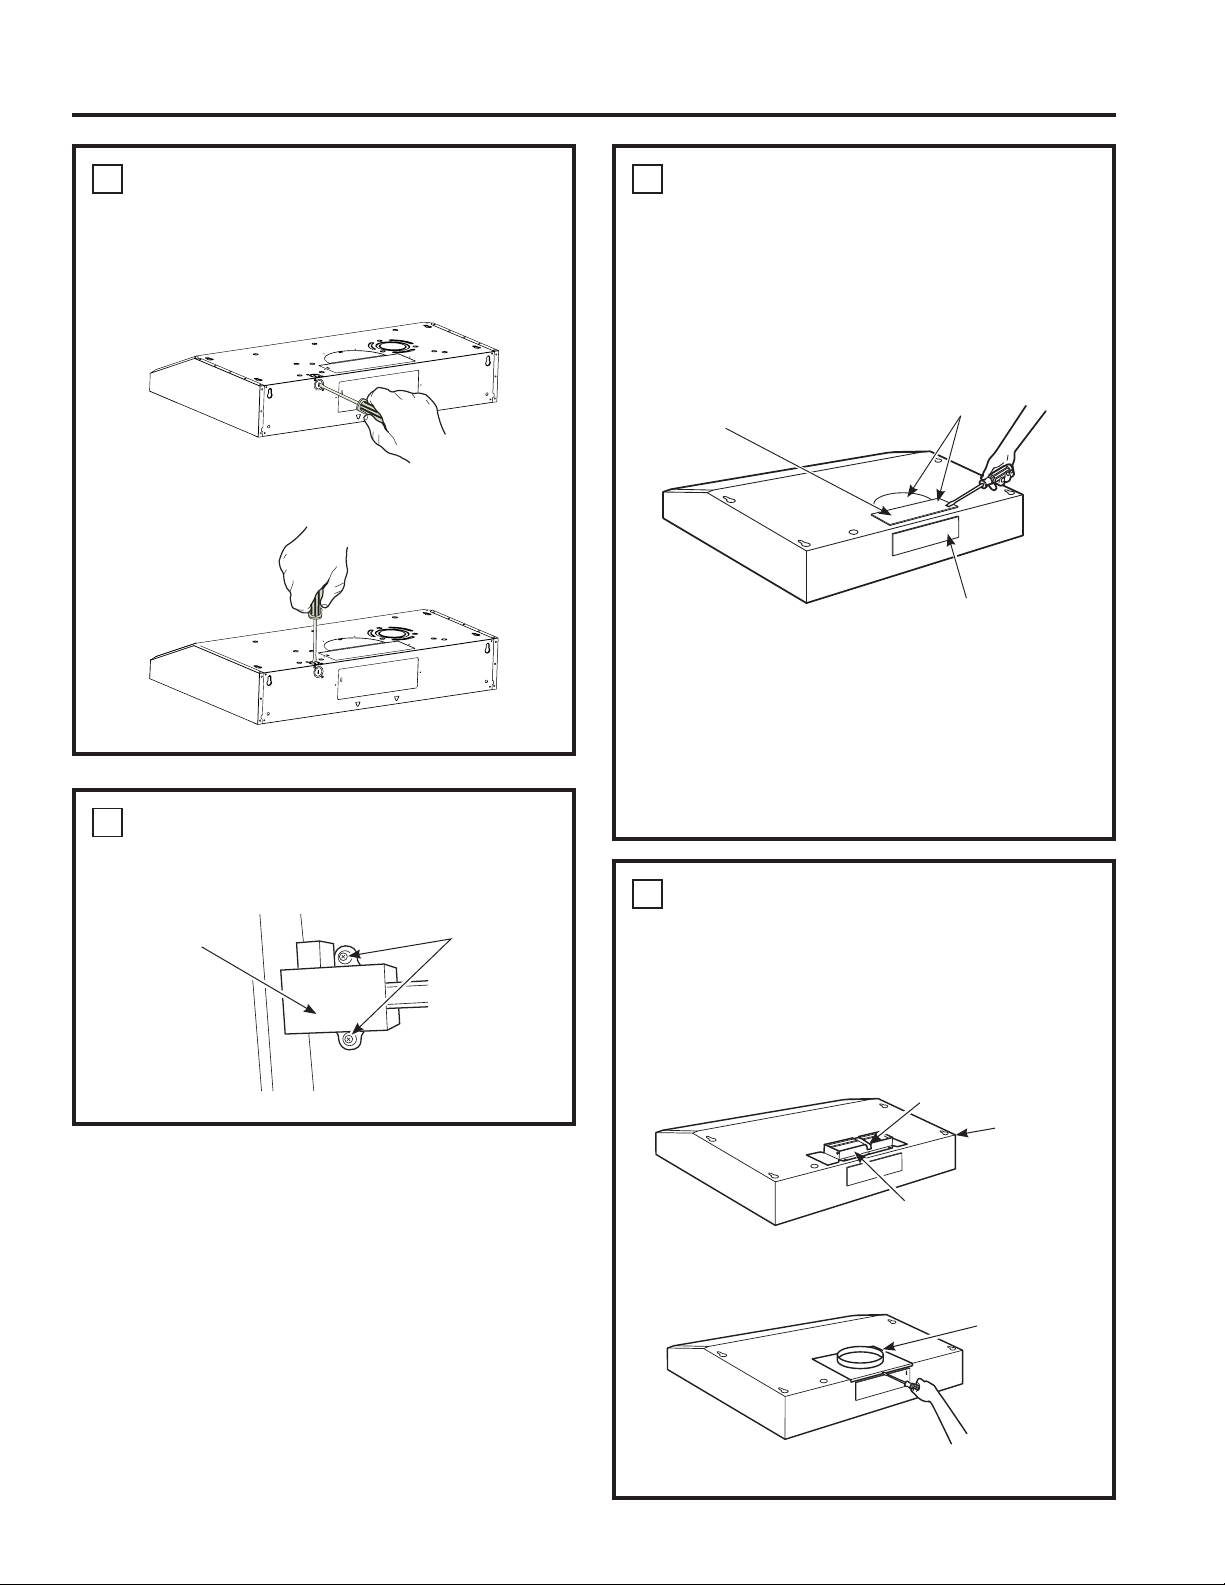
4
REMOVE ELECTRICAL
KNOCKOUTS
Use a flat blade screwdriver, remove the
appropriate electrical knockout from the back or
the top of the hood.
5
REMOVE JUNCTION BOX
Remove junction box from inside the hood. Set
the junction box and mounting screws aside.
6
REMOVE DUCT KNOCKOUT(S)
FOR VENTED INSTALLATION
Determine which ducting option to use.
Using a flat blade screwdriver, remove the
appropriate duct knockout(s) from the top or
back of the hood.
NOTE: If the hood is to be installed in a
recirculation, non-vented ductless manner, do not
remove any venting knockouts.
NOTE: For an ENERGY STAR
®
model, unit must
be vented mode to be considered ENERGY STAR
®
certified.
7
ATTACH
DAMPER/DUCT CONNECTOR
Attach damper/duct connector over knockout
opening with two or four (D) screws. Make sure
damper pivot is nearest to top/back edge of
hood. Remove any packaging tape to allow
damper to move freely.
INSTALLATION PREPARATION
Installation Preparation
3
1
»4” x 10” Rectangular
vertical discharge. Remove top
rectangular duct knockout only.
7” Round vertical discharge.
Remove semi-circular duct
knockout and top rectangular
duct knockout.
3
1
»4” x 10” Rectangular horizontal
discharge. Remove rear rectangular
duct knockout only.
Rectangular Ducting
Round Ducting
Damper (vertical discharge
position shown)
7RSEDFN
edge
Tape
7” round
exhaust
adaptor
Junction Box
Screws
Loading ...
Loading ...
Loading ...