Loading ...
Loading ...
Loading ...
12 49-80783-6
INSTALLATION PREPARATION
REMOVE THE PACKAGING
CAUTION
Wear gloves to protect against
sharp edges.
• Remove the hardware bag, literature package and
other boxed parts.
• Remove and properly discard the protective plastic
wrapping and other packaging materials.
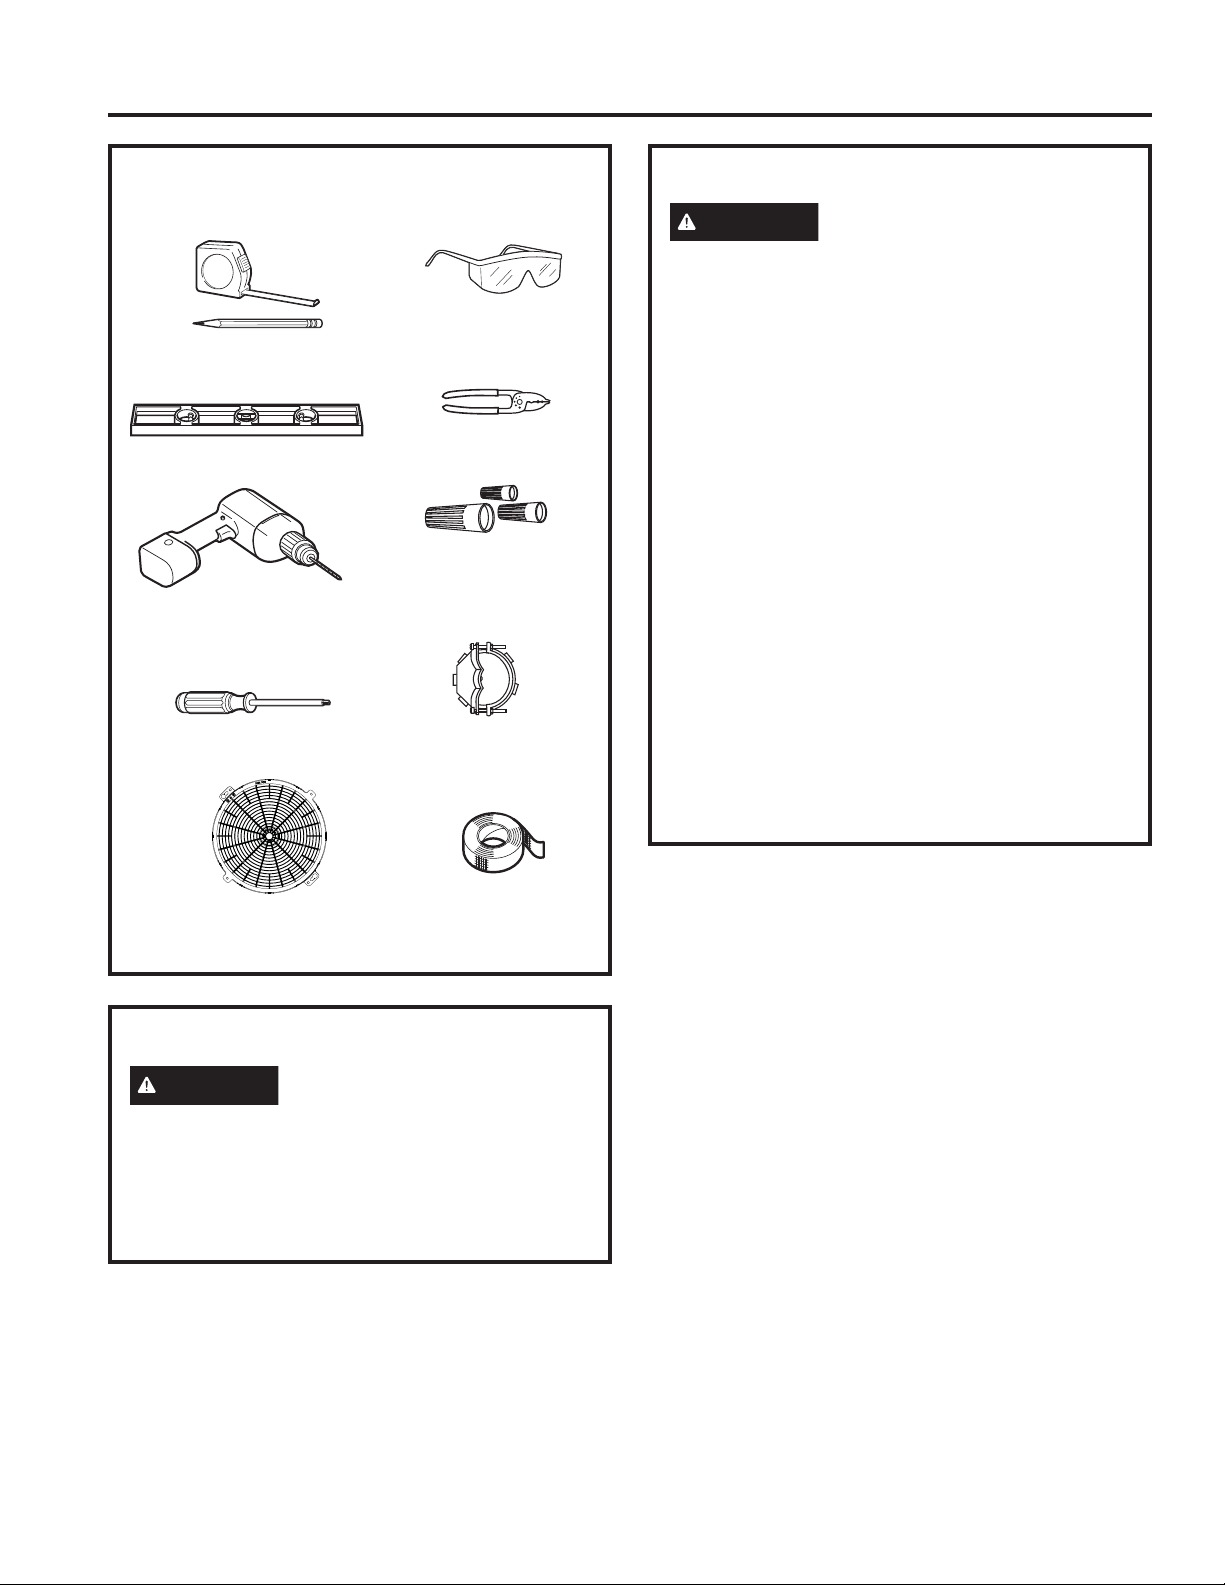
TOOLS AND MATERIALS
REQUIRED (NOT SUPPLIED)
:LUHFXWWHUVWULSSHU
Spirit level
Aluminized
Duct tape
Torx 10, 15, 20 driver
Charcoal Filter (required for some
models in recirculation mode)
Safety glasses
Strain relief for
junction box
Electric drill, #2 Phillips,
flat head, and
9
»32" drill bit
UL listed wire nuts
Pencil and tape measure
PLAN THE INSTALLATION
CAUTION
To reduce risk of fire and to
properly exhaust air, be sure to duct the air outside
– Do not vent exhaust air into spaces within walls or
ceilings or into attics, crawl spaces, or garages.
PARTS SUPPLIED FOR
INSTALLATION
• 1 Hardware Package
• 1 Literature Package
• 1 Vented Mode Deflector Part
PARTS NEEDED FOR INSTALLATION
• 1 Strain Relief
• Power Supply Cable
• 1 Wall or Roof Cap (for external venting only)
• All Metal Ductwork (for external venting only)
NOTE: This range hood can be installed as either
ducted or recirculation. In a ducted application,
this range hood can be vented through the wall or
ceiling. When installed for recirculation, the range
hood vents out the front of the hood.
NOTE: Before making any cuts or holes for
installation, determine which venting method will be
used and carefully calculate all measurements.
Installation Preparation
Loading ...
Loading ...
Loading ...