Loading ...
Loading ...
Loading ...
10
Install Vent System
Install vent through the vent opening in upper cabinet
or wall. Complete venting system according to the
selected venting method. See “Venting Requirements”
section.
Use caulking to seal exterior wall or roof opening
around the cap.
INSTALL RANGE HOOD
(Ducted version)
NOTE
Your model includes a 3¼” x 10” (8.3 x 25.4 cm)
rectangular transition and a 7” (17.8 cm) round
vent mounting plate inside the package.
Detach the 3¼” x 10” (8.3 x 25.4 cm) rectangular and 7”
(17.8 cm) round vent from the package.
Unpack the one you have chosen and set the other in a
safe place.
1.
2.
1.
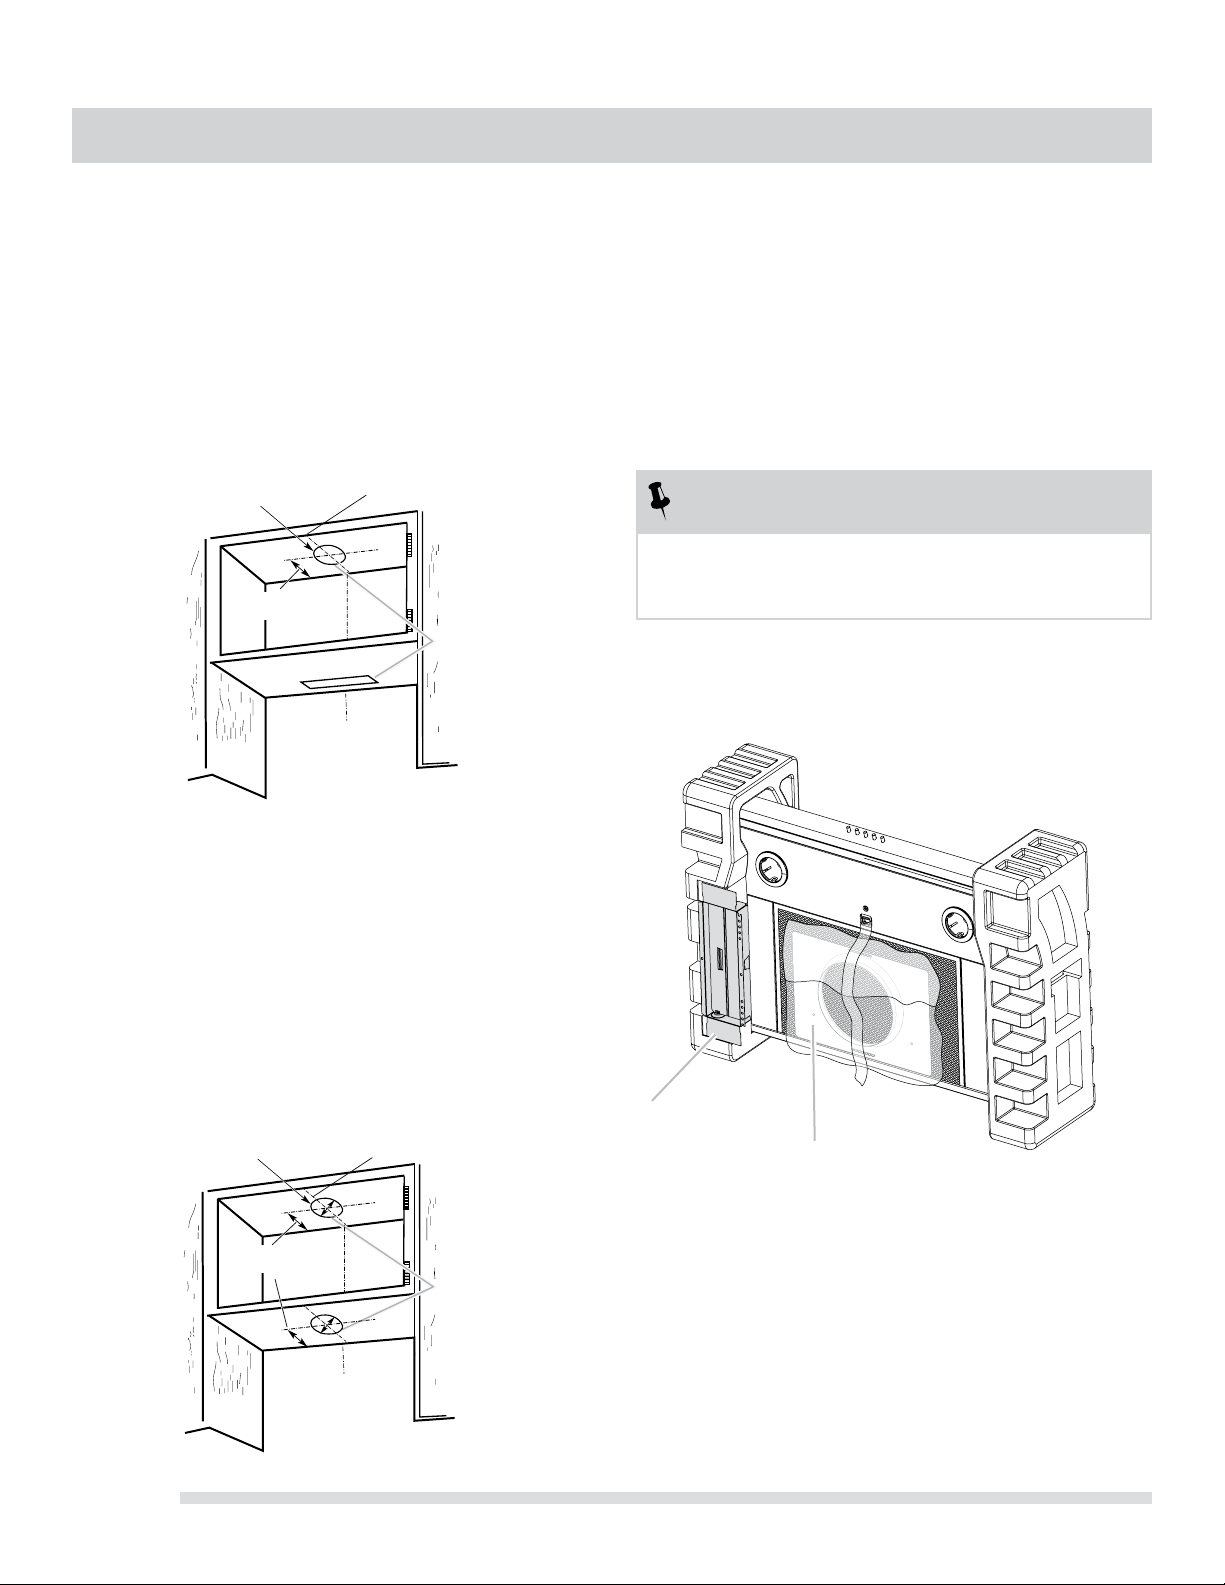
PREPARE THE LOCATION
Style 3 - Cut Openings for 3¼” x 10” (8.3 x 25.4
cm) Rectangular Vent Transition to Round Vent
Roof Venting
To make a circular vent opening on the underside of the
cabinet top:
Mark a centerline on the underside of the top of cabinet.
Mark a line 5” (12.7 cm) from the back wall on the
underside of the top of cabinet.
Use a compass or a circle template to draw a circle with
a diameter of 7½” (19 cm).
Use saber or keyhole saw to cut the circular vent
opening.
Style 4 - Cut Openings for 7” (17.8 cm) Round Vent
to Round Vent Transition
Roof Venting
To make a circular vent opening on the underside of the
cabinet top:
Mark a centerline on the underside of the top of cabinet.
Mark a line 5” (12.7 cm) from the back wall on the
underside of the top of cabinet.
Use a compass or a circle template to draw a circle with
a diameter of 7½” (19 cm).
Use saber or keyhole saw to cut the circular vent opening.
Repeat steps 1-3 for the underside of the top of the
cabinet.
1.
2.
3.
1.
2.
3.
4.
*From wall, not
cabinet frame
*5”
(12.7 cm)
Cabinet
cutouts
Ø 7½”
(19 cm)
Centerline
*From wall, not
cabinet frame
*5”
*
*
(12.7 cm)
Cabinet
cutouts
*Ø 7½”
(19 cm)
Centerline
A. 3¼” x 10” (8.3 x 25.4 cm) rectangular vent damper
B. 7” (17.8 cm) round vent mounting plate
A
B
Loading ...
Loading ...
Loading ...