Documents: Go to donwload!
- User Manual - (English)
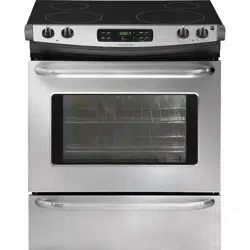
User Manual Built-In Range Frigidaire FFES3025LS
Table of Contents
- Welcome & Congratulations
- Important Safety Instructions
- Features at a Glance
- Surface Cooking
- Before Setting Surface Controls
- Setting Surface Controls
- Before Setting Oven Controls
- Setting Oven Controls - Model A
- Setting Oven Controls - Models B & C
- Care & Cleaning (Cleaning Chart)
- Care & Cleaning
- Before You Call
- Major Appliance Warranty
CARE & CLEANING (Cleaning Chart)
Glass, Painted and Plastic Body Parts, Control Knobs & Decorative Trim Pieces
- Using a soft cloth, clean with mild dish detergent and water or a 50/50 solution of vinegar and water. Follow by rinsing the area with clean water; dry and polish with a soft cloth. Glass cleaners may be used if sprayed on a soft cloth fi rst. DO NOT spray liquids directly on the control pad and display area. Do not use large amounts of water on the control panel - excess water on the control area may cause damage to the appliance. Do not use other liquid cleaners, abrasive cleaners, scouring pads, or paper towels - they will damage the fi nish. To remove control knobs, turn to the OFF position; grasp fi rmly and pull straight off the shaft. To replace knobs after cleaning, line up the fl at sides of both the knob and the shaft; then push the knob into place.
Control Panels
- Before cleaning the control panel, turn all controls to OFF and remove the control knobs. To remove, pull each knob straight off the shaft. Clean as instructed above. Squeeze excess water from the cloth before wiping the panel; especially when wiping around the controls. Excess water in or around the controls may cause damage to the appliance. To replace knobs after cleaning, line up the fl at sides of both the knob and the shaft; then push the knob into place.
Coil Elements Cooktop Cleaning & Maintenance
To Remove
- Lift up edge of surface element across from terminal end just enough to clear the edge of the drip bowl.
- Gently slide the surface element out of the terminal plug.
- Lift the drip bowl up and out.
To Replace
- Line up the opening of the drip bowl with the terminal plug.
- Hold the surface element as level as possible and slide the terminal end through the opening and into the terminal plug.
- Be sure the surface element is level to reduce the hazard of pans sliding off the element.
To Raise the Top for Cleaning
- Grasp the sides and lift from the front. Some models may have a lift-up rod to support the top in its raised position. Lift the top only high enough to allow the support rod to fi t into place, then gently lower the cooktop onto the raised rod.
- Clean underneath using a clean cloth and hot, soapy water.
- Gently lower the cooktop into the frame. If your model has a support rod, lower the support rod, then gently lower the cooktop into the frame.
Baking Problems and Solutions Chart
Cookies and biscuits burn on the bottom.
- Allow oven to preheat to the selected temperature before placing food in oven.
- Choose pan sizes that will permit 5.1cm to 10.2cm (2” to 4”) of air space on all sides when placed in the oven.
- Use a medium-weight aluminum baking sheet.
Cakes too dark on top or bottom.
- Allow oven to preheat to the selected temperature before placing food in the oven.
- Use proper rack position for baking needs.
- Set oven temperature 25°F/12°C lower than recommended.
Cakes not level.
- Place a marked glass measuring cup fi lled with water on the center of the oven rack. If the water level is uneven, refer to the installation instructions for leveling the range.
- Be sure to allow 5.1cm to 10.2cm (2” to 4”) of clearance on all sides of each pan in the oven.
- Do not use pans that are dented or warped.
See other models: FGHD2455LF FGCD2444SF GLGC36S8CB FFEC3605LS FFHT2033VE