Loading ...
Loading ...
Loading ...
13
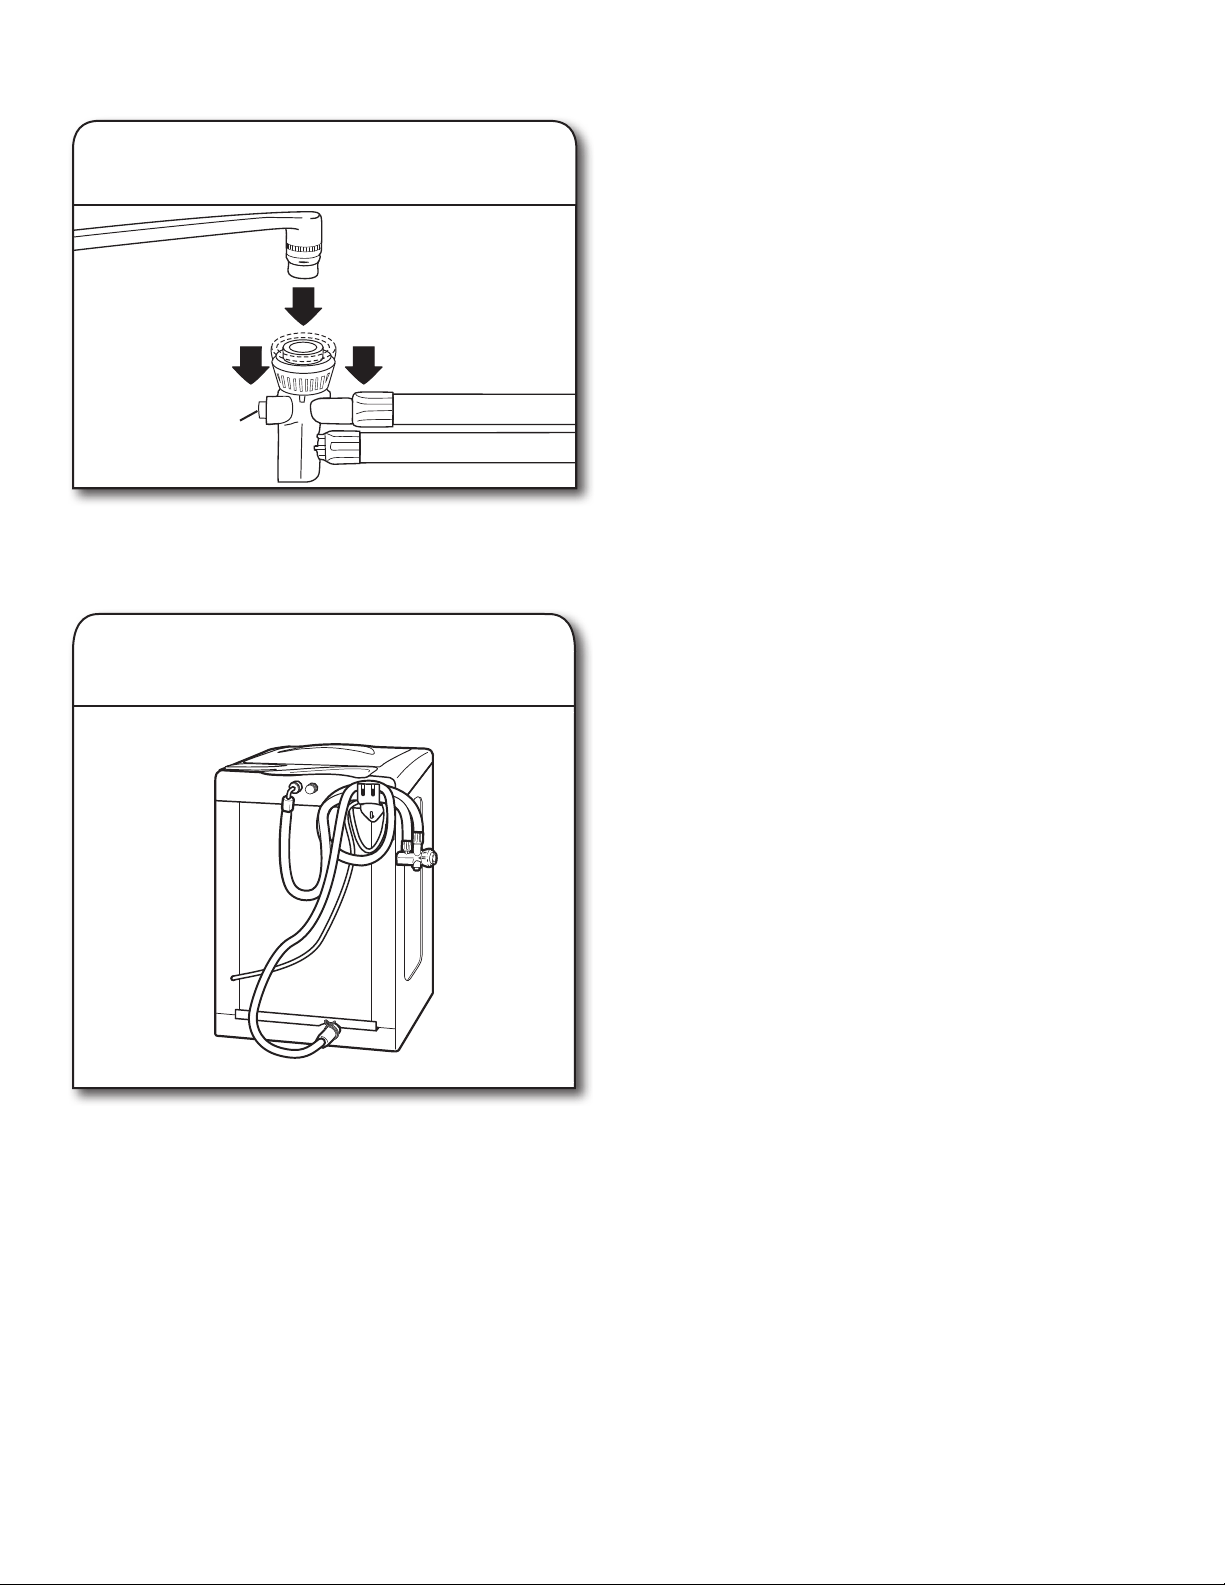
Disconnect Washer
1. Remove ll-and-drain hose connector
from faucet
Red water-ow
button
Turn off water faucets and unplug the power cord. Press the
red water-ow button to release water pressure in the hose.
Pull the locking collar down to remove the connector from
the faucet.
2. Replace ll-and-drain hose on storage
bracket
Pour water out of the ll-and-drain hose connector. Place ll-and-
drain hose on the plastic holder in the back of the washer.
Complete Installation Checklist
❑ Check electrical requirements. Be sure you have correct
electrical supply and recommended grounding method.
❑ Check that all parts are now installed. If there is an extra
part, go back through steps to see what was skipped.
❑ Check that you have all of your tools.
❑ Check that shipping materials were completely removed
from washer.
❑ Check that water faucets are on.
❑ Check for leaks around faucets and inlet hoses.
NOTE: If the washer is attached to a faucet equipped with
a spray hose, the constant water pressure may cause the spray
hose to leak. To avoid possible failure, the spray hose should
be disconnected or replaced with a high-pressure hose.
❑ Remove protective lm from console and any tape remaining
on washer.
❑ Check that washer is plugged into a grounded 3 prong outlet.
❑ Dispose of/recycle all packaging materials.
❑ Read “Washer Maintenance.”
❑ To test and clean your washer, measure ½ of normal
recommended amount of powdered or liquid detergent
and pour it into washer basket or detergent dispenser
(on some models). Close lid. Select any cycle. Start
washer and allow to complete full cycle.
Loading ...
Loading ...
Loading ...