Loading ...
Loading ...
Loading ...
8
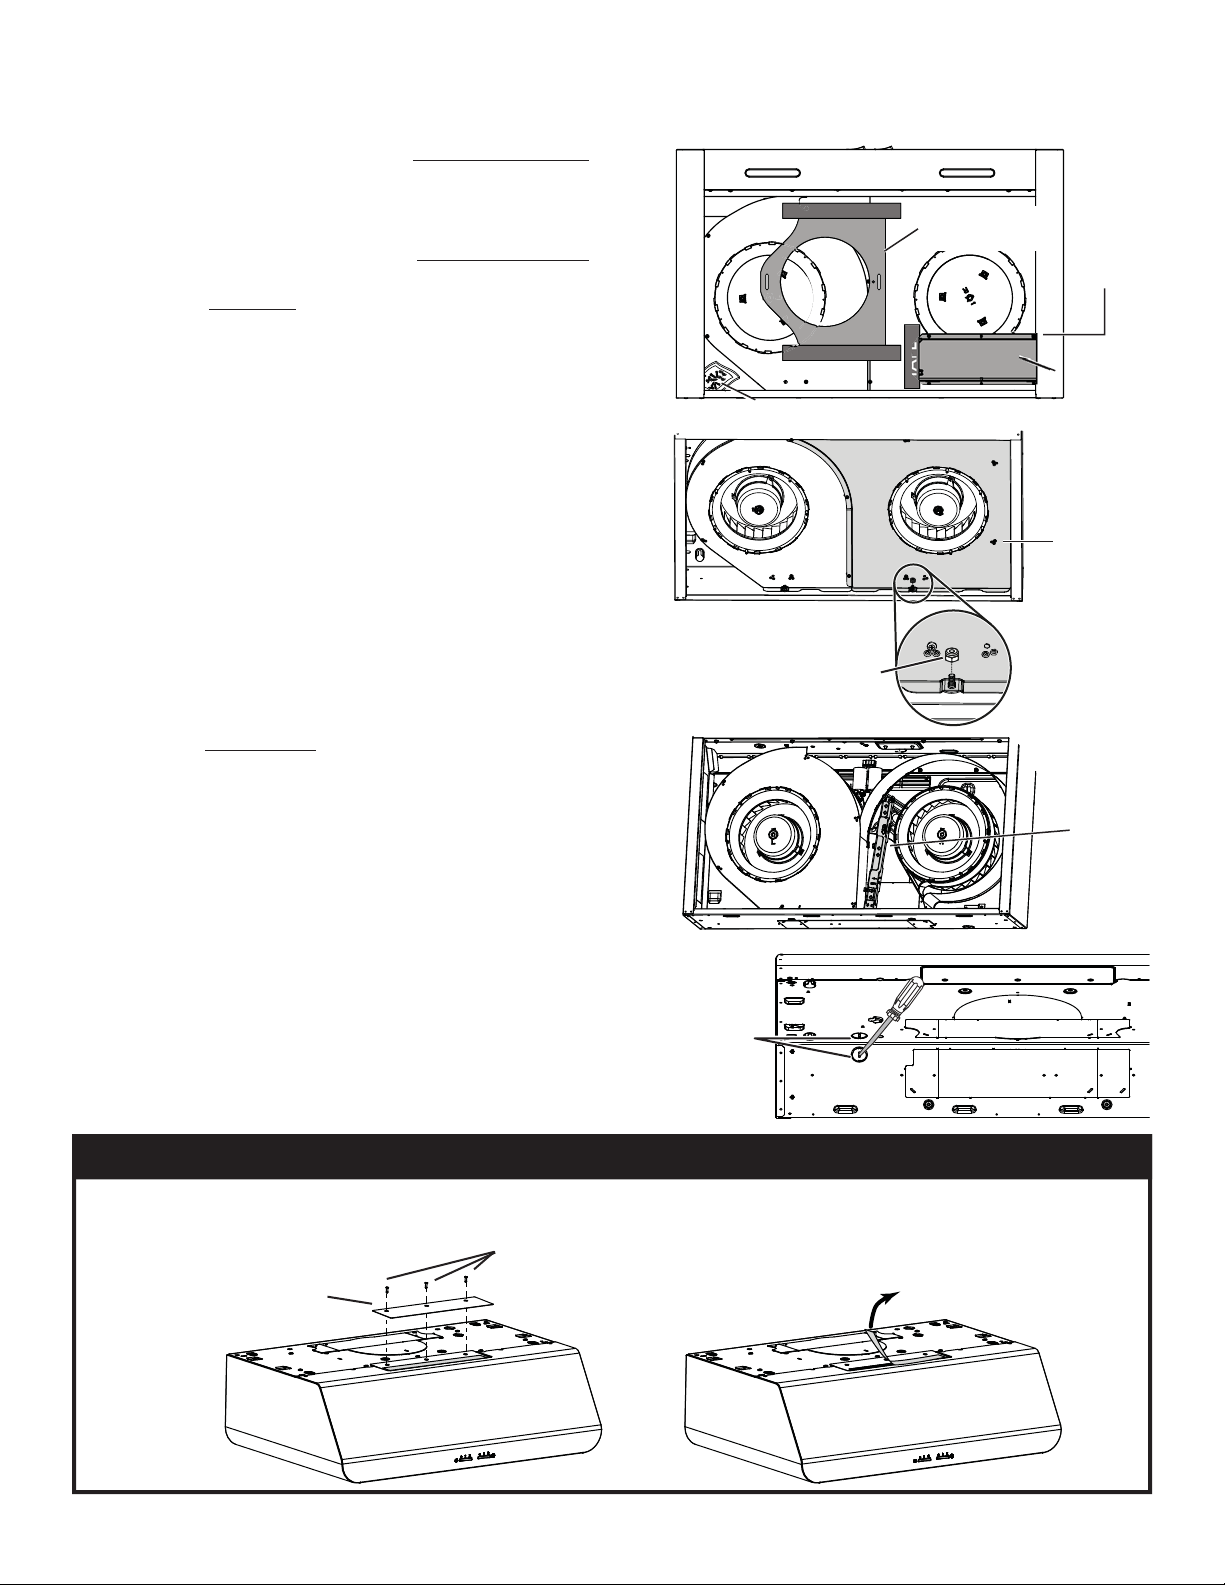
3. Remove the screw holding the damper assembly,
remove the tape strip and and put the damper
assembly aside.
Save this screws, it will be used later to
hold the blower cover plate
.
4. Remove both tape strips holding the 7” round duct plate,
and put the duct plate aside.
5. Remove the parts bag taped in the lower left corner of
the hood.
RECIRCULATION
COVER PLATE
SCREWS
ELECTRICAL
POWER
CABLE
KNOCKOUT
7” ROUND
DUCT PLATE
1 SCREW
8. Remove Electrical Power Cable Knockout from top
(vertical exhaust) or back (horizontal exhaust) of
hood. For knockout removed from back of hood,
install an appropriate strain relief, 1/2” diameter
(not included). For knockout removed from top of hood,
the strain relief will be installed later.
NON-DUCTED INSTALLATIONS ONLY
9. Remove 3 screws retaining the recirculation cover plate to the hood. Discard this plate with its screws. Peel off and
discard the membrane (shaded part in illustration below) covering the recirculation grille, ensuring the openings are
totally cleared.
TAPE
TAPE
TAPE
DAMPER
ASSEMBLY
PARTS BAG
6. Using a 11/32” nut driver, remove the lock nut retaining
the fl ange of the right blower cover plate (shaded part on
illustration beside) to the inner back of hood (see inset).
Remove the right cover plate remaining retaining screws
(6 screws), then set the blower cover along with its screws
and nut aside.
NOTE: Sightly lift up the cover plate before sliding it towards
the left to remove it.
1
2
3
45
6
7
BACK OF HOOD
LOCK NUT
SCREW
REMOVED IN
STEP 3
EZ1
BRACKETS
7. Remove the EZ1 brackets from inside the hood by cutting
off the tie wrap. Discard the tie wrap.
Loading ...
Loading ...
Loading ...