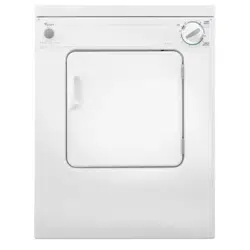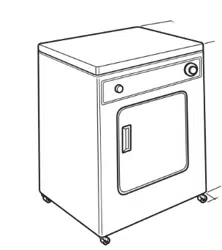
120 V Electric
Compact Dryer
Use and Care Guide
Table of Contents
W11205457C
DRYER SAFETY .............................................................................. 2
SPECIFICATIONS ...........................................................................3
INSTALLATION INSTRUCTIONS ................................................... 4
Tools and Parts .............................................................................4
Location Requirements ................................................................4
Electrical Requirements ...............................................................6
VENTING .........................................................................................6
Venting Requirements ..................................................................6
Plan Vent System .........................................................................7
Install Vent System .......................................................................8
Install Cord Bracket and Casters .................................................8
Connect Vent ................................................................................ 9
Complete Installation ...................................................................9
USING YOUR DRYER ..................................................................10
Starting Your Dryer .....................................................................10
Stopping and Restarting ...........................................................10
Loading .......................................................................................11
Drying, Cycle, and Temperature Tips .........................................11
Cycles .........................................................................................11
DRYER CARE................................................................................12
Cleaning the Dryer Location ......................................................12
Cleaning the Lint Screen ............................................................12
Cleaning the Dryer Interior .........................................................12
Removing Accumulated Lint .....................................................12
Vacation and Moving Care .........................................................12
TROUBLESHOOTING ..................................................................13
乾衣機使用保養手冊
目錄
乾衣機安全 .....................................................................................15
規格 ................................................................................................16
安裝說明 .........................................................................................17
工具與零件 .................................................................................17
場地需求 .....................................................................................17
電源需求 .....................................................................................19
排氣 ................................................................................................19
排氣要求 .....................................................................................19
設計排氣系統 ..............................................................................20
安裝排氣系統 ..............................................................................21
安裝線架與腳輪 ..........................................................................23
連接排氣管 .................................................................................24
完成安裝 .....................................................................................24
使用乾衣機 .....................................................................................25
啟動乾衣機 .................................................................................25
停機與重啟 ................................................................................25
放入衣物 .....................................................................................26
乾衣、行程與溫度提示 ...............................................................26
行程 ............................................................................................26
乾衣機保養 .....................................................................................27
清潔乾衣機位置 ..........................................................................27
清潔絨毛過濾網 ..........................................................................27
清潔乾衣機內部 ..........................................................................27
清除積聚絨毛 .............................................................................27
假期與搬運保養 ..........................................................................27
故障排除 .........................................................................................28
2
Dryer Safety
3
Specifications
Capacity: Maximum dry load size which can be treated in a
cycle, as declared by the manufacturer.
*IEC Capacity is the maximum capacity of dry linens and textiles which the manufacturer declares can be treated in a specic cycle.
Rated Voltage
120 V
Rated Frequency
60 Hz
Rated Current
12 A
Max. drying capacity
(dry loads)
7.0 Kg
*IEC Capacity
3.4 kg
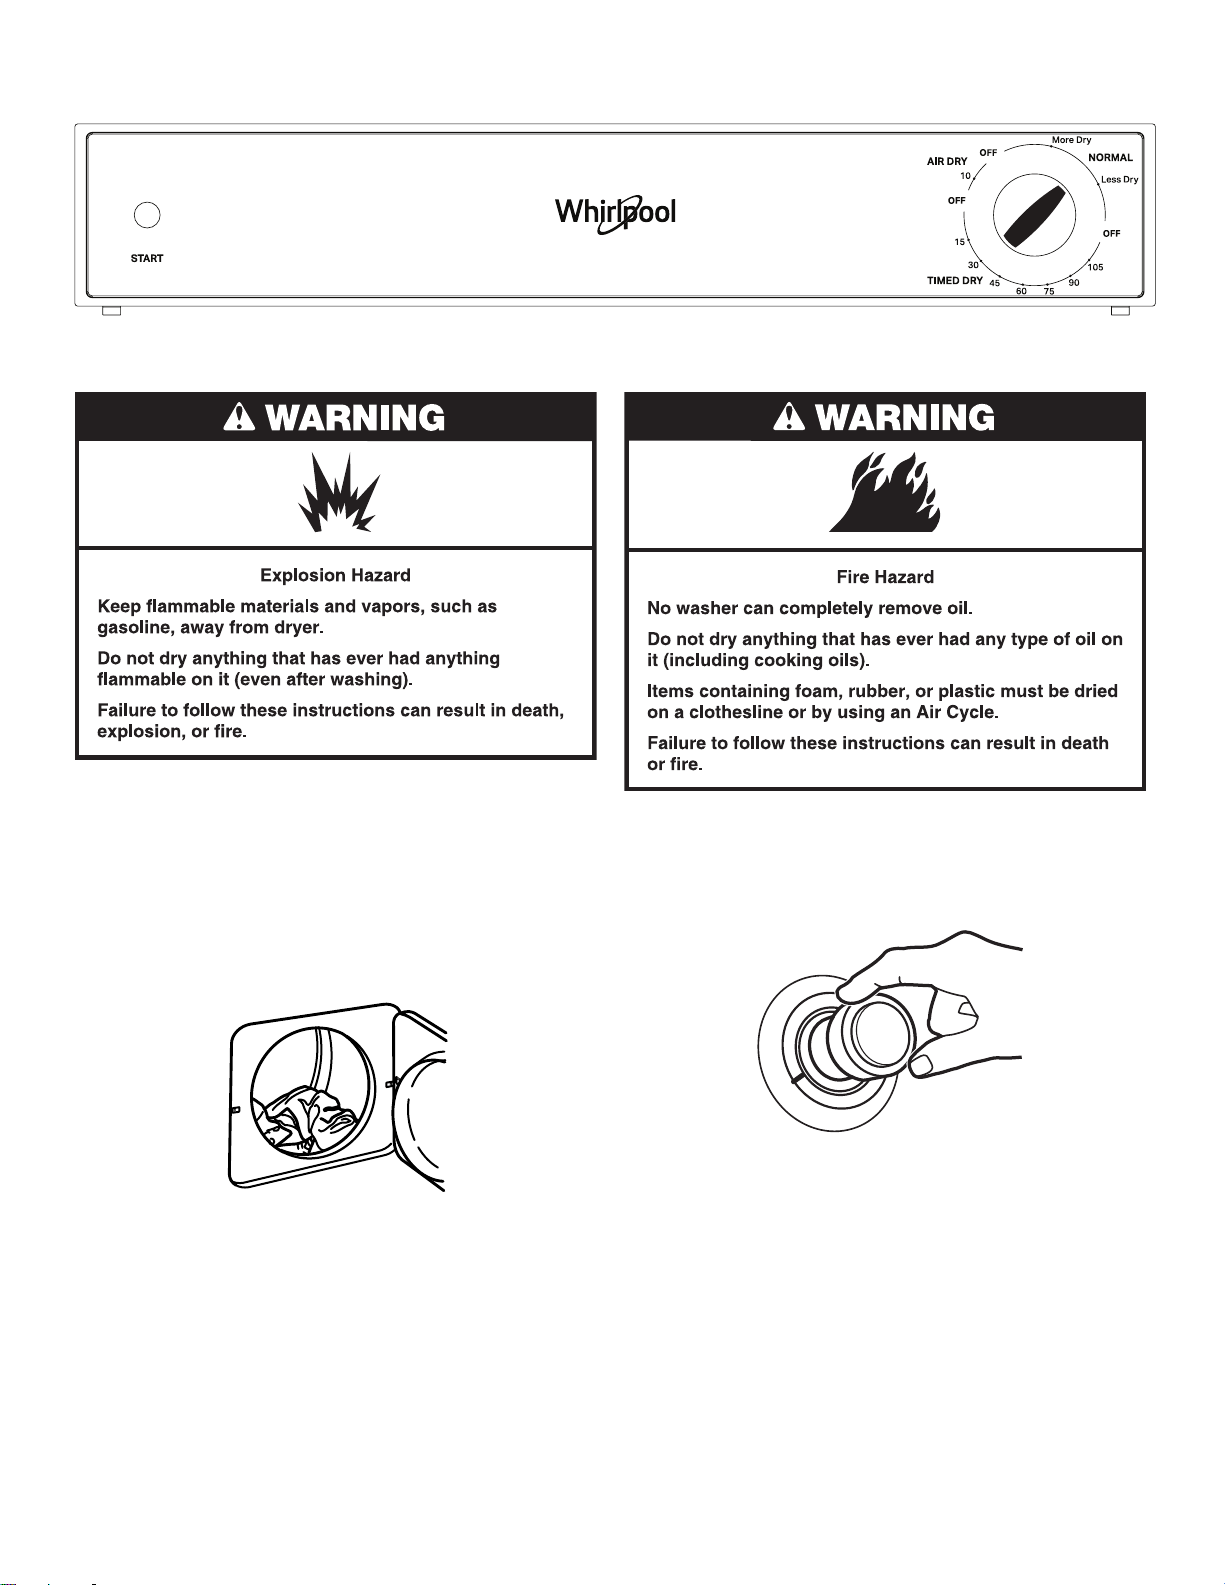
IMPORTANT SAFETY INSTRUCTIONS
WARNING: To reduce the risk of re, electric shock, or injury to persons when using the dryer, follow basic precautions,
including the following:
SAVE THESE INSTRUCTIONS
■ Read all instructions before using the dryer.
■ Do not place items exposed to cooking oils in your dryer.
Items contaminated with cooking oils may contribute to
a chemical reaction that could cause a load to catch re.
To reduce the risk of re due to contaminated loads, the
nal part of a tumble dryer cycle occurs without heat
(cool down period).
WARNING: Avoid stopping a tumble dryer before the end
of the drying cycle unless all items are quickly removed
and spread out so that the heat is dissipated.
■ Do not dry articles that have been previously cleaned
in, washed in, soaked in, or spotted with gasoline,
dry-cleaning solvents, other ammable, or explosive
substances as they give off vapors that could ignite or
explode.
■ Do not allow children to play on or in the dryer. Close
supervision of children is necessary when the dryer is
used near children.
■ Before the dryer is removed from service or discarded,
remove the door to the drying compartment.
■ Do not reach into the dryer if the drum is moving.
■ This appliance is not intended for use by persons
(including children) with reduced physical, sensory
or mental capabilities, or lack of experience and
knowledge, unless they have been given supervision
or instruction concerning use of the appliance by a
person responsible for their safety.
■ That adequate ventilation has to be provided to avoid
the back ow of gasses into the room from appliances
burning other fuels, including open res.
■ Do not dry unwashed items in the tumble dryer.
■ Items that have been soiled with substances such as
cooking oil, acetone, alcohol, petrol, kerosene, spot
removers, turpentine, waxes and wax removers should
be washed in hot water with an extra amount of
detergent before being dried in the tumble dryer.
■ Remove all objects from pockets such as lighters and
matches.
■ That exhaust air must not be discharged into a ue
which used for exhausting fumes from appliances
burning gas other fuel.
■ That the appliance must not be installed behind a
lockable door, a sliding door or a door with a hinge on
the opposite side to that of the tumble dryer, in such
a way that a full opening of the tumble dryer door is
restricted.
■ If the power supply cord damaged, it must replaced by
manufacturer or its service agent or similarly qualied
person in order to avoid a hazard.
■ Do not install or store the dryer where it will be
exposed to the weather.
■ Do not tamper with controls.
■ Do not repair or replace any part of the dryer
or attempt any servicing unless specically
recommended in this Use and Care Guide or in
published user-repair instructions that you understand
and have the skills to carry out.
■ Do not use fabric softeners or products to eliminate
static unless recommended by the manufacturer of the
fabric softener or product.
■ Do not use heat to dry articles containing foam rubber
or similarly textured rubber-like materials.
■ Clean lint screen before or after each load.
■ Keep area around the exhaust opening and adjacent
surrounding areas free from the accumulation of lint,
dust, and dirt.
■ The interior of the dryer and exhaust vent should be
cleaned periodically by qualied service personnel.
■ See installation instructions for grounding
requirements.
4
Installation Instructions
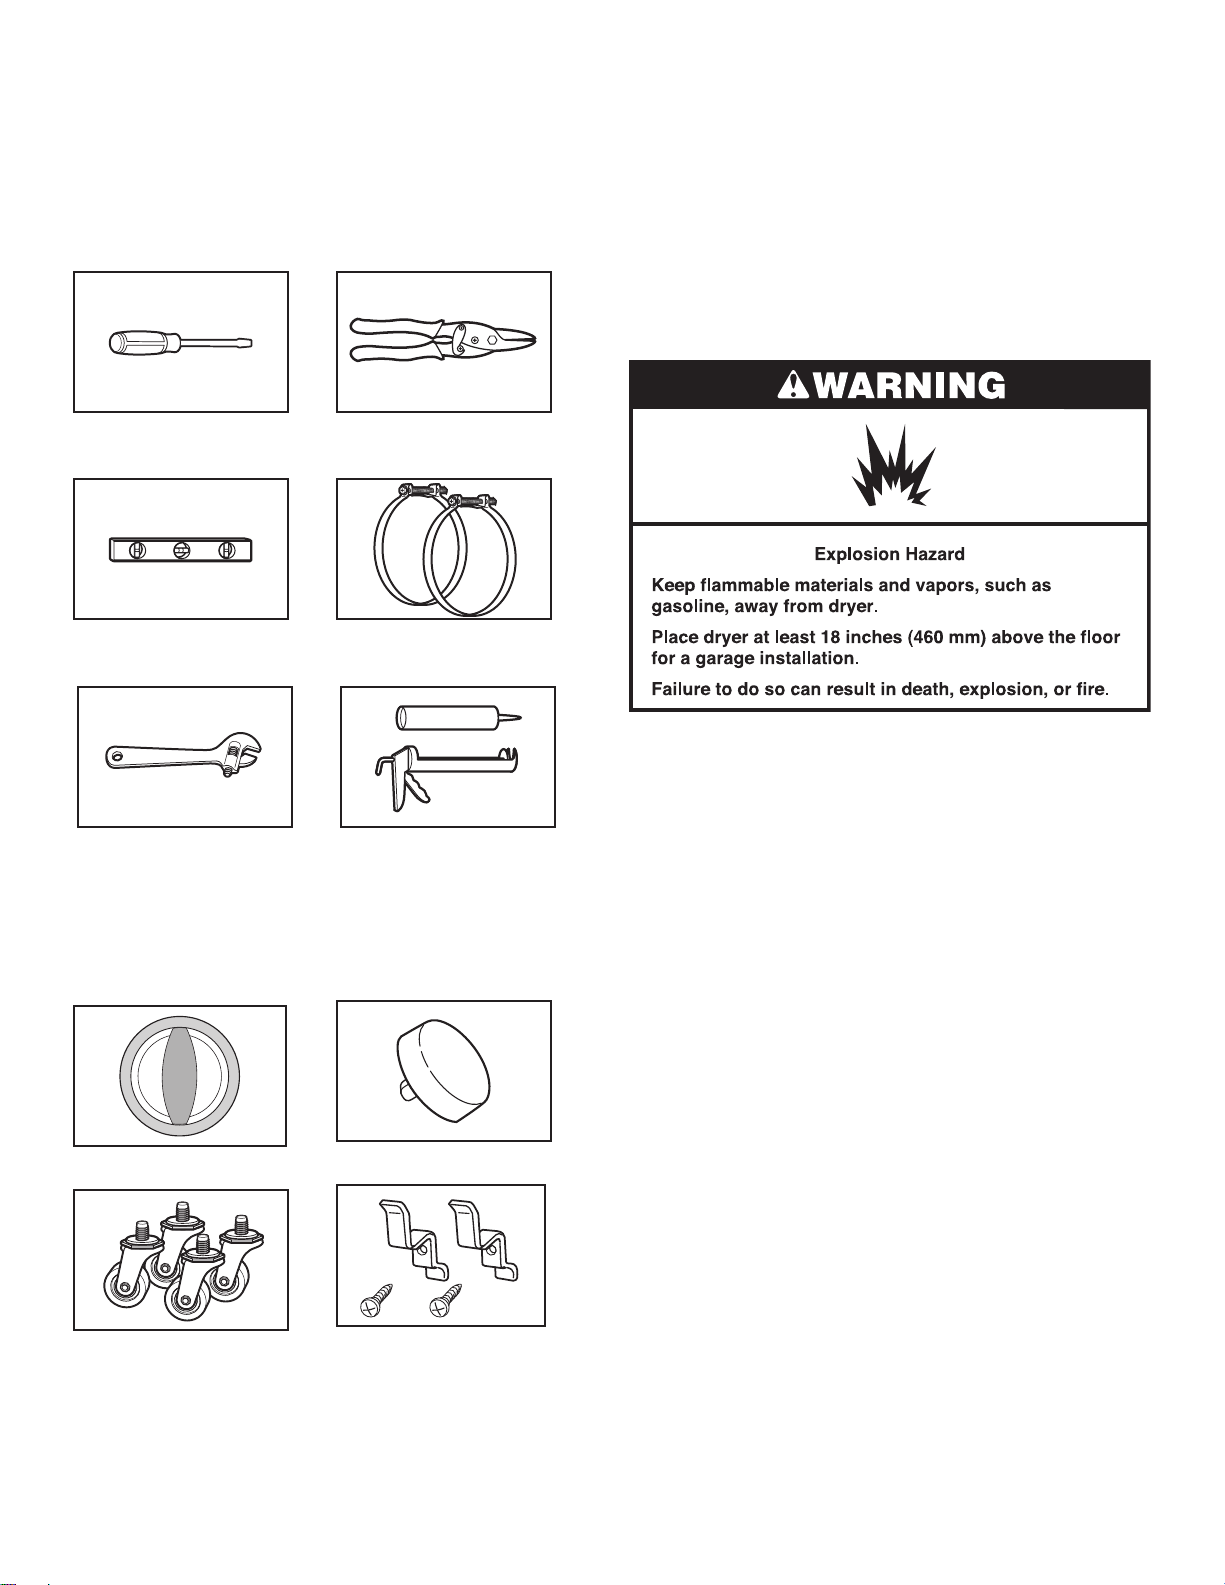
Tools and Parts
Tools needed
Gather the required tools and parts before starting installation.
Read and follow the instructions provided with any tools
listed here.
Flat-blade screwdriver Tin snips (new vent
installations)
Level Vent clamps
Adjustable wrench that opens
to 1" (25 mm) or hex-head
socket wrench
Caulking gun and compound
(for installing new exhaust vent)
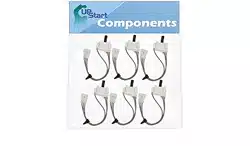
Parts supplied
Remove parts package from the dryer drum. Check that all parts
listed are included.
Cycle control knob Start button
Casters (4) Cord brackets (2) and
screws (2)
Location Requirements
You will need
■ A location that allows for proper exhaust installation. See
“Venting Requirements.”
■ A 120 V, 60 Hz., AC only, 15 or 20 A circuit.
■ A grounded electrical outlet located within 2 ft (610 mm) of
either side of the dryer. See “Electrical Requirements.”
■ A sturdy oor to support the dryer weight (dryer and load)
of 115 lbs (52 kg). The combined weight of a companion
appliance should also be considered.
■ A level oor with a maximum slope of 1" (25 mm) under
entire dryer.
Do not operate your dryer at temperatures below 45ºF (7ºC). At
lower temperatures, the dryer might not shut off at the end of an
automatic cycle. Drying times can be extended.
The dryer must not be installed or stored in an area where it will
be exposed to water and/or weather.
Check code requirements. Some codes limit, or do not permit,
installation of the dryer in garages, closets, mobile homes, or
sleeping quarters. Contact your local building inspector.
Parts needed
Check local codes, existing electrical supply and venting, and
see “Venting Requirements” and “Electrical Requirements” before
purchasing parts.
■ Mobile home installations require metal exhaust system
hardware.
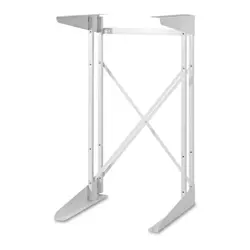
■ Permanent installations require 4 dryer feet
For information on ordering, please refer to “Assistance or
Service” on the back cover. You may also contact the dealer from
whom you purchased your dryer.
5
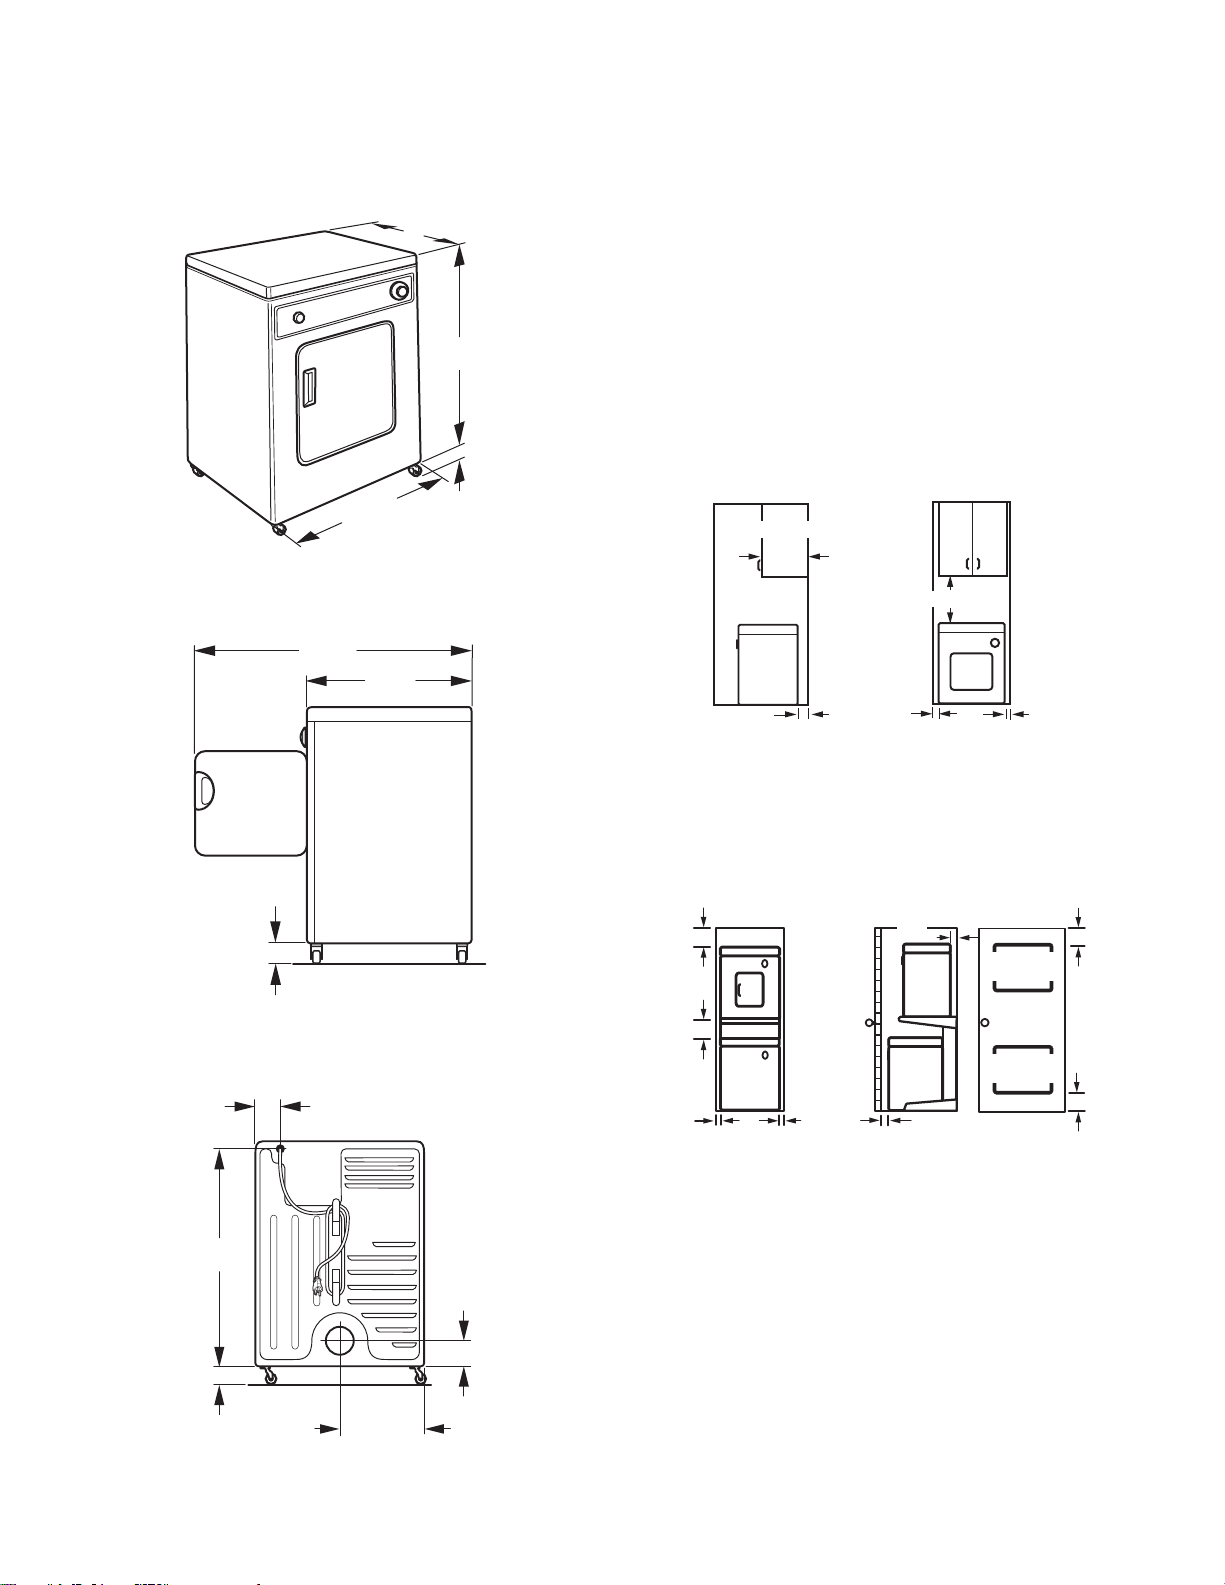
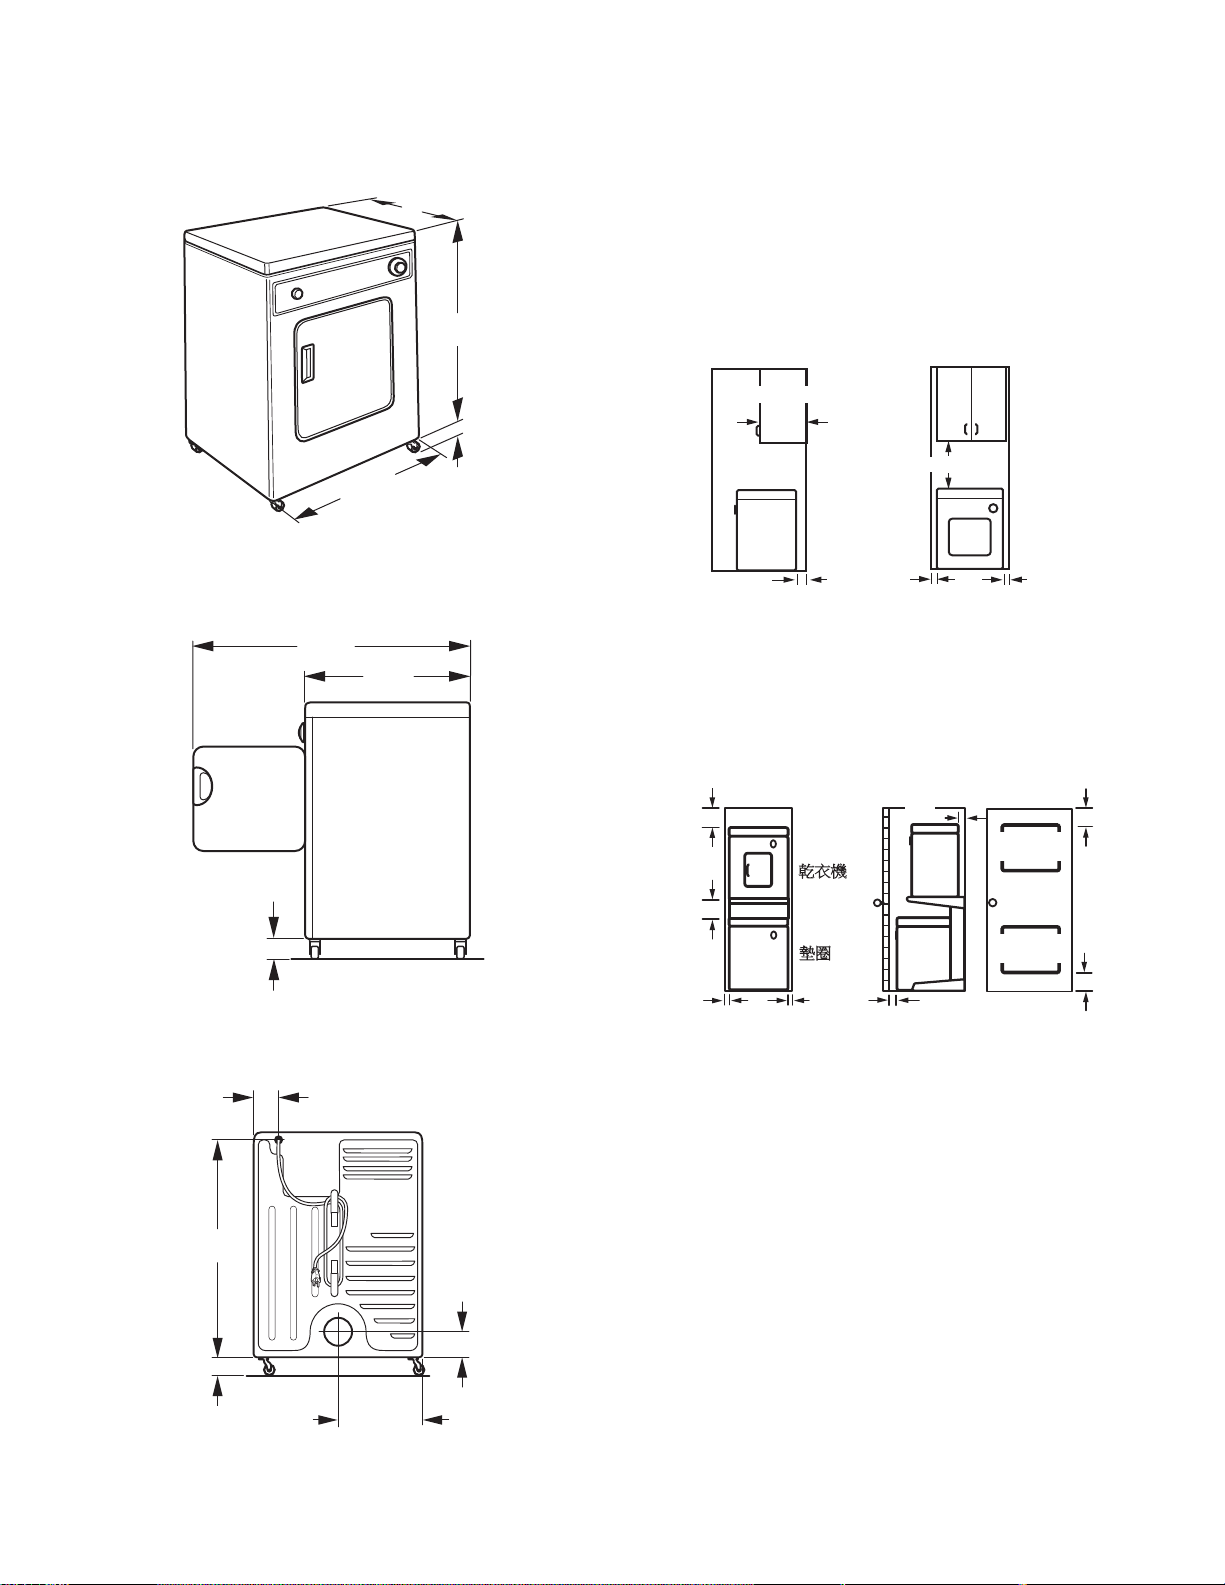
Installation Clearances
The location must be large enough to allow the dryer door to
open fully.
Dryer Dimensions
Front View
23
7
/8"
(606 mm)
1
3
/
4
"
(44 mm)
20
3
/4"*
(527 mm)
31"
(787 mm)
†
Side View
1
3
/4"
(44 mm)
36"
(914 mm)
20
3
/4"
(527 mm)
Back View
1
3
/4"
(44 mm)
3
1
/4"
(83 mm)
3
1
/2"
(89 mm)
11
7
/8"
(303 mm)
29
1
/4"
(743 mm)
Minimum installation spacing for recessed
area and closet installation
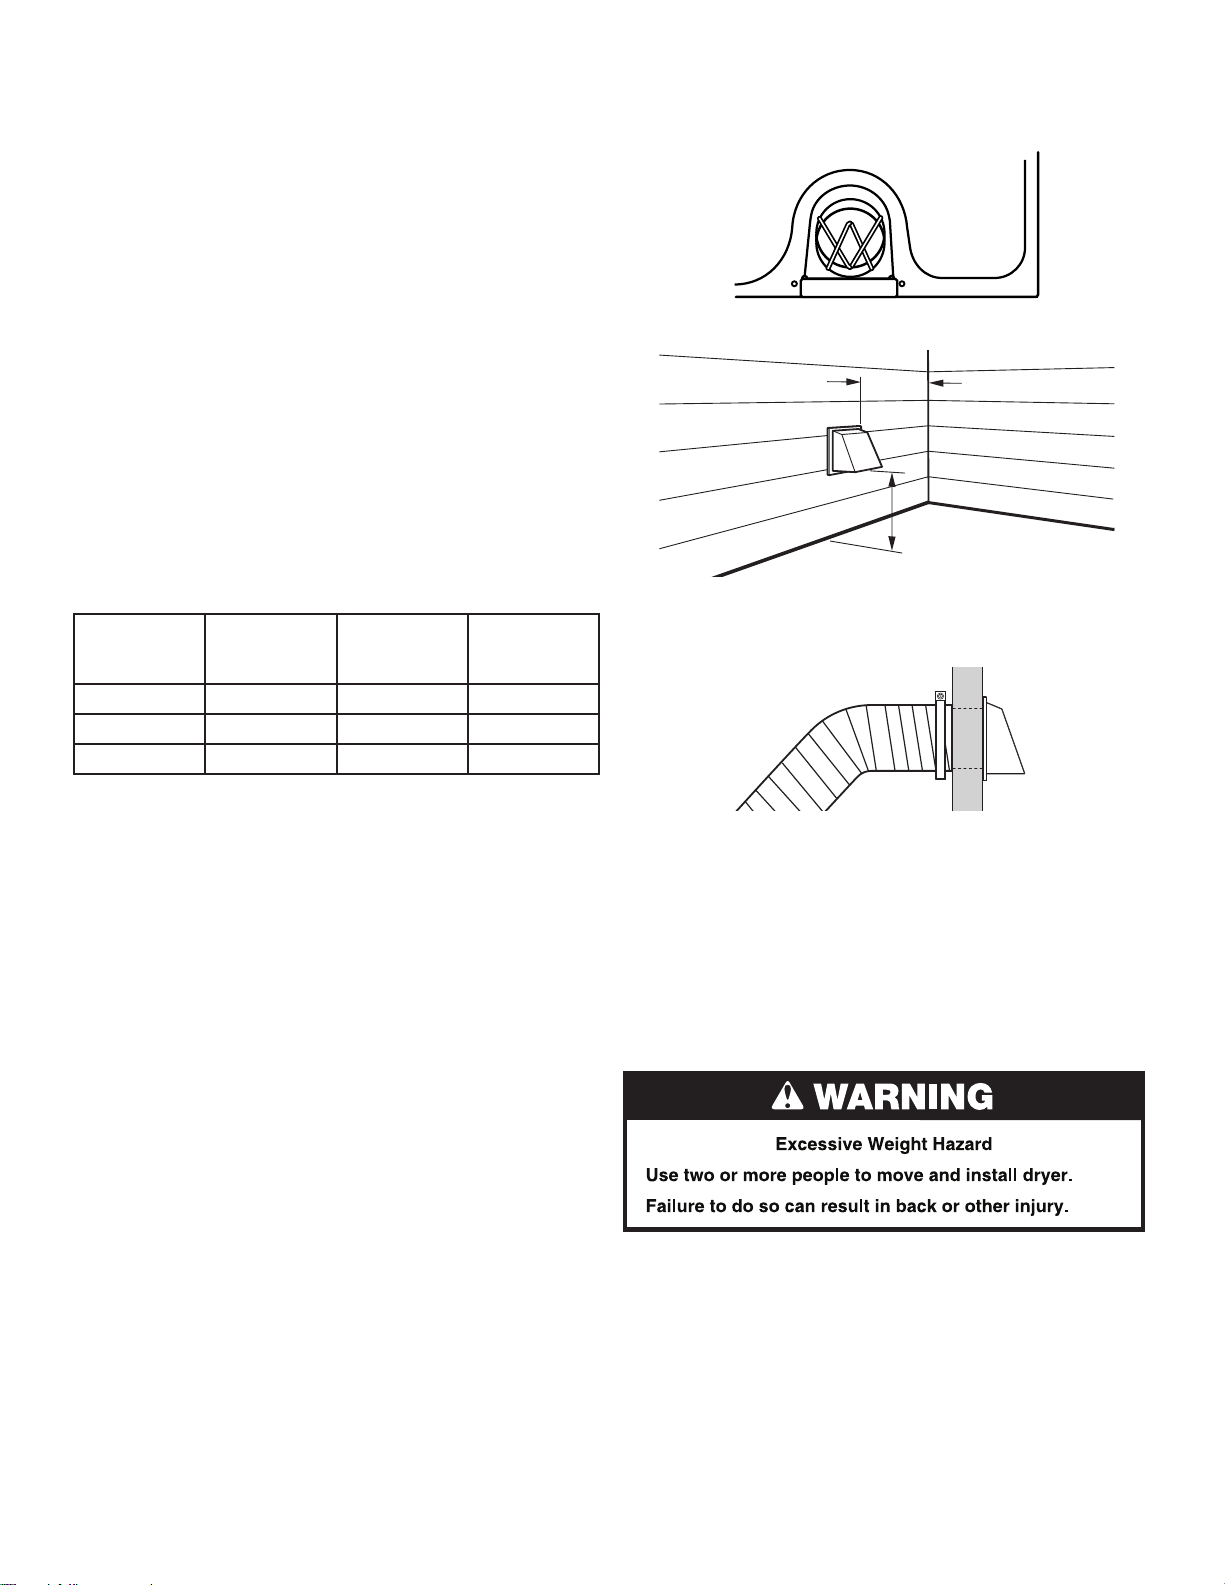
The following dimensions shown are for the minimum spacing
allowed when the dryer is to be operated with, or without, the
Stack Stand Kit. To purchase a Stack Stand Kit, see “Assistance
or Service.”
■ Additional spacing should be considered for ease of
installation and servicing.
■ Additional clearances might be required for wall, door, and
oor moldings.
■ Additional spacing of 1" (25 mm) on all sides of the dryer is
recommended to reduce noise transfer.
■ For closet installation with a door, minimum ventilation
openings in the top and bottom of the door are required.
Louvered doors with equivalent ventilation openings
are acceptable.
■ Companion appliance spacing should also be considered.
Recessed or closet installation - Dryer only
AB
14"*
(356 mm)
18"* (457 mm)
1"
(25 mm)
1"
(25 mm)
5
1
/2"*
(140 mm)
A. Side view - closet or confined area
B. Recessed area
*Most installations require a minimum 5½" (140 mm) clearance
behind the dryer for the exhaust vent with elbows. See “Venting
Requirements.”
Recessed or closet installation - Stacked
DRYER
WASHER
5
1
/2"
(140mm)
(305 mm)
12"*
(305 mm)
12"*
1"
(25 mm)
1"
(25 mm)
A B
C
1"*
(25 mm)
3"*
(76 mm)
48 in. *
2
(309.7 cm )
2
24 in. *
2
(154.8 cm )
2
3"*
(76 mm)
A. Recessed area
B. Side view - closet or confined area
C. Closet door with vents
†Height with caster is 32½" (826 mm)
6
Venting Requirements
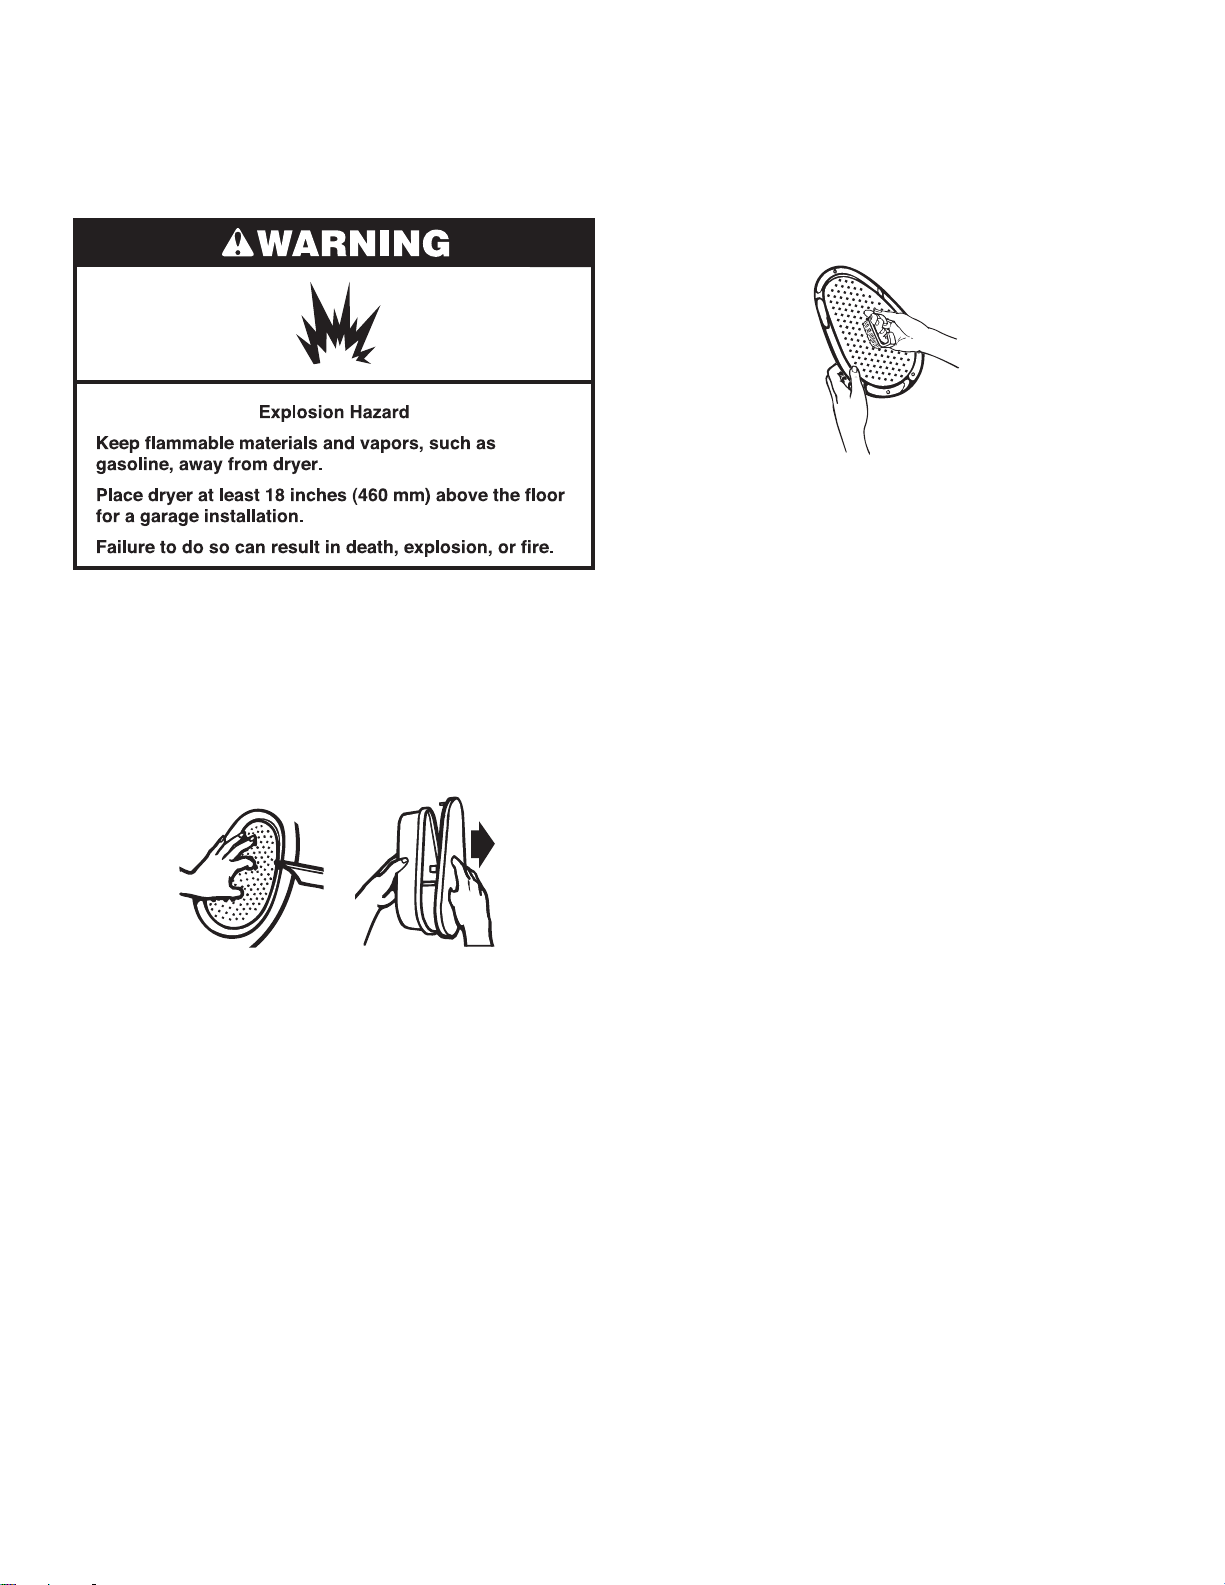
WARNING
Fire Hazard
Use a heavy metal vent.
Do not use a plastic vent.
Do not use a metal foil vent.
Failure to follow these instructions can result in death
or fire.
WARNING: To reduce the risk of re, this dryer MUST BE
EXHAUSTED OUTDOORS.
IMPORTANT: Observe all governing codes and ordinances.
Dryer exhaust must not be connected into any gas vent, chimney,
wall, ceiling, attic, crawlspace, or a concealed space of a
building. Only rigid or exible metal vent shall be used
for exhausting.
4"
(102 mm)
4" (102 mm) heavy metal exhaust vent
■ Only a 4" (102 mm) heavy metal exhaust vent and clamps
may be used.
■ Do not use plastic or metal foil vent.
Rigid metal vent:
■ Recommended for best drying performance and to avoid
crushing and kinking.
Flexible metal vent: (Acceptable only if it is accessible to
clean)
■ Must be fully extended and supported in nal dryer location.
■ Remove excess to avoid sagging and kinking that may result
in reduced airow and poor performance.
■ Do not install in enclosed walls, ceilings, or oors.
■ The total length should not exceed 7¾ ft. (2.4 m).
NOTE: If using an existing vent system, clean lint from entire
length of the system and make sure exhaust hood is not plugged
with lint. Replace plastic or metal foil vents with rigid metal
or exible metal vents. Review “Vent System Chart” and, if
necessary, modify existing vent system to achieve best drying
performance.
Electrical Requirements
■ 120 V, 60 Hz, AC only, 15 or 20 A fused electrical supply is
required.
■ A time-delay fuse or circuit breaker is recommended.
Check that the fuse or circuit breaker matches the rating
of your line.
■ It is also recommended that a separate circuit serving only this
dryer be provided.
■ Do not use an extension cord.
GROUNDING INSTRUCTIONS
SAVE THESE INSTRUCTIONS
■
For a grounded, cord-connected dryer:
This dryer must be grounded. In the event of malfunction or
breakdown, grounding will reduce the risk of electric shock
by providing a path of least resistance for electric current.
This dryer is equipped with a cord having an equipment-
grounding conductor and a grounding plug. The plug must
be plugged into an appropriate outlet that is properly
installed and grounded in accordance with all local codes
and ordinances.
WARNING: Improper connection of the equipment-
grounding conductor can result in a risk of electric shock.
Check with a qualied electrician or service representative
or personnel if you are in doubt as to whether the dryer is
properly grounded. Do not modify the plug provided with
the dryer: if it will not t the outlet, have a proper outlet
installed by a qualied electrician.
Venting
7
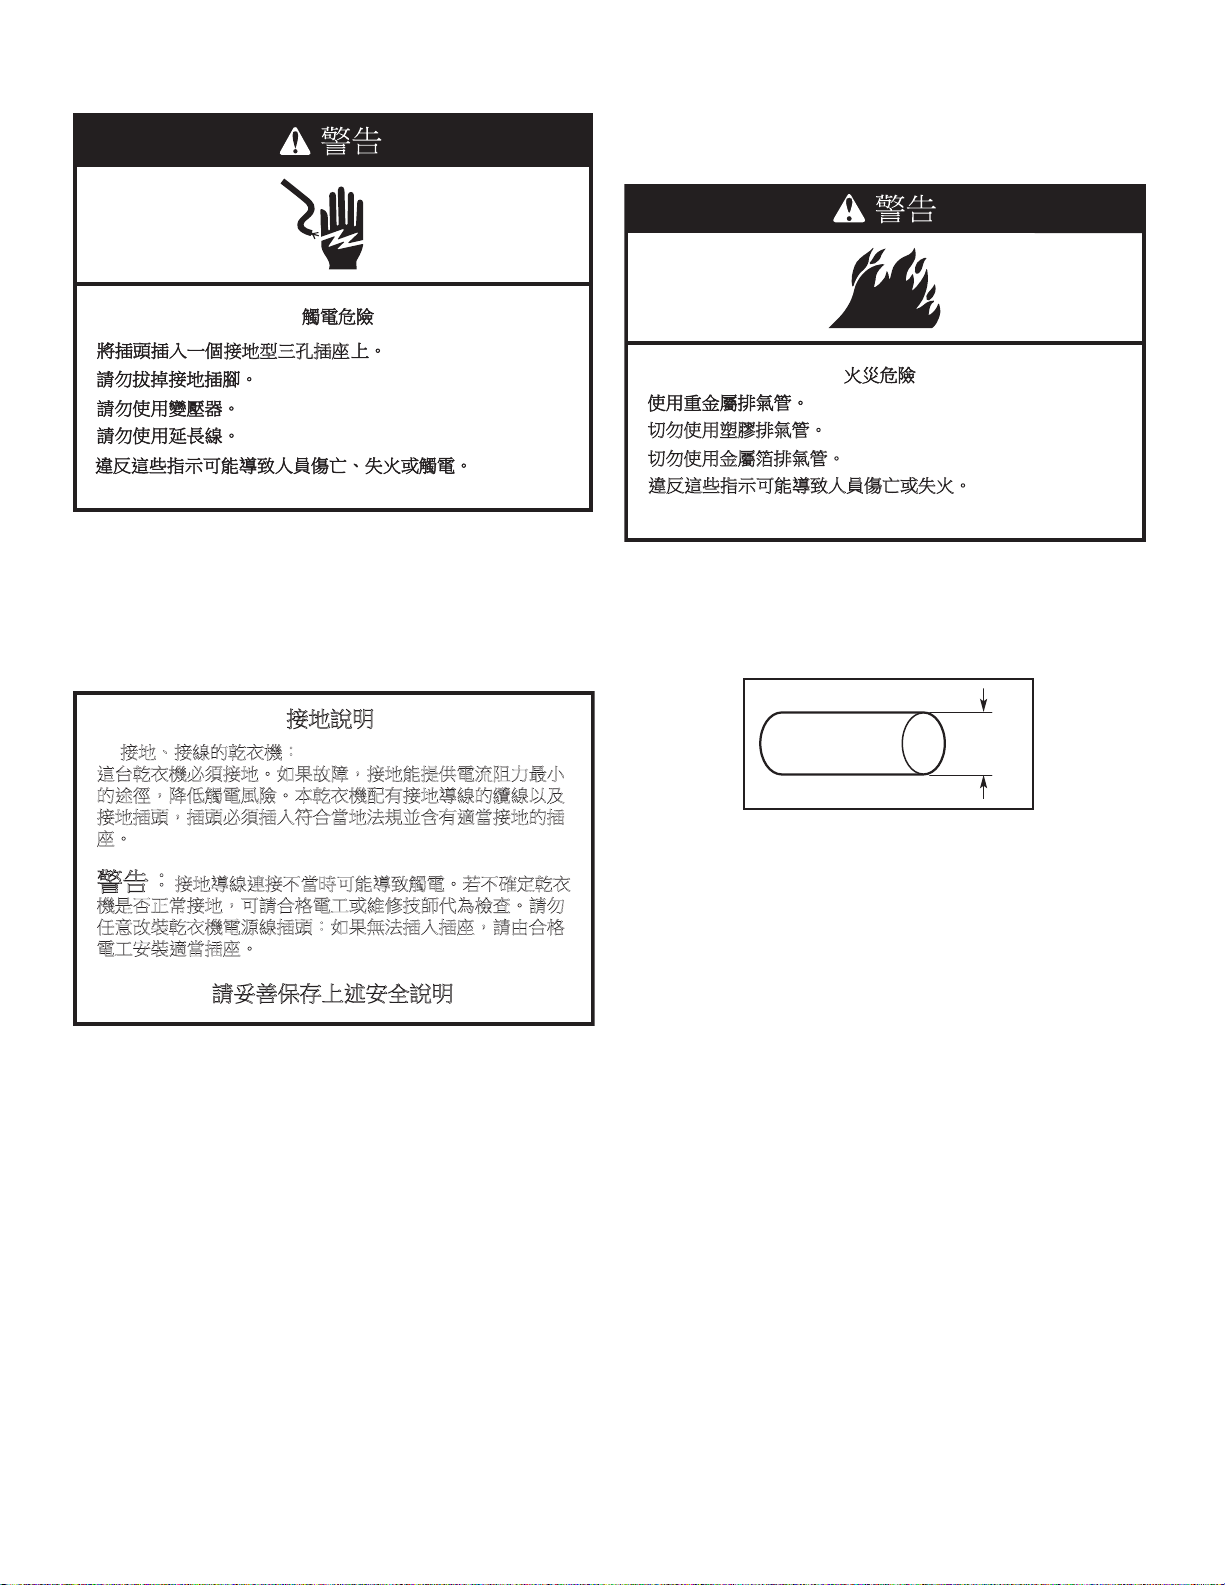
Plan Vent System
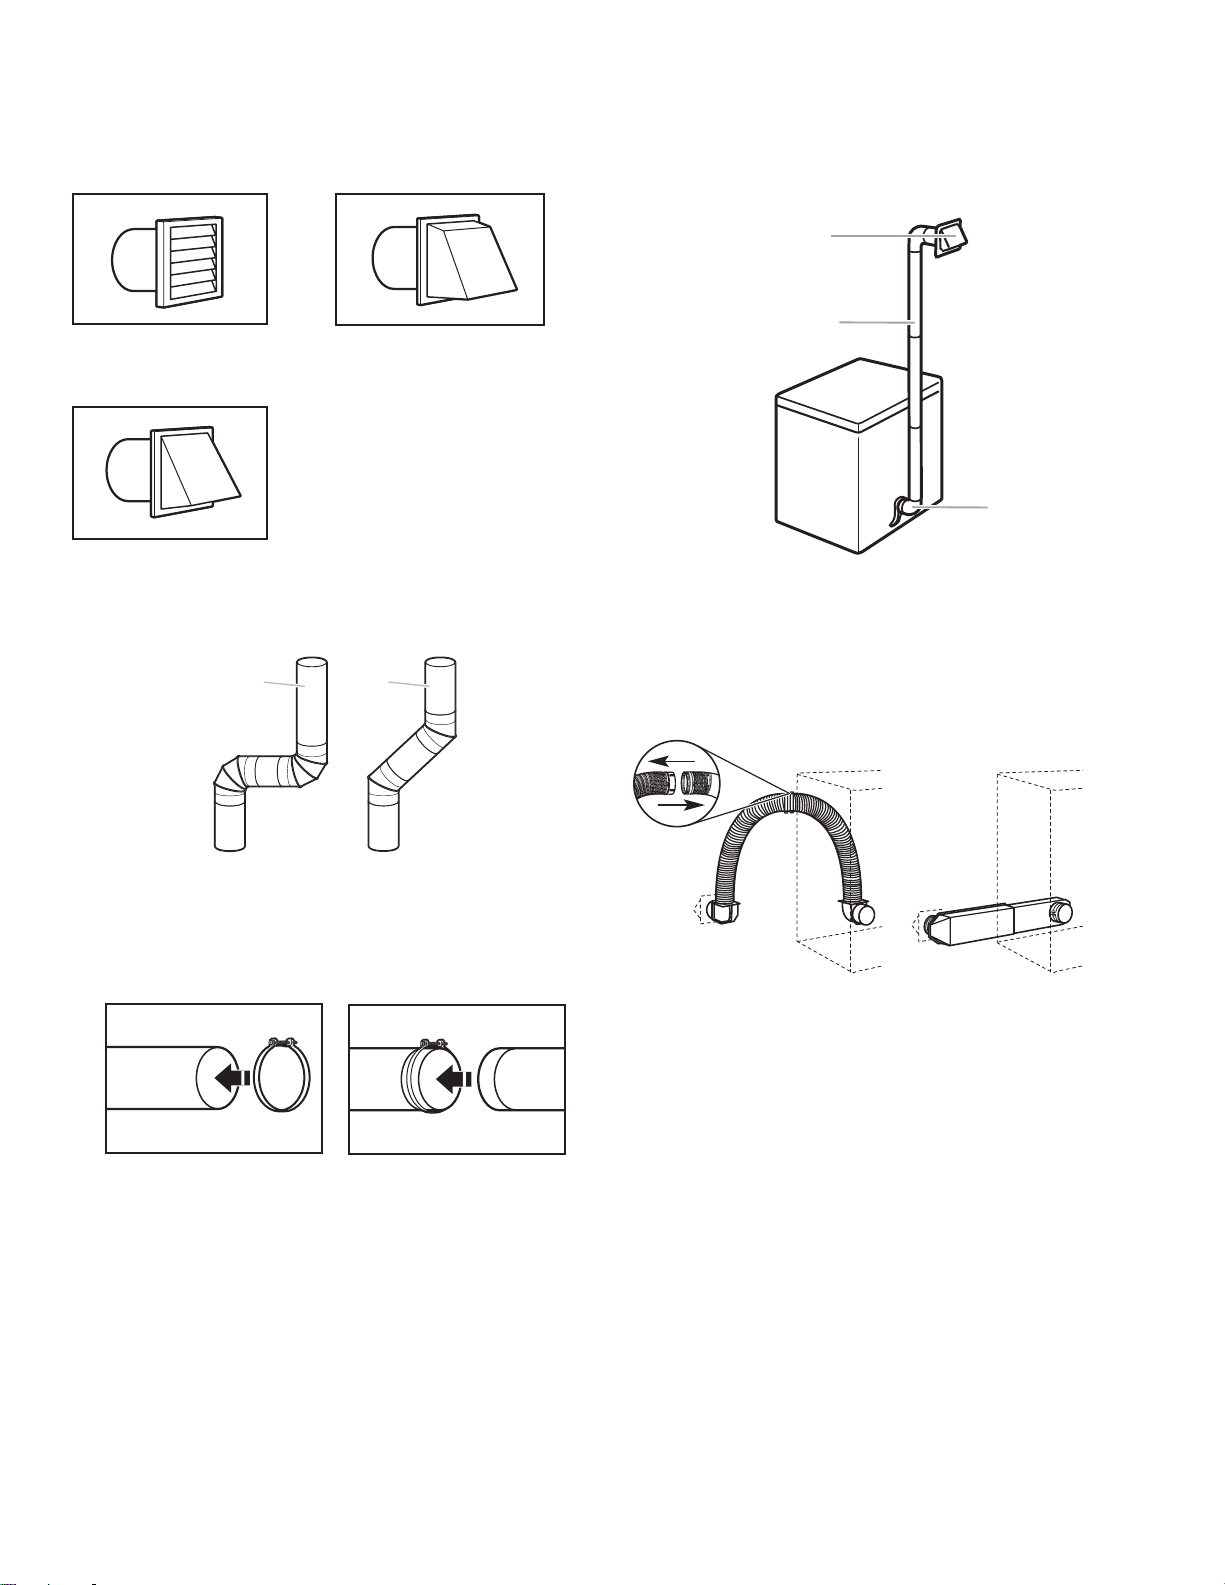
Choose your exhaust installation type
Recommended exhaust installations:
Typical installations vent the dryer from the rear of the dryer.
Other installations are possible.
A
B
C
A. Exhaust hood
B. Flexible metal or rigid metal vent
C. Elbow
Alternate installations for close clearances:
Venting systems come in many varieties. Select the type best
for your installation. Two close-clearance installations are shown.
Refer to the manufacturer’s instructions.
A B
A. Over-the-top installation
(also available with one offset elbow)
B. Periscope installation
NOTE: The following kits for close clearance alternate
installations are available for purchase. Contact the place of
purchase for further assistance.
■ Over-the-Top Installation:
Part Number 4396028
■ Periscope Installation (for use with dryer vent to wall vent
mismatch):
Part Number 4396037 - for mismatch of 0" (0 mm) to
18" (457 mm)
Part Number 4396011 - for mismatch of 18" (457 mm) to
29" (737 mm)
Part Number 4396014 - for mismatch of 29" (737 mm) to
50" (1.27 m)
Exhaust hoods:
■ Must be at least 12" (305 mm) from ground or any object
that may obstruct exhaust (such as owers, rocks, bushes,
or snow).
Recommended Style:
Louvered hood Box hood
Acceptable Style:
Angled hood
Elbows
45° elbows provide better airow than 90° elbows.
Good
Better
Clamps
■ Use clamps to seal all joints.
■ Exhaust vent must not be connected or secured with screws
or other fastening devices that extend into the interior of the
duct, because they can catch lint. Do not use duct tape.
8
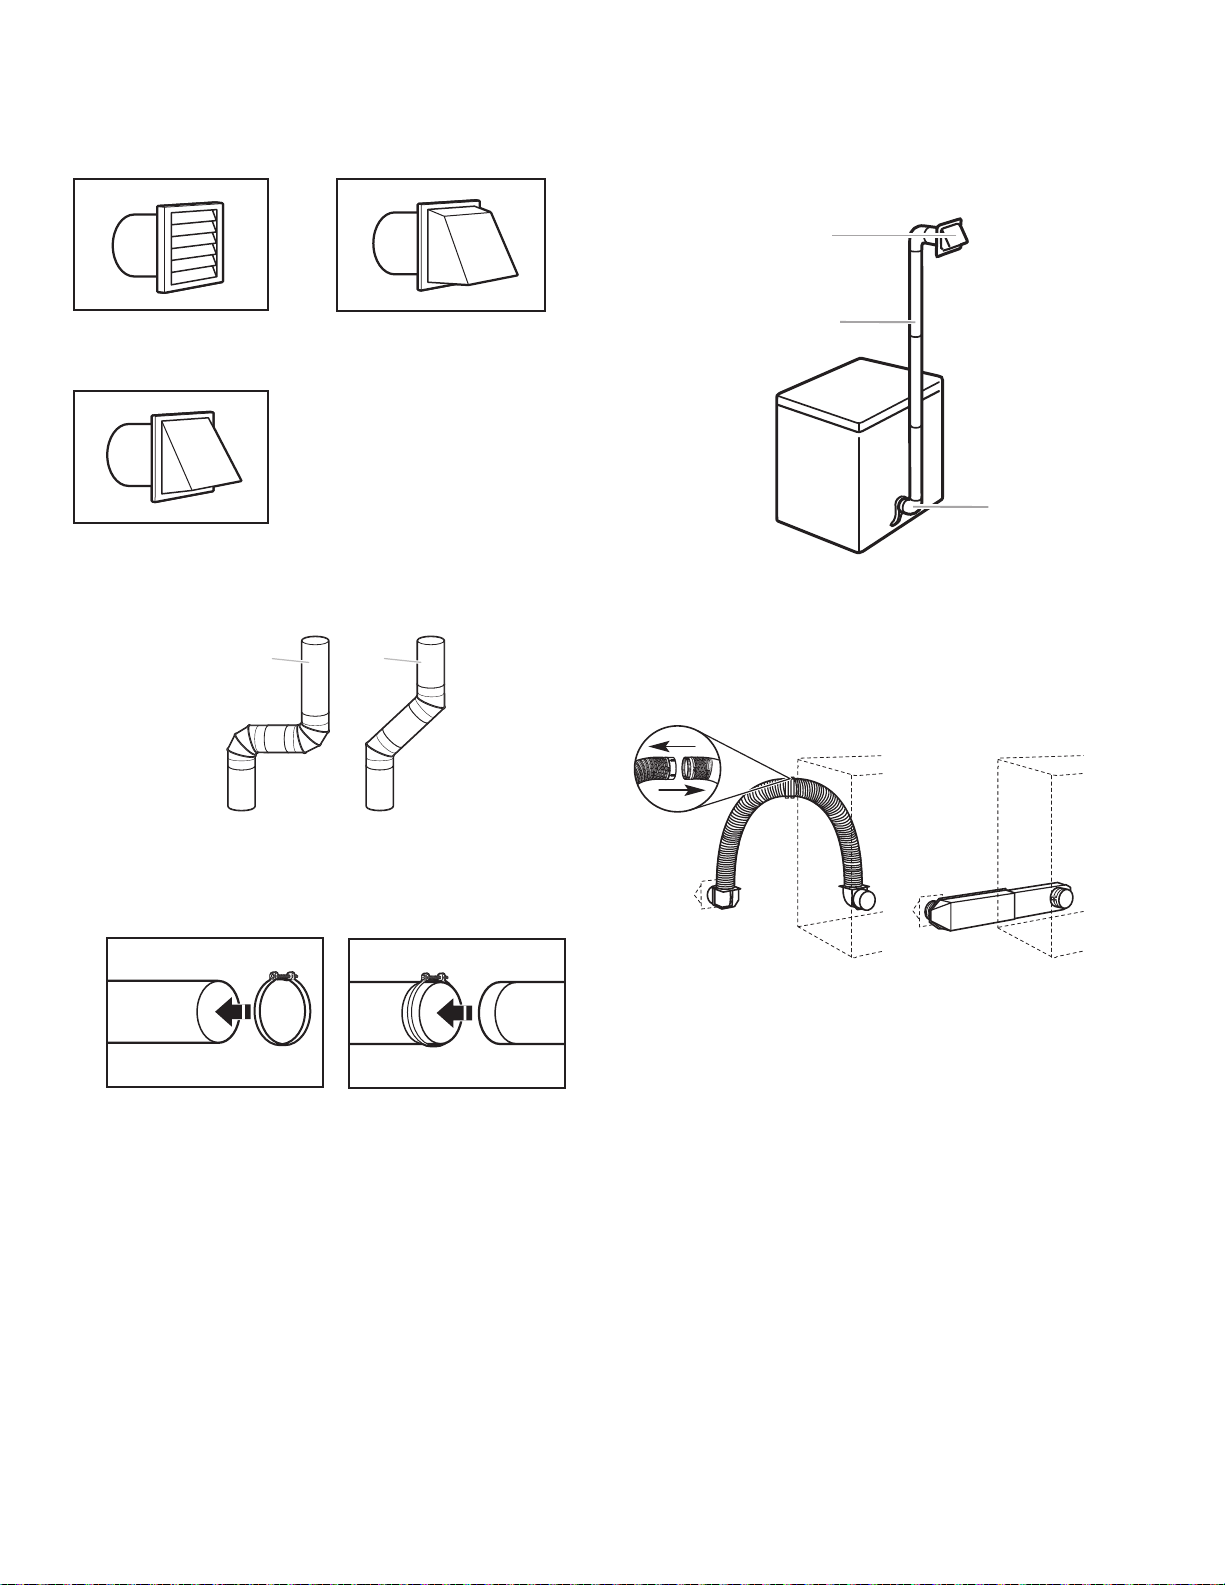
Install Vent System
1. Before installing the vent system, be sure to remove the wire
exhaust guard that is located at the exhaust outlet.
2. Install exhaust hood.
12" min.
(305 mm)
12" min.
(305 mm)
Install exhaust hood and use caulking compound to seal
exterior wall opening around exhaust hood.
3. Connect vent to exhaust hood.
Vent must t inside exhaust hood. Secure vent to exhaust
hood with 4" (102 mm) clamp. Run vent to dryer location.
Use the straightest path possible. See “Determine vent path”
in “Plan Vent System.” Avoid 90º turns. Use clamps to seal
all joints. Do not use duct tape, screws, or other fastening
devices that extend into the interior of the vent to secure vent,
because they can catch lint.
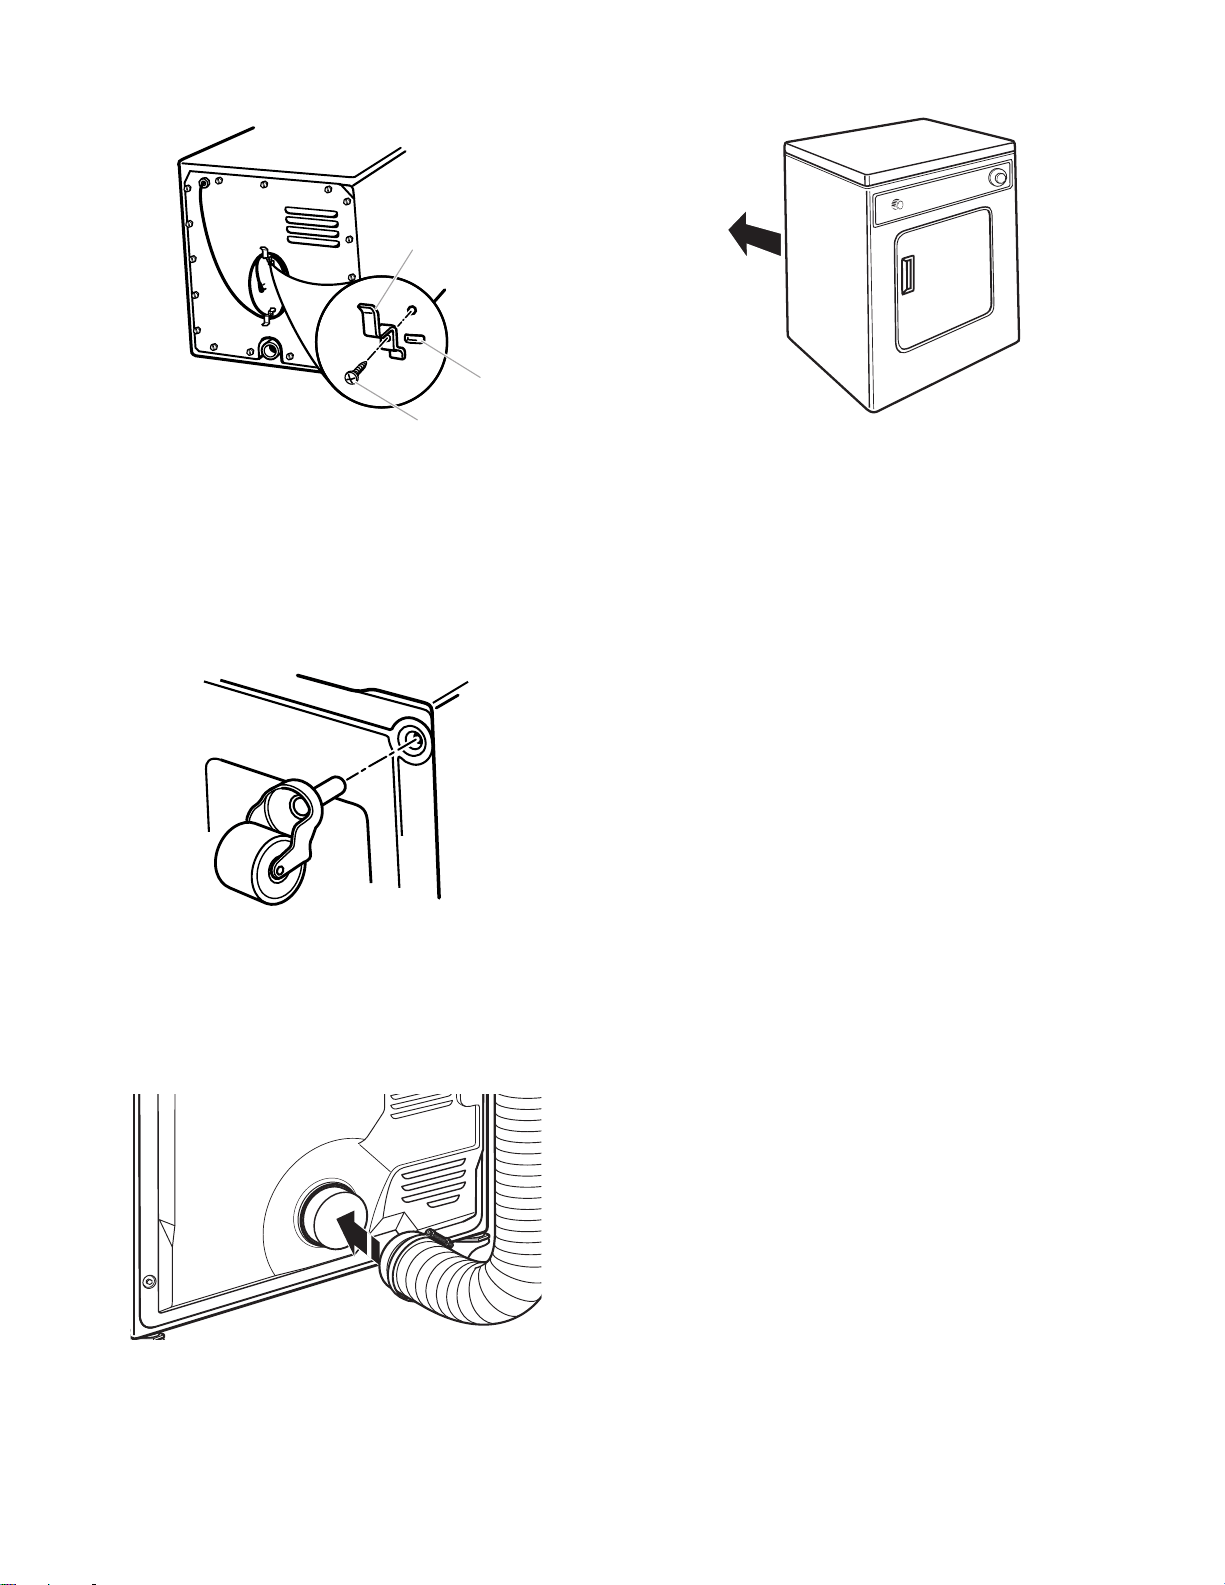
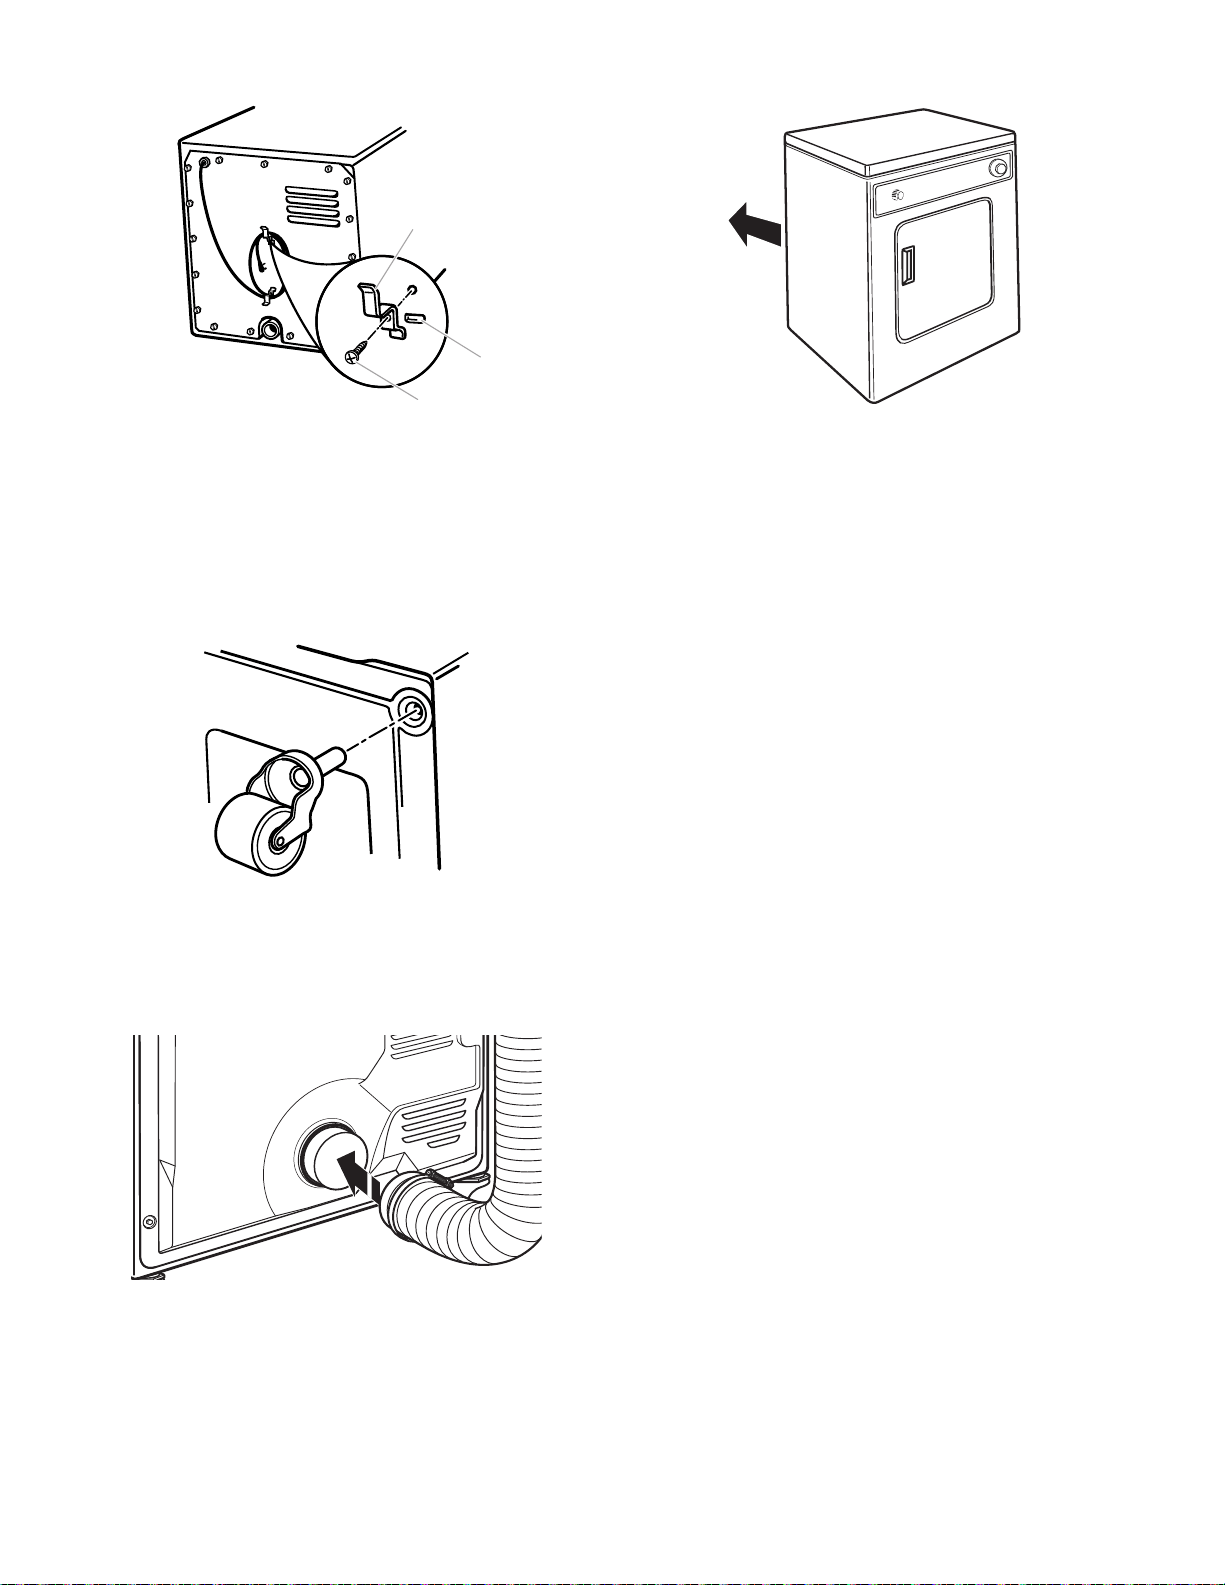
Install Cord Bracket and Casters
Do not move dryer into its nal location until the following steps
have been performed.
Install cord bracket
1. Remove tape from the power cord and the rear panel.
Determine vent path
■ Select the route that will provide the straightest and most
direct path outdoors.
■ Plan the installation to use the fewest number of elbows
and turns.
■ When using elbows or making turns, allow as much room
as possible.
■ Bend vent gradually to avoid kinking.
■ Use the fewest 90° turns possible.
Determine vent length and elbows needed for
best drying performance
■ Use the “Vent System Chart” below to determine type of vent
material and hood combinations acceptable to use.
NOTE: Do not use vent runs longer than those specied in
the Vent system chart. Exhaust systems longer than those
specied will:
■ Shorten the life of the dryer.
■ Reduce performance, resulting in longer drying times and
increased energy usage.
The “Vent System Chart” provides venting requirements that will
help to achieve the best drying performance.
Vent System Chart
Number of
90º turns or
elbows
Type of vent Box or
louvered
hoods
Angled
hoods
0
Rigid metal 36 ft (11 m) 26 ft (7.9 m)
1
Rigid metal 26 ft (7.9 m) 16 ft (4.9 m)
2
Rigid metal 16 ft (4.9 m) 6 ft (1.8 m)
9
2. Insert cord brackets into slotted holes in rear panel and
secure with screws provided.
B
A
C
A .Cord bracket
B. Slotted hole
C. Screw
NOTE: Power supply cord may be wrapped around the brackets
for storage convenience when dryer is not in use.
Install casters
1. To avoid damaging oor, use a large at piece of cardboard
from dryer carton. Place cardboard under entire back edge
of the dryer.
2. Firmly grasp dryer body and gently lay dryer on cardboard.
3. Screw casters into dryer base at four corners and
tighten securely.
4. Set the dryer upright. In doing so, be certain that the dryer
does not roll away from you.
Connect Vent
1. Connect vent to exhaust outlet.
Using a 4" (102 mm) clamp, connect vent to exhaust outlet
in dryer. If connecting to existing vent, make sure the vent is
clean. Dryer vent must t over dryer exhaust outlet and inside
exhaust hood. Check that vent is secured to exhaust hood
with a 4" (102 mm) clamp.
2. Move dryer into its nal location. Avoid crushing or kinking
the vent.
3. Once exhaust vent connection is made, remove cardboard.
Complete Installation
1. Check that all parts are now installed. If there is an extra part,
go back through the steps to see what was skipped.
2. Check that you have all of your tools.
3. Dispose of/recycle all packaging materials.
4. Check dryer’s nal location. Be sure vent is not crushed
or kinked.
5. Check that dryer is on a level surface.
6. Plug into a grounded 3 prong outlet.
7. Remove lm on the console and any tape remaining on dryer.
Remove tape from lint screen (located on inside back wall
of dryer).
8. Read “Using your Dryer.”
9. Wipe dryer drum interior thoroughly with a damp cloth to
remove any dust.
10. To test the dryer, set the dryer on a full heat cycle
(not an air cycle) for 20 minutes and start the dryer.
If the dryer will not start, check the following:
■ Controls are set in a running or “On” position.
■ Start button has been rmly pressed.
■ Dryer is plugged into a grounded 3 prong outlet.
■ Household fuse is intact and tight, or circuit breaker has
not tripped.
■ Dryer door is closed.
11. When the dryer has been running for 5 minutes, open the
dryer door and feel for heat. If you feel heat, cancel cycle and
close the door.
If you do not feel heat, check the following:
■ Controls are set on a heated cycle, not an air cycle.
NOTE: You may notice an odor when dryer is rst heated. This
odor is common when the heating element is rst used. The odor
will go away.
10
WARNING: To reduce the risk of re, electric shock, or injury to
persons, read the IMPORTANT SAFETY INSTRUCTIONS before
operating this appliance.
Before using your dryer, wipe the dryer drum with a damp cloth
to remove dust from storing and shipping.
1. Clean the lint screen before each load. See “Cleaning the
Lint Screen.”
2. Load clothes loosely into the dryer and close the door. Do not
pack the dryer. Allow space for clothes to tumble freely.
Using Your Dryer
Starting Your Dryer
3. Turn the Cycle Control knob to the recommended cycle for the
type of load being dried. Use the Normal automatic cycle to
dry most heavyweight and medium weight loads. See “Drying,
Cycle, and Temperature Tips.”
4. Press the PUSH TO START button.
Stopping and Restarting
You can stop your dryer anytime during a cycle.
To stop your dryer:
Open dryer door or turn Cycle Control knob to OFF.
NOTE: The Cycle Control knob should point to an Off area when
dryer is not in use.
To restart your dryer:
1. Close the door.
2. Select a new cycle and temperature (if desired).
3. Press the PUSH TO START button.
11
Loading
Load clothes loosely into the dryer. Do not overload the dryer.
Allow space for clothes to tumble freely. The following chart
shows the maximum load you can place in your compact dryer.
Expect longer drying times.
Heavy work clothes
2 pair of pants, 3 work shirts
Delicates
1 camisole, 2 slips, 4 undergarments,
1 set of sleepwear, 1 half slip
Towels
9 bath towels; or 6 bath towels,
3hand towels, 6 washcloths
Mixed load
2 pillowcases, 1 T-shirt, 2 shirts,
1pair slacks
Knits
2 slacks, 2 shirts; or 3 dresses
Normal
6 shirts; or 2 double sheets &
2pillowcases; or 2 singles sheets &
2pillowcases
Drying, Cycle, and Temperature Tips
Select the correct cycle and temperature for your load.
Your dryer tumbles the load without heat during the last few
minutes of all cycles to make the load easier to handle.
Drying tips
■ Follow care label directions when they are available.
■ If desired, add a fabric softener sheet. Follow package
instructions.
■ Remove load from the dryer as soon as tumbling stops to
reduce wrinkling. This is especially important for Normal, knits,
and synthetic fabrics.
Cycle and temperature tips
■ Dry most loads using the Normal automatic cycle.
■ Use a no heat (air) setting for rubber, plastic, or heat-
sensitive fabrics.
■ Line-dry bonded or laminated fabrics.
NOTE: If you have questions about drying temperatures for
various loads, refer to the care label directions.
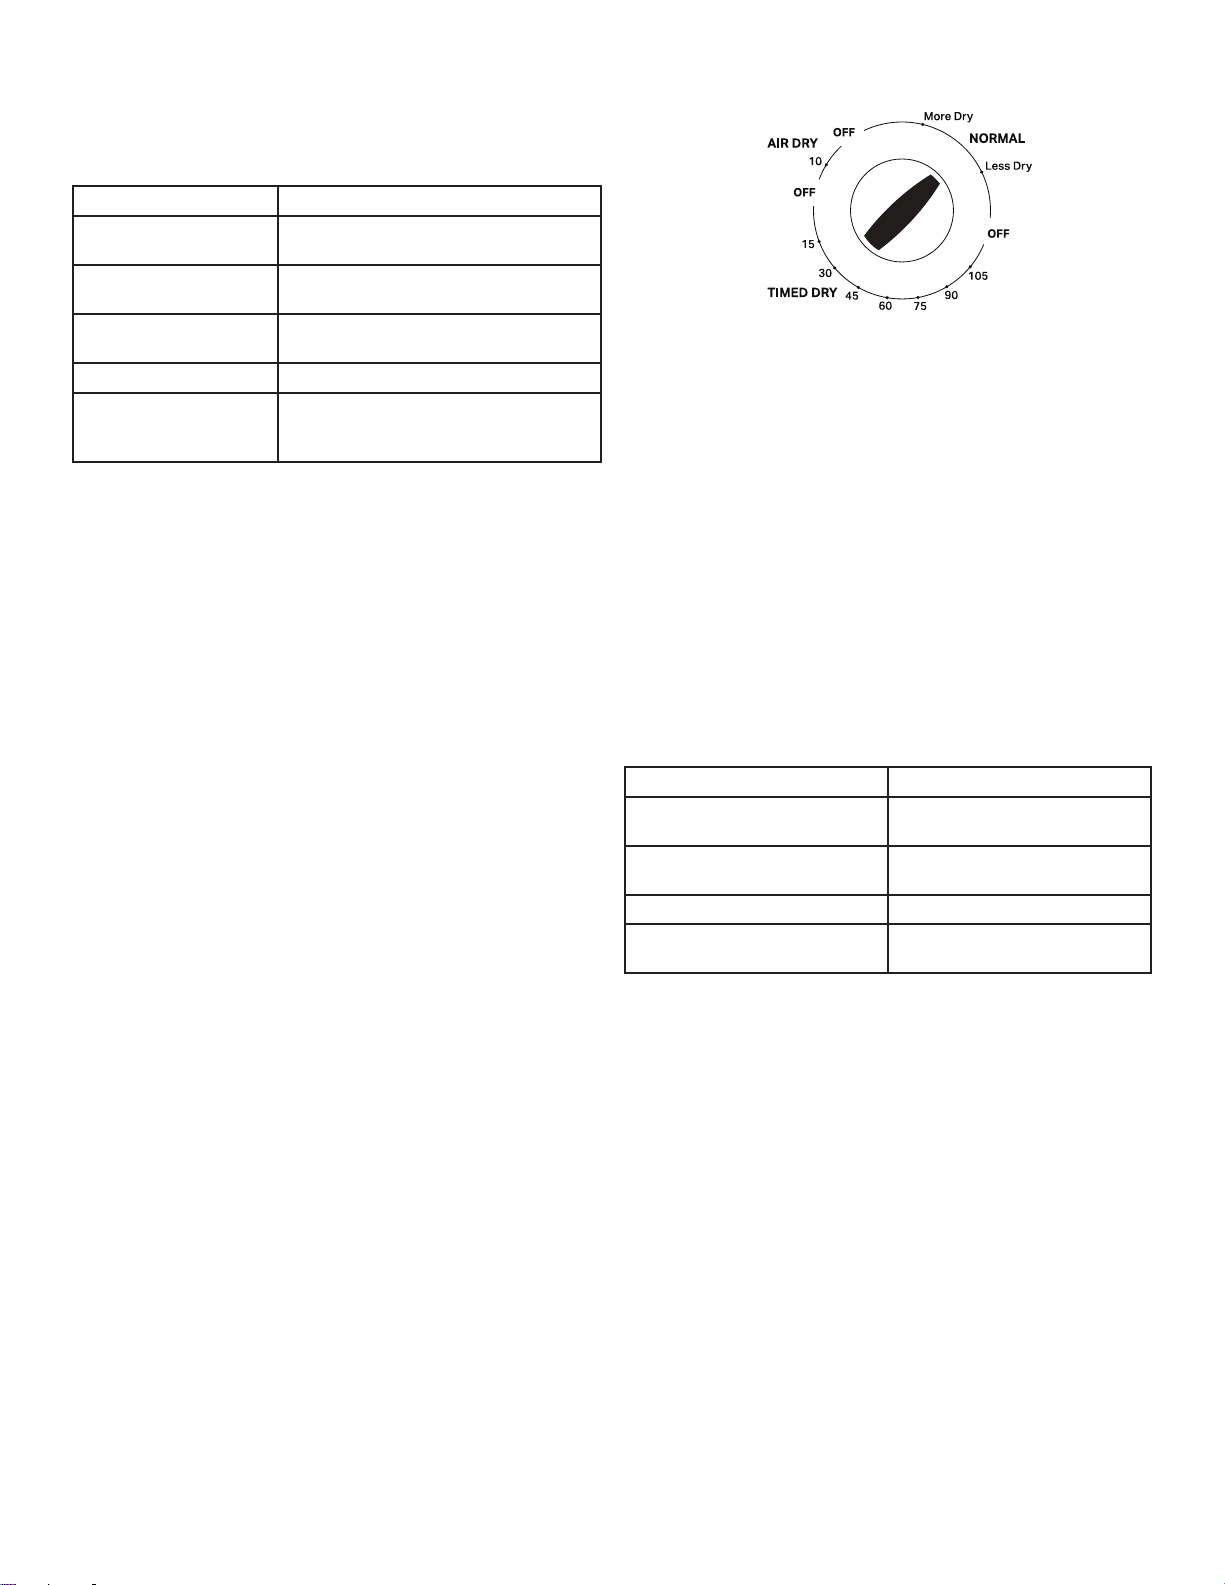
Cycles
Normal
This automatic cycle shuts off the dryer when the selected
dryness is reached. The Cycle Control knob does not move
until the load is almost dry. After the cool down, the knob
automatically turns to an Off area and tumbling stops.
Dry most loads using the Normal automatic cycle.
■ If the load is drier than you like, select a setting closer to Less
Dry the next time you dry a similar load.
■ If the load is not as dry as you like, complete drying using
the Timed Drying cycle. The next time you dry a similar load,
select a setting closer to Very Dry.
NOTE: Drying time with an automatic cycle varies according to
the type of fabric and size of load.
Air cycle
Use this cycle for items that require drying without heat, such
as rubber, plastic and heat-sensitive fabrics. See the chart for
examples of items that can be dried using an air cycle.
Type of Load Time*
Foam rubber - pillows,
padded bras, stuffed toys
20 - 30
Plastic - shower curtains,
tablecloths
20 - 30
Rubber-backed rugs 40 - 50
Olen, polypropylene, sheer
nylon
10 - 20
*(Minutes). Reset cycle to complete drying, if needed.
When using an air cycle
■ Check that coverings are securely stitched.
■ Shake and uff pillows by hand periodically during cycle.
■ Dry item completely. Foam rubber pillows are slow to dry.
Timed Drying Cycle
Use this cycle to complete drying if items are still damp after the
automatic cycle.
Timed Drying is also useful for:
■ Heavyweight items and work clothes that require a long
drying time.
■ Lightweight items, such as lingerie, blouses and knits that
require a short drying time.
For damp dry, turn the Cycle Control knob to 30 minutes or less.
End of Cycle Signal
The dryer sounds a signal to let you know when the cycle is
nished. The signal is not adjustable and cannot be turned off.
The signal is helpful when you are drying Normal, synthetics and
other items that should be taken out as soon as the dryer stops.
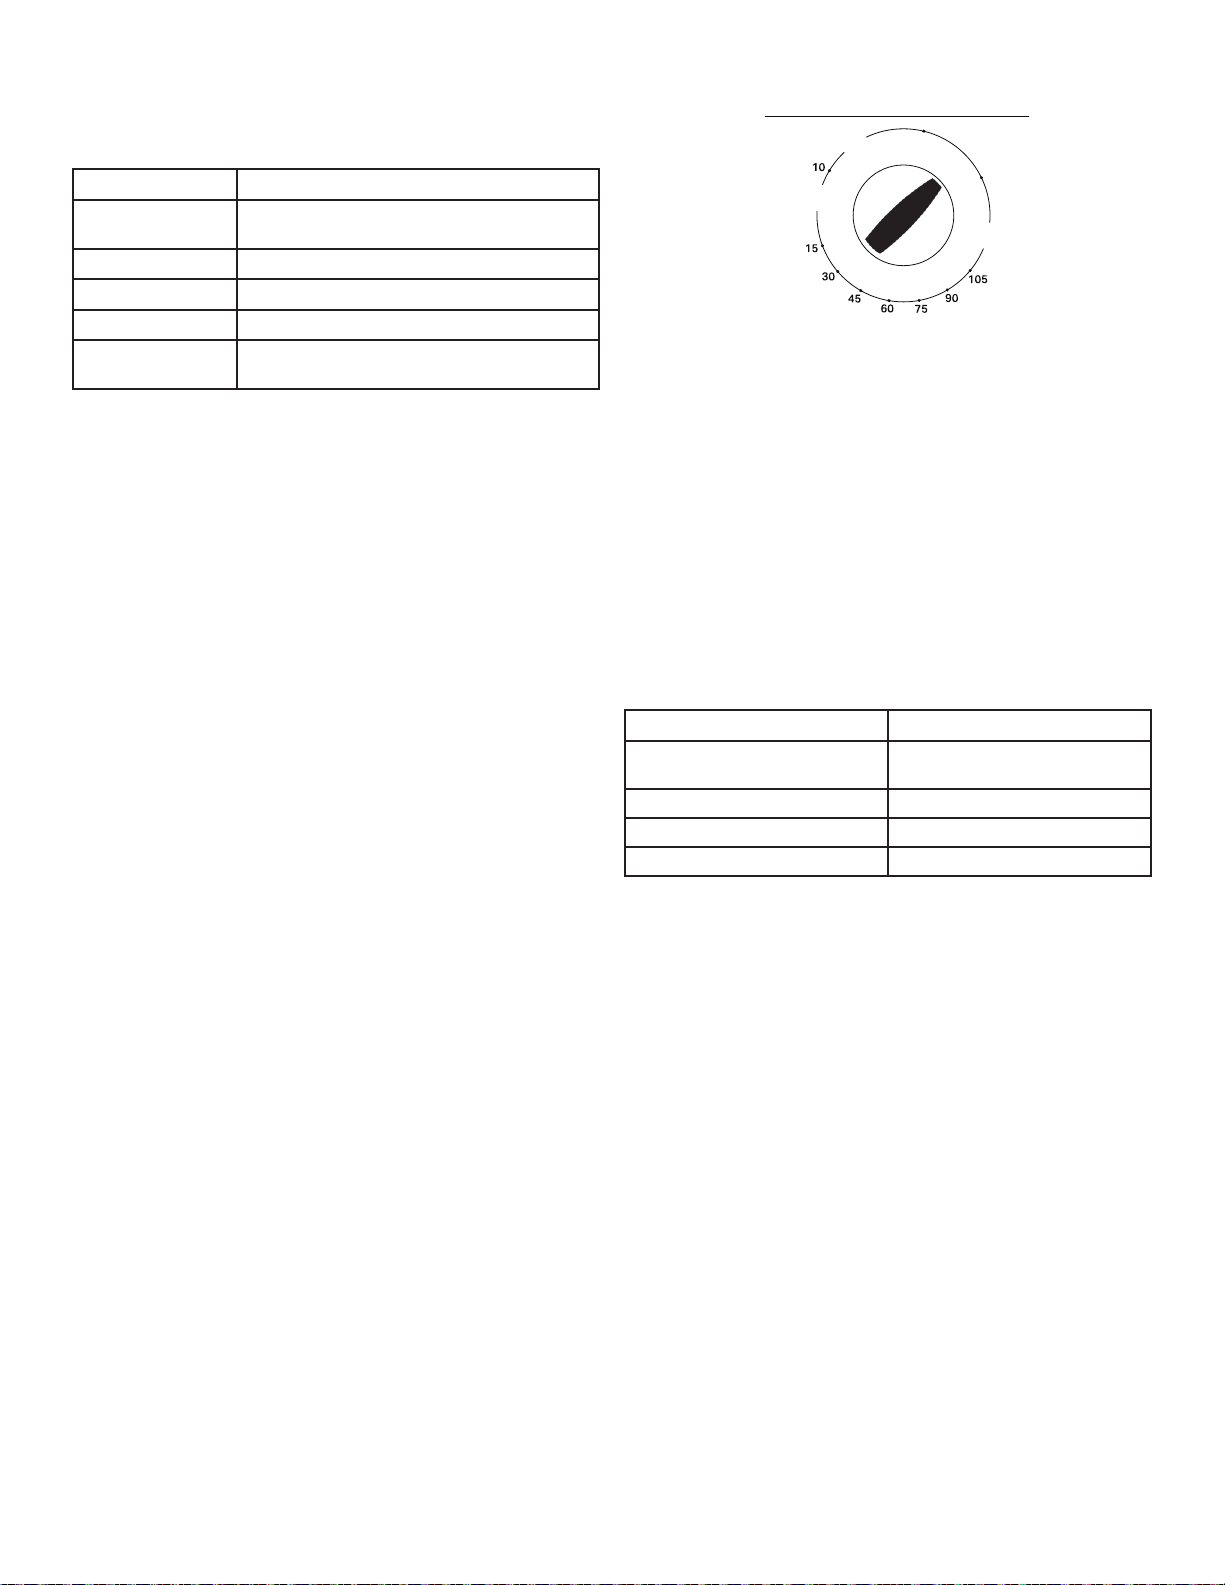
Cycle Control knob
12
Cleaning the Dryer Location
Keep dryer area clear and free from items that would obstruct the
ow of combustion and ventilation air.
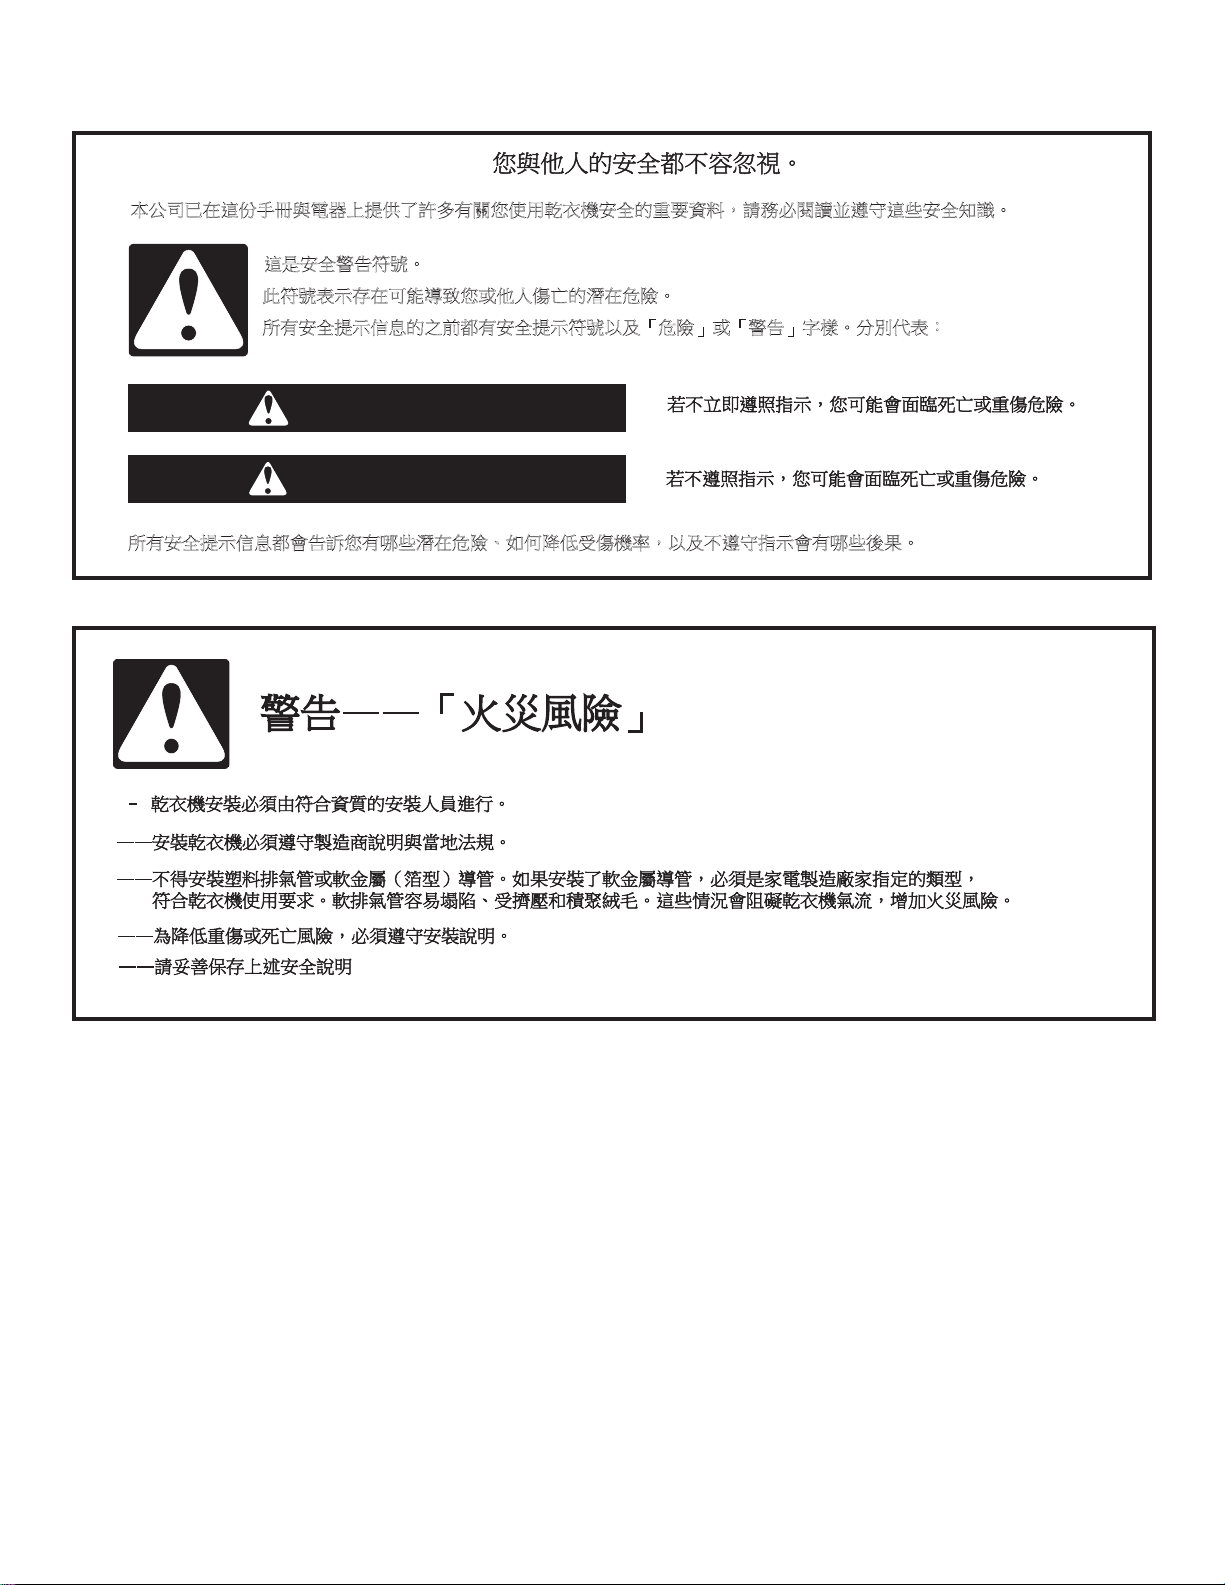
Cleaning the Lint Screen
Every load cleaning
The lint screen is located inside the dryer drum, on the back wall.
Clean it before each load. A screen blocked by lint can increase
drying time.
To clean:
1. Open the door and pull the lint screen straight out.
2. Squeeze body of lint screen lightly while pulling off the cover.
3. Roll lint off the screen with your ngers. Do not rinse or wash
screen to remove lint. Wet lint is hard to remove.
4. Replace cover on lint screen body. Push the lint screen rmly
back into place and close the door.
IMPORTANT:
■ Do not run the dryer with the lint screen loose, damaged,
blocked, or missing. Doing so can cause overheating and
damage to both the dryer and fabrics.
■ Some towels made of synthetic bers and natural bers
(polyester and cotton blends) may shed more lint than other
towels, causing your dryer’s lint screen to ll up faster. Be sure
to remove lint from the lint screen before and after drying new
towels.
As needed cleaning
Laundry detergent and fabric softener residue can build up on the
lint screen. This buildup can cause longer drying times for your
clothes, or cause the dryer to stop before your load is completely
dry. The screen is probably clogged if lint falls off the screen.
Clean the lint screen with a nylon brush every 6 months, or more
frequently if it becomes clogged due to a residue buildup.
Dryer Care
To wash:
1. Roll lint off the screen with your ngers.
2. Wet both the lint screen cover and body with hot water.
3. Wet a nylon brush with hot water and liquid detergent.
Scrub lint screen cover and body with the brush to remove
residue buildup.
4. Rinse with hot water.
5. Thoroughly dry lint screen body and cover with a clean towel.
Replace in dryer.
Cleaning the Dryer Interior
To clean dryer drum:
1. Make a paste with powdered laundry detergent and very
warm water.
2. Apply paste to a soft cloth.
OR
Apply a liquid, nonammable household cleaner to the stained
area and rub with a soft cloth until all excess dye is removed.
3. Wipe drum thoroughly with a damp cloth.
4. Tumble a load of clean cloths or towels to dry drum.
NOTE: Garments that contain unstable dyes, such as denim blue
jeans or brightly colored cotton items, may discolor the dryer
interior. These stains are not harmful to your dryer and will not
stain future loads of clothes. Dry unstable dye items inside-out to
avoid transfer of dye.
Removing Accumulated Lint
From Inside the Dryer Cabinet
Lint should be removed every 2 years, or more often, depending
on dryer usage. Cleaning should be done by a qualied person.
From the Exhaust Vent
Lint should be removed every 2 years, or more often, depending
on dryer usage.
Vacation and Moving Care
Vacation Care
Operate your dryer only when you are at home. If you will be on
vacation or not using your dryer for an extended period of time,
you should:
1. Unplug dryer or disconnect power.
2. Clean lint screen. See “Cleaning the Lint Screen.”
Moving Care
1. Unplug the power supply cord.
2. Make sure leveling legs are secure in dryer base.
3. Use masking tape to secure dryer door.

13
Troubleshooting
If you experience Possible Causes Solution
Dryer Operation
Dryer will not run Door not closed completely. Make sure the dryer door is closed completely.
Press and hold the START button
2–5 seconds.
Press and hold the START button 2–5 seconds.
Household fuse is blown or circuit
breaker has tripped.
There Should be a household fuse or circuit breaker for the dryer.
Check that the fuse is intact and tight, or that the circuit breaker
has not tripped. Replace the fuse or reset the circuit breaker. If
the problem continues, call an electrician.
Incorrect power supply. Electric dryers require 120 V power supply.
Check with a qualied electrician.
Wrong type of fuse. Use a time-delay fuse.
Timer does not
noticeably advance
Dryer set to Timed or Air Dry The timer moves slowly and continuously for the time setting.
Dryer set to Auto Dry The timer moves only when the clothing is mostly dry. See “How
Auto Moisture Sensing Works” in “Using your Dryer.”
Unusual Noise
Thumping noise Dryer hasn’t been used in a while. This is normal. The thumping sound should diminish after a few
minutes of use.
Rattling or vibrating noise A small object caught between the
edges of dryer drum.
Check the front and rear edges of the drum for small objects.
Clean out pockets before laundering.
Dryer isn’t properly leveled. The dryer may vibrate if not properly installed. Check the
levelness of the dryer. All four casters should be in rm contact
with the oor.
Clothing is balled up in dryer. When balled up, the load will bounce, causing the dryer to
vibrate. Separate the load items and restart the dryer.
First try the solutions suggested here or visit our website at www.whirlpool.com/product_help -
In Canada www.whirlpool.ca for assistance and to possibly avoid a service call.
Dryer Results
NOTE: The compact dryer operates at a lower wattage. Expect longer drying times.
Clothes are not drying
satisfactorily or drying
times are too long
Lint screen is clogged with lint. Clean lint screen before each load.
The exhaust vent or outside exhaust
hood is clogged with lint, restricting
air movement.
Run the dryer for 5–10 minutes. Hold your hand under
the outside exhaust hood to check air movement. If you
do not feel air movement, clean exhaust system of lint
or replace exhaust vent with heavy metal or exible metal vent.
See “Venting.”

14
Troubleshooting
If you experience Possible Causes Solution
Dryer Results
Clothes are not drying
satisfactorily or drying
times are too long (cont.)
The exhaust vent is not the
correct length.
Check that the exhaust vent is not too long or has
too many turns. Long venting will increase drying times.
See “Venting.”
The exhaust vent diameter is not the
correct size.
Use 4" (102 mm) diameter vent material.
The dryer is not level. Clothes not contacting the moisture sensors during Automatic
cycles. Check the levelness of the dryer. All four casters should
be in rm contact with the oor.
The Air Dry temperature setting has
been selected.
Select the correct temperature for the types of garments being
dried. See “Cycles.”
The load is too large and heavy
to dry quickly.
Separate the load to tumble freely.
Fabric softener sheets are blocking
the lint screen cover.
Use only one fabric softener sheet, and use it only once.
The dryer is located in a room with
temperature below 45ºF (7ºC).
Proper operation of dryer cycles requires temperatures above
45ºF (7ºC).
The dryer is located in a closet. Closet doors must have ventilation openings at the top
and bottom of the door. The front of the dryer requires a
minimum of 1" (25 mm) of airspace, and, for most installations,
the rear of the dryer requires 5½" (140 mm). See “Location
Requirements.”
The load may not be contacting the
sensor strips on Sensor Cycles.
Check the levelness of the dryer. All four casters should be in
rm contact with the oor.
Cycle time is too short The sensor cycle is ending early. Change the dryness level setting on sensor cycles. Increasing
or decreasing the dryness level will change the amount of
drying time in a cycle. If loads are consistently ending too early,
see “Cycles.”
Lint on load Lint screen is clogged with lint. Clean lint screen before each load.
Stains on load Improper use of fabric softener. Add dryer fabric softener sheets at the beginning of the cycle.
Fabric softener sheets added to a partially dried load can stain
your garments.
Stains on drum Loose dyes in clothes. Drum stains are caused by dyes in clothing (usually blue jeans).
These will not transfer to other clothing.
Loads are wrinkled The load was not removed from dryer
at the end of the cycle.
Refer to garment care label instructions. Dry clean only garments
are not recommended.
The dryer was tightly packed. Dry smaller loads that can tumble freely.
Odors Recent painting, staining, or
varnishing in the area where your
dryer is located.
Ventilate the area. When the odors or fumes are gone from the
area, rewash and dry the clothing.
Dryer being used for the rst time. The new electric heating element may have an odor. The odor
will be gone after the rst cycle.
First try the solutions suggested here or visit our website at www.whirlpool.com/product_help -
In Canada www.whirlpool.ca for assistance and to possibly avoid a service call.
15
㛔℔⎠⛐忁ấㇳℲ冯暣☐ᶲ㍸ὃḮ姙⣂㚱斄ぐἧ䓐Ḧ堋㨇⬱ℐ䘬慵天屯㕁炻婳⊁⽭教嬨思⬰忁ṃ⬱ℐ䞍嬀ˤ
忁㗗⬱ℐ嬎⏲䫎嘇ˤ
㬌䫎嘇堐䣢⬀⛐⎗傥⮶农ぐㆾṾṢ ṉ䘬㼃⛐⌙晒ˤ
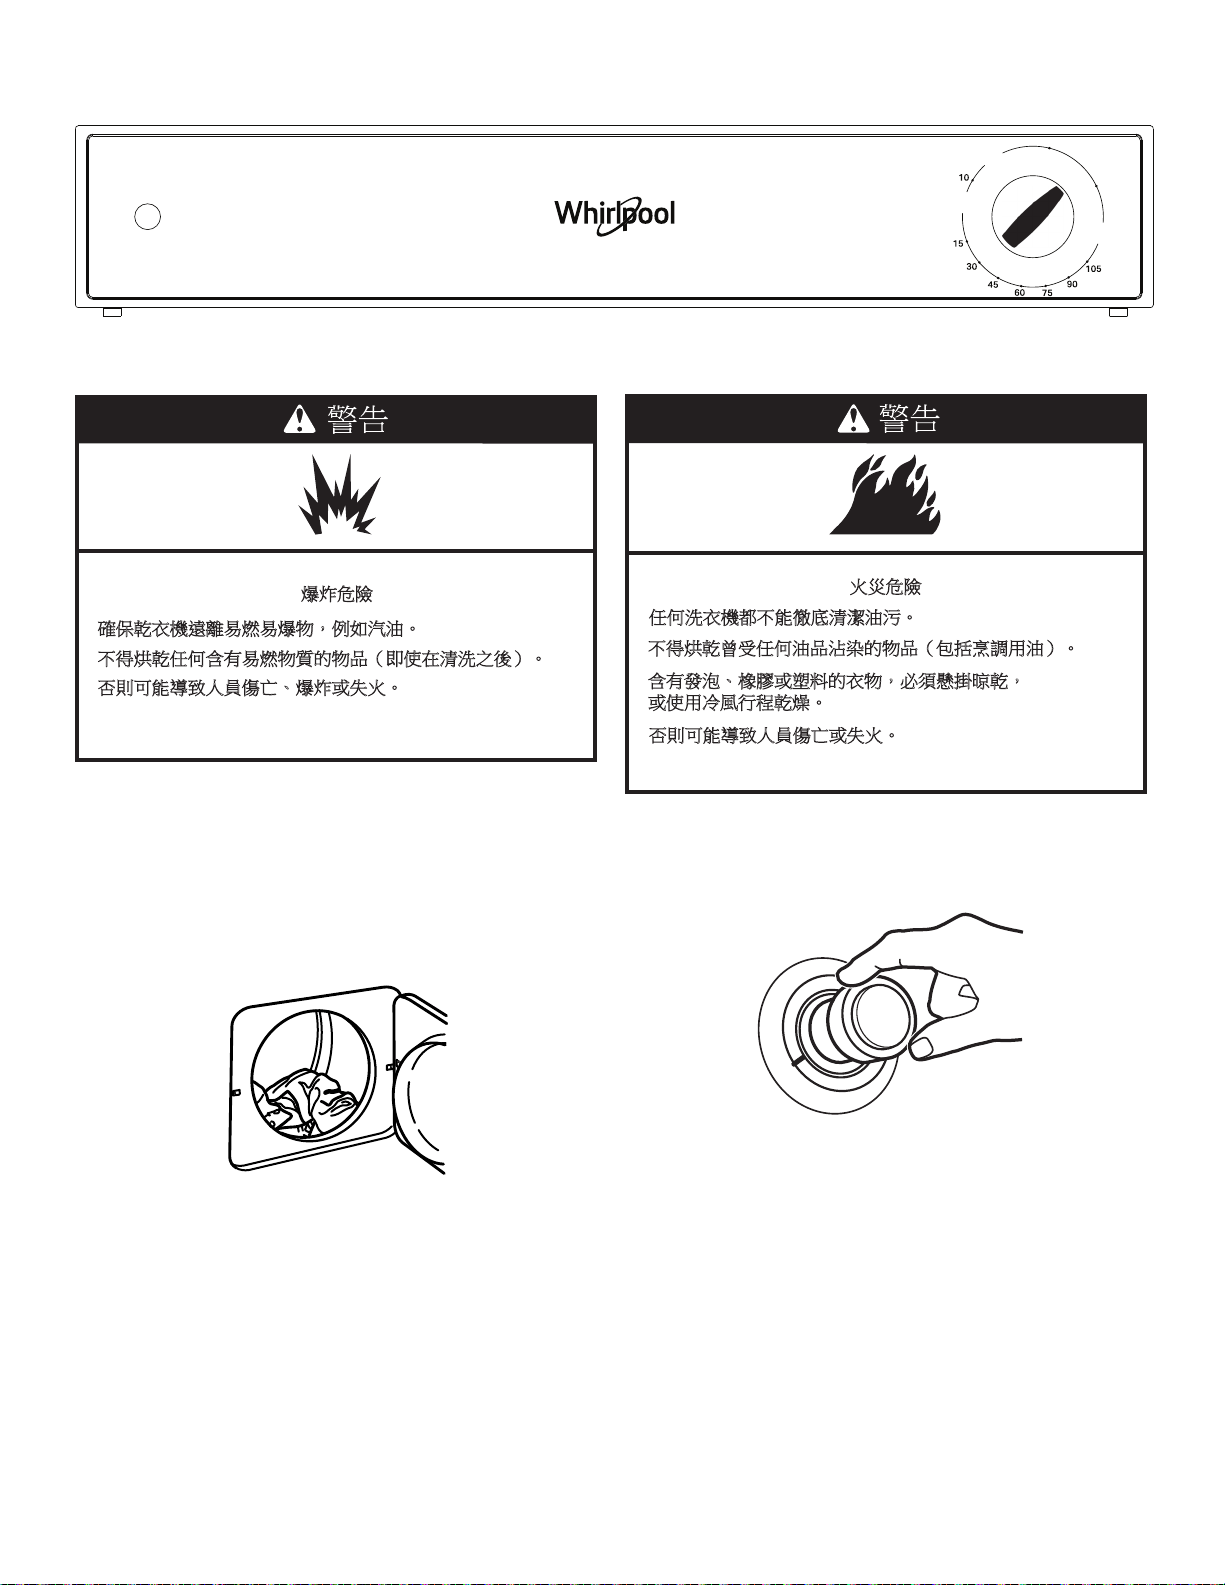
㚱⬱ℐ㍸䣢ᾉ〗䘬⇵悥㚱⬱ℐ㍸䣢䫎嘇ẍ⍲ˬ⌙晒˭ㆾˬ嬎⏲˭⫿㧋ˤ↮⇍ẋ堐烉
危險
警告
㚱⬱ℐ㍸䣢ᾉ〗悥㚫⏲姜ぐ㚱⒒ṃ㼃⛐⌙晒ˣ⤪ỽ旵Ỷ⍿ 㨇䌯炻ẍ⍲ᶵ思⬰㊯䣢㚫㚱⒒ṃ⼴㝄ˤ
乾衣機安全
16
㔜
せᏳ崹
㆙࿌ 㸸 ⏝⾰ᶵ㸪Ⅽ㝆పⅆ⅏ࠊ゙㟁ᡈேဨയஸ㢼㞋㸪ㄳ㑂Ᏺ௨ୗᇶᮏ㡸㜵ᥐ㸪ໟᣓ㸸
ᅾ⏝⾰ᶵ๓㸪ㄳヲ桀ᡤ᭷ᣦ♧ࠋ
せᢕἡᰁↀㄪ⏝Ἔⓗ⾰≀ᨺධ⾰ᶵ⏶ࠋἡᰁↀ
ㄪ⏝Ἔⓗ⾰≀㸪ྍ⬟᭳ಁᡂᏥ᠕㸪ᘬ㉳⾰≀㉳
ⅆࠋ ⁸⟄⾰ᶵⓗ᭱ᚋ୍ಶ⾜⛬సຍ⇕㸪௨㝆ప
ཷ㻰ᰁ⾰≀ⓗⅆ⅏㢼㞋ࠋ
㆙࿌㸸㑊චᅾ⾰⾜⛬⤖᮰๓ᑘ⁸⟄⾰ᶵ㜝ᶵ
㸪㝖㠀㎿㏿ྲྀฟᡤ᭷⾰≀୪ᨦ㛤ᩓ⇕ࠋ
ษⅸ᭯⥂⏝ỶἜࠊὙກᡈ⇞ࠊ⇿≀
㉁Ύ₩ࠊἈὙࠊᾐἻᡈἡᰁⓗ⾰≀ࠋᅉⅭ㏺ல≀㉁
ⓗỶྍ⬟᭳㉳ⅆᡈ⇿Ⅻࠋ
ษㆸඤ❺ᅾ⾰ᶵୖᡈ⏶㒊⋵⪌ࠋዴ᭷㟂せᅾඤ
❺㝃㏆⏝⾰ᶵ㸪ົᚲᑞඤ❺ᄫຍ┘⟶ࠋ
ᅾ⏝ᡈ୦Რ⾰ᶵ๓㸪ㄳඛᢕᶵ㛛ᚘᶵ㌟ୖᢹ
ୗࠋ
ᅾ⾰ᶵ⁸⟄άື㸪ษᢕ㌟㧓㒊ఙධᶵ⏶ࠋ
ڦ
ڦ
ڦ
ڦ
ڦ
ڦ
ڦ
ᮏ㟁ჾ㡸ᮇ౪⏕⌮ࠊឤ▱ࠊᚰᬛ⬟ຊࠊ⥂㦩ᡈ▱
㆑㊊அ⏝⪅ໟ ྵᏝ❺⏝㸪㝖㠀ᅾᑞ㈇᭷
Ᏻ㈐௵ⓗேဨஅ┘ㆤᡈᣦᑟୗᏳ⏝ࠋ
ڦ᠕ᥦ౪㊊⮯ⓗ㏻㢼௨㑊ච㟁ჾ⇞⇦⇞ᩱⓗỀ㧓
ໟ ᣓ㛤ⅆᅇὶ฿ᡣ㛫ࠋ
ڦྍᅾ⾰ᶵ⏶ⅸᮍὙⓗ⾰≀ࠋ
ڦ⿕ↀ㣠Ἔࠊ揽ࠊ㓇⢭ࠊỶἜࠊ↴ἜࠊཤỞກࠊᯇ
揾ࠊ⮞ཤ⮞ກ➼Ởᰁ㐣ⓗ⾰≀㸪ᅾᨺධ⾰ᶵ㐍
⾜ⅸ๓㸪㡲௨⇕Ỉᦚ㓄㔞ⓗὙ⾰⢊ඛὙ㐣ࠋ
ڦ⛣㝖ᡤ᭷ᅾ⾰≀ཱྀ⿄ⓗ≀ရ㸪ዴᡴⅆᶵⅆᰘࠋ
ڦᚓỀ⮳⏝⇞⇦⎰᪁ᡈ⇞ᩱჾලⓗᘄỀ
⟶ࠋ
ڦ
ڦ
㟁ჾᚓᏳ⿶ᅾྍ㙐ఫⓗ㛛ࠊྍືⓗ㛛ᡈ⫼ᚋ᭷
㛛㘟ⓗᚋ㠃㸪ᅾṈᙧୗ㸪᭳㝈ไఫ⾰ᶵᡴ
㛤ࠋ
ڦ
ڦ
ڦ
ڦ
ڦ
ڦ
ڦ
ڦ
ڦ
ⱝ㟁※⥺ᦆኀ㸪ᚲ㡲⏤〇㐀ᘂၟᡈ᭹ົᡈල
᭷┦㜝㈨᱁ⓗேဨຍ௨᭦௨㑊ච༴㞋ࠋ
ᚓᢕ⾰ᶵᏳ⿶ᡈᏑᨺᅾ㟢ኳ⨨ࠋ
ᚓ᧩⮬᭦ᨵ᥍ไჾࠋ
ᚓ⥔ಟᡈ᭦⾰ᶵⓗ௵ఱ㒊௳㸪ᡈ㐍⾜௵ఱ⥔
ಟაヨ㸪㝖㠀ᮏ⏝ಖ㣴ᡭᡈ༳ๅ⏝㓅⥔ಟ崹
୰᭷ᑙ㛛ᘓ㆟㸪ୟᝍ᭷⬟ຊ⌮ゎ୪ᇳ⾜ࠋ
㝖㠀㑂↷⾰≀ᰂ㌾ກᡈ䞱ရⓗ〇㐀ᘂၟᘓ㆟㸪ྰ๎
ᚓ⏝⾰≀ᰂ㌾ກᡈ䞱ရཤ㝖㟿㟁ࠋ
ዴ⾰≀⏶ྵ᭷ⓐἻᶶ⭺ᡈ㢮ఝᶶ⭺ⓗᮦᩱ㸪ᚓຍ
⇕ⅸࠋ
ẗḟⅸ⾰๓ᚋ㸪ᚲ 㡲Ύ₩⤧ẟ㐣ℐ⥙ࠋ
ಖᣢỀཱྀᶵჾ࿘㑔༐ᇦ㸪☜ಖ↓Ფ⤩ࠊ⅊ሻ
⯅㻰ᇈሁ✚ࠋ
⾰ᶵ⯅Ề⟶⏶㒊ᚲ㡲⏤➢ྜ㈨᱁ⓗ⥔ಟேဨᐃ
ᮇΎ₩ࠋ
ㄳཨ桀᥋ᆅᏳ⿶崹ⓗࠕ㟁※㟂ồࠖ❶⠇ࠋ
ㄳጇၿಖᏑୖ㏙Ᏻ崹
つ᱁
ᐜ㔞㸸
㢠ᐃ㟁ቶ 120 V
㢠ᐃ㢖⋡ 60 Hz
㢠ᐃ㟁ὶ 12 A
7.0 kg
᭱⾰㔞⇱⾰≀
3.4
kg
IECᐜ㔞
*IEC 容量是指製造商宣稱能以特定行程烘乾衣物和紡織品的最大容量。
17
安裝說明
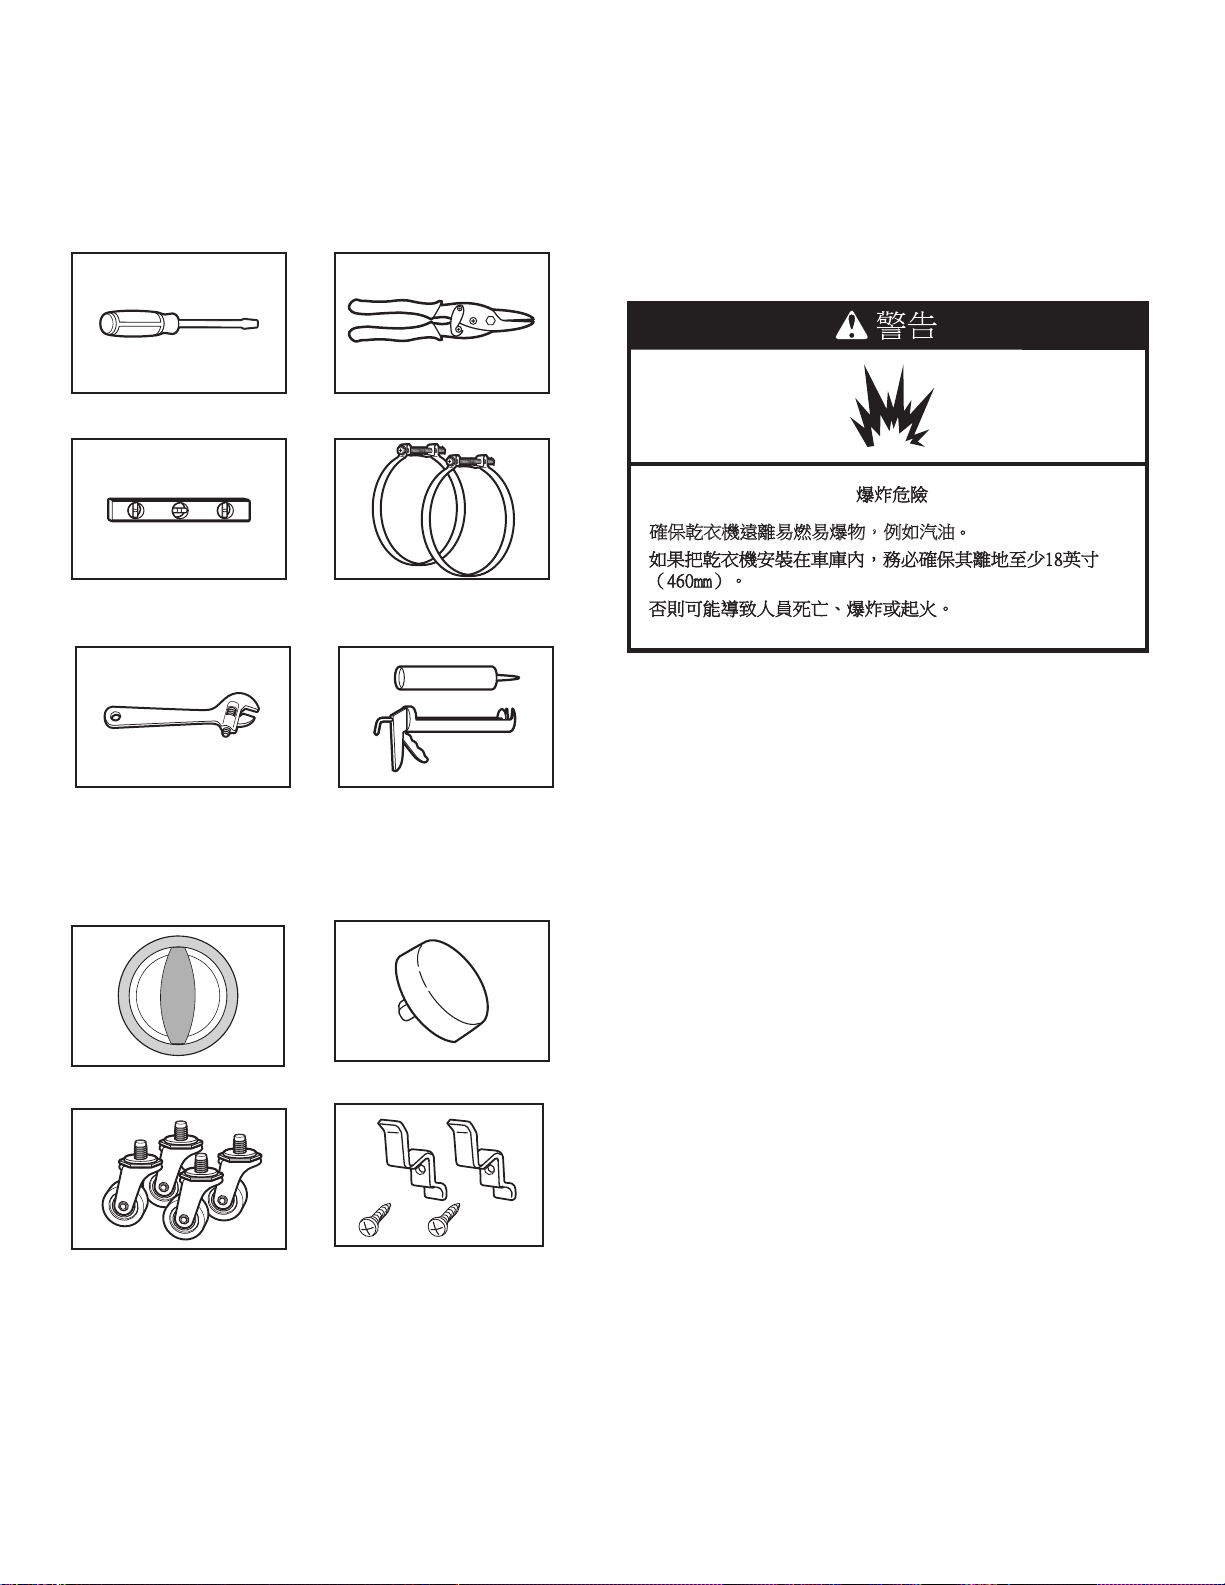
工具與零件
所需工具
在開始安裝之前,請準備好所需的工具與零件。仔細閱讀並遵照製
造商提供的說明,使用以下列舉的工具。
一字起子 鍍錫鐵皮剪 (安裝新排氣管之用)
水平儀 排氣管夾
活動扳手,開口為1"(25 mm)
或六角頭套筒扳手
矽膠槍和矽膠 (安裝新排氣管用)
供應零件
拆開乾衣機滾筒上的包裝。檢查清單上的零件是否齊全。
行程控制旋鈕 啟動按鈕
腳輪(4個) 電線支架(2個)與螺絲
(2個)
場地需求
䡢ᾅḦ堋㨇怈暊㖻䅫㖻䆮䈑炻ἳ⤪㰥㱡
您需要
■ 可允許適當排氣管安裝的地點。請參看「排氣要求 」章節。
■ 一個120 V、60 Hz、純交流電、15至20 A的電路。
■ 一個接地的電插座,位於乾衣機一側的2呎(610mm)之內。
請參看「電源需求 」章節。
■ 可支撐乾衣機重量(乾衣機和衣物)115 lb(52 kg)的穩固地
面。組合式產品之重量也應列入考慮。
■ 平整地面,整台乾衣機下的坡度最多為1" (25 mm)。
不得在低於45 ºF (7 ºC)的溫度下運作乾衣機。在低溫下,乾衣
機可能在自動行程結束後不會停機。乾衣時間可能會延長。
乾衣機不得安裝或存放於受日曬雨淋的場所。
查明地方法規之要求 。某些法規會限制或不允許把乾衣機安裝在車
庫、櫥櫃、移動房屋或臥室區域。請聯絡您當地的建築督察員。
所需零件
在購買零件前,請先核查本地法規及現有供電與排氣管道,並查看
「排氣要求」與「電源需求」。
■ 移動式汽車屋必須使用金屬的排氣管。
■ 永久性安裝需要安裝4個乾衣機支腳。
諮詢或訂購請參閱封底的「協助或服務」。您也可以聯絡您購買乾
衣機的經銷商。
18
安裝空間
安裝地點必須足夠寬敞,可容乾衣機門完全打開。
乾衣機規格
正視圖
24
7
/8"
(610 mm)
1
3
/
4
"
(44 mm)
*22"
(560 mm)
32"
(813 mm)
†
側視圖
1
3
/4"
(44 mm)
37
1
/4"
(947 mm)
22"
(560 mm)
後視圖
1
3
/4"
(44 mm)
3
1
/4"
(83 mm)
3
1
/2"
(89 mm)
12"
(305 mm)
29
1
/4"
(743 mm)
嵌入式與入櫥式安裝最小安裝空間
以下尺寸是在乾衣機疊在一起或單獨使用時,
所需的最小空間。要購買疊放架套件,請參閱「協助或服務」。
■ 為安裝與維修方便,應預留額外空間。
■ 牆壁、門與地板也可能需要額外空間。
■ 建議在乾衣機四周各預留1" (25 mm)的空間,以減少噪音傳
播。
■ 如乾衣機安裝在櫥櫃內,門的上方與下方必須開有最小的通風
口。有通風口的百葉窗亦可接受。
■ 也需要考慮組合式產品的空間。
嵌入式或入櫥式安裝——僅限乾衣機
AB
14"*
(356 mm)
18"* (457 mm)
1"
(25 mm)
1"
(25 mm)
5
1
/2"*
(140 mm)
A.
側視圖——櫥櫃或封閉空間
B.
凹陷區域
* 多數安裝需要在乾衣機後預留至少5½" (140 mm) 的空隙,以安裝
帶彎管接頭的排氣管請參閱「排氣要求 」
嵌入式或入櫥式安裝——疊放
5
1
/2"
(140mm)
(305 mm)
12"*
(305 mm)
12"*
1"
(25 mm)
1"
(25 mm)
A B
C
1"*
(25 mm)
3"*
(76 mm)
48 in. *
2
(309.7 cm )
2
24 in. *
2
(154.8 cm )
2
3"*
(76 mm)
Ḧ堋㨇
⠲⚰
A. 凹陷區域
B. 側視圖——櫥櫃或封閉空間
C. 帶通風口的櫥櫃門
†
連腳輪高度為
33¾" (857 mm)
19
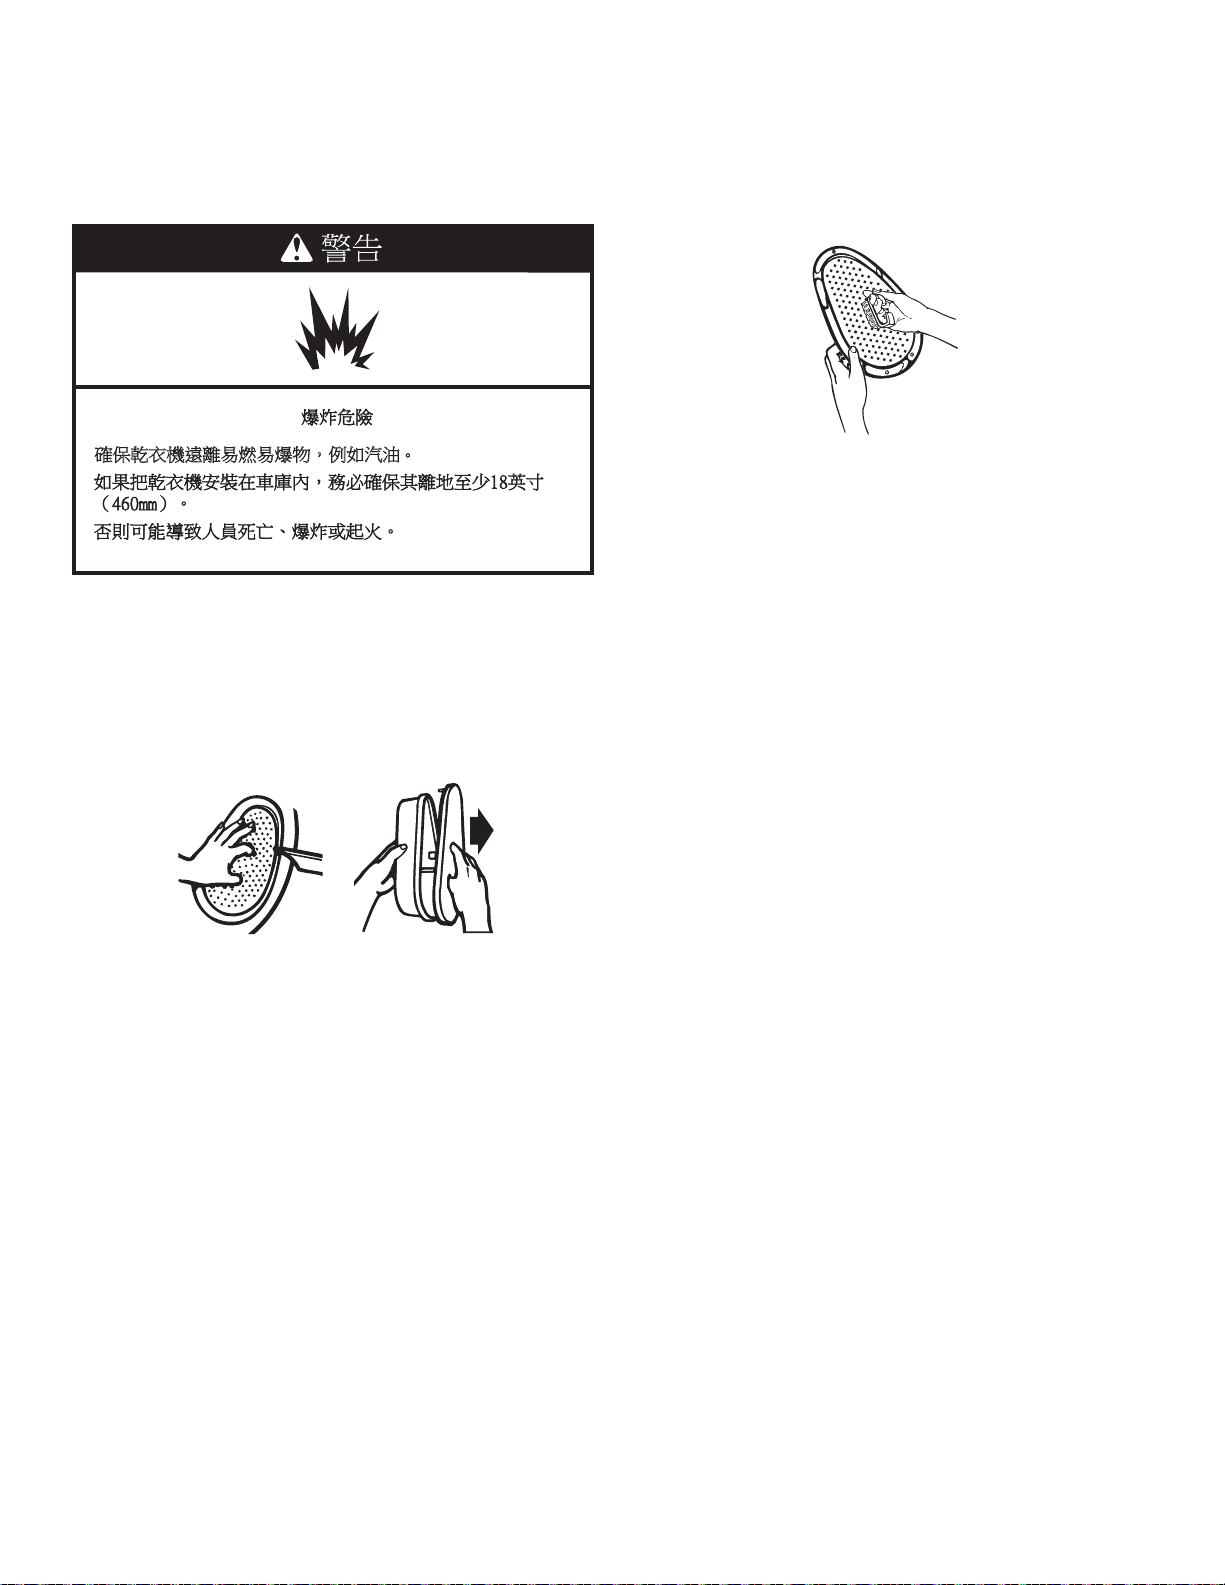
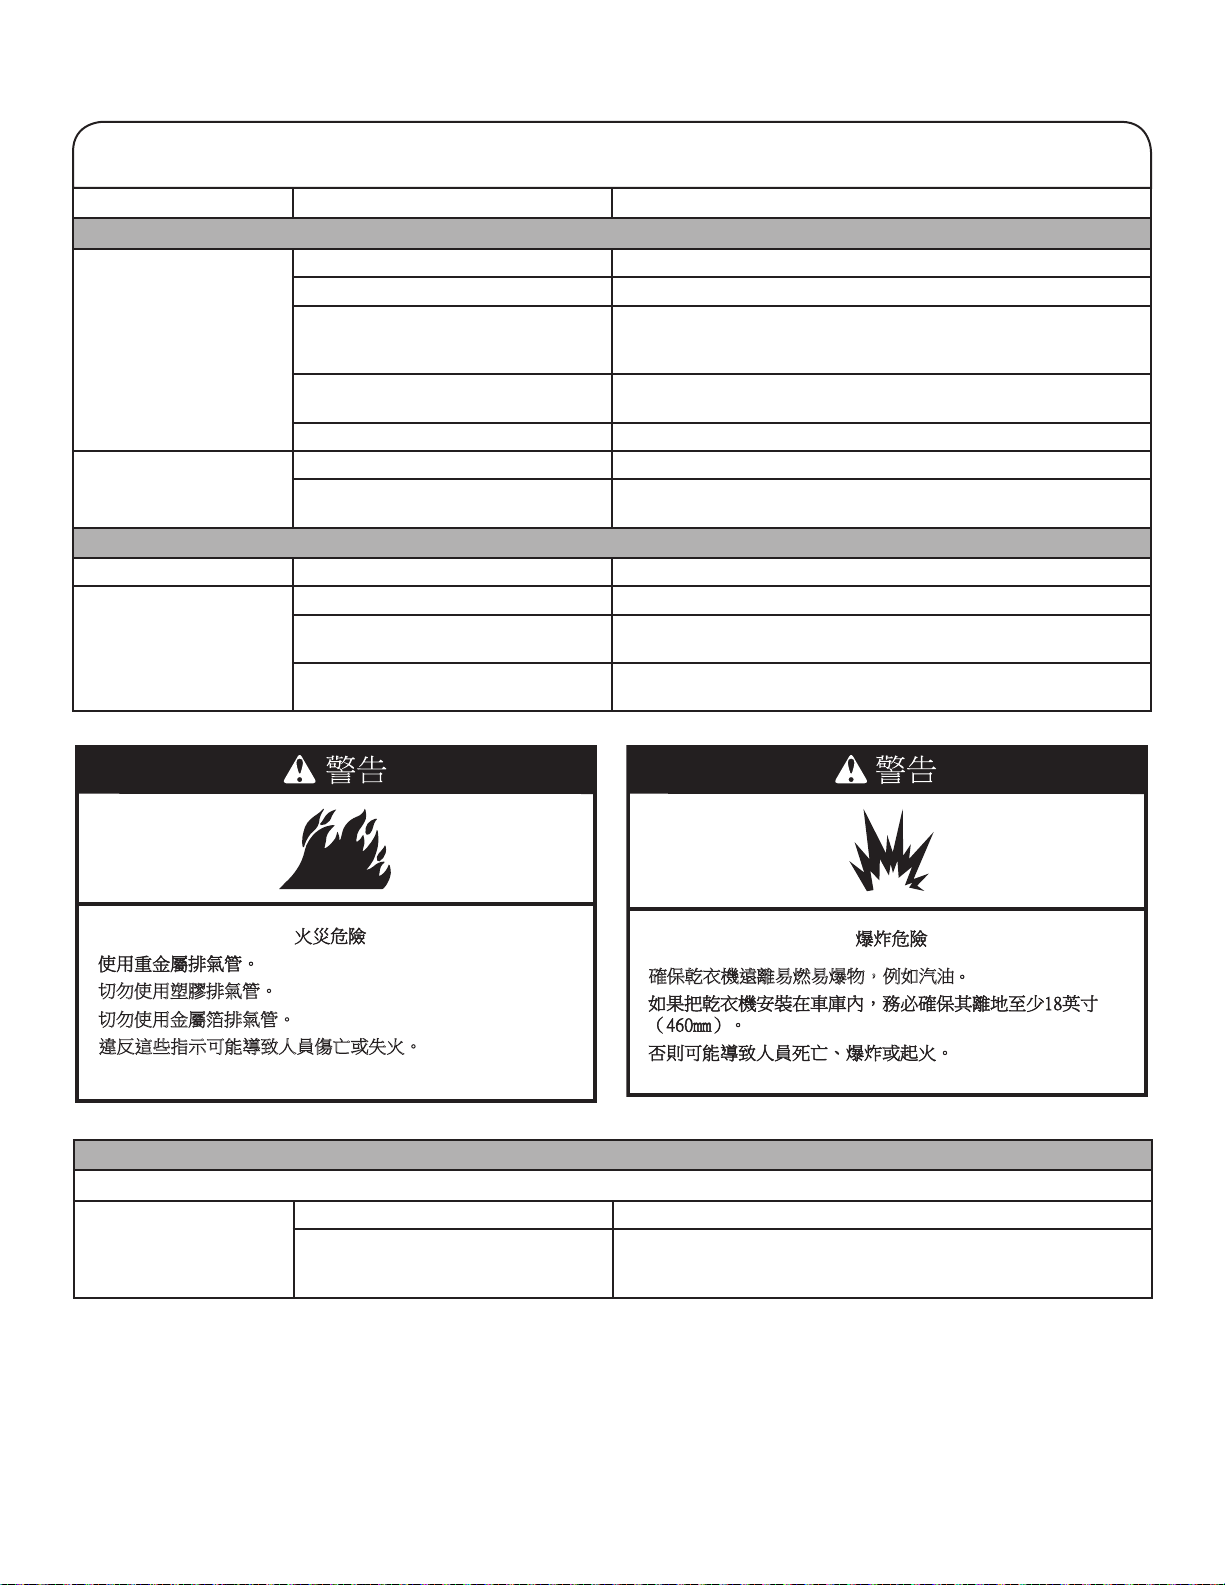
排氣需求
↯⊧ἧ䓐⟹先㌺㯋䭉ˤ
↯⊧ἧ䓐慹Ⱄ䬼㌺㯋䭉ˤ
忽⍵忁ṃ㊯䣢⎗傥⮶农Ṣ⒉ ṉㆾ⣙䀓ˤ
警告:為降低起火風險,本乾衣機必須排氣至戶外。
重要事項:務必遵守所有政府法規與條例。
乾衣機排氣管不得連接任何建築的排氣口、煙囪、牆壁、天花板、
閣樓、管線夾層或隱蔽空間。只可使用耐久且安全的金屬排氣管。
4"
(102 mm)
4" (102 mm)
重金屬排氣管
■ 只可使用4" (102 mm) 重金屬排氣管與管夾。
■ 不得使用塑料或金屬箔排氣管。
堅硬金屬排氣管:
■ 為確保最佳的乾衣性能,建議使用堅硬金屬排氣管以避免排氣管
破壞或折損。
軟金屬排氣管:(只可接受安裝場所可作清潔的情況)
■ 排氣管必須有足夠的長度和支撐,抵達最終乾衣機所在地。
■ 清除多餘排氣管,避免下垂與扭結而導致氣流減少及乾衣效果
不佳。
■ 不得安裝在封閉的牆壁、天花板或地板內。
■ 總長度不應超過 7¾ 呎(2.4公呎)。
註:如果使用排氣系統,請清除整個系統內的棉絮,確保排氣罩無
棉絮阻塞。以堅硬或軟金屬排氣管替代塑料或金屬箔排氣管。如有
需要請重新查閱「排氣系統圖」,更改現有的排氣系統,以獲得更
好的性能。
電源需求
㍍⛘✳ᶱ⫼㍺⹏
■ 需要具有120 V、60 Hz、交流電、15至20 A、帶保險絲的電
源。
■ 建議安裝延遲保險絲或斷路器。
檢查保險絲或斷路器匹配電線的等級。
■ 也建議安裝僅為本乾衣機供電的獨立迴路。
■ 請勿使用延長線。
■
㍍⛘ˣ㍍䶂䘬Ḧ堋㨇烉
忁⎘Ḧ堋㨇⽭枰㍍⛘ˤ⤪㝄㓭晄炻㍍⛘傥㍸ὃ暣㳩旣≃㚨⮷
䘬徼⼹炻旵Ỷ妠暣桐晒ˤ㛔Ḧ堋㨇惵㚱㍍⛘⮶䶂䘬乄䶂ẍ⍲
㍍⛘㍺柕炻㍺柕⽭枰㍺ℍ䫎⎰䔞⛘㱽夷⏓㚱怑䔞㍍⛘䘬㍺
⹏ˤ
嬎⏲烉
㍍⛘⮶䶂忋㍍ᶵ䔞㗪⎗傥⮶农妠暣ˤ劍ᶵ䡢⭂Ḧ堋
㨇㗗⏎㬋ⷠ㍍⛘炻⎗婳⎰㟤暣ⶍㆾ䵕ᾖ㈨ⷓẋ䁢㩊㞍ˤ婳⊧
ảシ㓡墅Ḧ堋㨇暣㸸䶂㍺柕烉⤪㝄䃉㱽㍺ℍ㍺⹏炻婳䓙⎰㟤
暣ⶍ⬱墅怑䔞㍺⹏ˤ
㍍⛘婒㖶
婳⥍┬ᾅ⬀ᶲ徘⬱ℐ婒㖶
排氣
20
設計排氣系統
選擇您的排氣管安裝類型
建議排氣管安裝類型:
典型的乾衣機排氣管,安裝在乾衣機後方。其他類型安裝也可以接
受。
A
B
C
A.
排氣罩
B.
軟金屬或硬金屬管
C.
彎管
封閉空間的其他安裝類型:
排氣系統有多種款式。選擇最適合您的安裝類型。圖中展示了兩個
封閉空間的安裝類型。請參閱製造商的說明。
A B
A.
上彎曲式安裝法(也可提供一個偏置彎管)
B.
望遠鏡式安裝法
註:以下封閉空間的替代安裝套件可供選購。訂購信息請參閱「協
助或服務 」。
■ 上彎曲式安裝法:
零件號4396028
■ 望遠鏡式安裝法(用於乾衣機排氣管與牆壁排氣管不匹配的情
況):
零件號4396027——用於 0" (0 mm ) 至18" (457 mm)的差距
零件號4396011——用於 18" (457 mm ) 至29" (737 mm)的差距
零件號4396014——用於 29" (737 mm ) 至50" (1.27 mm)的差距
排氣罩:
■ 必須至少距離地面或任何可能阻塞排氣管的物品(例如花卉、
石頭、刷子或雪)12" (305 mm)。
建議風格:
百葉窗式排風罩 箱型排風罩
可接受風格:
斜角式排風罩
彎管
45° 彎管可提供比90° 彎管更好的氣流。
好 更好
夾具
■ 使用夾具封閉所有接口。
■ 排氣管的連接或固定不得使用螺絲或其他會插入管道內部的固定
裝置,因為它們會積聚棉絮。不得使用風管膠帶。

21
安裝排氣系統
1. 在安裝排氣系統前,請確保已移除位於排氣管出口的金屬護
網。
2. 安裝排氣罩。
12" min.
(305 mm)
12" min.
(305 mm)
安裝排氣罩,使用填隙膠密封外牆上排氣罩周圍的開口。
3. 連接排氣管與排氣罩。
排氣管必須符合排氣罩內部尺寸。以4" (102 mm) 夾具把排氣管
固定在排氣罩上。把排氣管引導至乾衣機的位置。盡量使用最筆
直的路徑。參看「設計排氣系統」章節的「決定排氣管路徑」。
避免90º轉彎。使用管夾封閉所有接口。不得使用導管膠帶、螺
絲或其他會插入管道內部的固定裝置,因為它們會積聚棉絮。
安裝電源線固定架與腳輪
在執行以下步驟之前,不得把乾衣機搬運至最終擺放位置。
忶慵⌙晒
婳≽䓐ℑ⎵ㆾ⣂⎵Ṣ⒉㏔忳冯⬱墅Ḧ堋㨇ˤ
⏎⇯⎗傥⮶农Ṣ⒉⼴側ㆾ℞Ṿ悐ỵ⍿ ˤ
安裝電源線固定架
1. 拆開電源線與後板上的膠帶。
決定排氣管路徑
■ 選擇最筆直直接通向戶外的路徑。
■ 使用最少數量的彎管與轉彎設計安裝路徑。
■ 在使用彎管或製造轉彎時,應盡量預留較多的空間。
■ 逐漸折彎管道避免扭結。
■ 盡量少用90°轉彎。
決定管道長度與所需彎管,以保證最佳乾衣性能。
■ 使用下圖「排氣管道圖」,決定您可使用之排氣管材料與排氣罩
搭配類型。
註:使用的管道不得長於排氣系統圖的規定。如果排氣系統比
規定長度更長,則會:
■ 縮短乾衣機壽命。
■ 降低乾衣機性能,延長乾衣時間,增加能源消耗。
「排氣系統圖」提供的排氣要求有助於達到最佳乾衣表現。
排氣系統圖
90º轉彎或彎
管數量
排氣管類型 箱型或百葉窗式
排風罩
斜角式排風罩
0
堅硬金屬
36 呎 (11 m) 26 呎 (7.9 m)
1
堅硬金屬
26 呎 (7.9 m) 16 呎 (4.9 m)
2
堅硬金屬
16 呎 (4.9 m) 6 呎 (1.8 m)
22
2. 把電源線固定架插入後板的窄孔內,以配備的螺絲固定。
B
A
C
A.
電源線固定架
B.
窄孔
C.
螺絲
註:在乾衣機不使用時,電源線可纏繞在固定架周圍,以方便存
放。
安裝腳輪
1. 為避免損壞地板,請使用一塊乾衣機包裝盒的大紙板。把紙板
放在乾衣機的後方。
2. 緊緊抓住乾衣機身,輕輕把乾衣機放在紙板上。
3. 把腳輪旋入乾衣機底座的四角並鎖緊。
4. 把乾衣機擺正。在這樣做時,請確保不要讓乾衣機滑走。
連接排氣管
1. 把排氣管連接到排氣口上。
使用4" (102 mm) 管夾,把排氣管連接到乾衣機的排氣口上。
如果連接已有的排氣管,請確保排氣管道乾淨。乾衣機排氣管
必須符合乾衣機排氣口與內部的排氣罩尺寸。檢查確保排氣管
通過4" (102 mm) 管夾固定在排氣罩上。
2. 把乾衣機搬運至最終擺放位置。避免擠壓或扭結排氣管。
3. 一旦排氣管連接完成,即可把紙板移開。
完成安裝
1. 檢查確認清單上的零件已安裝完畢。如果有多餘的零件,請重
新檢查所有步驟,看是否有遺漏。
2. 檢查確保所有工具齊全。
3. 處理/回收所有的包裝材料。
4. 檢查乾衣機的最終位置。確保排氣管沒有壓壞或扭結。
5. 檢查確保乾衣機水平放置。
6. 將插頭插入一個三孔接地型插座上。
7. 移除乾衣機操作面板上的薄膜及機身殘留的膠帶。移除棉絮過
濾網上的膠帶(位於乾衣機內後壁)。
8. 閱讀「乾衣機使用手冊」。
9. 以濕布徹底擦拭乾衣機內滾筒,清除灰塵。
10. 測試乾衣機,設置20分鐘的加熱烘乾之行程(非冷風行程),
啟動乾衣機。
如果乾衣機不啟動,請檢查以下項目:
■ 操控鍵已調至運行或「On(打開)」位置。
■ 開始按鍵已確實觸壓。
■ 乾衣機已確實插入接地型3孔插座上。
■ 保險絲完好緊鎖,斷路器未跳閘。
■ 乾衣機門已關好。
11.當乾衣機運行5分鐘後,打開乾衣機門,感覺一下熱度。如果感
覺到熱量,即取消行程,關上幾門。
如果不能感覺到熱量,請檢查以下項目:
■ 操控鍵已設置為加熱行程,而非冷風行程。
備註:在乾衣機首次加熱時,可能會散發氣味。加熱元件首次使用
時,發出這種氣味是正常的。氣味會漸漸消散。
23
警告:為降低火災、觸電、人員傷害風險,在運行電器前,請閱讀
「重要安全說明」。
在使用乾衣機前,請以濕布擦拭乾衣機滾筒,清除儲存運輸期間積
聚的灰塵。
1. 每次放入衣物前,必須清潔棉絮過濾網。請參閱「清潔棉絮濾
網」。
2. 把衣物鬆散地裝入乾衣機,關上機門。不可把乾衣機填得太
滿。預留空間,讓衣物可自由攪拌。
使用乾衣機
啟動乾衣機
䀓䀥⌙晒
ảỽ㲿堋㨇悥ᶵ傥⽡⸽㶭㻼㱡㰉ˤ
ᶵ⼿䂀Ḧ㚦⍿ảỽ㱡⑩㱦㝻䘬䈑⑩炷⊭㊔䂡婧䓐㱡炸ˤ
⏓㚱䘤㲉ˣ㨉先ㆾ⟹㕁䘬堋䈑炻⽭枰ㆠ㍃㘦Ḧ炻
ㆾἧ䓐⅟桐埴䦳Ḧ䆍ˤ
⏎⇯⎗傥⮶农Ṣ⒉ ṉㆾ⣙䀓ˤ
3. 把行程控制旋鈕調至相應的乾衣類型建議行程。乾燥沉重或中
等重量的衣物,請使用「免燙衣物」全自動乾衣行程 。查閱「
乾衣、行程與溫度提示」。
4. 按下「啟動鍵」。
停機與重啟
您可在行程中隨時停止乾衣機之運轉。
停止乾衣機步驟:
打開乾衣機門,或把行程控制旋鈕旋至「OFF(關機)」。
備註:在乾衣機不使用時,行程控制旋鈕應指向「OFF」區域。
重啟乾衣機步驟:
1. 關上乾衣機門。
2. 選擇新的行程與溫度(如有需要)。
3. 按下「啟動鍵」。
䆮䁠⌙晒
䡢ᾅḦ堋㨇怈暊㖻䅫㖻䆮䈑炻ἳ⤪㰥㱡ˤ
ᶵ⼿䂀Ḧảỽ⏓㚱㖻䅫䈑岒䘬䈑⑩炷⌛ἧ⛐㶭㲿⼴炸ˤ
⏎⇯⎗傥⮶农Ṣ⒉ ṉˣ䆮䁠ㆾ⣙䀓ˤ
非常乾
關
關
關
微乾
標準
冷風行程
定時乾衣行程
按壓啟動
24
放入衣物
把衣物鬆散地裝入乾衣機內。不可讓乾衣機過載。預留空間,讓衣
物可自由翻轉。下圖展示了乾衣機的最大乾衣量。預計需要更長的
乾衣時間。
厚重衣物或工作服
2條褲子,3件工作襯衫
精緻衣物
1件小背心,2件襯裙,4件內衣,1套睡衣,
1件半身襯裙
毛巾
9件浴巾;或6件浴巾,3件手巾,6件毛巾
混合衣物
2件枕套,1件T恤,2件襯衫,1條運動褲
針織衣物
2條褲子,2件襯衫;或3條裙子
免燙衣物
6件襯衫;或2件被套與2件枕套;或2件床單
與2件枕套
乾衣、行程與溫度提示
選擇適合待烘乾衣物的正確行程與溫度。
在行程的最後幾分鐘內,乾衣機會滾動衣物並停止加熱,讓衣物更
易於處理。
乾衣提示
■ 如衣物上有保養標籤,請遵照標籤上的指示。
■ 如有需要,可添加一片衣料柔軟紙。遵照包裝上的指示說明。
■ 滾動停止後應盡快取出衣物,以減少皺褶。這對於免燙衣物、針
織衣物與合成織物尤其重要。
行程與溫度提示
■ 大部分衣物請使用「免燙衣物」全自動乾衣行程。
■ 橡膠、塑料或熱敏感織物請使用冷風行程。
■ 使用曬衣竿或曬線乾燥極薄之衣物。
備註:如對不同衣物的乾衣溫度有疑問,請查閱衣物上的保養標籤
說明。
行程
免燙衣料行程
本自動行程將在達到選定乾燥度後關停乾衣機。在待烘乾衣物未達
乾燥度時,行程控制旋鈕不會轉動。在冷卻之後,旋鈕會自動轉動
至「OFF」區域,停止運轉。
大部分衣物請使用「免燙衣物」全自動乾衣行程。
■ 如果待烘乾衣物比理想程度更乾燥,下次乾燥相似衣物時,請把
行程選擇鈕調向「Less Dry(微乾)」。
■ 如果衣物比預期乾度更濕潤,請使用「Timed Drying(定時乾
衣)」行程完成乾衣。下次乾燥相似衣物時,請把旋鈕稍調向
「Very Dry(非常乾)」方向。
備註:自動行程的乾衣時間會依衣料材質與乾衣量之多寡而不同。
冷風行程
此行程適用於不能加熱烘乾的材質,例如橡膠、塑料與熱敏感織
物。請查閱使用冷風行程進行乾燥的衣物圖例。
衣物類型 時間*
發泡橡膠——枕頭,加墊內
衣,填充玩具。
20 - 30
塑料——浴簾,桌布
20 - 30
橡膠——加墊地毯 40 - 50
烯烴,聚丙烯,纯尼龍
10 - 20
*(分鐘)。如有需要,請重設行程完成乾衣。
在使用冷風行程時,
■ 請檢查確保外包裝縫線拉鍊固定好。
■ 在行程期間,定期將它取出抖動使之鬆開。
■ 完全乾燥衣物。發泡橡膠枕頭乾衣過程緩慢。
定時乾衣行程
如果衣物在自動行程後依然潮濕,請使用此行程。
定時乾衣行程也可用於:
■ 乾衣時間長的厚重衣物與工作服。
■ 輕盈衣物,例如乾衣時間更短的女式內衣,女襯衫與針織衫。
如要乾燥潮濕衣物,請把行程控制旋鈕調至30分鐘或更少。
行程結束響鈴
當行程結束時,乾衣機會發出聲響作為通知。聲響不能調整,不能
關閉。聲響有助於正確乾燥免燙衣物、合成纖維衣物與其他需要在
乾衣機停機時立即取出的衣物。
行程選擇旋鈕
非常乾
關
關
關
微乾
標準
冷風行程
定時乾衣行程
25
乾衣機擺放場所之清潔
保持乾衣機位置乾淨整潔,清除有可能阻擋燃燒氣流與通風的物
品。
䡢ᾅḦ堋㨇怈暊㖻䅫㖻䆮䈑炻ἳ⤪㰥㱡
清潔棉絮濾網
每次使用之清潔
棉絮過濾網位於乾衣機滾筒內部的後壁上。請於每次烘衣前對之進
行清潔。如過濾網被棉絮阻塞,將會延長乾衣時間。
清潔步驟:
1. 打開機門,直接拉出棉絮過濾網。
2. 一邊拉出蓋子,一邊輕輕擠壓絨毛過濾網。
3. 以手指把棉絮從過濾網上清除。請勿為清除棉絮沖洗或洗刷過
濾網。沾濕的棉絮更難以清除。
4. 把上蓋重新裝回棉絮濾網上。把棉絮濾網牢牢推回原位,關上
機門。
重要事項:
■ 切勿在棉絮過濾網鬆弛、受損、阻塞或缺失的情況下操作乾衣
機。這樣做會導致過熱,損壞乾衣機與衣物。
■ 某些以合成纖維混合天然纖維(多元脂和棉紡品)製成的毛巾會
比其他毛巾釋出更多棉絮,讓乾衣機的棉絮過濾網更快裝滿。請
在乾燥新毛巾前後確保棉絮濾網的清潔。
視需要作清潔
洗衣劑與衣物柔軟劑殘留可能會積聚在棉絮濾網上。這些殘留物會
延長乾衣時間,或導致乾衣機在衣物完全乾燥前停機。如果棉絮從
過濾網掉落,可能是由於過濾網阻塞所致。
請每六個月使用尼龍刷清潔棉絮過濾網,如果因殘留物導致棉絮濾
網阻塞,則應更頻繁清潔。
乾衣機保養
清洗步驟:
1. 以手指把棉絮從過濾網上卷出。
2. 用熱水打濕棉絮過濾網及其蓋子。
3. 以尼龍刷沾上熱水與液體清潔劑。
刷洗棉絮濾網及其蓋子,清除殘留物。
4. 以熱水沖洗。
5. 以乾淨毛巾徹底擦乾棉絮濾網及其蓋子。將之重新裝回乾衣機
上。
清潔乾衣機內部
清潔乾衣機滾筒步驟:
1. 以洗衣粉混合溫水和成糊狀。
2. 把洗衣粉糊塗抹在一塊軟布上。
或
把不可燃的液體家用清潔劑塗抹在骯髒的區域,以軟布把它擦
乾淨。
3. 以濕布徹底擦拭滾筒。
4. 滾動一筒乾淨衣物或毛巾,以烘乾滾筒。
備註:含有不穩定染料的衣物,例如藍色牛仔褲或鮮豔色彩的棉質
衣物,可能會令滾筒內部染色。這些污漬對乾衣機無害,也不會污
染其他衣物。請把顏色不穩定的衣物翻面後再放入乾衣機,以免掉
色。
清除累積棉絮
從乾衣機內部
必須每隔2年或更頻繁地清潔,視乾衣機使用情況而定。必須由合
格技師進行清潔。
從排氣管
必須每隔2年或更頻繁地清潔,視乾衣機使用情況而定。
假期與搬運保養
假期保養
只可在有人在家時運行乾衣機。如果您出門度假,或長期不使用乾
衣機,則應:
1. 拔下乾衣機的插頭,或切斷電源。
2. 清潔棉絮過濾網。請參閱「棉絮濾網」。
搬運保養
1. 拔出電源線。
2. 確保水平支腳已固定在乾衣機底部。
3. 使用膠帶固定乾衣機門。
26
故障排除
如果您經歷了 可能原因 解決方案
乾衣機運行
乾衣機不運轉 乾衣機門沒關緊。 請確保乾衣機門已關緊。
長按START(啟動)鍵2-5秒。 長按START(啟動)鍵2-5秒。
家用保險絲熔斷,或斷路器跳閘。 乾衣機有家用保險絲或斷路器。檢查確保保險絲完好緊鎖,斷路器
未跳閘。重新安裝保險絲,或重設斷路器。如果問題繼續存在,請
聯繫電工。
電源不正確。
電力乾衣機要求120伏特的電源。
請合格的電工檢查。
保險絲類型錯誤。 使用延遲保險絲。
計時器不明顯前進 乾衣機設置為定時或冷風乾衣。 計時器時間設置持續性緩慢前進。
乾衣機設置為自動乾衣 計時器只在衣物幾近乾燥時移動。請查閱「乾衣機使用章節」的
「自動濕度感應如何工作」。
不尋常噪音
巨大噪音 乾衣機一段時間沒使用。 這是正常現象。巨大噪音在使用數分鐘後會減弱。
發出連續短促的咔嗒聲或
振動聲響
細小物品卡在乾衣機滾筒邊緣。 檢查乾衣機滾筒前後邊緣是否有細小物品。在洗衣前清理口袋。
乾衣機未放平。 如果乾衣機安裝不妥當,可能會振動。檢查乾衣機的水平。四個腳
輪必須緊密接觸地面。
衣物在乾衣機內糾結成團。 如果衣物糾結成團,會發生彈跳,導致乾衣機振動。分開衣物,重
啟乾衣機。
首先,請嘗試此處的建議辦法,或訪問我們的網站www.whirlpool.com/product_help,
加拿大地區用戶可訪問www.whirlpool.ca以尋求協助,盡量避免致電服務熱線。
台灣地區用戶可訪問http://www.whirlpool.com.tw以尋求協助。
↯⊧ἧ䓐⟹先㌺㯋䭉ˤ
↯⊧ἧ䓐慹Ⱄ䬼㌺㯋䭉ˤ
忽⍵忁ṃ㊯䣢⎗傥⮶农Ṣ⒉ ṉㆾ⣙䀓ˤ
䡢ᾅḦ堋㨇怈暊㖻䅫㖻䆮䈑炻ἳ⤪㰥㱡
乾衣機結果
備註:乾衣機的運行功率較低。預期延長乾衣時間。
衣物乾燥效果不滿意,
或乾衣時間太長
棉絮濾網被棉絮阻塞。 每次使用前,必須清潔棉絮濾網。
排氣管或外部排氣罩棉絮阻塞,限制
空氣流通。
運行乾衣機5-10分鐘。把手放在外部排氣罩下,檢查空氣流通情
況。如果您感覺不到空氣流動,請清潔排氣系統的棉絮,或更換
耐久並安全的金屬排氣管。請參閱「排氣 」章節。

27
故障排除
如果您經歷了 可能原因 解決方案
乾衣機結果
衣物乾燥效果不滿意,
或乾衣時間太長
排氣管長度不正確。 檢查排氣管是否太長,或轉彎太多。過長的排氣管會延長乾衣時
間。請參閱「排氣 」章節。
排氣管直徑尺寸不正確。
使用直徑為4" (102 mm) 的排氣管。
乾衣機未放平。 在自動行程中,衣物與濕度感應器無接觸。檢查乾衣機是否平放。
四個腳輪必須緊密接觸地面。
選擇了冷風溫度設置。 選擇適合乾衣類型的正確溫度。請查閱 「行程」章節。
衣物裝載太大太重,難以快速乾衣。 請分開衣物,以便自由翻轉。
衣料柔軟紙堵塞棉絮過濾網蓋。 只使用一片衣料柔軟紙,且只用一次。
乾衣機放置在室溫低於45 ºF (7 ºC)的
房間。
乾衣機需要在室溫45 ºF (7 ºC)以上,才可正常運轉。
乾衣機放置在壁櫥內。 壁櫥門上方與下方必須有通風口。在乾衣機前方應預留至少
1"(25 mm) 的空間,在大多數的安裝情況下,乾衣機後方應預留
5½" (140 mm)的空間。請參閱「場地需求 」。
衣物無法接觸自動行程上的感應裝置 檢查乾衣機的水平。四個腳輪必須緊密接觸地面。
行程時間太短 自動行程過早結束。 更換自動行程設置的乾燥程度。提高或降低乾燥程度,將會改變行
程的乾衣時間總量。如果使用時持續過早結束,請參閱「行程」
章節。
衣物上有棉絮 棉絮過濾網棉絮堵塞。 每次使用前,必須清潔棉絮濾網。
衣物有污漬 不當使用衣料柔軟紙。 在行程開始時加入乾衣機衣料柔軟紙。衣料柔軟紙若加入部分乾燥
的衣物,會讓衣物染色。
滾筒上有污漬 衣物褪色。 滾筒污漬來自衣物染料(通常是藍色牛仔褲)。這些污漬不會污染
其他衣物。
衣物起皺 衣物在行程結束後未及時取出。 請參閱衣物保養標籤說明。不建議烘乾只可乾洗的衣物。
乾衣機衣物塞太滿。 減少烘衣量,讓衣物充分翻轉。
異味 乾衣機所在位置近期進行過油漆、著
色、上漆。
對區域進行通風。當該區域的異味或煙霧散去之後,重新清洗和烘
乾衣物。
第一次使用乾衣機。 新的電力加熱元件可能會發出異味。在初次使用之後異味會消失。
首先,請嘗試此處的建議辦法,或訪問我們的網站www.whirlpool.com/product_help,
加拿大地區用戶可訪問www.whirlpool.ca以尋求協助,盡量避免致電服務熱線。
台灣地區用戶可訪問http://www.whirlpool.com.tw以尋求協助。
28
限用物質含有情況標示:
設備名稱: 乾衣機
型號(型式):8TLDR3822HQ
單元
限用物質及其化學符號
鉛
(Pb)
汞
(Hg)
鎘
(Cd))
六價鉻
(Cr
+6
)
多溴聯苯
(PBB)
多溴二苯
醚 (PBDE)
電源線
º º º º º º
機構件
-
º º º º º
印刷電路板
-
º º º º º
馬達
º º º º º º
加熱器
º º º º º º
滾筒
º º º º º º
備考1.〝 超出0.1 wt %〞及〝超出0.01 wt %〞係指限用物質之百分比含量超出百分比含量
基準值。
備考2.〝
º
〞係指該項限用物質之百分比含量未超出百分比含量基準值。
備考3.〝
-
〞係指該項限用物質為排除項目。
註: 規格以實際的機身銘牌為主
進口商資訊
台灣惠而浦股份有限公司
地址:新北市板橋區縣民大道二段68號17樓
消費者免付費服務專線:0800 258 558
消費者服務信箱:[email protected]
官網:www.whirlpool.com.tw
產品規格:
機型
8TLDR3822HQ
備註
電源(60Hz) 120 V
最大乾衣量(乾燥衣物)
7.0 kg
滿載電流
12 A
額定消耗電功率
1,450 W
產品重量
41 kg
外觀尺寸(高x寬x深) mm 813 x 610 x 560 mm
生產國別 美國

29
Notes

30
Notes

31
Notes

©2018 All rights reserved.
版權所有。在加拿大境內依授權使用。
11/18
Printed in U.S.A.
美國印製。
W11205457C