Loading ...
Loading ...
Loading ...
Water connection
Risk of damage!
If the water intake is blocked while
the Ice Maker is still in use, the water
intake pipe can freeze up.
Turn the Ice Maker off if the water in-
take is interrupted (e.g., while on va-
cation).
Unduly high water pressure in the
system can result in damage to the
appliance.
Install a pressure reducing valve if
the water pressure in the system ex-
ceeds 116 psi (8bar).
Do not install the system if the water
pressure exceeds 120 psi (8.3bar).
Contact your plumbing specialist if
you are unsure of your water pres-
sure.
Installing the water hose to the appli-
ance
Before establishing the plumbed-wa-
ter connection, ensure that the appli-
ance is disconnected from the power
supply.
When installing the water hose, make
sure that it is neither kinked nor dam-
aged.
By this time, the installation niche
should already have been prepared so
that the appliance needs only to be
pushed into it.
Position the appliance slightly in front
of the installation niche so that the
shut-off valve can still be accessed.
2
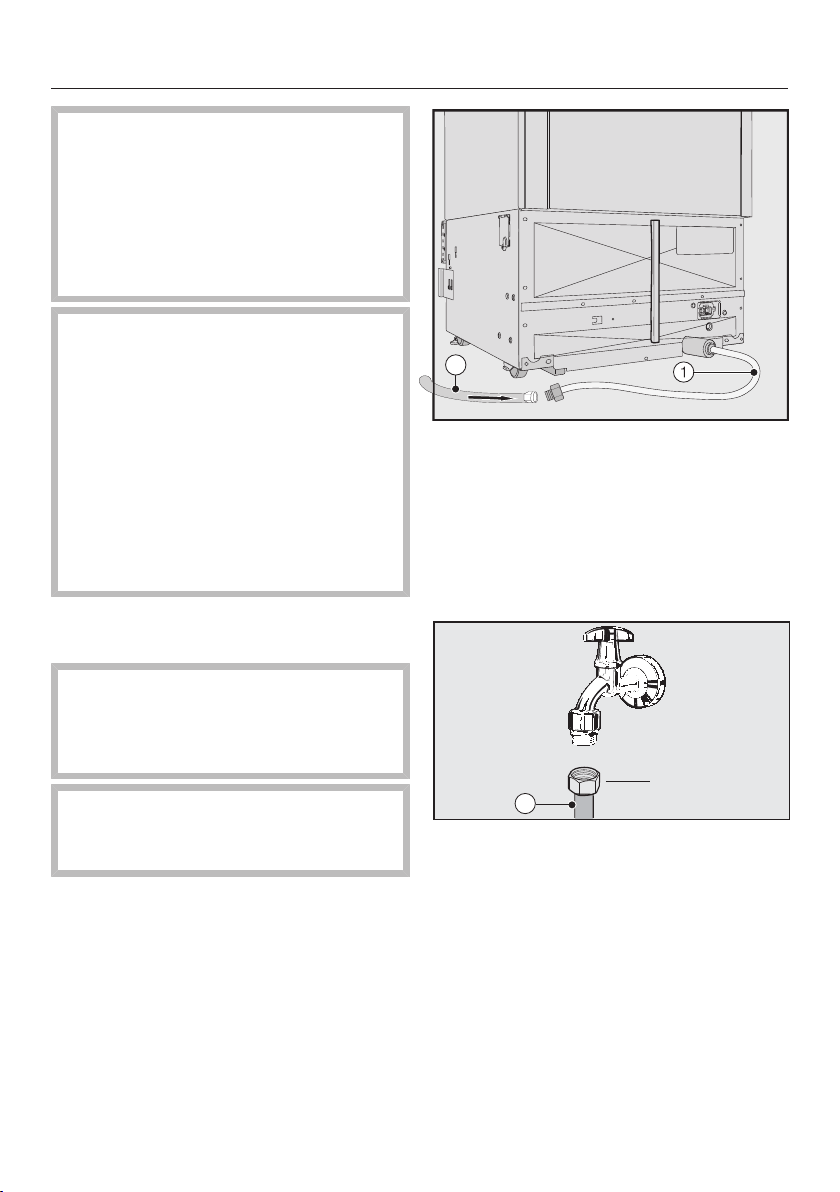
The water connection of the appli-
ance is ready for connection at the
rear of the appliance.
Install the water hose onto the wa-
ter connection at the rear of the
appliance. Ensure that the connec-
tions are tight and leak-proof.
7/16"
2
Connect the water hose to the
shut-off valve.
Ensure that it is properly screwed into
position.
Slowly open the shut-off valve in the
water supply line and check the
whole water system for leaks.
The appliance can now be installed in
the niche (see “Installation”).
The appliance can now be connected
to the power supply (see “Electrical
connection”).
Loading ...
Loading ...
Loading ...