Loading ...
Loading ...
Loading ...

Français
5
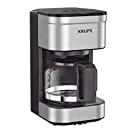
DESCRIPTION
BEFORE FIRST USE
■ To remove the glass carafe (E), press the safety button (B), while holding it down, simultaneously lift
the locking lever (A). Fig. 1
■ Remove all packaging or other accessories inside as well as outside of the appliance.
■ Run your coffee maker two times without coffee and the equivalent of a carafe of water to rinse it (maximum
1 liter / 33 oz.). Wait for about 5 minutes between the two cycles.
PREPARATION OF COFFEE
■ Remove the glass carafe (E) by pressing the safety button (B). While holding it down, simultaneously
lift the locking lever (A). Fig. 1
■ Remove the lid (F) of the water tank. Fig. 2
■ Fill the water tank (G) with the required amount of water. Fig. 3
■ Use the glass carafe (E) which is calibrated in order to help you measure the quantity of water required
according to the number of cups. Do not put the water tank directly under the tap to fill it.
■ For more convenience, your KRUPS machine comes with a permanent filter (D). Place this permanent
filter (D) on the glass carafe (E). Fig. 6.
■ Put the necessary quantity of coffee in the permanent filter (D) using the spoon provided (K). Fig. 5
■ For a regular coffee, we recommend 8 spoons of ground coffee for a full carafe. (1 spoon per cup)
■ Spread the ground coffee in the permanent filter (D) and flatten it slightly.
■ Place the lid (F) on the water tank (G) by positioning the handle backwards. Fig. 6
■ The lid of the water tank (F) must be properly fixed, so that the edge of the lid surrounds the ring of rubber.
■ Place the lid (C) on the permanent filter (D) and put this unit back on the glass carafe (E).
■ The handles of the lid (C), of the permanent filter (D) and the glass carafe (E) must be all aligned to lock
into place. Fig. 7
■ Set up the glass carafe (E) until it stops at the front.
■ Then put the locking lever (A) back in place. The glass carafe (E) should be locked in place at that point.
Fig. 8
■ The glass carafe (E) must be positioned so that the handle is exactly in the center of the appliance and not
turned to the side. Fig. 9 and 10
■ Please DO NOT open the locking lever (A) during a brewing.
■ Plug the appliance and turn it on. Fig. 11
■ If the appliance was accidentally turned on without water, the color of the boiler may be faded. This has
no influence on the functioning of the appliance.
NB : Please note it is normal that some time passes between the beginning of the brewing cycle and the
moment when coffee starts dripping in the carafe. This corresponds to the amount of time necessary
to increase the pressure inside the appliance. There will also be a small loss of water quantity between
what was poured initially and what is in the carafe after a brewing cycle.
■ The pressure inside the appliance is constantly renewed and the coffee will flow little by little.
■ The brewing cycle is over when the coffee no longer drips for about ten seconds.
A Locking lever
B Safety button
C Lid
D Permanent filter
E Glass carafe
F Water tank lid
G Water tank
H Power switch
I Cord housing
J Gasket
K Spoon
L Seal of the water tank (Gasket)
English
Loading ...
Loading ...
Loading ...
